Home Blog Page 5

Egyptian Mummy Dogs

0
Egyptian Mummy Dogs
Egyptian Mummy Dogs

Although Mummy Dogs are almost certainly an American invention, we will geotag this recipe with the Great Pyramids of Egypt because most people associate Mummies with Egypt. So walk like an Egyptian to the kitchen with the kids and make some Mummy Dogs.

This snack is easy to make and the kids will love to help. Cut the dough strips and let your kids wrap them up. Bake them in your oven until they are golden brown and attach the candy eyes with a drop of ketchup or mustard. Don’t have candy eyes? Not to worry, just use a drop of mustard for the eyes.

Ways to Make Mummy Dogs 𓀃

There is not a lot of variation in making these tasty little treats. The Pillsbury™ Original Crescent Rolls are so easy to find but if you can find the Pillsbury™ Original Crescent Dough Sheet they make better wrapping strips for your mummy.

How to Store Egyptian Mummy Dogs 𓁏

Leftover Mummy Dogs will keep for up to 4 days in an airtight container in the Refridgerator. To reheat your Mummy Dogs, cover the baking dish with aluminum foil and reheat in the oven at 350F until warmed through.

History of the Hot Dog 𓉈

As the story goes, German immigrants first sold small sausages in a bun from pushcarts in New York City’s Bowery in the 1860s. While the hot dog’s true history is lost forever, the one certain thing we all know is that the hot dog is one of America’s favorite foods!

Egyptian Mummy Dogs
Egyptian Mummy Dogs

The Great Pyramid of Giza 𓋖

Preferred Travel Services

The Great Pyramid of Giza (also known as the Pyramid of Khufu or the Pyramid of Cheops) is the oldest and largest of the pyramids in the Giza pyramid complex bordering present-day Giza in Greater Cairo, Egypt. It is the oldest of the Seven Wonders of the Ancient World, and the only one to remain largely intact.

Pyramids of Giza at Night

The Great Pyramid was built by quarrying an estimated 2.3 million large blocks weighing 6 million tonnes in total. The majority of stones are not uniform in size or shape and are only roughly dressed. The outside layers were bound together by mortar. Primarily local limestone from the Giza Plateau was used. Other blocks were imported by boat down the Nile: White limestone from Tura for the casing, and granite blocks from Aswan, weighing up to 80 tonnes, for the King’s Chamber structure.

There are three known chambers inside the Great Pyramid. The lowest was cut into the bedrock, upon which the pyramid was built, but remained unfinished. The so-called Queen’s Chamber and King’s Chamber, which contain a granite sarcophagus, are higher up, within the pyramid structure. Khufu’s vizier, Hemiunu (also called Hemon), is believed by some to be the architect of the Great Pyramid. Many varying scientific and alternative hypotheses attempt to explain the exact construction techniques.

The funerary complex around the pyramid consisted of two mortuary temples connected by a causeway (one close to the pyramid and one near the Nile), tombs for the immediate family and court of Khufu, including three smaller pyramids for Khufu’s wives, an even smaller “satellite pyramid” and five buried solar barges.

9 Pyramids Lounge
Al Giza Desert, Giza Governorate, Egypt

9 Pyramids Lounge
9 Pyramids Lounge

The restaurant’s unique location offers a view of all pyramids in Giza. It’s built in a subtle wooden setting, with pillows scattered on the ground to emulate the Bedouin style.

How to Make This Egyptian Mummy Dog Recipe 𓀓

This is one of those super easy, kid-friendly recipes that is guaranteed to bring a smile to everyone’s face. They are the perfect cute but creepy appetizers for this year’s Halloween party.

What You Will Need to Make Egyptian Mummy Dogs 𓀧

Quick and easy and only 3 ingredients.

Ingredients for Egyptian Mummy Dogs

Equipment

  • Cutting Board
  • Knife
  • Cookie Sheet

Ingredients  

  • 1 package crescent roll dough
  • 6 hot dogs
  • 12 candy eyes

Cooking Directions for Egyptian Mummy Dogs 𓀩

Time needed: 27 minutes

How to Cook Mummy Dogs

  1. Preheat the Oven

    Preheat the oven to 375 degrees F.

  2. Cut the Dough

    Open the crescent roll package and unroll the dough. Press on the perforations to seal them together. Cut the dough into 1/4 inch strips.

  3. Wrap the Dogs

    Wrap the pieces of dough around each hot dog creating bandages by stretching the dough slightly and letting it overlap and criss-cross. You don’t completely cover the hot dog, leave gaps so it looks like a mummy peeking out from its bandages.

  4. Cook the Mummy Dogs

    Place each wrapped hot dog on a baking sheet and then bake for 10-12 minutes or until the dough is golden brown and hot dogs are warmed through.

  5. Garnish and Serve

    Remove from the oven and place a small dot of ketchup or mustard on the back of your candy eyes and add 2 to each mummy dog.

Wrap up some mummy dogs for that Halloween party or as a tasty treat before, after, or while serving candy to kids out on Trick or Treat.

If you liked this dish please Rate This Recipe and leave a comment.

Egyptian Mummy Dogs
Print

Egyptian Mummy Dogs

These Egyptian Mummy Dogs are easy, kid-friendly, and guaranteed to bring a smile to everyone’s face. Serve them as a cute but creepy appetizer at this year’s Halloween party. Bake them as a special Halloween treat before heading out for trick-or-treating.
Prep Time 15 minutes
Cook Time 12 minutes
Total Time 27 minutes
Servings 6 servings
Calories 187kcal

Instructions

  • Preheat the oven to 375 degrees F.
  • Open the crescent roll package and unroll the dough. Press on the perforations to seal them together. Cut the dough into 1/4 inch strips.
    1 package crescent roll dough
  • Wrap the pieces of dough around each hot dog creating bandages by stretching the dough slightly and letting it overlap and criss-cross. You don’t completely cover the hot dog, leave gaps so it looks like a mummy peeking out from its bandages.
    6 all-beef hot dogs
  • Place each wrapped hot dog on a baking sheet and then bake for 10-12 minutes or until the dough is golden brown and hot dogs are warmed through.
  • Remove from the oven and place a small dot of ketchup or mustard on the back of your candy eyes and add 2 to each mummy dog.
    12 candy eyes

Nutrition

Serving: 1Dog | Calories: 187kcal | Carbohydrates: 16.8g | Protein: 5.2g | Fat: 11g | Saturated Fat: 3.9g | Cholesterol: 25mg | Sodium: 457mg | Sugar: 10.5g | Calcium: 20mg

Other Recipes That Will Go Well With Egyptian Mummy Dogs 𓅄

Pennsylvania Dutch Chicken Corn Soup
It's a delicious Pennsylvania Dutch Chicken Corn Soup that's a hearty and delicious, thick and creamy soup that does the body good. Serve with Saltine Crackers, a Grilled Cheese Sandwich, or a nice Cold Cut Deli Sandwich for a perfect meal.
Check out this recipe
Pennsylvania Dutch Chicken Corn Soup

Photo Credits:

  • By Taste The World Cookbook – Copyright 2022 All rights reserved.
  • By 9 Pyramids Lounge – By https://www.facebook.com/9PyramidsLounge/

Battle of the LED Camping Lantern | BulbHead vs Cascade Mountain Tech

0
BulbHead vs Cascade Mountain Tech

I tested two LED Camping Lanterns to find the right mix of quality, price, and usability of the Atomic Beam LED Camping Lantern by BulbHead and the Cascade LED Camping Lantern by Cascade Mountain Tech.  I personally like the Atomic Beam which you can buy on Amazon for $19.88 although the Cascade sells for $11.63 each (sold in 3 packs for $34.89).

Atomic Beam by BulbHead

Atomic Beam LED Camping Lantern by BulbHead
  • ➤ The camping lantern that shines 360-degrees of bright LED light
  • ➤ Hang your atomic lantern from handles, magnetic base, or hook for hands-free torchlight
  • ➤ Collapsible light has easy pull-n-push on/off the system so you’re not fumbling for buttons when you need an emergency light
  • ➤ LED Lantern that’s great for everyday emergencies, blackouts, camping, boating, and working on the car, making it the perfect tent light, storm light, and fishing light – easily stash this emergency lantern in your disaster kit
  • ➤ Includes 1 Atomic Beam Lantern — requires 3 AA batteries (batteries not included). Rechargeable batteries are not compatible.

Cascade by Cascade Mountain Tech

Cascade LED Camping Lantern by Cascade Mountain Tech
  • ➤ 3 LANTERNS & 4 MODES: this set of three lanterns with 9 batteries including features 4 light settings to make the perfect camping mode for you and your family.
  • ➤ ULTRA BRIGHT: Includes 30 individual low-powered LED bulbs that give 100 Lumens of Bright Light, designed for a longer lifespan.
  • ➤ DEPENDABLE BUILD: Constructed with high-grade material; promising long-time durability. The extremely lightweight build allows you to take your lantern on the go with ease.
  • ➤ LONG LASTING: Light up to 12 hours of regular, continuous use with enough battery capacity.
  • ➤ COLLAPSIBLE: When not in use collapse the lantern to a smaller size; store it effortlessly, taking little space. Carry a handle for your night walking adventures, or lighting the path of your backyard

Both are great camping lights but the Atomic Beam has the brightest light. Good for some things but sometimes you want a softer light and the winner of that category is the Cascade lantern.

Georgia Peach Ice Cream

0
Georgia Peach Ice Cream

This Peach Ice Cream recipe comes to us from the city of Atlanta, Georgia. It’s a non-churn recipe meaning you do not need an ice cream maker, ice, and salt to make this creamy Georgia Peach Ice Cream.

Ways to Make Ice Cream

There are three basic ways of making ice cream, in a baggie, in a pan, or in an ice cream machine. The bag method is the most laborious method as you must shake it by hand until frozen. This recipe calls to freeze it in a pan but it can also be used in an ice cream maker if you wish.

Georgia Peach Ice Cream

How to Store Ice Cream

Store your homemade ice cream in the main part of the freezer and avoid storing it on the freezer door, where ice cream can be subject to more fluctuating temperatures since the door is repeatedly opened and shut. Keep your homemade ice cream in an airtight container with a lid tightly closed on it to reduce the formation of ice crystals.

History of Ice Cream

In 1824 Mary Randolph published her cookbook called The Virginia Housewife, which included many ice cream recipes. The first commercial ice-making machine was invented in 1854. In 1913, refrigerators for home use were invented.

History of Peaches

Peaches originally came from China. They were traded along the Silk Road and made their way to Europe before eventually gracing American groves. Franciscan monks introduced peaches to St. Simons and Cumberland islands along Georgia’s coast in 1571.

The Metropolitan City of Atlanta, Georgia

Atlanta is the capital of the U.S. state of Georgia. It played an important part in both the Civil War and the 1960s Civil Rights Movement. Atlanta History Center chronicles the city’s past, and the Martin Luther King Jr. National Historic Site is dedicated to the African-American leader’s life and times. Downtown, Centennial Olympic Park, built for the 1996 Olympics, encompasses the massive Georgia Aquarium.

A Brief History of Atlanta

For thousands of years prior to the discovery of the New World, the indigenous Creek people and their ancestors inhabited the area. The Creek people were forced to leave the area in 1821, under Indian Removal by the federal government, and European American settlers arrived the following year.

By 1860, Atlanta’s population had grown to 9,554 and during the American Civil War, the city was a strategic hub for the distribution of military supplies. In 1864 General Sherman surrounded the city and began a four-month-long siege that would lead to its surrender on September 1, 1864.

During the 20th century, Atlanta enjoyed continued growth by building the city’s infrastructure, and skyscrapers, and attracting merchants and manufacturing companies. During the 2000s, the city of Atlanta underwent profound physical, cultural, and demographic changes. As some of the African American middle and upper classes also began to move to the suburbs, a booming economy drew numerous new migrants from other cities in the United States, who contributed to changes in the city’s demographics.

Tourism in Atlanta

As of 2010, Atlanta is the seventh-most visited city in the United States, with over 35 million visitors per year. Atlanta’s tourism industry is mostly driven by the city’s history museums and outdoor attractions. Tourists are drawn to the city’s culinary scene, which comprises a mix of urban establishments garnering national attention, ethnic restaurants serving cuisine from every corner of the world, and traditional eateries specializing in Southern dining.

The Cuisine of Atlanta

The cuisine of Atlanta reflects both Southern and much broader influences. The city is home to a mix of high-end chef-driven restaurants receiving praise at the national level, an ethnic restaurant scene along Buford Highway, and traditional Southern eateries.

The city’s first restaurant was a tiny establishment manned by a Frenchman named Toney Maquino and he served ham, eggs, and oysters when the city was still known as Marthasville.

The Sun Dial Restaurant, Bar & View
210 Peachtree St NW Greensboro, NC 30303

The Sun Dial Restaurant, Bar & View

Situated on the uppermost floors of The Westin Peachtree Plaza, The Sun Dial Restaurant, Bar & View offers unparalleled views and a distinct Atlanta dining experience that makes the most of the city’s proximity to local, farm-to-table ingredients. A tri-level complex, The Sun Dial features an upscale restaurant, a cocktail lounge, and an observatory level with a breathtaking 360-degree panorama of the magnificent skyline from 723 feet above.

How to Make This Georgia Peach Ice Cream Recipe

This recipe takes 5 minutes to mix up and 3 hours to freeze. You should stir the mix about every 20 or 30 minutes to help it fluff up a bit.

What You Need to Make Peach Ice Cream

Fast and easy with only 6 ingredients. Replace the peaches with any fruit you like best.

Ingredients for Georgia Peach Ice Cream

Equipment Needed

  • Blender
  • 9×5 Loaf Pan
  • Wax Paper

Ingredients Needed

  • 2 cups heavy cream
  • 1 cup whole milk
  • 3 tbsp lemon juice
  • 1 tsp pure vanilla extract
  • 1 cup sugar divided
  • 3 cups peaches peeled and sliced

Time needed: 3 hours and 5 minutes

How to Mix Peach Ice Cream

  1. Blend Ingredients

    In a blender, pour in the cream, milk, sugar, lemon juice, vanilla extract, and sugar in the blender and mix well. Blend for about 20 to 30 seconds then add the pieces of peach.

  2. Pour into a Pan

    Blend again for a few seconds. Pour into a metal pan, add the remaining peaches cut into tiny pieces, and place in the freezer for about an hour.

  3. Freeze and Stir

    Remove from the freezer and stir with a spoon. Repeat this two more times every hour for a total of 3 times in 3 hours. You will see the mixture begin to take on the texture of ice cream.

  4. Scoop and Serve

    When it’s ready, scoop it into bowls, cups, or cones. Serve with a peach slice, if desired.

Georgia Peach Ice Cream Mix

If you liked this dish please Rate This Recipe and leave a comment.

Georgia Peach Ice Cream
Print

Georgia Peach Ice Cream

This recipe for non-churn Peach ice cream is both easy and tasty. You can use it in an ice cream maker if you want but it turns out creamy and smooth without the maker. It will have your taste buds doing the happy dance.
Prep Time 5 minutes
Freezing Time 3 hours
Total Time 3 hours 5 minutes
Servings 7 cups
Calories 275kcal

Equipment

Ingredients

Instructions

  • In a blender, pour in the cream, milk, lemon juice, vanilla extract, and sugar into the blender and mix well.
    2 cups heavy cream, 1 cup whole milk, 3 tbsp lemon juice, 1 tsp vanilla extract, 1 cup white sugar
  • Blend for about 20 to 30 seconds then add the pieces of peach.
    3 cups peaches
  • Blend again for a few seconds. Pour into a metal pan, add the remaining peaches cut into tiny pieces, and place in the freezer for about an hour.
  • Remove from the freezer and stir with a spoon.
  • Repeat this two more times every hour for a total of 3 times in 3 hours. You will see the mixture begin to take on the texture of ice cream.
  • When it’s ready, scoop into bowls, cups, or cones. Serve with a peach slice, if desired.

Nutrition

Serving: 1cup | Calories: 275kcal | Carbohydrates: 37.3g | Protein: 2.5g | Fat: 14g | Saturated Fat: 8.6g | Cholesterol: 50mg | Sodium: 28mg | Potassium: 207mg | Fiber: 1g | Sugar: 36.7g | Calcium: 62mg

Recipes That Go Well With Peach Ice Cream

Apple, Carrot, and Raisin Pie
Venture into a new culinary adventure with this distinctive Apple, Carrot, and Raisin Pie. This delightful fusion of flavors isn't just delicious, it's simpler to craft than you'd imagine! Dare to create your very own Zimbabwean-inspired pie from scratch and let this recipe guide you every step of the way. Indulge in the taste of success as you slice into your homemade culinary masterpiece.
Check out this recipe
Apple, Carrot, and Raisin Pie
Old Fashion New Orleans Pecan Pie
Savor a slice of the Big Easy with this Classic New Orleans Pecan Pie recipe. Embodying the spirit of Southern comfort, this pie features a delicately flaky, all-butter crust cradling a lush, custard-like filling. Topped with a stunning arrangement of crunchy pecans, this traditional dessert holds an undisputed title as a royal treat among pies.
Check out this recipe
Old Fashion New Orleans Pecan Pie

Photo Credits:

  • By Taste The World Cookbook – Copyright 2022 All rights reserved.
  • By The Sun Dial Restaurant, Bar & View – By https://www.facebook.com/sundialatl/
  • By Anish Patel, CC BY-SA 4.0, https://commons.wikimedia.org/w/index.php?curid=41229533
  • By Matthew Kimemia – Own work by the original uploader, CC BY-SA 3.0, https://commons.wikimedia.org/w/index.php?curid=56668345
  • By Atlien1996 – Own work, CC BY-SA 4.0, https://commons.wikimedia.org/w/index.php?curid=74248195
  • By Daniel Mayer – Own work, CC BY-SA 3.0, https://commons.wikimedia.org/w/index.php?curid=1819474
  • By Allenman12 – Own work, CC BY-SA 4.0, https://commons.wikimedia.org/w/index.php?curid=77389636

Egg Foo Young (芙蓉蛋) the Chinese Stuffed Omelette

0
Egg Foo Young (芙蓉蛋) the Chinese Stuffed Omelette

Prepare your tastebuds for a journey from your kitchen all the way to China! We’re diving deep into one of China’s quintessential dishes: the flavorful and versatile Egg Foo Young. We’ll explore its history, origins, and variations, take a detour through the vibrant city of Guangzhou, and learn how to whip up a classic Egg Foo Young in your own kitchen.

Understanding Egg Foo Young: A Chinese Culinary Gem

Egg Foo Young, simply put, is a delectable Chinese omelet packed with a medley of ingredients. Traditionally, it brims with vegetables, seafood, or meat, and it’s seasoned with a variety of spices. Its magic lies in its versatility; it lends itself to endless experimentation and customization, making it a beloved dish around the world.

Egg Foo Young first emerged in American-Chinese eateries as a dish that bridged Eastern and Western cuisine. With its protein-rich content and hearty texture, it quickly became a favorite among patrons. Even today, it continues to wow palates across continents, owing to its rich flavor profile and satisfying mouthfeel.

What’s particularly charming about Egg Foo Young is that it fits any meal. Be it a savory breakfast, a light lunch, or a sumptuous dinner, this Chinese omelet suits every dining experience. It embodies the essence of Chinese cuisine – a harmonious balance of diverse flavors and textures, woven together in one delightful dish.

Mastering the Art of Making a Chinese Omelette: Different Approaches to Egg Foo Young

Making Egg Foo Young at home is straightforward, requiring just a few steps. First, a flavorful sauce is created using a blend of Chinese cooking wine, oyster sauce, soy sauce, and a dash of white pepper. This sauce sets the stage for the rich, savory profile of the dish.

Next, the main ingredients – usually a mix of shrimp, vegetables, and eggs – are stir-fried until they’re just right. The stir-frying technique imbues the ingredients with a robust, smoky flavor, which is quintessential to Chinese cuisine. Once cooked, these ingredients are then combined with a well-beaten egg base.

The final step is transforming this mixture into an omelet. The mixture is spooned onto a hot pan and cooked until it forms a golden, fluffy omelet. The result? A delicious, hearty Chinese omelet that’s bursting with flavors and textures, ready to be savored bite by bite.

Ensuring Freshness: The Proper Storage Techniques for Egg Foo Young

Storing Egg Foo Young is as simple as its preparation. First, allow the omelets to cool completely before storing them. By letting them cool, you prevent condensation, which could make the omelets soggy.

Once cooled, you can store the omelets in an airtight container. Place them in the refrigerator, where they’ll stay fresh for up to 4 days. For longer storage, you can freeze the omelets. Wrap each one individually in a plastic wrap, then place them in a zip-top freezer bag. Properly stored, they can last up to 3 months in the freezer.

To reheat, thaw frozen omelets in the fridge overnight. Then, you can heat them in a microwave or an oven until warmed through. Always make sure to check the temperature in the middle to ensure they’re adequately heated.

From Rural China to Global Tables: The Evocative History of Egg Foo Young

According to the New York Times, the Chinese Omelette origin story goes back to the southern Chinese coastal province of Guangdong, formerly known as Canton.

Egg Foo Young has a fascinating history rooted in the culinary traditions of China. The name “Foo Young” translates to “hibiscus” in Cantonese, referring to the omelet’s resemblance to the blooming petals of a hibiscus flower. This dish dates back to the early days of China when eggs and vegetables were staple ingredients in rural households.

In the mid-19th century, as Chinese immigrants began arriving in the U.S., they brought along their rich culinary heritage. Among the numerous dishes they introduced to America was Egg Foo Young. Adapted to suit local palates, it became a staple in American Chinese cuisine.

Today, Egg Foo Young is enjoyed worldwide. Its universal appeal lies in its adaptability and versatility. You can find variations of this dish in various countries, each tweaked to accommodate local flavors while keeping the core essence of the original Chinese recipe intact.

Guangzhou: A Vibrant Mosaic of Tradition and Modernity

Guangzhou, also known as Canton, is a bustling metropolis located in Southern China. As one of China’s three largest cities, Guangzhou is a significant economic powerhouse. But it’s not just its economic prowess that makes it remarkable; it’s also a city that beautifully marries tradition with modernity.

Guangzhou is home to several UNESCO World Heritage Sites, captivating museums, and traditional temples, all of which testify to its rich history. Simultaneously, its skyline features gleaming skyscrapers, modern architecture, and sprawling shopping malls, reflecting its forward-thinking spirit.

From quiet, tree-lined avenues to lively street markets, Guangzhou offers an enchanting blend of the old and new. Its diverse culture, warm hospitality, and vibrant energy make it a must-visit city for any traveler.

Tracing Guangzhou’s Path: A Glimpse into the City’s Historical Tapestry

The history of Guangzhou traces back over 2,200 years, making it one of the oldest cities in China. During the Han Dynasty, it emerged as an important part of the Silk Road, serving as a major port for foreign trade.

Throughout the centuries, Guangzhou witnessed numerous significant events that shaped its destiny. From the opium wars to the revolution that led to the birth of modern China, Guangzhou has always been at the heart of China’s history.

Today, Guangzhou is a thriving metropolis that seamlessly blends its past with its future. Its rich history is evident in its well-preserved monuments, while its modern identity shines through its bustling markets and impressive skyscrapers.

The Alluring Pull of Guangzhou: Exploring the City’s Tourism Appeal

Guangzhou offers a myriad of attractions for tourists. History buffs can explore the city’s ancient temples and museums, like the Temple of the Six Banyan Trees or the Guangzhou Museum. For nature lovers, the Baiyun Mountain offers stunning views and tranquil surroundings.

The city’s Pearl River is another popular attraction. A river cruise offers a unique perspective on Guangzhou’s skyline, especially when illuminated at night. For those looking for retail therapy, Guangzhou’s markets are a treasure trove of everything from antiques to fashion.

Whether you’re seeking culinary delights, cultural experiences, or historical exploration, Guangzhou has something for every traveler.

A Gastronomic Adventure in Guangzhou: An Insight into its Distinctive Cuisine

As the capital city of the Guangdong province, Guangzhou is at the heart of Cantonese cuisine, one of China’s most famous culinary traditions. It’s renowned for its fresh ingredients, mild flavors, and a variety of cooking methods.

Dim sum, a variety of bite-sized delicacies, is a signature element of Cantonese cuisine. Other local specialties include roast duck, white cut chicken, and of course, our beloved Egg Foo Young. Seafood also plays a vital role in the local cuisine, with dishes like steamed fish, stir-fried shrimp, and crab often featured in meals.

From street food stalls to elegant dining restaurants, Guangzhou offers a culinary journey that’s rich, diverse, and tantalizing, much like the city itself.

Beiyuan Cuisine 北园酒家
202 Xiaobei Rd, Yuexiu District, Guangzhou, Guangdong Province, China

Beiyuan Cuisine
Beiyuan Cuisine

A national historical site in the heart of the city, this space faithfully depicts the details of a Lingnan-style Chinese garden. The interior is equally impressive, showcasing 14 gilded redwood vases with elaborate carvings on all sides. Opened in 1928, it is famed not only for its palatial décor but also for such Cantonese home-style dishes as Shaoxing drunken chicken or braised fish head with mushrooms, pork, and tofu.

Crafting the Perfect Egg Foo Young: A Step-by-Step Guide

Making Egg Foo Young at home is an exciting culinary project. The recipe, despite its impressive results, is straightforward and beginner-friendly. The process involves creating a hearty sauce, stir-frying the main ingredients, and finally, cooking the omelets.

The first step sets the flavor foundation for the dish. Combining Chinese cooking wine, oyster sauce, soy sauce, and white pepper, we create a sauce that’s rich, savory, and slightly spicy. This sauce brings all the ingredients together and gives the dish its characteristic taste.

Stir-frying the main ingredients is where the magic happens. The shrimp, vegetables, and eggs, when cooked on high heat, release their flavors, which meld beautifully with the sauce. The final product is a colorful, fragrant mix that’s ready to be transformed into fluffy omelets.

The final step – making the omelets – is where the fun lies. You pour the mixture onto a hot pan and watch as it fluffs up into a golden omelet. The end result is a feast for the eyes and the palate, ready to be served and savored.

The Essential Toolbox: What You Need to Create Delicious Egg Foo Young

To create this flavorful dish at home, you’ll need some essential kitchen equipment and a range of ingredients. You’ll require a saucepan and a mixing bowl, along with a seasoned wok or frying pan. The ingredients encompass a blend of sauces, seasonings, vegetables, shrimp, and, of course, eggs. The recipe also includes a homemade sauce that ties all the flavors together. But don’t worry, you’ll find all the details in the recipe card that follows.

Equipment Needed

  • 1 Sauce Pan
  • 1 Mixing Bowl
  • 1 Spatula

For the Sauce

  • 1 ½ cups chicken broth
  • 1 ½ tbsp Chinese cooking wine aka Shaoxing wine, substitute Mirin or dry sherry
  • Pinch white pepper
  • ½ tsp sesame oil
  • 1 tbsp oyster sauce
  • 1 tsp rice vinegar
  • 1 tsp white sugar
  • 2 tbsp soy sauce
  • 1 ½ tbsp cornstarch

For the Chinese Omelette

  • vegetable oil, as needed to fry omelets
  • ½ cup yellow onion, diced small
  • 1 tsp garlic
  • ¼ lbs shrimp, cut up small (about 5–6 large shrimp peeled and deveined)
  • ¼ cup carrots, diced small
  • ½ cup red bell pepper, cut up small
  • 8 eggs
  • 2 cups bean sprouts
  • 1 cup water chestnuts, sliced
  • 1 tsp oyster sauce
  • ¼ tsp white sugar
  • ¼ tsp white pepper
  • ½ cup peas, thawed
  • ½ tsp salt
  • green scallion, chopped for garnish

Time needed: 40 minutes

How to Cook Egg Foo Young

  1. Make the Sauce

    Place chicken stock, sherry, white pepper, sesame oil, oyster sauce, vinegar, and sugar in a medium saucepan and heat. Mix cornstarch with soy sauce in a small bowl and add to the pan and stir to combine and thicken. Once hot, remove from heat and hold for the end of the recipe.

  2. Prep the Wok

    In a seasoned wok over high heat, add a half cup of oil, and once hot, swirl around to oil sides then remove all but two tablespoons of the oil. Reserve the remaining oil.

  3. Cook the Shrimp and Vegetables

    Once smoking hot, add the onion, garlic, shrimp, carrots, and red bell pepper all at once and cook and stir for about two minutes until the shrimp is cooked and starting to turn pink. Remove to a bowl or plate to cool. Turn off the heat.

  4. Beat the Eggs

    In a large bowl, beat eggs and add fresh bean sprouts, oyster sauce, sugar, BBQ pork, pepper, peas, and salt. Once the cooked ingredients are cool, add to the bowl. Stir to combine.

  5. Preheat the Oven

    Preheat the oven to 200 degrees to keep the omelets warm while you cook the entire batch.

  6. Cook the Egg Mix

    Using the same pan you cooked the vegetables, heat to between medium and medium-high. Once the pan is very hot, add about two tablespoons of the vegetable oil and once that is very hot, use a ¼ cup measure and scoop out a full ¼ cup of the mixture and pour it into the hot pan. The pan must be hot, and the omelets nice and browned when done, not mildly yellow like an omelet. As soon as you pour the mixture in, the sides will bubble up and puff in the hot oil and the bottom will brown. Once the center is set enough that you can safely flip, flip using your favorite spatula.

  7. Finish the Egg Mix

    Cook on the other side just long enough to set the egg then remove to a waiting oven-proof platter. Continue until all the mixture has been cooked into several omelets, using two tablespoons of oil between each omelet. If there is enough oil after each batch, you don’t need to keep adding more, just make sure that each omelet is cooked in at least two tablespoons of the oil.

  8. Top with Gravey and Serve

    Bring the sauce up to serving temperature and either serve on the side or pour over the omelets.
    Garnish with chopped green scallion tops.

Honestly, I think that the Chinese Omelette is by far the best omelet in the world.

If you liked this dish please Rate This Recipe and leave a comment.

Egg Foo Young (芙蓉蛋) the Chinese Stuffed Omelette
Print

Egg Foo Young

This Egg Foo Young recipe is a symphony of flavors that promises a culinary spectacle right on your plate. This cherished Chinese dish, a sumptuously filled omelet brimming with tender shrimp and vibrant vegetables, is a versatile delight that can elevate your breakfast, lunch, or dinner experience. Every bite you take, every flavor you savor, turns any ordinary day into a gastronomic festival.
Cuisine Chinese
Prep Time 20 minutes
Cook Time 20 minutes
Total Time 40 minutes
Servings 6 people
Calories 212kcal

Ingredients

For the Sauce

For the Egg

Instructions

  • Place chicken stock, sherry, white pepper, sesame oil, oyster sauce, vinegar, and sugar in a medium saucepan and heat. Mix corn starch with soy sauce in a small bowl and add to the pan and stir to combine and thicken. Once hot, remove from heat and hold for the end of the recipe.
    1 ½ cups chicken broth, 1 ½ tbsp Chinese cooking wine, Pinch white pepper, ½ tsp sesame oil, 1 tbsp oyster sauce, 1 tsp rice vinegar, 1 tsp white sugar, 2 tbsp soy sauce, 1 ½ tbsp corn starch
  • In a seasoned wok over high heat, add a half cup of oil and once hot, swirl around to oil sides then remove all but two tablespoons of the oil. Reserve the remaining oil.
    vegetable oil
  • Once smoking hot, add the onion, garlic, shrimp, carrots, and red bell pepper all at once and cook and stir for about two minutes until shrimp is cooked and starting to turn pink. Remove to a bowl or plate to cool. Turn off heat.
    ½ cup yellow onion, 1 tsp garlic, ¼ lbs shrimp, ¼ cup carrot, ½ cup red bell pepper
  • In a large bowl, beat eggs and add fresh bean sprouts, water chessnuts, oyster sauce, sugar, pepper, peas, and salt. Once the cooked ingredients are cool, add to the bowl. Stir to combine.
    8 eggs, 2 cups bean sprouts, 1 cup water chestnuts, 1 tsp oyster sauce, ¼ tsp white sugar, ¼ tsp white pepper, ½ cup peas, ½ tsp salt
  • Preheat the oven to 200 degrees to keep the omelets warm while you cook the entire batch.
  • Using the same pan you cooked the vegetables, heat to between medium and medium-high. Once the pan is very hot, add about two tablespoons of the vegetable oil and once that is very hot, use a ¼ cup measure and scoop out a full ¼ cup of the mixture and pour it into the hot pan. The pan must be hot, and the omelets nice and browned when done, not mildly yellow like an omelet. As soon as you pour the mixture in, the sides will bubble up and puff in the hot oil and the bottom will brown. Once the center is set enough that you can safely flip, flip using your favorite spatula.
  • Cook on the other side just long enough to set the egg then remove to a waiting oven-proof platter. Continue until all the mixture has been cooked into several omelets, using two tablespoons of oil between each omelet. If there is enough oil after each batch, you don’t need to keep adding more, just make sure that each omelet is cooked in at least two tablespoons of the oil.
  • Bring the sauce up to serving temperature and either serve on the side or pour over the omelets.
  • Garnish with chopped green scallion tops.
    green scallion

Nutrition

Calories: 212kcal | Carbohydrates: 19.8g | Protein: 17.3g | Fat: 7.4g | Saturated Fat: 2.1g | Cholesterol: 258mg | Sodium: 688mg | Potassium: 450mg | Fiber: 1.1g | Sugar: 3.4g | Calcium: 79mg | Iron: 2mg

Complementing the Main Act: Recipes That Pair Well with Egg Foo Young

To compliment your Egg Foo Young, here are a few recipes that are a great pairing. Whether you’re in the mood for a full Chinese-themed meal or you want something light and fresh to balance the richness of the omelet, you’ll find plenty of options in our selection.

Thai Shrimp Cake
Brace yourself for a delectable Thai Shrimp Cake recipe that packs a punch of flavor. This dish proudly features succulent shrimp, harmoniously blended with vibrant red curry. To finish off, we serve it with a drizzle of sweet chili sauce that perfectly complements the savory cake. You're in for a real treat!
Check out this recipe
Thai Shrimp Cakes

And there you have it – an in-depth journey through Egg Foo Young. We dove into its origins, explored the bustling city of Guangzhou, and even learned how to create this flavorful dish at home. Remember, cooking is all about exploring, experimenting, and most importantly, enjoying. So, have fun in your culinary adventure with Egg Foo Young and enjoy the delightful journey it takes you on. Bon Appétit!

Photo Credits:

  • By Taste The World Cookbook – Copyright 2022 All rights reserved.
  • By Beiyuan Cuisine – By http://www.beiyuancuisine.com/
  • By Zhou Manying – Own work, CC BY-SA 4.0, https://commons.wikimedia.org/w/index.php?curid=62948907
  • By Zhangzhugang – Own work, CC BY-SA 3.0, https://commons.wikimedia.org/w/index.php?curid=29979769
  • By xiquinhosilva – https://www.flickr.com/photos/xiquinho/32894333162/in/photostream/, CC BY 2.0, https://commons.wikimedia.org/w/index.php?curid=86378721
  • By zengsx, CC BY-SA 3.0, https://commons.wikimedia.org/w/index.php?curid=40896660
  • By Mr a – Own work, CC BY 3.0, https://commons.wikimedia.org/w/index.php?curid=20338813

El Submarino the Argentinian Hot Chocolate

0
El Submarino the Argentinian Hot Chocolate Recipe Card

Warm your soul and your taste buds with El Submarino, a unique Argentinian spin on hot chocolate. Evoking memories of cold winter evenings, this delightful drink stands out with its creative presentation and simplicity of ingredients. A piece of dark chocolate is dropped like a submarine into a steaming cup of milk. As it melts, it transforms the milk into a rich, indulgent cup of hot chocolate. This is not just a drink, it’s an experience that is deeply rooted in Argentinian culture.

Diverse Paths to Hot Chocolate Heaven

Around the globe, cultures have adopted their own unique takes on hot chocolate. In Mexico, for instance, hot chocolate is traditionally spiced with a touch of chili and cinnamon, creating a beverage that is both warm and invigorating. Across the Atlantic, in Spain, hot chocolate is known for its thick, almost pudding-like consistency, usually served with churros for dipping. Swiss hot chocolate, on the other hand, is typically made with high-quality milk chocolate and heavy cream, creating a luxuriously rich and creamy concoction.

Closer to home, in North America, hot chocolate is often made with cocoa powder, sugar, and milk, and topped with a dollop of whipped cream or marshmallows. Each of these versions of hot chocolate carries the unique taste and tradition of their origin, showcasing the versatility of chocolate as a star ingredient.

Ensuring Your Chocolate Stays Pristine

Proper chocolate storage is paramount to maintaining its quality and taste. First and foremost, keep your chocolate away from heat and direct sunlight. Store it in a cool, dark place with a temperature ideally between 60-70°F (15-21°C). Secondly, chocolate absorbs odors from its surroundings, so it’s crucial to store it in an odor-free environment.

Moisture is also a foe of chocolate, leading to a condition called “sugar bloom”, where sugar rises to the surface and crystallizes, resulting in a whitish coating. To prevent this, make sure your chocolate is stored in a dry place. Finally, to avoid fluctuations in temperature and humidity, refrain from refrigerating your chocolate unless it’s absolutely necessary. If you do need to refrigerate it, make sure it’s tightly wrapped and consider placing it in an airtight container.

Tracing the Rich History of Chocolate

The history of chocolate dates back 4,000 years to ancient Mesoamerica, where the Mayans and Aztecs prized cacao beans as a form of currency and used them to create a bitter, frothy drink. In the 16th century, Spanish conquistadors brought cacao back to Europe, where sugar and other sweeteners were added to create a drink more suited to European palates.

Throughout the 17th and 18th centuries, chocolate remained a luxury, enjoyed mostly by the European elite. It wasn’t until the Industrial Revolution, with the invention of machines capable of grinding cacao beans into a fine paste, that chocolate became more widely accessible. The invention of the chocolate bar in the mid-19th century and the creation of milk chocolate by Daniel Peter and Henri Nestlé in 1875 forever transformed the chocolate industry, making it the beloved treat we know today.

Unraveling the Charm of Buenos Aires, Argentina

Buenos Aires, Argentina’s capital city, is a mesmerizing mix of European grandeur and Latin passion. Its bustling streets are lined with architectural gems, ranging from the iconic pink-hued Presidential Palace, Casa Rosada, to the grand Teatro Colón. This city of “fair winds” enchants visitors with its vibrant arts scene, its lively tango dance halls, and the passion of its football-loving populace.

The city also offers a culinary landscape as diverse as its culture. Traditional Argentinian barbecue, known as asado, is a must-try for meat lovers, while the cosmopolitan city streets offer a variety of world cuisines. Buenos Aires is also renowned for its local pastries, with the dulce de leche-filled medialunas being a local favorite.

Buenos Aires’ thriving nightlife, with its myriad of bars and nightclubs, ensures the city stays alive and buzzing until the early morning hours. Known as the ‘city that never sleeps,’ Buenos Aires offers an exhilarating experience to those who wish to immerse themselves in its distinctive rhythm.

A Brief Journey Through Buenos Aires’ Past

Buenos Aires’ history is a captivating blend of triumph and tribulation. Founded by Spanish settlers in the 16th century, the city initially grew slowly due to its distance from the traditional trade routes. It wasn’t until the 18th century, with the establishment of the Vice-Royalty of the Río de la Plata, that Buenos Aires began to flourish as a key trading port.

In the 19th century, the city was at the heart of Argentina’s struggle for independence from Spain. Following independence, Buenos Aires grew rapidly, fueled by a wave of immigration, primarily from Europe. These immigrants brought with them their diverse cultures, significantly influencing the city’s architectural style, cuisine, and overall character.

The 20th century brought further growth but also periods of political instability and economic crisis. Despite these challenges, Buenos Aires has emerged as a resilient city, its vibrant culture and rich history continuing to captivate residents and visitors alike.

The Allure of Buenos Aires for Tourists

Buenos Aires is a treasure trove for tourists. The city’s eclectic architecture is a feast for the eyes, from the colorful, mural-adorned buildings in the La Boca neighborhood to the elegant Parisian-style apartments in Recoleta. These districts also offer glimpses into the city’s past, with La Boca’s Caminito Street reflecting its immigrant roots, and Recoleta Cemetery housing the tombs of some of Argentina’s most iconic figures.

Nature lovers can enjoy the city’s many green spaces, such as the expansive Parque Tres de Febrero, while art enthusiasts will be drawn to the Museum of Latin American Art, known as MALBA, and the Buenos Aires Museum of Modern Art. Meanwhile, no visit to Buenos Aires would be complete without experiencing its vibrant tango culture, whether that’s at a glamorous tango show or a local milonga dance hall.

Buenos Aires also offers a compelling culinary journey, its food scene representing the city’s multicultural history. The famous San Telmo Market is a must-visit for foodies, offering a wide array of Argentinian street food, artisanal goods, and antiques.

The Delicious Tapestry of Buenos Aires Cuisine

Buenos Aires’ cuisine is a delectable reflection of its multicultural roots. The city’s most famous culinary offering is undoubtedly its beef. Asados, or barbecued meats, are a cornerstone of local cuisine, with parrillas (steakhouses) offering a dizzying array of cuts cooked to perfection.

However, Buenos Aires’ food scene goes beyond just meat. Empanadas, stuffed pastries that are baked or fried, are a popular snack, with fillings varying from region to region. Pizza is also a city staple, with Argentinian versions often featuring a thick, doughy crust and copious amounts of cheese. The influence of Italian immigrants can be felt here and in the prevalence of ice cream parlors serving Italian-style gelato.

For those with a sweet tooth, Buenos Aires is the capital of dulce de leche, a sweet, caramel-like sauce that is used in everything from pastries to ice cream. Medialunas, a type of Argentinian croissant, are commonly enjoyed for breakfast or with a cup of coffee in the afternoon.

Café Martínez
C1193AAF, Av. Corrientes 3303, 1193 Buenos Aires, Argentina

Café Martínez
Café Martínez

Step into Café Martínez and find yourself embraced by the hallmark of authentic Argentinian cuisine. Here, the quality of the food is impeccable, a testament to the rich culinary heritage it represents. The welcoming staff treats you not merely as a customer, but as a cherished friend, ensuring your every need is promptly and graciously met.

Even if your Spanish is a bit rusty, there’s no need for concern. The accommodating servers at Café Martínez are ever-ready to guide you through the menu, demystify the dishes, and help you make an excellent choice. So, you can fully immerse yourself in the dining experience, confident that you’re in good hands.

.

Crafting Your Own El Submarino Experience

Making El Submarino is less about following a recipe and more about creating an experience. It starts with heating milk until it begins to steam but is careful not to let it boil. While the milk is warming, place a piece of quality dark chocolate into a sturdy glass or mug.

Once the milk is hot, the magic happens. Pour the milk into the glass, over the chocolate, and stir. As the chocolate submarine starts to melt and disperse into the milk, it transforms into a creamy, rich hot chocolate, full of depth and flavor. It’s a simple process but one that encapsulates the warmth and comfort of this beloved Argentinian beverage.

Preparing for Your El Submarino Voyage

In terms of equipment, making El Submarino requires little more than a saucepan to heat your milk and a sturdy glass or mug to serve it in. A long spoon can also be useful for stirring the drink as the chocolate melts.

The real star of El Submarino is the chocolate. The quality of your chocolate will greatly impact the taste of the drink, so it’s best to opt for a high-quality dark chocolate. Though traditional El Submarino uses a chocolate shaped like a submarine, any shape or form of dark chocolate will work. Additionally, fresh, high-quality milk will ensure your El Submarino is as creamy and delicious as possible. With these simple ingredients and a little patience, you can create a comforting, delightful El Submarino experience at home.

Equipment Needed

  • 1 Saucepan
  • 4 Coffee Mugs

Ingredients Needed

  • 4 cups whole milk
  • 1/4 cup sugar
  • 1 tsp vanilla
  • 4 oz dark chocolate broken into 1-ounce pieces

Time needed: 15 minutes

How to Cook the El Submarino Hot Chocolate

  1. Mix the Ingredients

    Pour the milk into a saucepan. Stir in the sugar and vanilla.

  2. Heat the Mixture

    Heat the milk slowly over low heat until it is just about to boil. Do not let it boil.

  3. Garnish and Serve

    Remove from the heat and divide the milk into 4 mugs. Serve each mug with a few pieces of chocolate.

If you liked this dish please Rate This Recipe and leave a comment.

El Submarino the Argentinian Hot Chocolate
Print

El Submarino ~ Argentinian Hot Chocolate

Dive into the world of Argentinian cuisine with El Submarino, a delicious and engaging twist on the traditional hot chocolate. With this rich and creamy treat, you don't just make hot chocolate, you experience it. Its fun and interactive nature is sure to delight children, turning them into little chefs, as they create their own cup of warmth and sweetness. Compared to its American counterpart, El Submarino offers a unique, hands-on experience that enhances both the flavor and enjoyment of this beloved beverage.
Prep Time 10 minutes
Cook Time 5 minutes
Total Time 15 minutes
Servings 4 cups
Calories 348kcal

Equipment

Ingredients

Instructions

  • Pour the milk into a saucepan.
    4 cups whole milk
  • Stir in the sugar and vanilla.
    1/4 cup white sugar, 1 tsp vanilla extract
  • Heat the milk slowly over low heat until it is just about to boil. Do not let it boil.
  • Remove from the heat and divide the milk into 4 mugs.
  • Serve each mug with a piece of chocolate. After serving drop the chocolate into the warm milk and stir until dissolved.
    4 oz dark chocolate

Nutrition

Serving: 1cup | Calories: 348kcal | Carbohydrates: 40.5g | Protein: 10g | Fat: 16.3g | Saturated Fat: 10.4g | Cholesterol: 31mg | Sodium: 120mg | Potassium: 456mg | Fiber: 1g | Sugar: 40.1g | Calcium: 329mg | Iron: 1mg

Complementing Your El Submarino: Perfect Pairings for Your Argentinian Hot Chocolate

There’s nothing quite like savoring an El Submarino, but what if we could elevate this experience even further? The warmth and richness of the Argentinian hot chocolate open up a world of culinary pairings. Whether you’re in the mood for something sweet or savory, these handpicked recipes complement the flavors of El Submarino perfectly, creating a gastronomic journey that transports you straight to the heart of Buenos Aires.

Apple, Carrot, and Raisin Pie
Venture into a new culinary adventure with this distinctive Apple, Carrot, and Raisin Pie. This delightful fusion of flavors isn't just delicious, it's simpler to craft than you'd imagine! Dare to create your very own Zimbabwean-inspired pie from scratch and let this recipe guide you every step of the way. Indulge in the taste of success as you slice into your homemade culinary masterpiece.
Check out this recipe
Apple, Carrot, and Raisin Pie

By coupling your El Submarino with these harmonious pairings, you’ve just enhanced your tasting experience. The recipes suggested not only satiate your hunger but also resonate with the deep, chocolatey flavors of your drink. So, the next time you decide to make El Submarino, remember these delightful companion dishes that bring out the best in your Argentinian hot chocolate and allow you to immerse yourself in a truly authentic culinary journey.

Photo Credits:

  • By Taste The World Cookbook – Copyright 2022 All rights reserved.
  • By Café Martínez – By https://www.facebook.com/CafeMartinezSitioOficial/
  • By Deensel – Puerto Madero, Buenos Aires, CC BY 2.0, https://commons.wikimedia.org/w/index.php?curid=68120248
  • By The Cosmonaut – This image was created with darktable., CC BY-SA 2.5 ca, https://commons.wikimedia.org/w/index.php?curid=90712475
  • By U.S. Department of State from United States – A View of the Obelisk, in Buenos Aires, Argentina, the Host Site for the 2018 G-20 Leaders’ Summit, Public Domain, https://commons.wikimedia.org/w/index.php?curid=74798513
  • By Carlos Adampol Galindo – originally posted to Flickr as Caminito en Buenos Aires, Argentina, CC BY-SA 2.0, https://commons.wikimedia.org/w/index.php?curid=5853737
  • By The Cosmonaut – This image was created with darktable., CC BY-SA 2.5 ca, https://commons.wikimedia.org/w/index.php?curid=90645131

Thai Shrimp Cakes: A Gourmet Journey to Kaohsiung City, Taiwan

0
Thai Shrimp Cakes
Thai Shrimp Cakes

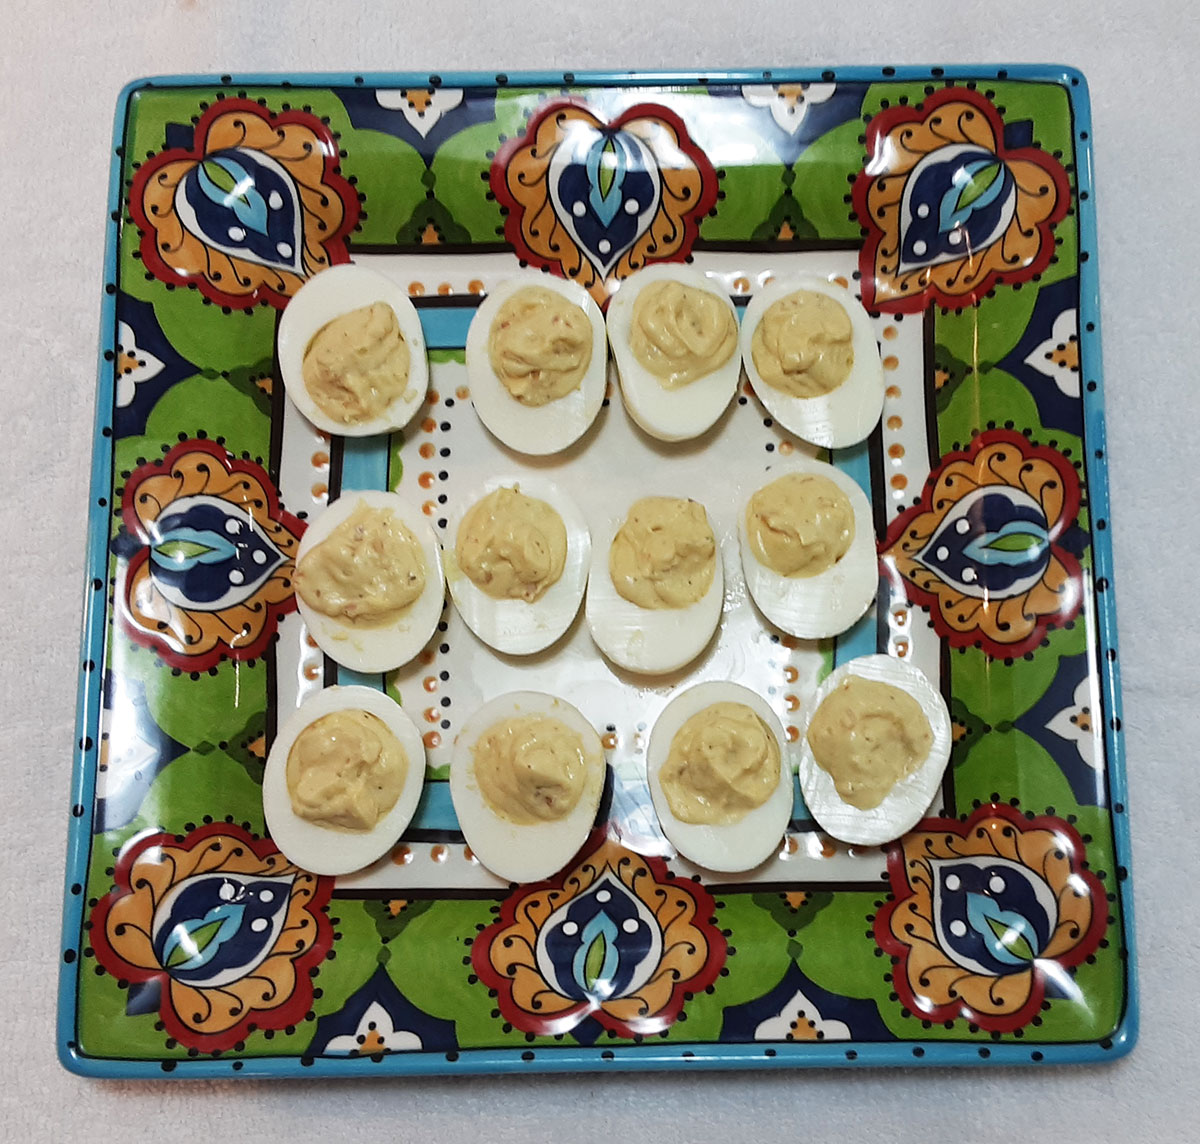
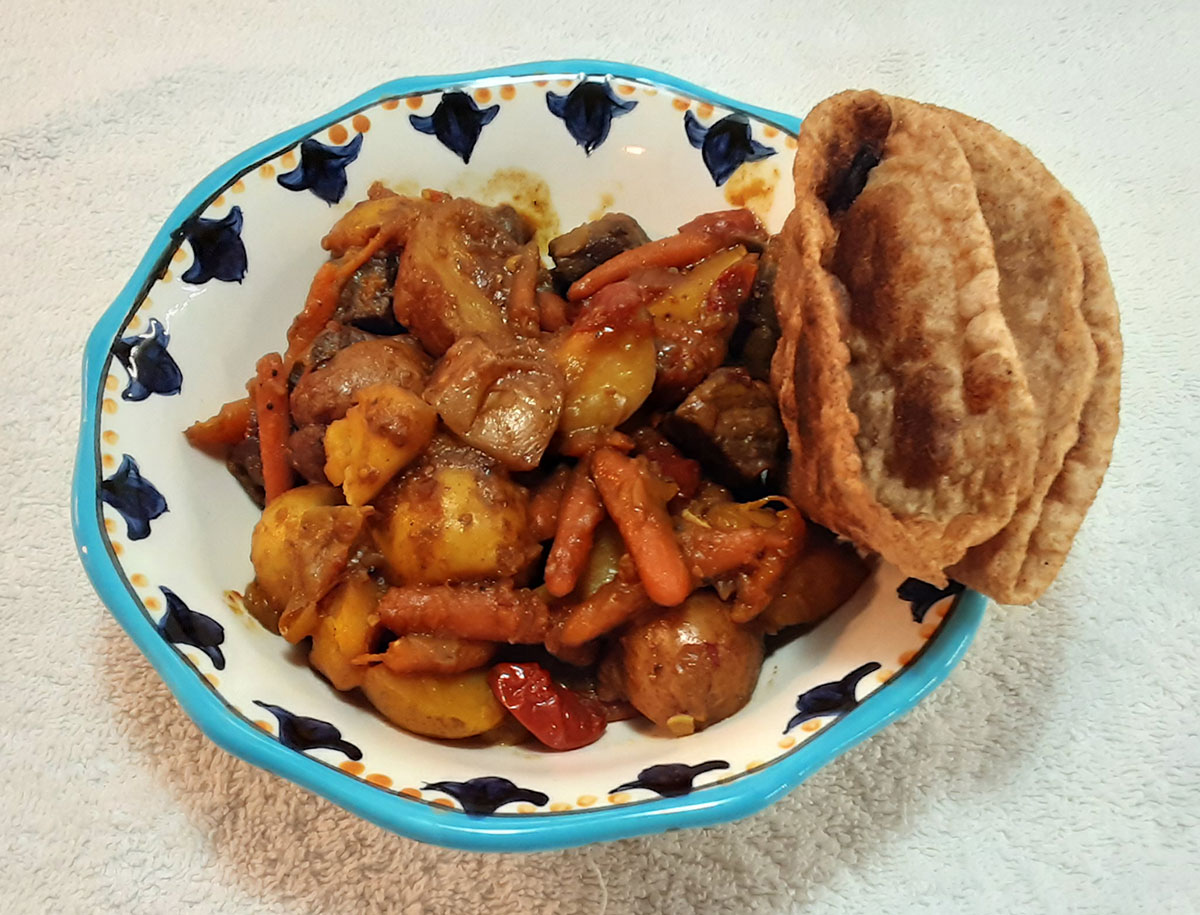
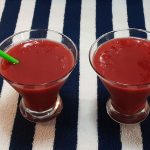
Embark on a culinary adventure to Kaohsiung City, Taiwan with Thai Shrimp Cakes, a delicacy that you will find irresistible, especially if crab cakes already hold a place in your heart. These cakes showcase the sweetness and the salty undertones of shrimp, letting them take center stage. Enhanced by the vibrant and traditional Thai blend of ginger, lime juice, and chili sauce, the shrimp offers an unforgettable taste experience.

Next, let’s dive deeper into the making of these shrimp cakes. This involves a delightful and somewhat artistic process where precision and balance of flavors play key roles. The shrimp, cleaned and shelled, are mixed with a blend of spices and herbs before they are carefully shaped into delicate cakes. A quick pan-frying gives them a beautiful golden-brown exterior that contrasts perfectly with the soft, flavorful interior.

Finally, to serve these Thai Shrimp Cakes, a tangy dipping sauce accompanies them, acting as a perfect counterpoint to the rich, savory cakes. This sauce, often a blend of soy sauce, vinegar, and a touch of sugar, elevates the experience, leaving a lasting impression of this Kaohsiung City’s culinary delight.

Discovering Versatile Techniques: Crafting Shrimp Cakes in Asian and European Styles

The beauty of shrimp cakes lies not only in their delightful taste but also in their versatility. The Asian style, for example, features shrimp cakes with a mixture of shrimp, salt, water, flour, and egg. A common variation includes the addition of fish paste and surimi, lending a unique depth of flavor to the dish.

Contrarily, European-style shrimp cakes lean towards a croquette-like texture, incorporating shrimp or other seafood into a potato patty. Sometimes, a coat of breadcrumbs or batter wraps around the patty, giving it a delightfully crunchy exterior. This method provides a distinctive taste and texture that sets it apart from its Asian counterpart.

Lastly, the method you choose to prepare shrimp cakes depends entirely on your preference. Both styles have their unique charm and characteristics. Whether you want to experience the flavors of Asia or Europe, shrimp cakes serve as a tasty canvas that adapt well to different cooking styles and flavors.

Proper Storage Techniques for Thai Shrimp Cakes: Ensuring Freshness and Quality

When it comes to storing leftover Thai Shrimp Cakes, using an airtight container is key. After cooling them completely, place them in the container and refrigerate. It’s important to consume these within 3 days to ensure the best quality and freshness.

If you wish to freeze the shrimp cakes, the process is just as straightforward. Similar to refrigeration, make sure the cakes are completely cool before moving to the freezer. Arrange them in a freezer-safe, airtight container, placing a piece of parchment between each cake to prevent them from sticking together.

When stored properly, the Thai Shrimp Cakes can last in the freezer for up to 2 months. This means you can always have these savory treats at hand whenever the cravings strike. Just remember to thaw them correctly before reheating for the best results.

Tracing Back the Origins of Shrimp Cakes: A Historical Perspective

While pinpointing the exact origins of shrimp cakes might be challenging, we find the earliest records of similar dishes in ancient Chinese history. Roughly 4000 years ago, the Chinese documented the use of fish cakes, making them one of the earliest civilizations to do so.

The tale begins with Emperor Shun, who traveled to Southern China with his wives. The long journey tired them, and their appetites waned. Concerned for their wellbeing, Shun sought a solution, which arrived in the form of a fisherman named Bo. Bo offered his homemade fish cakes to the weary travelers.

Much to Shun’s relief, the fish cakes rekindled his consorts’ appetites. Pleased, Shun asked Bo to teach his people the art of making fish cakes, believing it could help others who might struggle with poor appetites. This marked the beginning of the popularity of fish cakes in China, and we can infer the techniques adapted over time to incorporate shrimp, giving birth to the shrimp cakes we relish today.

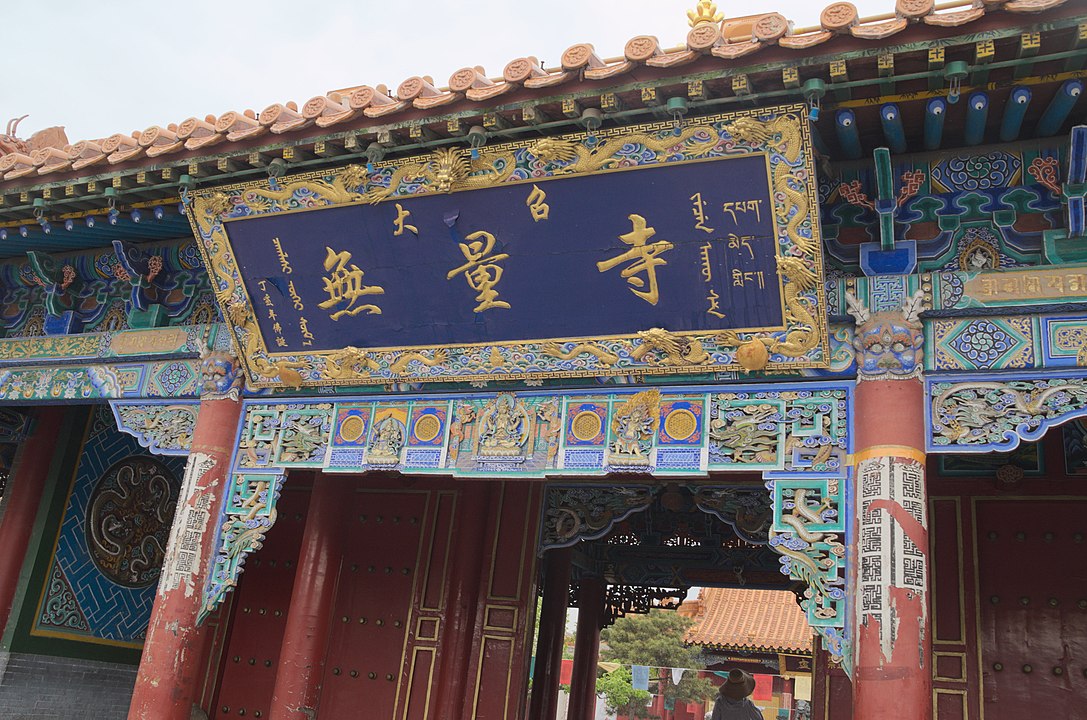
Unveiling the Urban Splendor of Kaohsiung City, Taiwan

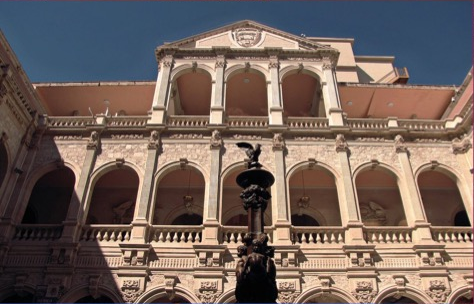
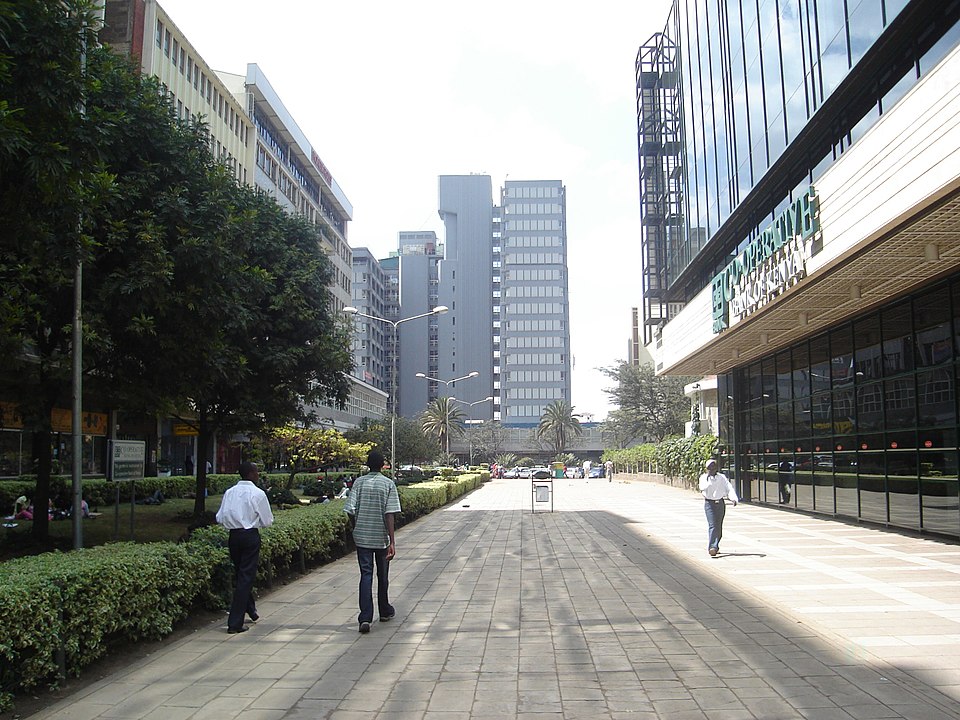
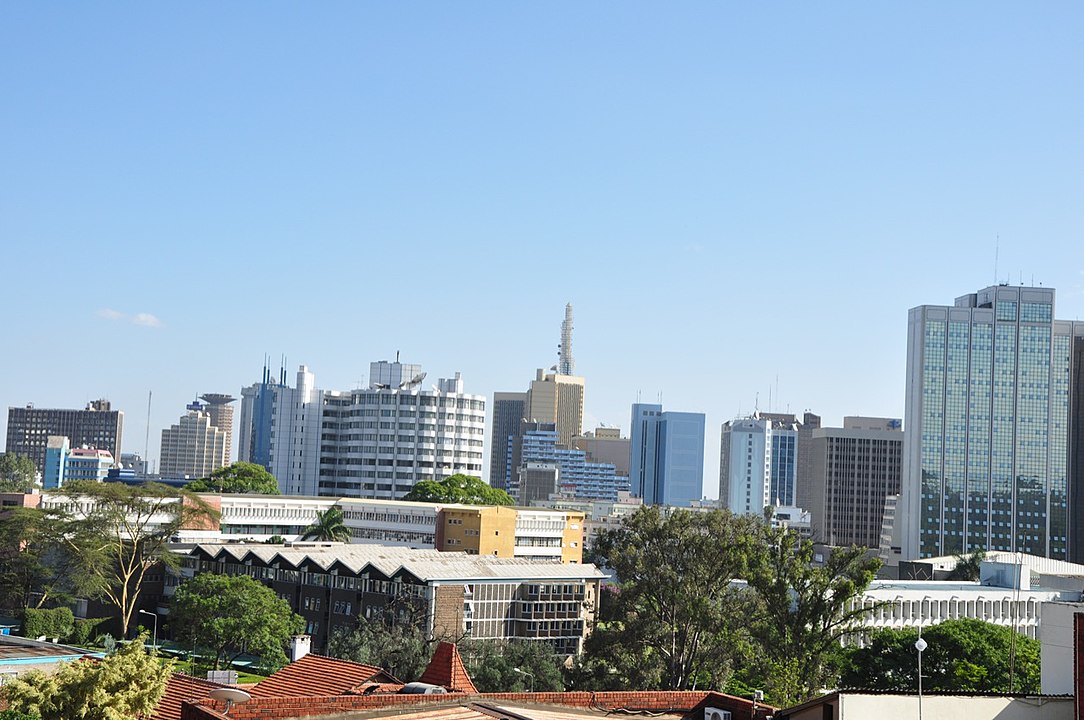
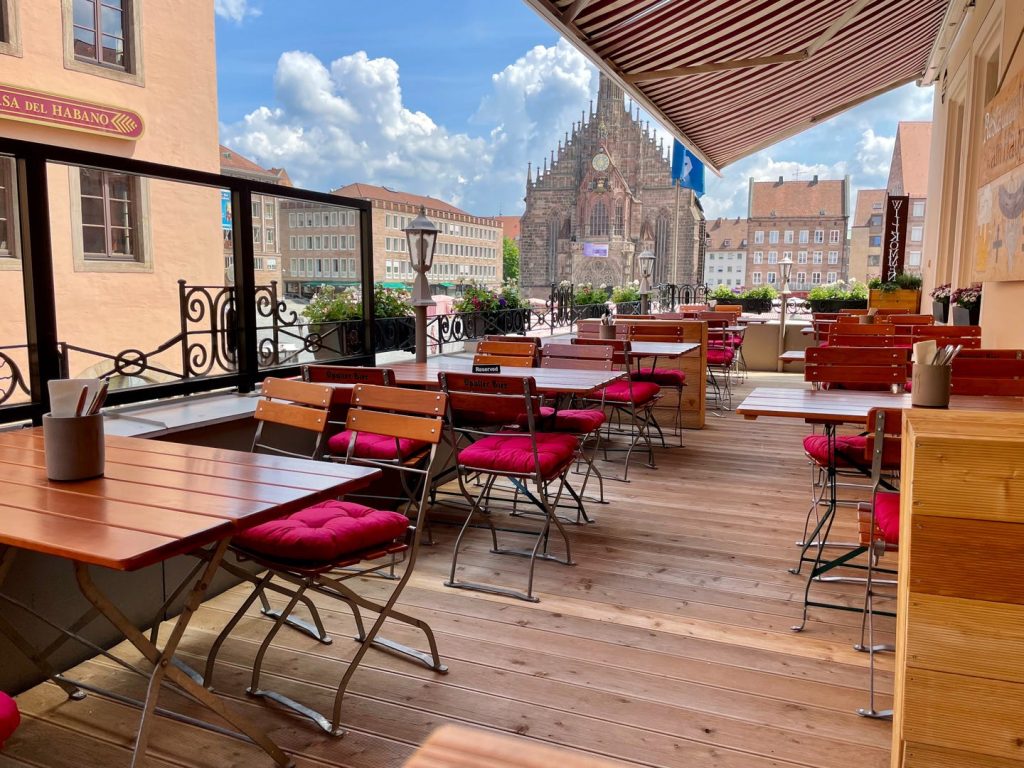
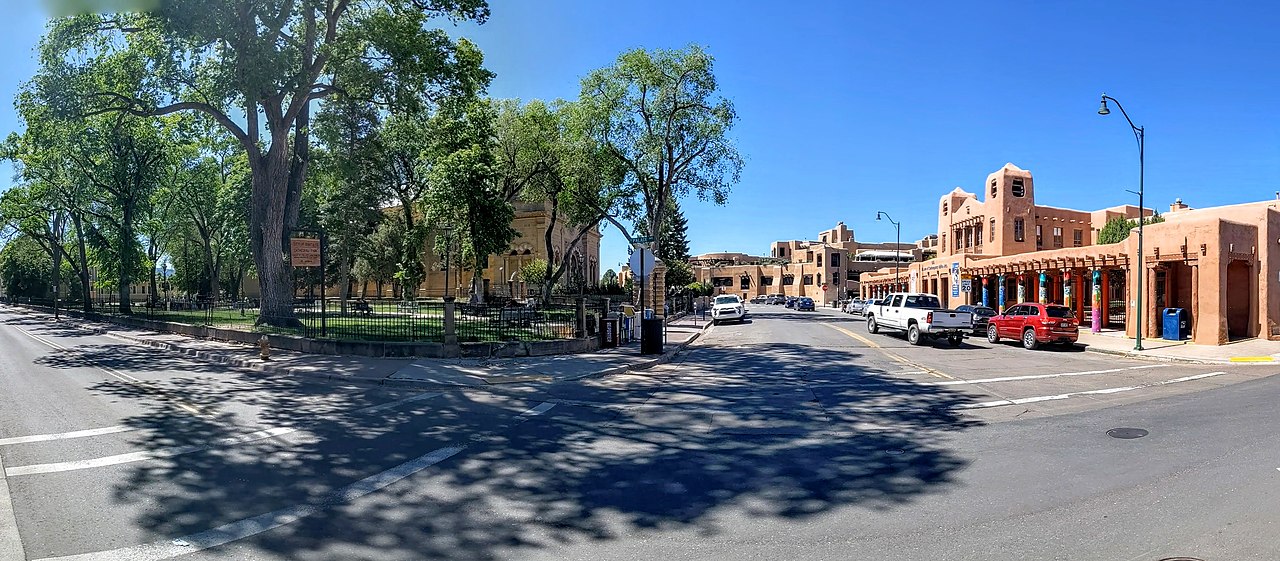
Experience the metropolis of Kaohsiung City, Taiwan, where modernity and tradition harmoniously intertwine. As the second largest city in Taiwan, Kaohsiung proudly showcases its rapid development in infrastructure, blending seamlessly with the heritage that has shaped its identity. Bustling with activity, the city comes alive with vibrant markets, impressive skyscrapers, and breathtaking night vistas.

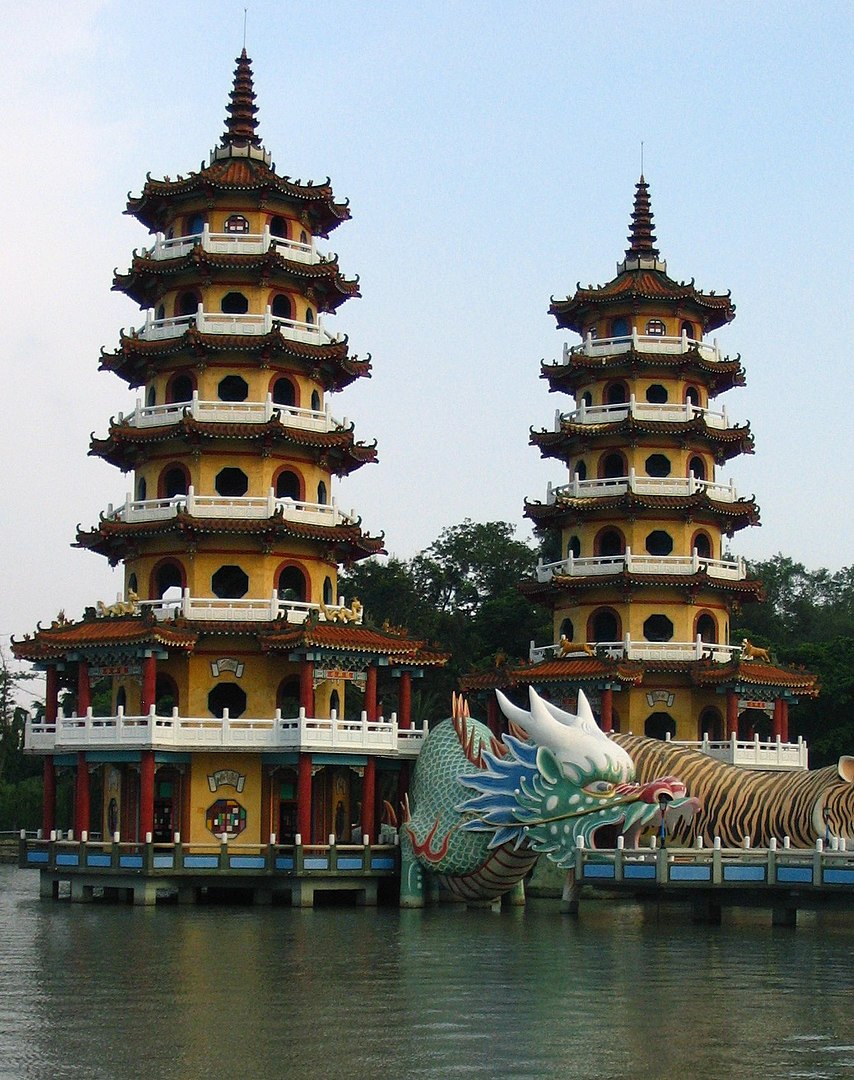
At the heart of the city lies the Love River, a symbol of the city’s transformation and renewal. Once heavily polluted, the river now hosts enchanting riverside parks, romantic cafes, and an array of nightlife activities, becoming a testament to the city’s commitment to environmental revitalization. The river, especially during the evening, bathes in an ethereal glow from the surrounding cityscape, offering a magical sight for locals and visitors alike.

The city’s extensive transportation system facilitates seamless travel, providing access to the various districts, each offering a unique piece of the Kaohsiung City experience. From the modern city center to the historic old town, the journey through the city is as captivating as the destinations themselves.

Tracing the Evolution of Kaohsiung City, Taiwan: A Historical Overview

The history of Kaohsiung City, Taiwan, unveils a compelling narrative of transformation and growth. Initially a small fishing community during the Ming Dynasty, the city underwent significant changes in its socio-economic landscape over the centuries. The port city’s advantageous location on the southwestern coast of Taiwan played a critical role in its evolution.

During the era of Japanese rule from 1895 to 1945, Kaohsiung began its transformation into an industrial city. Infrastructure development, especially the establishment of the Kaohsiung Harbor, propelled the city into becoming Taiwan’s vital economic and trade hub. The harbor continues to be one of the busiest and largest ports in the world.

Post World War II, under the Republic of China’s administration, Kaohsiung expanded further with urban development and modernization. Today, the city stands as a testimony to Taiwan’s growth, representing a vibrant mix of the old and the new, the traditional and the contemporary.

Exploring Kaohsiung City, Taiwan: A Must-Visit Destination for Travelers

When it comes to tourism, Kaohsiung City, Taiwan, effortlessly charms visitors with its diverse offerings. Nature enthusiasts find solace in the city’s beautiful parks, such as the Shoushan National Nature Park, home to a wide variety of flora and fauna. Cultural aficionados get a chance to delve into the city’s rich history at various museums and historic sites.

One of the must-visit attractions is the Fo Guang Shan Buddha Museum, which houses one of the tallest bronze Buddha statues in the world. The museum also offers a glimpse into Buddhist art and culture, making it a spiritual and artistic pilgrimage for many visitors.

For those who enjoy the thrill of bustling markets, the Liuhe Night Market remains a favorite. Here, you can experience the local life, sample delectable street food, and shop for a variety of goods. From serene temples to lively night markets, Kaohsiung City truly has something for every traveler.

Delighting in the Flavors of Kaohsiung City, Taiwan: A Gastronomic Journey

In Kaohsiung City, Taiwan, the local cuisine is a celebration of flavors that reflects its rich cultural tapestry. A vast array of seafood dishes pays tribute to the city’s history as a fishing community and a significant port. From traditional night market fare to gourmet seafood restaurants, Kaohsiung offers a feast for the senses.

A notable dish is the Milkfish, a local delicacy prepared in a variety of ways. Whether it’s a comforting bowl of Milkfish soup or a crispy Milkfish belly, this fish remains a favorite among locals and tourists. Also, the city’s renowned seafood markets offer an array of fresh catch, reflecting its deep connection with the sea.

On the sweet side, the city tempts dessert lovers with its tropical fruit offerings. Pineapple cakes, papaya milk, and mango shaved ice are some delightful treats that are sure to satisfy any sweet tooth. In Kaohsiung City, every meal is an opportunity to partake in a culinary adventure, showcasing the local culture and tradition through food.

Thomas Chien Restaurant
No. 11號, Chenggong 2nd Rd, Qianzhen District, Kaohsiung City, Taiwan 806

Thomas Chien Restaurant

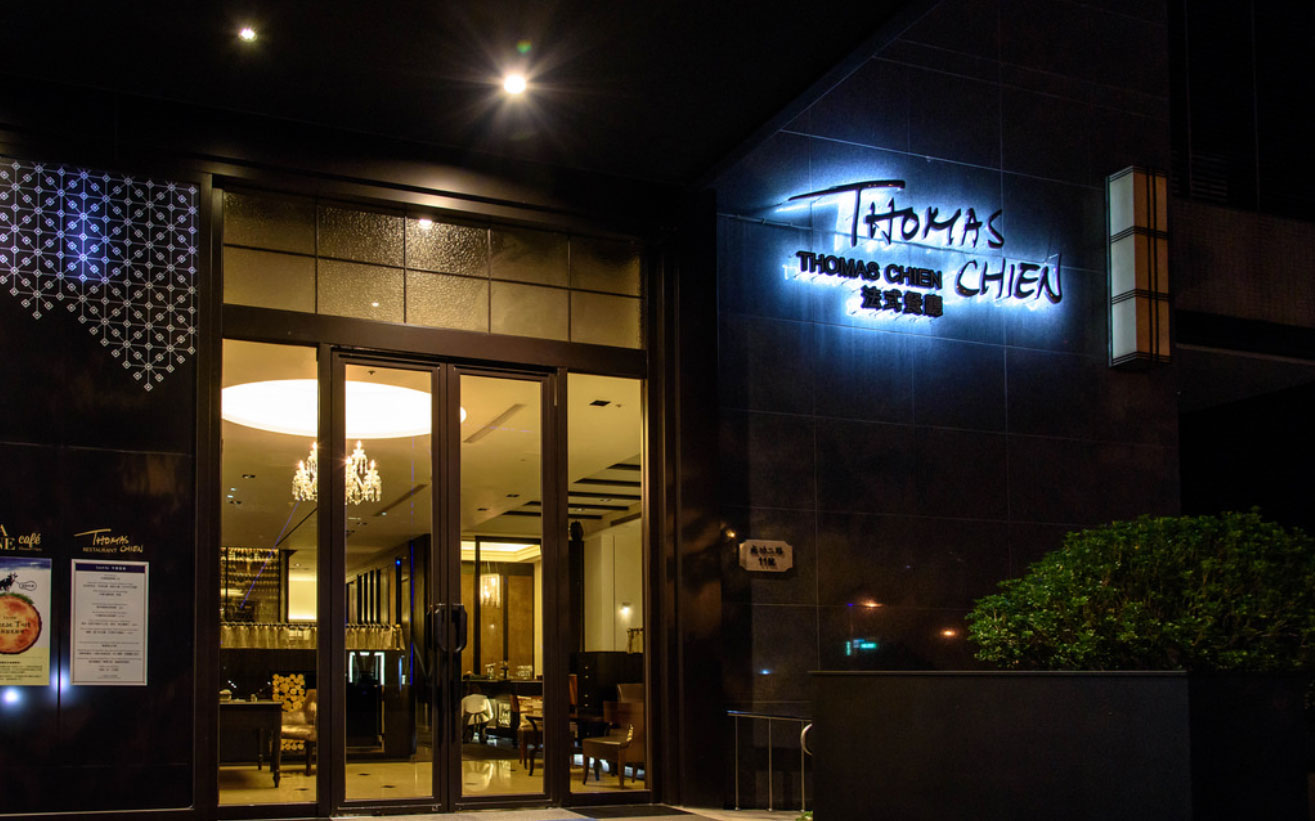
Gourmet French dishes & desserts are matched by wine at this refined, white-tablecloth venue.

Mastering the Art of Making Thai Shrimp Cakes: A Step-by-Step Guide

Embarking on the journey to create Thai Shrimp Cakes requires careful attention to your cooking oil’s temperature. Remember, ensuring the oil isn’t too hot will prevent your shrimp cakes from burning before they’re thoroughly cooked. This tip is crucial as the success of your dish depends heavily on achieving a perfect golden-brown crust without sacrificing the succulent, well-cooked interior.

Acquiring the necessary ingredients might present a challenge, given the exotic nature of some elements. However, overcoming this hurdle is part of the fun and adventure in creating this authentic Thai dish. Specialty Asian markets or online stores often stock these items, making your search a little easier. Once you’ve gathered everything you need, you’re ready to embark on your culinary adventure.

Preparing for the Cooking Process: Essentials for Making Thai Shrimp Cakes

Before you immerse yourself in the cooking process, ensure you have all your ingredients and equipment laid out. The key to a smooth, hassle-free cooking experience lies in preparation. When you’re in the heat of the moment, stirring, mixing, and frying, you won’t have the luxury of time to hunt for ingredients or tools. So, prep your kitchen beforehand, set everything within arm’s reach, and you’ll find yourself navigating the recipe with ease and confidence.

Equipment Needed

  • 1 Knife
  • 1 Cutting Board
  • 1 Mixing Bowl
  • 1 Cooking Pot
  • Paper Towles, for absorbing excess oil

For the Sweet Cilantro Sauce:

  • ¼ cup Thai sweet chili sauce
  • 1 tsp ginger minced
  • 2 tsp coriander or cilantro leaves chopped
  • 1 tbsp fresh lime juice

For the Shrimp Cakes:

  • 8 oz raw shrimp peeled, deveined, and roughly chopped
  • 2 tbsp red curry paste
  • 1 large egg
  • 2 tsp fish sauce
  • 1 tbsp sugar
  • 2 tbsp coconut milk
  • 2 tbsp basil leaves roughly chopped
  • 2 cups bread crumbs
  • oil for frying

Time needed: 20 minutes

How to Cook Thai Shrimp Cakes

  1. Mix the Sweet Cilantro Sauce

    Prepare the Sweet Cilantro Sauce by whisking all the ingredients together in a small bowl and then set aside.

  2. Blend the Shrimp Mix

    Combine the chilled shrimp, red curry paste, egg, fish sauce, sugar, and coconut milk in a food processor or blender. Process until smooth, about 30 seconds. Transfer the mixture to a mixing bowl and mix in the basil. Refrigerate it for at least 10 minutes.

  3. Make the Patties

    Form the shrimp mixture into patties about 3 ½ inches in diameter. Roll each patty in the bread crumbs until coated.

  4. Heat the Oil

    Heat a large skillet over medium heat. When hot pour in the oil and bring it to 325°F.
    oil

  5. Cook the Patties

    Gently lower the shrimp cakes into the hot oil. They will puff up quite considerably in the oil, so make sure you don’t overcrowd your frying vessel. Cook the cakes until they are golden brown on each side and cooked through, about 2 minutes per side.

  6. Serve the Thai Shrimp Cakes

    Serve with a side bowl of the Sweet Chili Sauce.

If you liked this dish please Rate This Recipe and leave a comment.

Thai Shrimp Cakes
Print

Thai Shrimp Cake

Brace yourself for a delectable Thai Shrimp Cake recipe that packs a punch of flavor. This dish proudly features succulent shrimp, harmoniously blended with vibrant red curry. To finish off, we serve it with a drizzle of sweet chili sauce that perfectly complements the savory cake. You're in for a real treat!
Prep Time 7 minutes
Cook Time 10 minutes
Total Time 17 minutes
Servings 12 servings
Calories 130kcal

Ingredients

For the Sweet Cilantro Sauce:

For the Shrimp Cakes:

Instructions

For the Sweet Cilantro Sauce:

  • Prepare the Sweet Cilantro Sauce by whisking all the ingredients together in a small bowl and then set aside.
    ¼ cup Thai sweet chili sauce, 1 tsp ginger root, 2 tsp dried cilantro, 1 tbsp lime juice

For the Shrimp Cakes:

  • Combine the chilled shrimp, red curry paste, egg, fish sauce, sugar, and coconut milk in a food processor or blender. Process until smooth, about 30 seconds. Transfer the mixture to a mixing bowl and mix in the basil. Refrigerate it for at least 10 minutes.
    8 oz shrimp, 2 tbsp red curry paste, 1 large egg, 2 tsp fish sauce, 1 tbsp white sugar, 2 tbsp coconut milk, 2 tbsp basil
  • Form the shrimp mixture into patties about 3 ½ inches in diameter. Roll each patty in the bread crumbs untill coated.
    2 cups bread crumbs
  • Heat a large skillet over medium heat. When hot pour in the oil and bring it to 325°F.
    vegetable oil
  • Gently lower the shrimp cakes into the hot oil. They will puff up quite considerably in the oil, so make sure you don't overcrowd your frying vessel.
  • Cook the cakes until they are golden brown on each side and cooked through, about 2 minutes per side.
  • Serve with a side bowl of the Sweet Chili Sauce.

Nutrition

Serving: 1Shrimp Cake | Calories: 130kcal | Carbohydrates: 17.3g | Protein: 7.3g | Fat: 3g | Saturated Fat: 1.2g | Cholesterol: 55mg | Sodium: 426mg | Potassium: 84mg | Fiber: 0.9g | Sugar: 4.3g | Calcium: 54mg | Iron: 1mg

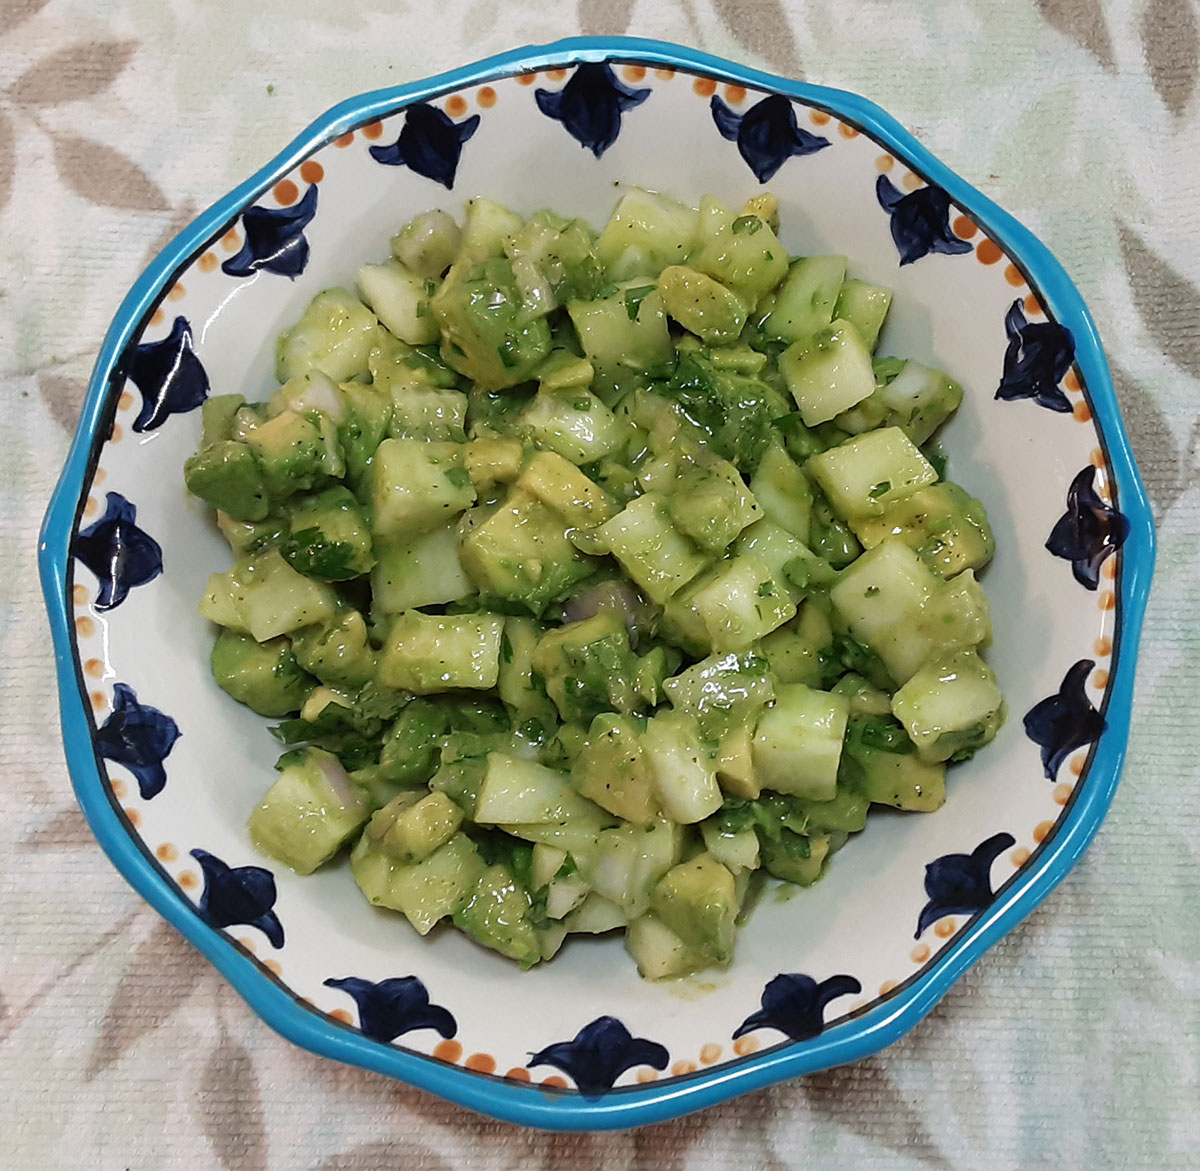
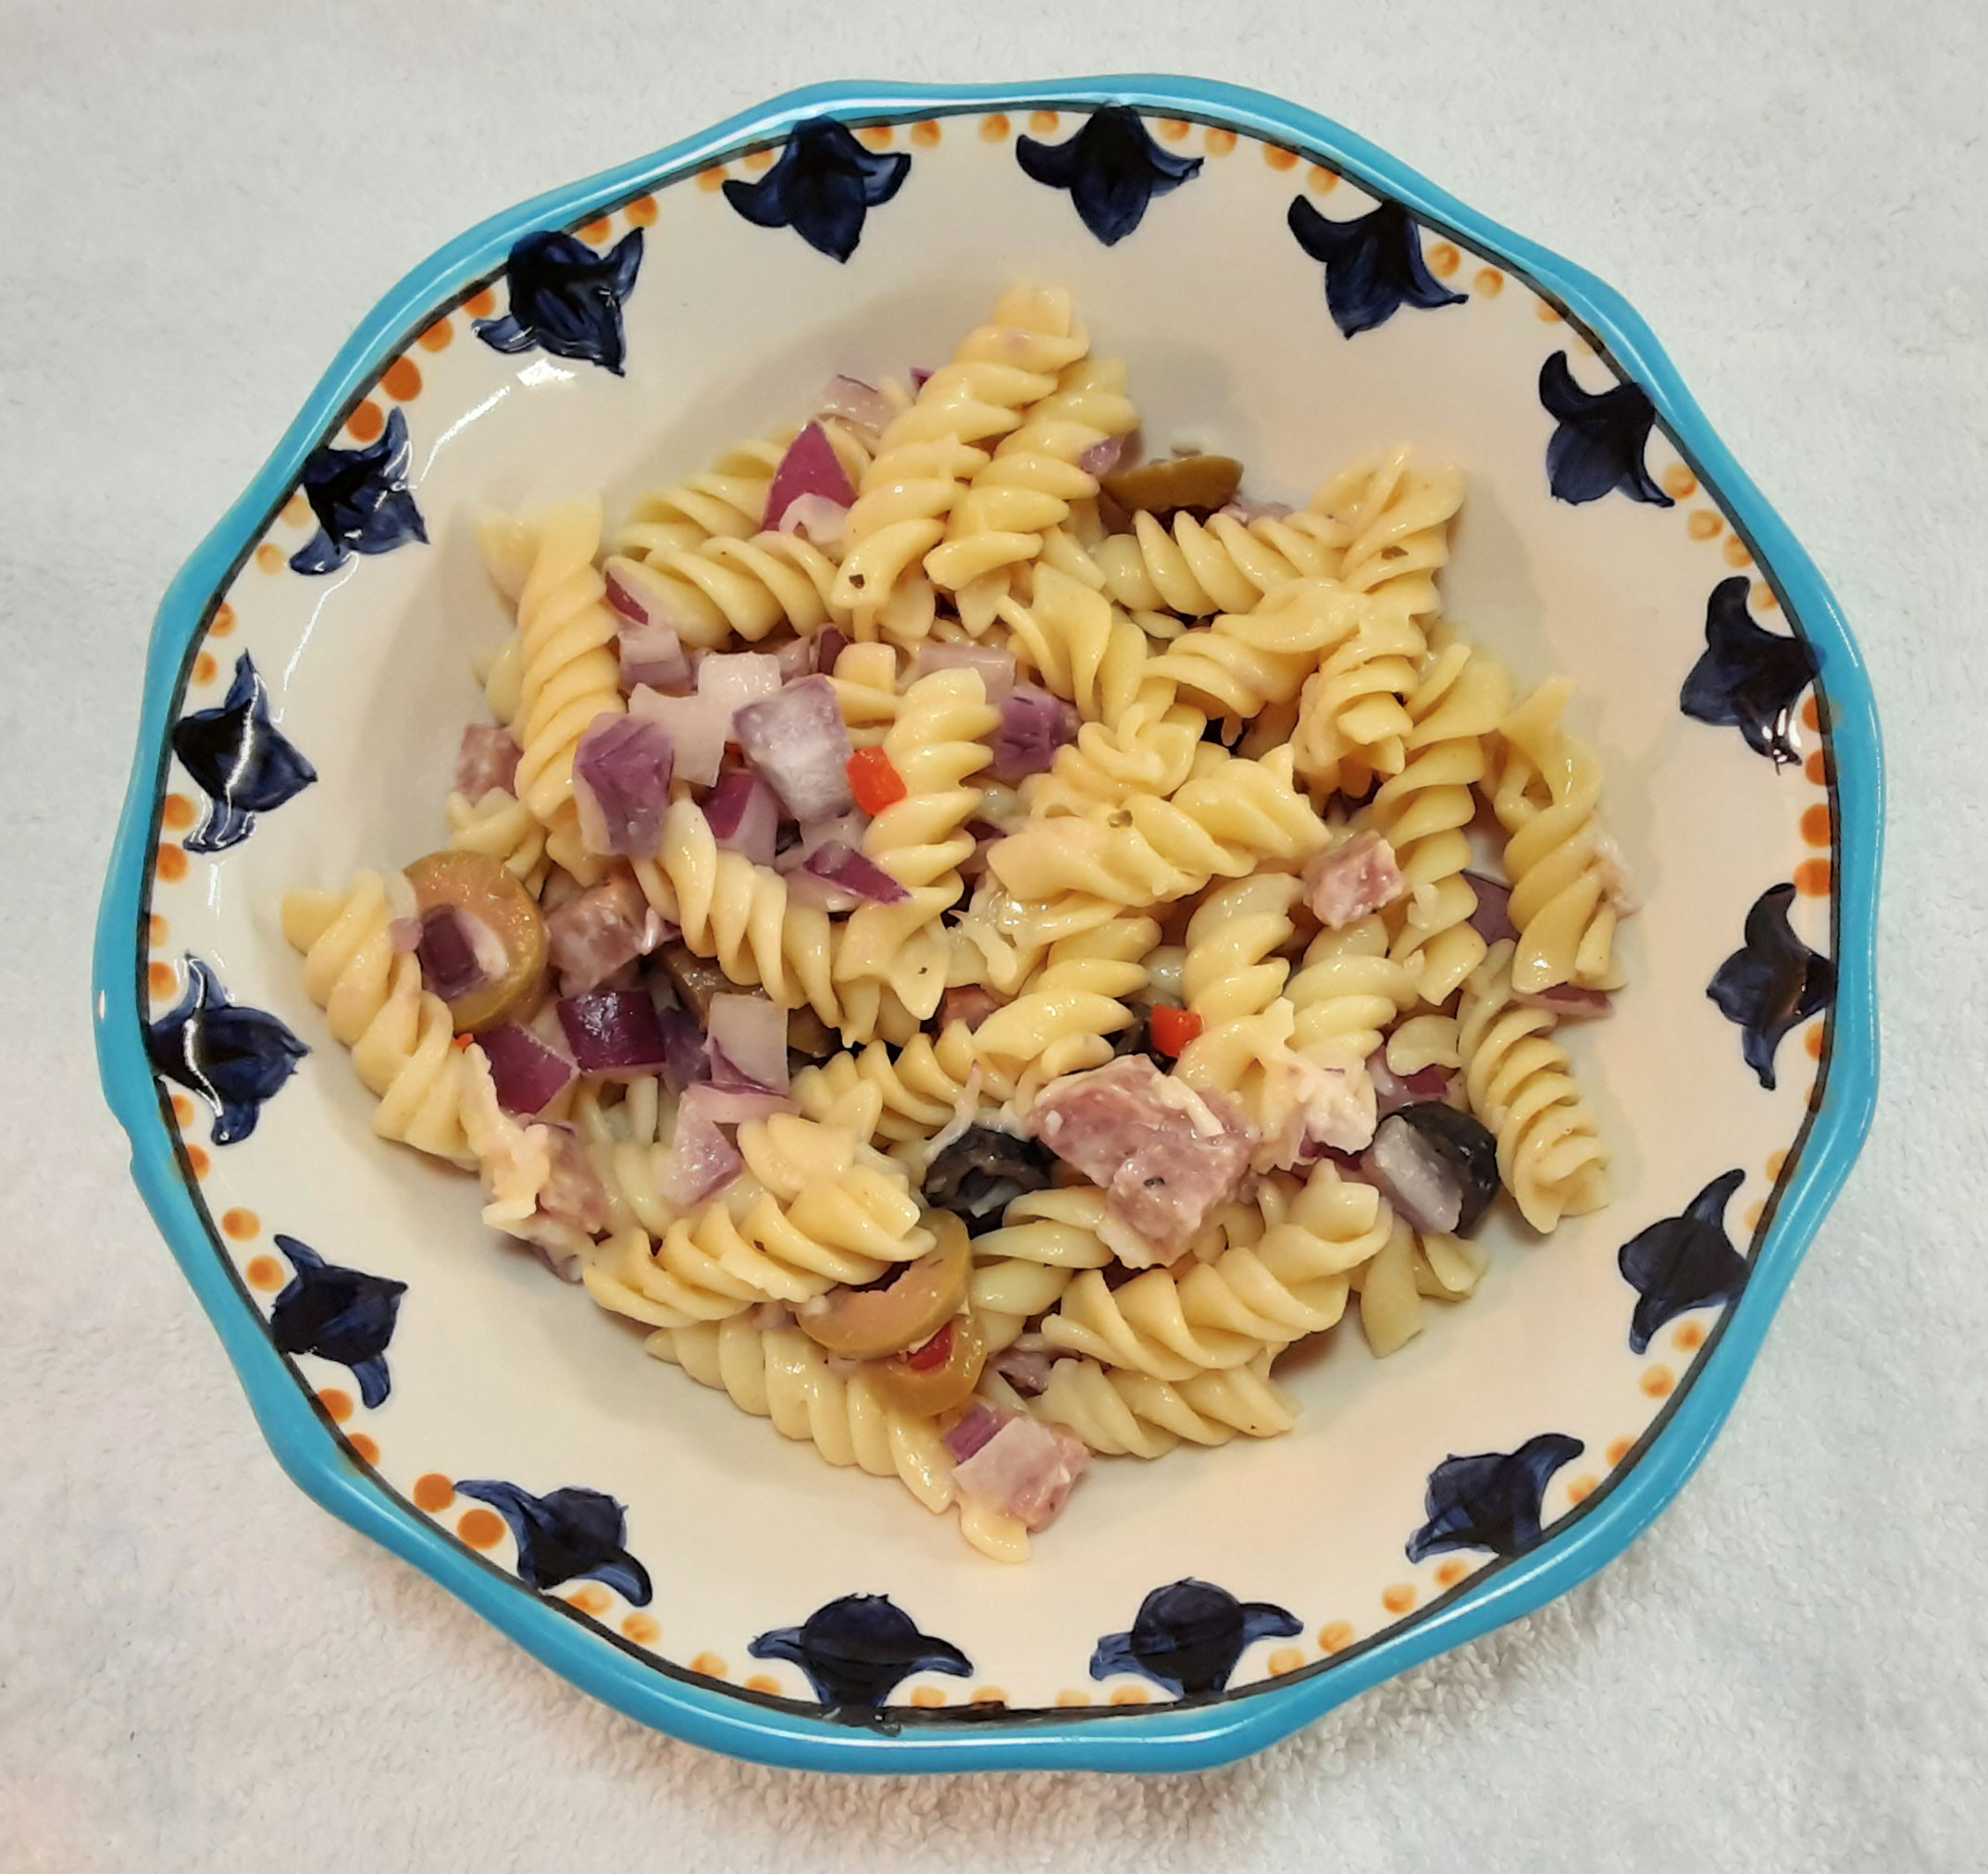
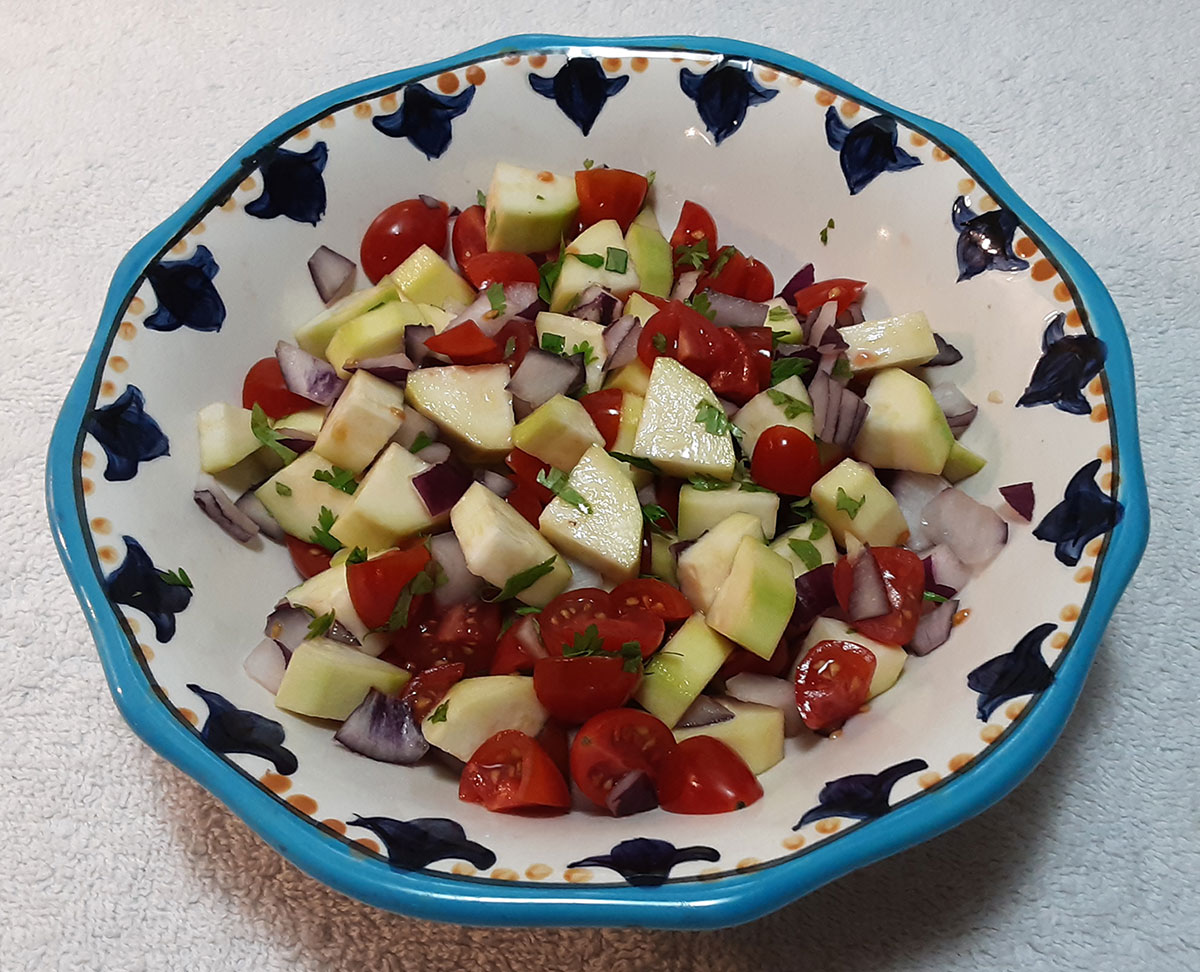
Complementing Your Meal: Perfect Pairings for Thai Shrimp Cakes

Before delving into the world of tantalizing recipes that pair exquisitely with Thai Shrimp Cakes, it’s worth noting that the versatility of these cakes make them a wonderful addition to various dishes. Whether you’re seeking something light and refreshing or a more hearty accompaniment, the savory and slightly spicy nature of Thai Shrimp Cakes allows them to blend well with a plethora of flavors.

Egg Foo Young
This Egg Foo Young recipe is a symphony of flavors that promises a culinary spectacle right on your plate. This cherished Chinese dish, a sumptuously filled omelet brimming with tender shrimp and vibrant vegetables, is a versatile delight that can elevate your breakfast, lunch, or dinner experience. Every bite you take, every flavor you savor, turns any ordinary day into a gastronomic festival.
Check out this recipe
Egg Foo Young (芙蓉蛋) the Chinese Stuffed Omelette

After exploring these delicious pairing options, you’ll surely agree that Thai Shrimp Cakes are a versatile star of the culinary world. With each recommended recipe, you enhance the dining experience, allowing the unique flavors of the shrimp cakes to shine while creating a well-rounded and satisfying meal. Enjoy the process of mixing and matching these recipes, and most importantly, savoring the delightful flavors they bring to your table.

Photo Credits:

  • By Taste The World Cookbook – Copyright 2022 All rights reserved.
  • By Thomas Chien Restaurant – By https://www.facebook.com/thomaschien2012
  • By 毛貓大少爺 – https://www.flickr.com/photos/92975612@N02/49578924873/, CC BY-SA 2.0, https://commons.wikimedia.org/w/index.php?curid=98646580
  • By Taiwan Junior – Own work, CC BY-SA 3.0, https://commons.wikimedia.org/w/index.php?curid=98646717
  • By Linguixperiments – Author’s collection, CC BY-SA 2.5, https://commons.wikimedia.org/w/index.php?curid=98646849
  • By Peellden – Own work, CC BY-SA 3.0, https://commons.wikimedia.org/w/index.php?curid=5976356
  • By Kaoshiung panorama.jpg: Rubendenederivative work: ויקיג’אנקי – This file was derived from: Kaoshiung panorama.jpg:, CC0, https://commons.wikimedia.org/w/index.php?curid=30897233

Classic Russian Raisin Cake: A Moscow Speciality

0
Russian Raisin Cake ~ Русский Изюмный Пирог

Unleashing your culinary prowess begins with understanding the intricacies of the recipe. The Classic Russian Raisin Cake (Русский Изюмный Пирог in Russian), is an authentic delight straight from the heart of Moscow, and can be a wonderful addition to your baking repertoire. To create this delicious treat, start by preparing a robust dough of flour, sugar, and yeast, letting it rise to double its original volume.

In the next step, steep the key element, raisins, in warm water, and then mix them into the dough. This crucial step infuses the dough with a natural sweetness and gives the cake a unique texture. Let the dough rise once more, allowing it to take in the flavor of the raisins, before baking.

After baking the dough until it’s golden brown, the result is a cake that’s light, fluffy, and interspersed with sweet, plump raisins. This mix of flavors and textures is what makes the Russian Raisin Cake a beloved treat and an exemplary element of Moscow’s culinary scene.

Diverse Approaches to Creating the Russian Raisin Cake

The beauty of the Russian Raisin Cake lies in its versatility, as there are numerous ways to interpret and prepare this classic dessert. One approach is the traditional method, where the dough rises twice before baking – once without the raisins, and the second time with the raisins incorporated. This method yields a cake that is light, fluffy, and full of plump, sweet raisins.

Yet, you might also consider a variation where the raisins are soaked in rum or brandy, adding an extra layer of flavor. In this approach, steep the raisins in your chosen spirit before folding them into the dough. This technique infuses the cake with a subtle alcoholic note that beautifully complements the sweet raisins.

Another creative approach involves adding additional flavorings to the dough. A hint of vanilla or a dusting of cinnamon can enhance the taste profile of the cake, introducing a new complexity to the classic recipe. For the adventurous baker, adding zest from lemons or oranges can provide a tangy contrast to the sweet raisins. Regardless of your chosen approach, the process of making the Russian Raisin Cake allows for innovation while maintaining a connection to its traditional roots.

Russian Raisin Cake ~ Русский Изюмный Пирог

Preserving the Flavor: Storing Your Russian Raisin Cake

Once you’ve baked the Classic Russian Raisin Cake, it’s important to store it properly to maintain its fresh-baked flavor and texture. As with most homemade breads, you want to keep it in a cool, dry place. However, because of its high fruit content, you also need to take additional steps to prevent the cake from getting overly moist.

Place the cake in an airtight container or tightly seal it in plastic wrap. This step helps to keep the cake moist and prevents it from drying out. If you plan on consuming the cake within a few days, storing it at room temperature should suffice. For longer periods, consider refrigeration or even freezing, as both methods can help maintain the cake’s quality.

Storing your Russian Raisin Cake properly will allow it to maintain its quality for as long as possible. This means you can bake it in advance of events or simply enjoy a slice whenever you like, safe in the knowledge that you’re getting the best possible flavor and texture from your creation.

A Journey through Time: The History of Russian Raisin Cake

The Russian Raisin Cake has a rich and fascinating history, deeply rooted in the culinary traditions of Russia. In the past, this cake was baked in large quantities for celebrations, festivals, and religious events. Even today, it remains a staple dessert in many Russian homes, beloved for its distinct flavor and unique texture.

Baking the Russian Raisin Cake was often a family affair, where everyone took part in the process. The raisins were carefully selected, the dough was lovingly mixed and shaped, and the entire family waited in anticipation as the cake baked to a golden hue. This collective effort added a layer of emotional warmth to the cake, making it more than just a dessert.

While today’s fast-paced life may not always allow for such a communal cooking experience, the legacy of the Russian Raisin Cake lives on. Each time this dessert is baked, it carries a piece of Russia’s rich culinary history, making each bite a taste of the past.

Moscow Unveiled: The Heart of Russia

Stepping into Moscow, Russia’s capital city, is akin to walking into a grand, vibrant tapestry of history, culture, and modernity. The city pulsates with life, reflecting its storied past while embracing the new. Towering architectural gems, modern skyscrapers, and sprawling parks contribute to the city’s unique landscape, offering a diverse array of sights to behold.

Moscow’s dynamism extends to its cultural offerings as well. Walk into any of the numerous museums, theaters, and galleries, and immerse yourself in the rich tapestry of Russian art, literature, and history. Explore the iconic Red Square, with the grandeur of the Kremlin and the multi-colored domes of St. Basil’s Cathedral providing a majestic backdrop.

Amid the hustle and bustle, Moscow also presents serene corners for respite. The city’s parks and gardens provide a green retreat in the heart of the urban sprawl. Here, you can enjoy a leisurely stroll, engage in recreational activities, or simply take in the scenic views, showcasing another facet of Moscow’s charm.

Journey through the Ages: Moscow’s Storied Past

Delving into Moscow’s history is a voyage through time. The city’s story begins in the 12th century, as a small wooden fort erected by Prince Yuri Dolgoruky. Over the centuries, Moscow grew and evolved, surviving invasions, fires, and revolutions, each era leaving its indelible mark on the city’s fabric.

The reign of Ivan the Terrible in the 16th century heralded Moscow’s rise as Russia’s political and cultural center. This era saw the construction of the Kremlin’s architectural ensemble and the establishment of Moscow as a leading force in the country. Later, the tumultuous years of the Russian Revolution and the Soviet era drastically transformed the city’s landscape and ideology.

Today, Moscow’s history is visible in its streets, buildings, and monuments. Every corner of the city tells a story, inviting you to delve deeper into its fascinating past. From its humble beginnings to its rise as a global city, Moscow’s history is a captivating tale of resilience, transformation, and endurance.

Unveiling Moscow’s Allure: Tourism in the Russian Capital

Moscow’s magnetic pull draws tourists from across the globe, each one keen to experience the city’s unique blend of history, culture, and modernity. One of the main attractions is the Red Square, the heart of Moscow, and home to iconic landmarks such as the Kremlin, St. Basil’s Cathedral, and the historic GUM department store.

Stepping beyond the Red Square, Moscow offers a wealth of other attractions. The Tretyakov Gallery and the Pushkin Museum beckon art enthusiasts, while the Bolshoi Theatre captivates lovers of ballet and opera. The city’s parks, including Gorky Park and Sokolniki Park, offer refreshing green spaces for leisure and recreation.

However, experiencing Moscow extends beyond visiting landmarks and museums. Participate in the city’s thriving cultural scene, explore its diverse neighborhoods, and engage with locals to get a sense of Moscow’s soul. Each interaction, each exploration, unveils a new facet of this vibrant city, adding depth to your Moscow experience.

Taste of Moscow: Exploring the City’s Cuisine

The culinary scene in Moscow offers an array of tastes and experiences, reflecting the city’s rich history and cultural diversity. Start with the basics – traditional dishes like borscht, a hearty beetroot soup, or pelmeni, delightful dumplings filled with meat. These staple dishes offer a glimpse into Moscow’s culinary heritage.

But Moscow’s food scene isn’t limited to traditional fare. The city also boasts an impressive array of international cuisines, thanks to a burgeoning restaurant scene. From upscale dining establishments serving gourmet fusion cuisine to cozy cafes offering global flavors, there’s something to satiate every palate.

The gastronomic journey in Moscow is incomplete without indulging in its tea culture. Visit one of the city’s historic tea houses or modern cafes, and enjoy a steaming cup of Russian tea, often served with traditional sweets like pryaniki (honey-spice cookies) or blini (thin pancakes). Each bite, each sip, takes you deeper into the heart of Moscow’s culinary landscape, making it an essential part of your city exploration.

Volkonskiy Bakery Пекарня Волконский
Bol’shaya Sadovaya Ulitsa, 2/46 стр 1, Moscow, Russia, 123001

Volkonskiy Bakery
Volkonskiy Bakery

Quality standards at Volkonskoye are uncompromising and are our competitive advantage. Carefully selected, the best natural products and the manual labor of professional craftsmen – this is the guarantee the production of a high-quality product.

High-quality service is the result of the fact that we are looking for an individual approach to each guest and find a way to his heart. We are the Volkonsky team, and we guarantee the quality of the product, the quality of management, and the quality of interaction – these are the principles on which our work is based. The key to our success is a conscientious attitude to business and responsibility to guests for the high quality of our offer on the market.

A Culinary Journey: Creating the Delectable Russian Raisin Coffee Cake

Preparing the Russian Raisin Coffee Cake is akin to engaging in a heartening culinary journey, one that combines simplicity of process with the delight of a well-loved treat. This journey begins with an understanding of the basic elements of the cake. These include the tender crumb, achieved through a balance of dry and wet ingredients, and the sweet pop of flavor provided by the raisins. These aspects work together harmoniously, creating a cake that is both comforting and satisfying.

In this journey, the value of technique becomes evident. Though the process may seem straightforward, attention to details such as properly combining the ingredients and ensuring even distribution of the raisins can dramatically impact the final result. These techniques are part of the essence of cake-making, offering a rewarding challenge for both novice and experienced bakers.

The final, and perhaps most enjoyable, part of this journey is the anticipation as the cake bakes. The aroma of baking cake filling the kitchen is a tantalizing hint of the treat to come. And of course, the final destination of this journey: savoring the warm, raisin-studded cake, ideally paired with a cup of coffee or tea. This cake embodies the joy of baking, where simple ingredients are transformed into a delicious creation that brings a sense of comfort and satisfaction.

Key Components: Essential Equipment and Ingredients for the Russian Raisin Coffee Cake

The core ingredients for the Russian Raisin Coffee Cake represent a harmonious blend of pantry essentials. These ingredients, while simple and straightforward, are transformed through the baking process into a comforting and delightful cake. The list includes basics like all-purpose flour, sugar, and baking powder. Eggs contribute structure and richness, and the butter adds necessary moisture. The raisins, naturally, are an essential component, contributing bursts of sweetness and texture. While each ingredient may seem unassuming on its own, when combined and baked, they create a sum that is truly greater than its parts – a testament to the transformative power of baking.

Equipment Needed

  • 1 Mixing Bowl
  • 1 Mixing Machine
  • 1 Cake Pan
  • 1 Sugar Sifter

Ingredients Needed

  • 3 eggs
  • 1 ½ cups sugar
  • ½ cup butter softened
  • 10 ½ ounces sour cream
  • 1 teaspoon vanilla extract
  • 2 teaspoons baking powder
  • 2 ¼ cups flour
  • 1 cup raisins
  • confectioners’ sugar, for dusting

Time needed: 1 hour and 40 minutes

How to Make Russian Raisin Cake

  1. Mix Sugar and Eggs

    Mix the sugar and eggs and whip lightly.

  2. Add Butter and Sour Cream

    Add the butter and sour cream, and mix until smooth.

  3. Stir in Vanilla and Baking Powder

    Add the vanilla extract and baking powder and mix.

  4. Add the Flour

    Add the flour, stirring until it’s thoroughly mixed. The dough should be thicker than the pancake batter, but it should still flow freely.

  5. Add the Raisins

    Add the raisins.

  6. Pour and Bake

    Stir the batter, and pour it into the mold filling it evenly. Bake for approximately one hour at 350°F until a match or toothpick comes out dry.

  7. Cool the Cake

    Let cool before taking the cake out of the mold.

  8. Dust the Cake

    Dust with confectioners’ sugar before serving or use your favorite frosting.

If you liked this dish please Rate This Recipe and leave a comment.

Russian Raisin Cake ~ Русский Изюмный Пирог
Print

Russian Raisin Cake ~ Русский Изюмный Пирог

Embark on a delightful culinary adventure with this authentic Russian Raisin Cake recipe. Brimming with juicy raisins, this tender and moist cake promises a burst of sweetness in every bite. As effortless to create as it is delightful to devour, this cake is the perfect companion to your morning coffee or afternoon tea. Enjoy the simplicity of its preparation and the rich, comforting flavor that defines this classic Russian delicacy.
Course Dessert
Cuisine Russian
Prep Time 20 minutes
Cook Time 1 hour
Resting Time 20 minutes
Total Time 1 hour 40 minutes
Servings 8 servings
Calories 531kcal

Equipment

Ingredients

For the Cake

For the Topping

For the Meringue

Instructions

For the Cake

  • Mix the sugar and eggs and whip lightly.
    3 eggs, 1 ½ cups white sugar
  • Add the butter and sour cream, and mix until smooth.
    ½ cup unsalted butter, 10 ½ oz sour cream
  • Add the vanilla extract and baking powder and mix.
    1 tsp vanilla extract, 2 tsp baking powder
  • Add the flour, stirring until it’s thoroughly mixed. The dough should be thicker than pancake batter, but it should still flow freely.
    2 ¼ cups all-purpose flour
  • Add the raisins.
    1 cup raisins
  • Stir the batter, and pour it into the mold filling it evenly. Bake for approximately one hour at 350°F until a match or toothpick comes out dry.
  • Let cool before taking the cake out of the mold.

For the Confictioners Sugar

  • Dust with confectioners’ sugar before serving or use your favorite frosting.
    confectioners’ sugar

To Make the Meringue

  • Over medium heat mix water and sugar on the stove.
    1 cup white sugar, ½ cup water
  • Using a mixer on medium, beat the egg whites until firm.
    4 egg whites
  • After egg whites are firm, pour in the sugar syrup while the mixer is still running. Increase the speed and continue to mix until the egg whites are firm again and shiny.
  • Add a thick layer on top of the cake, cut and serve.

Nutrition

Serving: 1slice | Calories: 531kcal | Carbohydrates: 81.1g | Protein: 7.6g | Fat: 21.4g | Saturated Fat: 12.7g | Cholesterol: 108mg | Sodium: 128mg | Potassium: 380mg | Fiber: 1.7g | Sugar: 48.6g | Calcium: 124mg | Iron: 2mg

Complementary Delights: Pairing Suggestions for Russian Raisin Cake

Exploring the myriad of flavors that pair well with Russian Raisin Cake opens up a world of delightful culinary combinations. This cake, with its sweet, fruity notes and comforting texture, pairs well with a range of both savory and sweet dishes. Whether you’re planning a brunch, afternoon tea, or dessert spread, incorporating the Russian Raisin Cake provides an opportunity to create a cohesive and delectable menu that’s sure to impress.

Golubtsi ~ Stuffed Cabbage Rolls
Ukrainian Golubtsi (голубцы) ore Stuffed Cabbage Rolls are little bundles of cabbage leaves that have been stuffed and cooked with a mixture of ground beef and pork, onions, mushrooms, and other spices, and braised in a homemade tomato sauce. They are typically served with a sour cream-based sauce.
Check out this recipe
Golubtsi ~ Stuffed Cabbage Rolls
Georgia Peach Ice Cream
This recipe for non-churn Peach ice cream is both easy and tasty. You can use it in an ice cream maker if you want but it turns out creamy and smooth without the maker. It will have your taste buds doing the happy dance.
Check out this recipe
Georgia Peach Ice Cream

Now that you’ve explored the fantastic pairings to complement the Russian Raisin Cake, it’s time to venture forth into your culinary journey. Don’t hesitate to experiment with different combinations, for that’s where the true joy of cooking lies. Each recipe suggested here brings its unique flavor profile to the table, forming a harmonious blend with the cake. Ultimately, the goal is to create a meal that delights the palate and sparks joy, adding another memorable chapter to your culinary story.

Photo Credits:

  • By Taste The World Cookbook – Copyright 2022 All rights reserved.
  • By Volkonskiy Bakery – By https://wolkonsky.com/
  • By U.S. Department of State – Russia, Public Domain, https://commons.wikimedia.org/w/index.php?curid=105454511
  • By Dmitry A. Mottl – Own work, CC BY-SA 3.0, https://commons.wikimedia.org/w/index.php?curid=35998443
  • By Dmitry Chistoprudov – Own work, CC0, https://commons.wikimedia.org/w/index.php?curid=95116990
  • By Mos.ru, CC BY 4.0, https://commons.wikimedia.org/w/index.php?curid=108839443
  • By Aleks G – Own work, CC BY-SA 3.0, https://commons.wikimedia.org/w/index.php?curid=17363963

Avocado-Cucumber Salad

0
Avocado-Cucumber Salad

Embark on a gastronomic journey with the Avocado-Cucumber Salad, an authentic culinary treasure from Chihuahua, Mexico. This particular Mexican dish is a marvel of simplicity and taste, combining effortlessly into a quick and easy preparation process. The resulting blend of flavors and textures is nothing short of a gastronomic treat, inviting you to savor each bite with delight.

Diving into the dish, the creaminess of the avocado meets the cucumber’s refreshing crunch in a harmonious medley. This perfect textural balance adds a multi-dimensional layer to the salad, turning it into an experience rather than a simple meal. The tangy zest of the lemon cuts through the richness of the avocado, providing an acidic balance that teases the palate, while the brown sugar adds a gentle touch of sweetness to round off the flavors.

The Avocado-Cucumber Salad is more than just a dish; it is a sensory experience that engages sight, taste, and touch. Each ingredient has a role to play, contributing its distinct feature to create an ensemble that’s greater than the sum of its parts. It’s this harmony of flavors that makes this salad an irresistible delicacy that leaves you yearning for more.

Discovering New Dimensions: Innovating Salad Recipes

When it comes to creating salads, the process should be anything but mundane. The vast array of ingredients at our disposal opens up a limitless world of culinary creativity. Experimenting with diverse dressings and seasonings, tinkering with textures, and balancing temperatures can all contribute to a superior salad experience.

Firstly, dressing and seasonings play a significant role in enhancing a salad’s flavor. From creamy ranch to tangy vinaigrette, the possibilities are endless. Incorporating herbs and spices can also add a new level of complexity and depth to your salads, making each bite an exciting surprise. Secondly, textures can dramatically alter a salad’s appeal. Mixing crunchy vegetables with softer ones, adding toasted nuts or seeds, or including a touch of creaminess from cheese or avocados can all contribute to a more dynamic salad.

Finally, temperature contrasts can also introduce a unique twist to your salads. While most salads are served cold, introducing some warm or hot elements can elevate the dish’s complexity. Warm roasted vegetables, hot grilled chicken, or even a warm dressing can completely transform the salad, making it more satisfying and appealing. By playing around with these elements, you can elevate your salad from the mundane to the extraordinary, turning each serving into a culinary adventure.

The Five Basic Types of Salads Are;

  • Tossed salads: This is probably what you think of when you think “salad.” Tossed salads are made by tossing ingredients (and usually dressing) in a haphazard way so that they end up evenly mixed.
  • Composed salads: While the ingredients in a tossed salad are thrown together with the dressing, the ingredients in a composed salad are carefully assembled from the ground up with a certain structure in mind.
  • Bound salads: Bound salads are held together with a binding agent like mayonnaise or a thick dressing. They look a bit different than traditional composed or tossed salads, as vegetables aren’t a requirement. This is a kind of salad you’ll often find at traditional picnics or potlucks.
  • Vegetable salads: Vegetable salads may be marinated or sauced mixtures of raw or cooked vegetables. They are commonly based on tomatoes, green beans, cucumbers, beets, and mushrooms.
  • Fruit salads: Salads of fruit mixtures with sweet dressings are often eaten as desserts.
  • Combination salads: Combination salads are hearty versions of green, vegetable, and starchy salads. The addition of meat, poultry, seafood, eggs, or cheese transforms the dish into a light entrée.

Preserving the Freshness: Storing Your Avocado-Cucumber Salad

When it comes to storing your Avocado-Cucumber Salad, the correct techniques can ensure your salad stays fresh for longer. The first step is to place the leftover salad in an airtight container. This preserves the salad’s quality by preventing air and moisture from affecting its freshness.

Once securely stored, place the container in your refrigerator. The cool temperature helps to slow down the degradation process, allowing you to enjoy the salad for up to three days post-preparation. This storage method offers a practical solution to avoid wasting food and also provides a ready-to-eat meal option at your convenience.

However, it’s important to note that avocados don’t fare well in freezing temperatures. The texture of avocado changes when frozen, losing its creaminess and becoming more grainy or mushy upon thawing. Therefore, it is not recommended to freeze your Avocado-Cucumber Salad. By following these storage guidelines, you can ensure your salad retains its taste, texture, and freshness for as long as possible.

The Storied Past of Avocados and Cucumbers

Tracing back the history of the ingredients in our Avocado-Cucumber Salad, we find that avocados, famous for their lush green or yellow flesh, buttery consistency, and rich, nutty flavor, have their roots in the Americas. Specifically, they originate from the regions stretching from Mexico to the Andean. Over the centuries, avocados have found their way into various dishes across different cultures, thanks to their versatile culinary applications and substantial health benefits.

Cucumbers, on the other hand, can trace their lineage back to India. Known for their high water content and substantial nutrient profile, cucumbers have been cherished for their health benefits throughout history. Their journey to global popularity began with Christopher Columbus, who introduced cucumbers to Haiti in 1494. Spanish settlers then cultivated them, and their cultivation gradually spread across the New World.

Given these historical contexts, it’s intriguing to consider that the Avocado-Cucumber Salad as we know it couldn’t have come into being before Columbus’ voyage in 1492. The majority of the salad’s ingredients might hail from Eurasia, but this unique dish is a testament to the culinary contribution of the Americas. The creation of this salad represents a global culinary convergence, where diverse flavors and ingredients from different parts of the world come together in a harmonious blend.

Exploring Chihuahua, Mexico: A Vibrant Metropolitan Oasis

Chihuahua City, the capital of the northwestern Mexican state of Chihuahua, stands as a vibrant metropolitan oasis brimming with cultural richness and historical significance. Known for its stunning architecture, the city boasts iconic landmarks such as the Spanish Baroque Cathedral de Chihuahua and the 18th-century Palacio de Gobierno. These landmarks not only add to the city’s aesthetic appeal but also serve as historical chronicles, with murals depicting significant events in Mexican history.

The city also serves as the eastern terminus of the famed Chepe railroad. This remarkable railway takes passengers on a captivating journey through the lush, green gorges of the Copper Canyon area, offering breathtaking views and an unforgettable experience. The blend of cultural heritage, architectural marvels, and natural beauty make Chihuahua City a destination of interest for travelers seeking a multi-faceted exploration.

Furthermore, Chihuahua’s unique location and strong infrastructure contribute to its standing as a bustling metropolis. The city acts as a key trading hub, catering to various economic activities that add to its overall vibrancy. From a cultural, historical, and economic perspective, Chihuahua City represents the fusion of traditional charm and modern dynamism, presenting an alluring mix to locals and visitors alike.

Unfolding the History of Chihuahua, Mexico

Founded on October 12, 1709, by Blas Cano de los Rios and Spanish explorer Antonio Deza y Ulloa, Chihuahua City, originally known as El Real de Minas de San Francisco de Cuéllar, holds a rich and intriguing history. Strategically located at the intersection of the Chuviscar and Sacramento rivers, and midway between the Rio Bravo del Norte (Rio Grande) and the mining city of Hidalgo del Parral, Chihuahua was perfectly positioned for growth and prosperity.

Throughout the 20th century, the city capitalized on its proximity to the U.S. border, evolving from a trading post for cattle and agricultural products to becoming an economic powerhouse. The establishment of foreign manufacturing plants in the 1970s further fueled Chihuahua’s economic growth, attracting investment and creating employment opportunities.

The city experienced a significant economic upturn during the 1990s, ultimately emerging as the third wealthiest municipality (per capita) in the republic. From humble beginnings to a prosperous metropolis, the story of Chihuahua is a testament to strategic growth, economic resilience, and a relentless drive towards progress.

Discovering the Touristic Treasures of Chihuahua, Mexico

Chihuahua City, with its rich history and vibrant culture, is a treasure trove of tourist attractions. The city houses a plethora of museums, each offering unique insights into Mexico’s past and present. Additionally, the stunning baroque Metropolitan Cathedral, the seat of the Archdiocese, and the final resting place of St Peter of Jesus Maldonado, a Cristero martyr of the 1930s, stands as an iconic landmark.

The Government Palace from the early 19th century and the City Hall from the turn of the 20th century, located on the Plaza de Armas opposite the cathedral, offer captivating architectural beauty. Beyond the city’s architectural attractions, natural wonders such as the Majalca Peaks National Park and the Basaseachic waterfall in the Sierra Madre, add to the city’s touristic allure.

Chihuahua’s notable geographical feature, the Conchos River, feeds into the Rio Grande and serves as a scenic point of interest for tourists. From historical landmarks to natural wonders, Chihuahua presents an array of attractions catering to diverse tourist interests, making it a must-visit destination.

Discovering the Gastronomic Delights of Chihuahua, Mexico

The gastronomy of Chihuahua, Mexico, captures a unique blend of traditional and contemporary culinary arts, reflecting the region’s rich cultural heritage and local flavors. From the locally grown produce to the staple grains and proteins, the cuisine of Chihuahua is as diverse as it is enticing. This culinary tradition beautifully intertwines indigenous practices with contemporary techniques, creating dishes that both comfort and surprise the palate.

One can’t discuss Chihuahua’s culinary culture without acknowledging the influence of its geography. Situated in Northwestern Mexico, Chihuahua is the country’s largest state, with a diverse climate and terrain that directly influence the region’s agriculture. This results in a variety of locally grown ingredients that form the foundation of Chihuahua’s cuisine. This includes staples like corn and beans, and the region’s prized chilies, all of which contribute to the distinct flavors of Chihuahua’s dishes.

Chihuahua is particularly known for its meat-based dishes, with beef and goat being prevalent due to the state’s significant cattle and goat herding. The “Discada,” a mixed meat dish cooked on an agricultural disc blade, is a popular regional specialty. However, it’s not all about the meat in Chihuahua. The state is also famous for its dairy products, particularly cheese. Queso Chihuahua, also known as “quesadilla cheese,” is a creamy, soft cheese that’s a favorite in many Mexican and Tex-Mex dishes. Whether you’re a fan of hearty meat dishes, flavorful vegetarian fare, or creamy dairy delights, the cuisine of Chihuahua, Mexico, promises a tantalizing culinary journey.

El Poeta Restaurante
Calle Guadalupe Victoria #202, Zona Centro, 31000 Chihuahua, Chih., Mexico

El Poeta Restaurante

Inspired by the blossoming beauty of the Sierra Tarahumara and the vastness of the region’s climates and ecosystems, “El Poeta” brings Chihuahua’s flavors to a level of culinary eloquence.

Using national farmed ingredients, fresh fruits, veggies, as well as local cheeses, and the finest meats, our chefs have created a genuine Northern Mexico culinary experience. Our menu is constantly evolving to meet sophisticated palates while evoking Mexican roots and traditions.

While respecting world-renowned classics our signature drinks proposal is influenced by regional distillates and our team´s wandering creativity.

Crafting the Avocado-Cucumber Salad: A Simple Mexican Recipe

The Avocado-Cucumber Salad is a quintessential Mexican recipe that is as simple to make as it is delightful to taste. With no cooking required, this recipe involves only chopping and mixing, making it accessible to cooks of all skill levels. The combination of creamy avocado and crisp cucumber, united in a refreshing salad, makes for an excellent culinary experience.

Begin by sourcing fresh avocados and cucumbers for this recipe. The quality of the ingredients significantly impacts the final outcome of the dish, and fresh produce guarantees a vibrant and flavorful salad. Next, follow the recipe instructions to chop and mix the ingredients, taking care to maintain a balanced ratio of avocado to cucumber.

Once prepared, take a moment to appreciate the amalgamation of flavors. The creaminess of the avocado provides a delightful contrast to the crisp cucumber, while the added seasonings enhance the overall taste. The Avocado-Cucumber Salad is not just a recipe, but a culinary adventure, inviting you to explore the simplicity and richness of Mexican cuisine.

Essential Ingredients and Tools for Crafting the Avocado-Cucumber Salad

Embarking on the journey to create the Avocado-Cucumber Salad requires thoughtful preparation. Begin by assembling and organizing all the ingredients and equipment necessary for the recipe. This simple, proactive step not only ensures you have everything at your disposal but also streamlines the cooking process, making it more enjoyable and efficient.

Avocado-Cucumber Salad
Avocado-Cucumber Salad Ingredients

Equipment Needed

  • 1 Knife
  • 1 Cutting Board
  • 1 Mixing Bowl

Ingredients Needed

  • 2 large avocados pitted, peeled, and cubed
  • 1 cucumber diced
  • 1 small shallot minced
  • ¼ cup fresh cilantro leaves roughly chopped
  • 3 tbsp extra-virgin olive oil
  • 1 ½ tbsp lemon juice
  • ½ tsp brown sugar
  • ¾ tsp salt plus more to taste
  • ¼ tsp black pepper plus more to taste

Time needed: 15 minutes

How to Mix Avocado-Cucumber Salad

  1. Chop and Mix the Salad

    In a medium salad bowl, chop and combine the avocado, cucumber, shallot, and cilantro.

  2. Make the Dressing

    In a small bowl, whisk together the olive oil, lemon juice, brown sugar, salt, and pepper.

  3. Add Dressing and Garnish

    Pour over the salad and toss gently to combine; season with additional salt and pepper.

  4. Serve and Enjoy

    Serve right away.

If you liked this dish please Rate This Recipe and leave a comment.

Avocado-Cucumber Salad
Print

Avocado-Cucumber Salad

In this enticing dish, we bring together the creaminess of ripe avocados and the crunchiness of fresh cucumbers. We then infuse these textures with the tangy zest of lemon and a subtle hint of sweetness from brown sugar. Each ingredient harmoniously combines to create an Avocado-Cucumber Salad that's both refreshing and satisfying.
Prep Time 15 minutes
Total Time 15 minutes
Servings 4 servings
Calories 314kcal

Ingredients

Instructions

  • In a medium salad bowl, combine the avocado, cucumber, shallot, and cilantro.
    2 avocados, 1 cucumbers, 1 small shallots, ¼ cup dried cilantro
  • In a small bowl, whisk together the olive oil, lemon juice, brown sugar, salt, and pepper.
    3 tbsp olive oil, 1 ½ tbsp lemon juice, ½ tsp brown sugar, ¾ tsp salt, ¼ tsp black pepper
  • Pour over the salad and toss gently to combine; season with additional salt and pepper.
  • Serve right away.

Nutrition

Serving: 1cup | Calories: 314kcal | Carbohydrates: 12.9g | Protein: 2.7g | Fat: 30.3g | Saturated Fat: 5.7g | Sodium: 449mg | Potassium: 628mg | Fiber: 7.3g | Sugar: 2.5g | Calcium: 30mg | Iron: 1mg

Complementary Dishes to Enhance Your Avocado-Cucumber Salad Experience

Embarking on a culinary journey with the refreshing Avocado-Cucumber Salad opens the door to a variety of dishes that perfectly complement its flavors. This salad, with its creamy avocados, crunchy cucumbers, and zesty lemon undertones, pairs well with a multitude of recipes. Whether you’re planning a casual lunch or a fancy dinner, the following suggestions will enrich your meal, creating a wholesome dining experience that balances and accentuates the flavors of your Avocado-Cucumber Salad.

Golubtsi ~ Stuffed Cabbage Rolls
Ukrainian Golubtsi (голубцы) ore Stuffed Cabbage Rolls are little bundles of cabbage leaves that have been stuffed and cooked with a mixture of ground beef and pork, onions, mushrooms, and other spices, and braised in a homemade tomato sauce. They are typically served with a sour cream-based sauce.
Check out this recipe
Golubtsi ~ Stuffed Cabbage Rolls
Baked Spaghetti and Meatballs
The Spaghetti is tossed in a marinara sauce and baked with tasty meatballs and a melted layer of mozzarella cheese.
Check out this recipe
Baked Spaghetti and Meatballs

In the realm of culinary exploration, finding the perfect dishes to accompany your Avocado-Cucumber Salad is a delightful adventure. Each of these recommended recipes not only pairs wonderfully with the salad but also adds its own unique touch to your meal. Whether it’s the comforting warmth of grilled chicken, the hearty satisfaction of a vegetable bake, or the indulgent taste of roasted salmon, these dishes enhance the salad’s flavors and contribute to a well-rounded, delicious meal. So, the next time you whip up a batch of Avocado-Cucumber Salad, consider trying one of these complementary recipes to elevate your dining experience.

Photo Credits:

  • By Taste The World Cookbook – Copyright 2022 All rights reserved.
  • By El Poeta Restaurante – By https://www.facebook.com/centralhotelb
  • By Cuucity – Own work, CC BY-SA 4.0, https://commons.wikimedia.org/w/index.php?curid=74777248

The Allure of Creole Seasoning Mix

0
Creole Seasoning Mix

Embracing the vibrant essence of Baton Rouge, Louisiana, our Creole Seasoning Mix is more than just a spice blend; it is a culinary experience. This versatile concoction promises to take a permanent place in your spice cabinet, reinventing the ordinary with its distinctive flavor profile.

Drawing on the rich and diverse cultural melting pot of Louisiana, this Creole Seasoning Mix is expertly crafted to bring out the best in your dishes. Each ingredient combines to create a symphony of flavors, embracing the sweet, the savory, and the spicy. Just a pinch of this seasoning mix can bring any meal from mundane to magical, transcending borders and inviting your palate to embark on a flavor-packed adventure.

This Creole Seasoning Mix is the result of centuries of culinary refinement, transforming staple spices into a unique blend. It embodies the Creole tradition, capturing the spirit and verve of Louisiana in a bottle. Whether you are a seasoned chef or an enthusiastic amateur, this seasoning blend is an essential part of your culinary journey.

The Multifaceted Applications of Creole Seasoning Mix

The Creole Seasoning Mix is not just a spice but an essential component that magnifies the flavor of a myriad of dishes. From classic Louisiana specialties like gumbo and jambalaya to seafood delights such as shrimp, crawfish, and crab boils, this seasoning adds a robust flavor that elevates the dish.

The versatility of this mix extends beyond traditional dishes; it breathes new life into seasoned rice, soups, stews, salads, and even eggs. Grilled meats, poultry, and seafood turn into gourmet meals with a touch of this Creole spice. It also adds a savory twist to pasta salads and potato salads and provides a zesty kick when sprinkled on French fries and potatoes. It makes popcorn more exciting and can even be used as a dry rub or incorporated into vinaigrette for a punchy dressing.

No dish is too ordinary for the Creole Seasoning Mix. With it, every meal becomes a flavorful exploration, invigorating your senses and bringing a taste of Louisiana to your table. No matter where you are, it’s like having a little piece of Creole culture in your kitchen.

Effective Preservation of Creole Seasoning Mix

To maintain the potent flavors of the Creole Seasoning Mix, it should be stored in an airtight spice jar, tucked away in a cool, dark corner of your kitchen or spice pantry. Ground spices, being the core of this mix, are susceptible to losing their freshness over time, typically not exceeding a six-month shelf life.

To ensure your spices remain fresh, you need to adopt a sensory approach. The freshness of ground spices can be determined by their aroma. If you open the jar and the smell isn’t as vibrant as it once was or is completely absent, it’s time to refresh your stock. As the sensory strength of the spice is integral to the flavor it imparts, keeping it fresh ensures your dishes continue to have that authentic Creole kick.

Preservation is key to maintaining the unique taste this Creole Seasoning Mix provides. So, handle it with care and it will reward you with a consistently potent flavor, elevating each dish you create to a new culinary dimension.

The Rich Legacy of Creole Seasoning

Creole Seasoning, an iconic culinary creation, is widely attributed to Tony Chachere, an esteemed American chef. Known for founding Tony Chachere’s Creole Foods, Seasonings, and Ingredients brand, his original product, Tony Chachere’s Original Creole Seasoning, is still celebrated today.

Chachere’s contribution is more than just a seasoning; it’s a tangible manifestation of the vibrant Creole culture. His seasoning mix, an innovative fusion of flavors, set the culinary world ablaze, redefining the meaning of Creole cuisine. Each bottle of Tony Chachere’s Original Creole Seasoning symbolizes a tradition steeped in diversity and innovation.

However, the history of Creole seasoning is not just about one man’s invention but the culmination of an entire culture’s culinary evolution. Infused with the influences of French, Spanish, African, and Native American cuisines, Creole seasoning is a testament to Louisiana’s rich cultural tapestry. Each spice in the blend tells a story of the region, its people, and their passion for food.

Discovering Baton Rouge, Louisiana: A Metropolitan Jewel on the Mississippi

Poised on the Mississippi River, Baton Rouge, the capital city of Louisiana, proudly showcases its historical and contemporary charm. Among its captivating landmarks from the antebellum period, the castle-like Old Louisiana State Capitol stands out, now functioning as a museum. The Magnolia Mound Plantation is another exquisite relic, boasting a French Creole house that provides an authentic glimpse into the region’s past.

Adding to its historic richness, the LSU Rural Life Museum, an assembly of beautifully refurbished structures, paints a vivid picture of life in the 18th and 19th centuries. Anchored on the river, the USS Kidd, a retired WWII destroyer, serves as a remarkable museum, narrating stories of bravery and resilience. Indeed, Baton Rouge, with its fusion of history and modernity, offers an intriguing exploration of American culture and heritage.

As a metropolitan hub, Baton Rouge buzzes with an effervescent lifestyle. Its thriving arts scene, diverse culinary offerings, and a myriad of entertainment venues make it a lively destination for locals and tourists alike. In Baton Rouge, one can truly experience the warmth of Southern hospitality and the pulsating rhythm of a vibrant city.

Baton Rouge, Louisiana: Tracing the Historical Footprints

Archaeological evidence reveals human habitation in the Baton Rouge area dating back to 12000–6500 BC, highlighting the city’s ancient roots. Traces of these early settlers can be found along the Mississippi, Comite, and Amite rivers, serving as silent testimonials to the region’s prehistoric past.

Baton Rouge’s history took a notable turn in 1698, under the French explorer Pierre Le Moyne d’Iberville. On his Mississippi River expedition, d’Iberville and his team noticed a red pole demarcating the hunting grounds between the Houma and Bayagoula tribes. This led to the naming of the city as le bâton rouge (“the red stick”), a translation of the native term Istrouma, believed to be derived from the Choctaw phrase iti humma (“red pole”). The first comprehensive account of this expedition was published by André-Joseph Pénicaut, a carpenter accompanying d’Iberville, in 1723.

Furthermore, the history of Baton Rouge is intrinsically tied to the Creole ethnic group, originating from racial amalgamation mainly involving West Africans, French, Spanish, and Indigenous American peoples during the colonial era. This process, known as creolization, resulted in a wide variety of ethnic backgrounds and mixtures, leading to the emergence of distinct Creole identities. Interestingly, the development of Creole languages is often erroneously linked to the emergence of these identities; however, the two phenomena occur independently.

Unveiling Baton Rouge, Louisiana: A Treasure Trove for Tourists

Baton Rouge entices visitors with its architectural masterpieces, ranging from the antebellum era to modern times. One such landmark is the neo-gothic Old Louisiana State Capitol, erected in the 1850s as Baton Rouge’s first statehouse. Later, the New Louisiana State Capitol, a towering 450-ft-tall art-deco edifice, replaced it. Notably, upon completion, it held the distinction of being the tallest building in the South.

In addition to these political landmarks, several plantation homes in the region, including the Magnolia Mound Plantation House, Myrtles Plantation, and Nottoway Plantation, beautifully display antebellum-era architecture. These exquisite structures serve as timeless symbols of the city’s rich history, adding to Baton Rouge’s appeal as a tourist hotspot.

Cajun Cuisine: A Flavorful Journey into Louisiana’s Culinary Heritage

Cajun cuisine is a unique culinary style that emerged from the Cajun–Acadians, who were displaced from Acadia to Louisiana during the 18th century. This gastronomic tradition embodies a medley of West African, French, and Spanish cooking techniques, reflecting the region’s diverse cultural influences.

Often referred to as a ‘rustic cuisine’, Cajun cuisine primarily relies on locally sourced ingredients and boasts simple yet flavorful preparations. This style of cooking is a testament to the region’s agricultural abundance and the local community’s ingenuity in creating delectable dishes using the resources available to them.

An authentic Cajun meal typically involves a three-pot affair: one pot dedicated to the main dish, another to steamed rice, sausages, or a seafood dish, and the third brimming with fresh, seasonal vegetables. Staple meats, such as crawfish, shrimp, and andouille sausage, feature prominently in a variety of Cajun dishes, lending a unique flavor profile to this beloved culinary tradition.

Matherne’s Market
440 N 3rd St, Baton Rouge, LA 70802

Matherne's Market
Matherne’s Market

Matherne’s Market is a family-owned business that has been serving the River Parish and Baton Rouge communities for over 35 years. Our company, which started as a convenience store in Grand Point, LA, has grown to four locations that offer an extensive selection of local and international products, fine wines and craft beers, and authentic Louisiana-style prepared meals. We believe in providing our communities with clean stores, friendly service, and a fast and convenient shopping experience!

Crafting Your Own Creole Seasoning Mix: A Quick Guide

Creating your own Creole seasoning mix can be an effortless and enjoyable endeavor. The necessary ingredients are readily accessible and can easily be found in local supermarkets. To get started, all you need is a clean spice jar for storing your homemade mix.

To craft this flavorful blend, combine a variety of spices, such as paprika, cayenne pepper, garlic powder, onion powder, salt, and pepper, among others. Thoroughly mix these ingredients and then store your homemade Creole seasoning in the prepared spice jar. Always keep this mix in a cool, dark area of your kitchen, preferably your spice pantry, to maintain its freshness.

With this simple recipe, you can add a burst of Creole flavor to any dish, whether it’s a classic gumbo, jambalaya, or even a humble serving of grilled vegetables. Dive into the culinary world of Louisiana and let your taste buds experience the magic of homemade Creole seasoning.

Gathering Your Essentials: The First Step to Creating Creole Seasoning Mix

Before embarking on your culinary journey to craft a delicious Creole Seasoning Mix, it is essential to prepare and lay out all necessary ingredients and equipment. This preliminary step not only ensures that you have everything you need at your fingertips but also streamlines the entire process. Gather your selection of spices that encapsulate the essence of Creole cuisine. Also, have your measuring spoons, a mixing bowl, and a clean spice jar ready for use. Organizing your workspace in this way sets the stage for a successful and enjoyable cooking experience.

Creole Seasoning Mix Ingredients

Equipment Needed

  • 1 Mixing Bowl
  • 1 Spice Jar

Ingredients Needed

  • 4 teaspoons garlic powder
  • 4 teaspoons onion powder
  • 2 tablespoons sweet paprika powder
  • 1 teaspoon smoked paprika
  • 1 tablespoon dried thyme
  • 2 teaspoons dried oregano
  • 2 teaspoons dried basil
  • 2 teaspoons cayenne pepper (or less if you don’t want it as hot)
  • 1½ teaspoons salt
  • 1 teaspoon freshly ground black pepper

Time needed: 5 minutes

How to Mix Creole Seasoning

  1. Mix

    Place all of the spices in a mixing bowl and mix well.

  2. Store

    Store in an airtight jar until ready to use.

If you liked this dish please Rate This Recipe and leave a comment.

Creole Seasoning Mix
Print

Homemade Creole Seasoning

Unleash a world of flavors with this homemade Creole seasoning recipe that's simple to prepare and versatile in its uses. Infusing a diverse range of dishes with its vibrant, distinctive taste, this seasoning blend works as a wonderful dry rub for meats and fish, adding depth and character to your dishes. Ideal for classic recipes like Gumbo and Jambalaya, it also enriches the flavor profiles of seafood delights like shrimp, crawfish, or crab boils. Every pinch of this Creole seasoning brings a culinary masterpiece a step closer, turning ordinary meals into extraordinary dining experiences.
Course Condiment
Cuisine American
Prep Time 5 minutes
Total Time 5 minutes
Servings 24 servings
Calories 6kcal

Ingredients

Instructions

  • Place all of the spices in a mixing bowl and mix well.
    4 tsp garlic powder, 4 tsp onion powder, 2 tbsp sweet paprika, 1 tsp smoked paprika, 1 tbsp dried thyme, 2 tsp dried oregano, 2 tsp basil, 2 tsp cayenne pepper, 1½ tsp salt, 1 tsp black pepper
  • Store in an airtight jar until ready to use.

Notes

For optimal flavor use within 2 months.
Makes 1/2 cup.

Nutrition

Calories: 6kcal | Carbohydrates: 1.4g | Protein: 0.3g | Fat: 0.1g | Sodium: 536mg | Potassium: 33mg | Fiber: 0.5g | Sugar: 0.4g | Calcium: 0.8mg

Discovering the Culinary Wonders: Recipes Enhanced with Creole Seasoning Mix

As you explore the culinary landscape with your newly crafted Creole Seasoning Mix, it’s time to introduce it to a range of diverse recipes. This versatile seasoning doesn’t just add a kick to your classic Louisiana dishes like Gumbo and Jambalaya, but it also enhances the flavors of everyday recipes, creating a fusion of taste that’s uniquely satisfying. Whether it’s a humble vegetable stir-fry or an elaborate seafood pasta, the addition of this Creole mix can elevate your dishes, offering a taste adventure that goes beyond the conventional. So let’s dive into some handpicked recipes that are wonderfully complemented by this versatile Creole Seasoning Mix.

  • Gumbo
  • Jambalaya
  • Shrimp, Crawfish, or Crab Boil
  • Seasoned Rice
  • Soups
  • Stews
  • Salads
  • Burgers
  • Eggs
  • Marinade
  • Grilled Meats, Poultry, and Seafood
  • Pasta Salads
  • Potato Salads
  • Sprinkled on French Fries and Potatoes
  • Popcorn
  • Dry Rub
  • Vegetables
  • Whisked into your Vinaigrette for a Zesty Dressing
  • …and on anything else that needs a flavor boost!

As we wrap up our flavorful journey with the Creole Seasoning Mix, it’s clear how this versatile blend can be a game-changer in your culinary adventures. By infusing a medley of flavors into your everyday dishes, you can bring the rich, diverse taste of Louisiana right into your home. Whether it’s enhancing the depth of a classic dish or adding an unexpected twist to a family favorite, this homemade Creole seasoning is your secret ingredient to creating meals that are simply unforgettable. So continue to experiment and discover more delightful ways to incorporate this flavorful blend into your culinary repertoire. Happy cooking!

Photo Credits:

  • By Taste The World Cookbook – Copyright 2022 All rights reserved.
  • By Matherne’s Market – Copyright BY https://www.facebook.com/matherneslongview/
  • By getmahesh – https://www.flickr.com/photos/getmahesh/8674772313/in/photolist-bCideq-6Z6kYd-bCibWE-fb9dDs-edJgES-edJgj5-6Z6myf-6Z6kby-9J4Bh6-asxEPy-6Z2k7c-6Z2ifk-6Z6jmA-7akw8q-6Z2jPR-6Z6nFm-6Z6wys-6Z6wk5-asuZcp-o2cWv-6ppuS4-bRcWNa-edytzT-bQb6ZT-bQbiQp-bQbd1P-bBgx8o-bBgweN-bQbpRr-bQbhqi-bQbqFB-bQbgpz-bBgCFw-bQbsRK-bQbr5B-bBgAx9-bBgF7E-bBgVW3-bBguAy-nFNi1-bQbkUV-bBgRFJ-bBgtdW-bBgGGb-bBgSy9-bBgsVL-bBgRc9-bQbbmi-bRcWsK-bQbuXT, CC BY-SA 2.0, https://commons.wikimedia.org/w/index.php?curid=77487643
  • By Yousef Abdul-Husain – Own work, CC BY-SA 4.0, https://commons.wikimedia.org/w/index.php?curid=45577427
  • By user:Cmire4 – Own work, CC BY-SA 3.0, https://commons.wikimedia.org/w/index.php?curid=1799618
  • By Farragutful – Own work, CC BY-SA 3.0, https://commons.wikimedia.org/w/index.php?curid=33337102
  • By davidpinter, CC BY 3.0, https://commons.wikimedia.org/w/index.php?curid=57607843

Mastering Taco Seasoning Mix

0
Taco Seasoning Mix
Taco Seasoning Mix

Discover the authentic flavor of Mexican cuisine with this remarkable Taco Seasoning Mix recipe, originating from the heart of Toluca de Lerdo in central Mexico. This carefully crafted blend captures the vibrancy and depth of traditional Mexican spices, offering a versatile and exciting addition to various dishes. The beauty of this recipe lies in its adaptability – you can tweak the spice levels to suit your taste, creating your unique version of this Toluca specialty.

At its core, this Taco Seasoning Mix is a reflection of Toluca’s rich culinary tradition, infusing food with a robust and tantalizing aroma. With its balanced combination of spices, this mix takes your taste buds on a tour of Toluca’s local flavors. Whether you’re preparing a family dinner or hosting a Mexican-themed party, this seasoning mix will add a kick to your meals, leaving a lasting impression on your guests.

Venturing into the world of Mexican cuisine with this recipe will not only broaden your culinary repertoire but also bring the essence of Toluca to your kitchen. Enjoy the process of adjusting the mix according to your preference, creating a medley of flavors that resonate with your palate. It’s not just about crafting a seasoning mix; it’s about experiencing the zest and soul of Mexican cuisine.

Creative Ways to Use Taco Seasoning Mix

Taco seasoning mix, while quintessential in crafting the perfect taco, is an incredibly versatile ingredient, capable of elevating an array of dishes. It imparts a robust flavor to meats, seafood, vegetables, or beans, making it an ideal ingredient for a variety of taco recipes. For those summer grilling sessions, it doubles as an excellent rub for steak, chicken, fish, or shrimp, infusing them with a vibrant Mexican tang.

The possibilities, however, don’t stop at the grill. You can add a spicy twist to soups with a sprinkle of taco seasoning or even whisk it into a vinaigrette for a zesty salad. This mix adds a dash of Toluca’s bold flavors to any dish, transforming the ordinary into extraordinary.

Feeling a bit adventurous? Why not try it on popcorn? The spicy and tangy notes of the seasoning provide an unexpected yet delightful kick, turning your usual popcorn into a unique snack. With this Taco Seasoning Mix, you’re equipped to transform every meal into an exciting culinary experience.

Preserving Your Taco Seasoning Mix

Preserving your Taco Seasoning Mix involves a simple but crucial process. Ensure you store it in an airtight container, away from direct sunlight, to maintain its potent aroma and taste. This practice will keep the mix fresh and flavorful, ready to liven up your meals at a moment’s notice.

With proper storage, your Taco Seasoning Mix can last up to six months. However, a decrease in aroma is an indication that the mix may have lost its potency. So, regularly check on your mix to ensure that it retains its signature robust and spicy aroma.

Remember, the quality of your Taco Seasoning Mix significantly impacts the dishes you prepare. So, prioritize its storage and preservation, ensuring you always have fresh and flavorful seasoning at hand to elevate your meals.

The Origins of Taco Seasoning

Taco seasoning, while a staple in modern cooking, is a relatively recent addition to culinary history. It was born out of the commercial invention of chili powder in 1894, which quickly became the key ingredient in many seasoning mixes. However, tracing the creation of the first “Taco Seasoning Recipe” proves to be a bit elusive.

Interestingly, the origin of the taco predates the invention of its seasoning. This popular dish was first created by the Aztecs in Mexico, forming the basis of the beloved Mexican cuisine we know today. While the exact timeline of taco seasoning’s inception remains uncertain, its contribution to enhancing the flavors of tacos, and many other dishes, is unquestionable.

The Bustling Metropolis of Toluca de Lerdo, Mexico

Toluca de Lerdo, often known simply as Toluca, is a bustling metropolis, renowned for its dynamic commerce and robust communication networks. Nestled in the heart of Mexico, this metropolitan city thrives on a diverse economy. It is a vibrant agricultural hub, producing a variety of crops such as wheat, corn, beans, and a host of other vegetables, reflecting the region’s rich, fertile soils.

Moreover, Toluca’s livestock sector contributes significantly to its economy. This thriving city boasts an extensive transportation system, seamlessly connecting it with Mexico City and other plateau cities through a network of highways and railways. This connectivity contributes to Toluca’s stature as a commercial and trading hub, promoting dynamic exchange and movement within and beyond its boundaries.

Toluca’s strategic location and economic diversity make it a vital asset to Mexico. It is a city that deftly intertwines traditional agricultural practices with modern commerce and communication. This harmonious blend of old and new helps Toluca stand tall as a metropolitan city, contributing substantially to the country’s economic growth and cultural richness.

The Evocative History of Toluca de Lerdo, Mexico

Steeped in rich history, the city of Toluca de Lerdo traces its roots back to ancient times when it was known as the Matlatzinco Valley. This land was home to four diverse linguistic groups: the Matlatzinca, Otomi, Mazahua, and Nahua peoples, each contributing to the region’s cultural tapestry. In 1478, the Mexica emperor Axayacatl conquered the Toluca Valley, changing the region’s political landscape.

The arrival of the Spanish in 1521 marked a significant turning point in Toluca’s history. Under the leadership of Gonzalo de Sandoval, a sergeant under Cortes, the Spanish conquest of the Valley of Toluca took place. King Carlos V of Spain eventually included the Valley of Toluca, including the present-day city, in the land grant made to Hernán Cortés.

The city’s journey continued through the centuries until 1830, when Toluca was finally designated as the constitutional capital of the State of Mexico, a title it proudly holds to this day. This historical evolution underscores Toluca’s significance as a city, its endurance through changing regimes, and its emergence as a resilient metropolitan center in Mexico.

Exploring the Touristic Wonders of Toluca de Lerdo, Mexico

Toluca de Lerdo, nestled in high altitude, offers a vibrant blend of natural beauty and architectural marvels, making it a must-visit destination for tourists. Its colonial architecture is beautifully showcased in landmarks like the imposing Catedral de San José and the neoclassical Palacio Municipal, both overlooking the main square, Plaza de los Mártires.

Apart from its architectural splendor, Toluca also offers natural wonders such as the Cosmovitral Botanical Garden, housed in a former marketplace. The garden is home to an array of global flora and stunning stained-glass murals, providing a tranquil escape within the bustling city. For nature enthusiasts, the forested highlands of Nevado de Toluca National Park, southwest of the city, are a winter haven for colonies of migratory monarch butterflies.

Toluca de Lerdo’s appeal lies in its ability to offer diverse experiences to its visitors. From admiring its rich architectural heritage to exploring its natural treasures, the city presents an immersive journey into the heart of Mexico’s cultural and natural landscape.

Relishing the Diverse Cuisine of Toluca de Lerdo, Mexico

Mexican cuisine, a harmonious fusion of European and Mesoamerican elements, finds expression in Toluca’s signature dishes. The city’s culinary repertoire is led by chorizo, a regional sausage made of ground pork and tomato sauce. This specialty incorporates a blend of ingredients, including pumpkin mole, pipian, salt, pepper, white wine, almonds, potatoes, vinegar, garlic, and chile.

Toluca’s culinary identity extends beyond its famous chorizo. “Tacos de carnitas” (pork tacos) and “tacos de plaza,” prepared with barbacoa, pork, chicharron, papalo Porophyllum ruderale, onion, coriander, nopales, cueritos, chili sauce, salt, and lime, are popular among locals and tourists alike. Vegetables such as “quelites”, “quintoniles”, “huazontles”, spinach, “verdolagas”, carrots, potatoes, tomatoes play a significant role in the region’s traditional cuisine.

In Toluca, the word “chorizo” extends beyond the kitchen and is affectionately used as a nickname for anything (or anyone) from the city. This speaks volumes about the deep culinary heritage that defines Toluca’s identity, revealing the close bond between its people, their food, and their city.

Lusso Cafe

Av. Primero de Mayo 614, Barrio de Sta Clara, 50150 Toluca de Lerdo, Méx., Mexico

Lusso Cafe
Lusso Cafe

Tucked away in the bustling heart of the city, you’ll discover Lusso Cafe, a charming hidden gem that’s poised to capture your heart with its extraordinary culinary offerings and exemplary service. From the moment you step into this cozy haven, you’ll be greeted with a warmth that extends beyond the inviting ambiance, radiating from a dedicated team committed to making your visit an unforgettable experience. Every meal at Lusso Cafe unfolds like a culinary journey, each dish skillfully crafted to tantalize your palate and leave a lasting impression. Whether you’re a discerning food connoisseur or a casual diner, Lusso Cafe is bound to make you fall in love, one delightful bite at a time.

Crafting Your Homemade Taco Seasoning Mix

Preparing a homemade Taco Seasoning Mix is a delightful culinary adventure that begins with organizing your workspace. Ensuring you have all the necessary equipment and ingredients laid out before you start is a crucial step toward a smooth cooking experience. This simple preparation strategy can turn even a complex recipe into a stress-free task, and in the case of our quick and easy taco seasoning, it’s no different.

Crafting this Taco Seasoning Mix requires only a few minutes of your time, but the result is truly spectacular. You’ll create a blend of flavors that surpasses anything you can buy pre-made. Every spoonful of this seasoning mix is a testament to the magic of homemade cooking, where quality ingredients combine under your skilled hands to form something truly special.

With the completion of this simple recipe, you’ll find yourself with a bottle of the most flavorful and delicious Taco Seasoning Mix you’ve ever tasted. This seasoning will not only elevate your taco game but can also serve as a fantastic rub for meats or a flavorful addition to soups and salads. So why wait? Let’s get started on creating this flavorful wonder!

Gathering Essentials for Your Taco Seasoning Mix

As with all culinary endeavors, preparing your homemade Taco Seasoning Mix starts with gathering the right ingredients and tools. These key elements are your building blocks to a successful and flavorful outcome. A simple yet essential checklist ensures you’re well-equipped to embark on this flavorful journey. With everything at hand, the process becomes more manageable and enjoyable, setting the stage for a delightful cooking experience.

Equipment Needed

  • 1 Mixing Bowl
  • 1 Spice Jar

Ingredients Needed

  • ¼ cup chili powder
  • 3 tbsp dried minced onion
  • 1 tbsp garlic powder
  • 2½ tsp salt
  • 2 tsp dried oregano
  • 2 tsp ground cumin
  • 1½ tsp cayenne pepper
  • 1 tsp ground coriander
Taco Seasoning Mix
Taco Seasoning Mix

Time needed: 5 minutes

How to Mix Taco Seasoning

  1. Mix the Ingredients

    Combine all ingredients and mix well.

  2. Store in a Spice Jar

    Store in an air-tight container. This taco seasoning mix will last up to 6 months.

If you liked this dish please Rate This Recipe and leave a comment.

Taco Seasoning Mix
Print

Taco Seasoning Mix

This Taco Seasoning Mix recipe yields one cup of sumptuous mix. To create your perfect tacos, simply use a ¼ cup of this delicious seasoning blend. The tantalizing flavors packed into each batch will elevate your taco game, leaving you and your guests craving more.
Prep Time 5 minutes
Total Time 5 minutes
Servings 10 servings
Calories 19kcal

Equipment

Instructions

  • Combine all ingredients and mix well.
    ¼ cup chili powder, 3 tbsp dried minced onion, 1 tbsp garlic powder, 2½ tsp salt, 2 tsp dried oregano, 2 tsp ground cumin, 1½ tsp cayenne pepper, 1 tsp ground coriander
  • Store in an air-tight container. Homemade taco seasoning will last up to 6 months.

Notes

To make Taco Meat, add 1/4 cup Taco Seasoning Mix and 3/4 cup water to 1 lb. of cooked ground meat. Simmer and stir for 2 minutes. 

Nutrition

Serving: 1tbsp | Calories: 19kcal | Carbohydrates: 3.5g | Protein: 0.8g | Fat: 0.8g | Saturated Fat: 0.1g | Sodium: 2475mg | Potassium: 107mg | Fiber: 1.7g | Sugar: 0.7g | Calcium: 22mg | Iron: 1mg

Diverse Dishes Enhanced by Taco Seasoning

From the rich repertoire of global cuisine, many recipes shine brighter when enhanced by the flavorful punch of Taco Seasoning. This versatile blend adds an unforgettable zing to a myriad of dishes, transforming the ordinary into the extraordinary. In the following sections, we delve into a selection of these recipes, where Taco Seasoning plays the starring role, lending its unique flavor profile to create culinary masterpieces.

Shredded Beef Taquitos
These crunchy Shredded Beef Taquitos are made with seasoned shredded beef and a Mexican blend of cheese is wrapped in corn tortillas and baked to perfection. Serve as an afternoon snack or for the next fiesta.
Check out this recipe
Shredded Beef Taquitos

The culinary journey through dishes enriched by Taco Seasoning undoubtedly leaves an impression of the seasoning’s versatility and wide-ranging appeal. Each recipe represents a unique interpretation of this robust blend, demonstrating how it can amplify flavors across different types of cuisine. As you explore these recipes, remember that the art of cooking is about exploration and creativity. So, feel free to experiment, adjusting the amount of Taco Seasoning to suit your taste, and let your culinary creativity soar.

Photo Credits:

  • By Taste The World Cookbook – Copyright 2022 All rights reserved.
  • By Lusso Cafe – Copyright BY 
  • By TolucaCity – Own work, CC BY-SA 3.0, https://commons.wikimedia.org/w/index.php?curid=27860466
  • By Thelmadatter – Own work, CC BY-SA 3.0, https://commons.wikimedia.org/w/index.php?curid=7370819
  • By Ustunol at the English-language Wikipedia, CC BY-SA 3.0, https://commons.wikimedia.org/w/index.php?curid=2818055
  • By Thelmadatter – Own work, CC BY-SA 3.0, https://commons.wikimedia.org/w/index.php?curid=7370634
  • By TolucaCity – Own work, CC BY-SA 3.0, https://commons.wikimedia.org/w/index.php?curid=27860382

Authentic Italian Pasta Salad

0
Italian Pasta Salad
Italian Pasta Salad

This Italian Pasta Salad recipe hails from the city of Naples, Italy. This Italian Pasta Salad recipe hails from the city of Naples, Italy. Served cold it is a delicious side dish that will make your taste buds do the happy dance.

Inviting us on a culinary journey to the vibrant city of Naples, Italy, this Italian Pasta Salad recipe is a cold and tantalizing side dish designed to awaken your palate. Bursting with freshness and loaded with flavors, the salad presents a beautiful harmony of textures. Tossed in a robust dressing, every bite leaves a lingering taste that encapsulates the essence of authentic Italian cuisine.

As you indulge in this traditional pasta salad, the various ingredients work together to deliver a gastronomic masterpiece. The pasta, cooked al dente, maintains a delightful chewiness that contrasts beautifully with the crisp vegetables. The tanginess of the dressing, coupled with the savory undertones, ties the dish together, leaving you with a satisfying post-meal contentment. Whether as a side dish or a light lunch, this Italian Pasta Salad is bound to have your taste buds dancing in joy.

So, prepare to travel through your senses and experience a taste of Italy. With the Italian Pasta Salad, every meal becomes an occasion, a moment to cherish. Serve it at your next gathering and watch as your guests savor the flavors of Naples right in your dining room.

Ways to Make Pasta Salad

Salads can be made into a wide variety of dishes that fall under the following principal categories: green salads; vegetable salads; salads of pasta, legumes, or grains; mixed salads incorporating meat, poultry, or seafood; and fruit salads. Most salads are traditionally served cold, although some, such as German potato salad, are served hot.

Preserving Your Italian Pasta Salad: A Storage Guide

Keeping pasta salad fresh and flavorful involves understanding the best methods for its storage. If you find yourself with leftover Italian Pasta Salad, fear not. By storing it in an airtight container and placing it in the refrigerator, you can relish the vibrant tastes for 4 to 5 days.

But what about longer-term storage? Freezing offers a solution. Pack your pasta salad into an airtight container or ziplock bag and you can preserve it in your freezer for 2 to 3 months. This allows you to have your homemade Italian Pasta Salad ready to enjoy whenever you please while maintaining its delightful taste and texture.

Unraveling the Past: A Dive into the History of Pasta

Pasta’s storied past reaches back to antiquity. Our first records trace its lineage to the 1st century AD, when Quintus Horatius Flaccus referenced Lagana, fine sheets of fried dough, a rudimentary form of pasta. Then in the 2nd century, Athenaeus of Naucratis penned a recipe for Lagana, crediting its invention to Chrysippus of Tyana, a figure from the 1st century.

One distinctive type of pasta, Fusilli, takes its name from the Latin word ‘Fuso’ which translates to ‘spindle’. In line with this etymology, Fusilli is formed into a corkscrew or helical shape. The traditional method involves spinning a small rod across thin strips of pasta, winding them around the rod into a spiral. This creates the signature spirals of Fusilli that we know and love today, and underscores pasta’s enduring link to craftsmanship.

From Ancient Trees to Modern Tables: The Story of Olives

Olives, a staple in Mediterranean cuisine, have a history as rich as their flavor. Fossil evidence indicates that olive trees first took root 20-40 million years ago during the Oligocene epoch, in regions now known as Italy and the eastern Mediterranean Basin. The cultivation of edible olives by humans began around 5,000 to 6,000 years ago, in the early Bronze Age.

Not only are olives delectable, they’re also highly nutritious. A serving of three ounces of cured green olives provides 146 calories, acts as a rich source of vitamin E (contributing 25% of the Daily Value), and contains a substantial amount of sodium. While other nutrients present in olives may not be significant, their unique combination of flavors and health benefits have secured their place in culinary traditions across the globe.

Exploring Naples: Italy’s Vibrant Metropolitan City

Uncover the soul of Italy by traversing through Naples, a metropolitan city rich in art, history, and culture. It is the third-largest city in Italy after Rome and Milan, possessing a vibrant energy that’s palpable in its bustling streets and colorful neighborhoods. With its fascinating architectural structures, sweeping views of the Bay of Naples, and Mount Vesuvius looming in the distance, the city is a spectacle that’s sure to captivate every traveler’s eye.

In Naples, culture and traditions intertwine, creating a dynamic, cosmopolitan atmosphere. Neapolitans take immense pride in their city’s heritage, preserving it in the city’s numerous museums, historical sites, and bustling piazzas. Moreover, the city’s vibrant street life, characterized by busy markets and animated conversation, is an integral part of the local culture and gives Naples its unmistakable charm.

Embracing both antiquity and modernity, Naples blends the past with the present in a seamless fusion that shapes its unique cityscape. Ancient ruins sit beside modern buildings, testament to the city’s historical depth and continuous development. With such diverse influences, Naples offers an intriguing glimpse into Italy’s rich past while paving the way for a promising future.

Delving into Naples, Italy’s Intriguing History

Embark on a journey back in time as you delve into the history of Naples, Italy. Founded by the Ancient Greeks in the 7th century BC, Naples, then known as Neapolis, quickly emerged as an important cultural center. The city’s strategic location made it a focal point of various historical events, resulting in a cultural richness that persists today.

Over centuries, Naples experienced various rulers, each leaving an indelible mark on its cultural and architectural landscape. It fell under Roman, Byzantine, Norman, Spanish, and French rule, and each era brought with it distinct influences that shaped the city’s identity. From Roman amphitheaters and Byzantine mosaics to Spanish baroque buildings and French boulevards, Naples stands as a living testament to its varied past.

The city also played a significant role in the Italian unification in the 19th century. Today, it boasts a strong sense of regional identity and retains its unique Neapolitan dialect, demonstrating its ability to balance preservation of its rich heritage with a thriving, modern lifestyle. This fusion of old and new defines Naples and offers an unforgettable historical voyage to its visitors.

A Guide to Tourism in Naples, Italy

Experience the allure of Naples, a top-tier tourist destination renowned for its mesmerizing views, rich history, and world-class attractions. Naples brims with places to visit, from ancient ruins and museums showcasing Italy’s cultural legacy to vibrant markets and shops offering local crafts and delights.

Exploring Naples’ historical core, a UNESCO World Heritage site, is akin to walking through a living museum. Discover sites like the Naples National Archaeological Museum, home to one of the world’s most extensive collections of Greek and Roman antiquities. Step inside the city’s opulent churches and chapels or stroll along the Spaccanapoli street, the historic heart of the city, for a sensory overload of sights, sounds, and smells.

Of course, a trip to Naples isn’t complete without a boat ride to the iconic Isle of Capri or a hike up Mount Vesuvius. Also, with its proximity to the ancient cities of Pompeii and Herculaneum, Naples serves as a gateway to some of Italy’s most famous archaeological sites. From vibrant city life to natural beauty and historic marvels, Naples offers tourists an eclectic mix of experiences.

Relishing Naples, Italy’s Sumptuous Cuisine

Savor the flavors of Naples, the birthplace of pizza, and indulge in its renowned cuisine that’s celebrated worldwide. Neapolitan food stands as a testament to the city’s love for fresh, local ingredients and traditional cooking methods. From hearty pasta dishes to mouth-watering street food, Naples promises a gastronomic delight for every palate.

No visit to Naples would be complete without trying its iconic pizza. Authentic Neapolitan pizza, characterized by its thin, soft, and chewy crust, is a must-try delicacy, best enjoyed in local pizzerias. Margherita and Marinara are the traditional varieties, featuring simple yet delicious toppings. A trip to Naples also provides an opportunity to discover lesser-known local specialties, such as ‘sfogliatella’, a crispy pastry filled with sweet ricotta cream, and ‘cuoppo’, a paper cone filled with fried seafood.

However, the city’s culinary culture extends beyond food. Naples is also renowned for its coffee, specifically the espresso, served in charming cafés dotted throughout the city. The local food and drink scene reflects Naples’ vibrant lifestyle and its inhabitants’ passion for good food, making it a veritable paradise for food lovers.

Trattoria Da Papa’
Via Nuova del Campo, 56, 80141 Napoli NA, Italy

Trattoria Da Papa
Trattoria Da Papa

The Trattoria Da Papà in Naples is an exciting place. The small size and the warm atmosphere preserve the great love with which the young chef Giovanni and his family prepare and serve simple dishes at the same time. and innovative, traditional, and refined. A small place for great cuisine.

Mastering the Italian Pasta Salad Recipe

Get ready to create a flavorful Italian Pasta Salad that’s not just easy to make, but also packed with vibrant tastes. This recipe involves a critical step where the pasta cools in the refrigerator for an hour. This chill time allows all the flavors to meld beautifully, enhancing the overall taste of the salad. So, clear your kitchen counter, gather your tools, and prepare to whip up an enticing Italian Pasta Salad.

Start by procuring all the necessary ingredients. Be meticulous in choosing fresh vegetables, a selection of your favorite pasta, and high-quality olives and cheese. The ingredients play a pivotal role in bringing out the authentic Italian taste in the salad. Also, ensure you have the right kitchen equipment at hand, including a good-quality pasta pot, a sharp knife for dicing, and a large mixing bowl.

Now, you’re all set to embark on this delightful culinary journey. Following the recipe step by step will help you achieve the perfect blend of flavors in your Italian Pasta Salad. Remember, patience is crucial, especially during the hour-long refrigeration process. Rest assured, your efforts will culminate in a refreshing, wholesome salad that brings a slice of Italy to your dining table.

Gathering Essentials for Italian Pasta Salad

Crafting the Italian Pasta Salad begins with ensuring you have all the necessary elements. Your shopping list should include a variety of fresh vegetables, your preferred type of pasta, high-quality olives, and authentic Italian cheese. Essential kitchen tools you’ll need are a large pot for boiling the pasta, a colander for draining, a sharp knife for chopping the vegetables, and a large bowl for mixing everything together. Having everything ready at the start will streamline the cooking process and bring you one step closer to savoring this delightful Italian dish.

Equipment Needed

  • 1 Cooking Pot
  • 1 Colander
  • 1 Knife
  • 1 Mixing Bowl
  • 1 Cheese Grater

Ingredients Needed

  • 16 oz fusilli pasta
  • ½ cup black olives sliced
  • ½ cup green olives sliced
  • 1 cup grape tomatoes halved
  • ½ large red onion chopped
  • 1 cup Salami chopped
  • ¼ cup parmesan cheese grated
  • ½ cup Italian salad dressing

Time needed: 1 hour and 15 minutes

How to Cook Italian Pasta Salad

  1. Cook your pasta as directed, until just al dente. Drain and set aside for 10 minutes.

  2. Add the pasta to a mixing bowl. Add the remaining ingredients, except for the dressing, until combined. Add the dressing and mix until just incorporated.

  3. Transfer to a salad bowl and serve immediately, or refrigerate it for at least an hour, to chill.

If you liked this dish please Rate This Recipe and leave a comment.

Italian Pasta Salad
Print

Italian Pasta Salad

This Italian Pasta Salad radiates both simplicity and delight. It harmoniously marries together the hearty pasta with juicy tomatoes, freshly grated parmesan cheese, tangy olives, and spicy salami. The dish gets its final touch with a generous drizzle of zesty Italian dressing, creating a salad that's easy to make yet bursting with authentic Italian flavors.
Course Salad
Cuisine Italian
Keyword Pasta, Salad
Prep Time 5 minutes
Cook Time 10 minutes
Refrigeration Time 1 hour
Total Time 1 hour 15 minutes
Servings 6 servings
Calories 489kcal

Ingredients

Instructions

  • Cook your pasta as directed, until just al dente. Drain and set aside for 10 minutes.
    16 oz fusilli pasta
  • Add the pasta into a mixing bowl. Add the remaining ingredients, except for the dressing, until combined. Add the dressing and mix until just incorporated.
    ½ cup black olives, ½ cup green olives, 1 cup grape tomatoes, ½ red onion, 1 cup salami sausage, ¼ cup parmesan cheese, ½ cup Italian salad dressing
  • Transfer to a salad bowl and serve immediately, or refrigerate it for at least an hour, to chill.

Nutrition

Calories: 489kcal | Carbohydrates: 62.8g | Protein: 21.3g | Fat: 18.3g | Saturated Fat: 6.9g | Cholesterol: 44mg | Sodium: 638mg | Potassium: 125mg | Fiber: 4g | Sugar: 4.8g | Calcium: 295mg | Iron: 5mg

Perfect Pairings: Complementing Your Italian Pasta Salad with These Recipes

Imagine a table adorned with your scrumptious Italian Pasta Salad, the star of your meal. Yet, what else can you prepare to accompany this vibrant dish and craft a well-rounded, satisfying meal? Here, we present a collection of recipes that harmonize beautifully with your pasta salad, each contributing unique flavors and textures to your culinary spread.

Baked Spaghetti and Meatballs
The Spaghetti is tossed in a marinara sauce and baked with tasty meatballs and a melted layer of mozzarella cheese.
Check out this recipe
Baked Spaghetti and Meatballs
Spaghetti alla Bolognese
The rich Bolognese sauce is full of flavor, thick, and will make you forget about canned spaghetti sauce. You can use it with any type of pasta or as a stand-alone stew with some crackers.
Check out this recipe
Spaghetti alla Bolognese

In conclusion, pairing your Italian Pasta Salad with these suggested recipes creates a delectable dining experience. Each dish, with its distinctive taste, complements the vibrant flavors of the pasta salad, thereby crafting a well-rounded and balanced meal. Whether it’s for a casual weekday dinner or a grand weekend feast, this selection promises a culinary adventure that’ll have your guests asking for more. So put on your apron, gather your ingredients, and start your journey towards an unforgettable Italian dining experience.

Photo Credits:

  • By Taste The World Cookbook – Copyright 2022 All rights reserved.
  • By Trattoria Da Papa’ – By https://trattoriadapapa.business.site/
  • By it:Utente:…Lord_Zarcon – it:Immagine:Napoli_di_sera_di_alessandro_zarcone.jpg modified, CC BY-SA 3.0, https://commons.wikimedia.org/w/index.php?curid=1686610
  • By pietro scerrato, CC BY 3.0, https://commons.wikimedia.org/w/index.php?curid=54107994
  • By ParsonsPhotographyNL – Own work, CC BY-SA 4.0, https://commons.wikimedia.org/w/index.php?curid=86676222
  • By ho visto nina volare – Flickr: Napoli 2012, CC BY-SA 2.0, https://commons.wikimedia.org/w/index.php?curid=23782920
  • By Sordelli – Own work, CC BY-SA 3.0, https://commons.wikimedia.org/w/index.php?curid=113226367

Mastering French-Style Deviled Eggs

0
French-Style Deviled Eggs

Exploring culinary boundaries can often lead to discovering delectable delicacies. Such is the case with our French-Style Deviled Eggs, a deviation from the classic American version that is both intriguing and delicious. Originating from the cultural hub of Nantes in France, these deviled eggs are remarkable, and their distinguishing factor lies in the liberal use of red wine vinegar. This unique ingredient infuses the dish with a characteristic tartness, offering a tangy twist to the familiar flavors of deviled eggs.

In the early stages of perfecting this recipe, a teaspoon of red wine vinegar was added to the mix. The resultant burst of flavor, though impressive, may surprise those accustomed to the mildness of traditional deviled eggs. To cater to a wider range of palates, an alteration was made to the recipe. The vinegar quantity was halved for the subsequent batch, yielding a toned-down version with a subtle tanginess that complemented the creamy egg filling beautifully.

The beauty of this French-Style Deviled Eggs recipe lies in its versatility and room for customization. Though red wine vinegar takes center stage in this version, adjustments can be made according to individual preferences. It’s all about striking the perfect balance between retaining the essence of the original French recipe and catering to your personal taste.

Diversifying Your Palette: Innovative Twists to Deviled Eggs

The traditional deviled eggs recipe has been a beloved staple in many households, celebrated for its creamy, flavorful filling. However, it’s always exciting to experiment with this classic dish by adding a little flare to your preparation. Consider adorning your deviled eggs with eclectic toppings such as crispy bacon, ripe avocados, spicy jalapenos, crunchy fried onions, or even succulent lobster for an upscale twist.

In addition to diversifying the toppings, the egg whites themselves can undergo various treatments to create unique variations of this dish. From pickling to grilling to frying, these methods each lend a distinctive taste and texture to the egg whites, further enhancing the overall appeal of your deviled eggs. Such innovative recipes are bound to impress at any gathering, whether it be a picnic, party, or barbecue.

Remember, the joy of cooking lies in experimentation and innovation. There are endless ways to reinvent deviled eggs, turning this classic dish into a canvas for culinary creativity. So, don’t hesitate to try something new the next time you’re making deviled eggs. You never know, your unique creation might just become the next crowd favorite.

Effective Storage Techniques for Deviled Eggs

Eggs are a staple in many households, but effective storage methods are crucial to maintaining their freshness and safety. For store-bought eggs that have undergone washing, a refrigerated environment ensures a shelf life of approximately 45 days. For those opting for countertop storage, a thin vaseline coating on the eggshell can prevent bacteria infiltration, extending its freshness for up to 21 days.

Cooked eggs require different storage considerations. After preparation, these can be safely stored in the refrigerator for up to four days. While freezing cooked eggs is an option, it’s crucial to note that their taste is best preserved when consumed within three to six months of preparation.

Deviled eggs, with their creamy filling and delicate structure, also require specific storage measures to maintain their taste and appearance. To prevent them from turning soggy or losing their shape, avoid refrigerating uncooked deviled eggs. Cooked deviled eggs, however, can be safely refrigerated for up to four days. When it comes to freezing, place cooked eggs on a tray in the freezer until fully frozen. After freezing, transfer them to an airtight container to prevent freezer burn and keep them flavorful.

Tracing the Origins: The Intriguing History of Deviled Eggs

Our journey into the captivating history of deviled eggs takes us back to the grandeur of ancient Rome, where the first recorded preparation of this dish was found. Romans relished boiled eggs adorned with spicy sauces, often serving them as a first course during meals. This practice set the stage for the birth of the modern-day deviled egg.

The evolution of deviled eggs witnessed an important milestone in 13th-century Spain. Here, culinary innovations led to the mashing of yolks, a technique that allowed the preparation of a stuffing for the eggs. By the 15th century, this concept had spread across Europe, and the version of deviled eggs that we are familiar with today began to take shape.

The beauty of the deviled eggs lies not just in their rich, creamy taste but also in their deep historical roots that span across centuries and civilizations. Its evolution from a simple boiled egg in ancient Rome to the diverse variations we see today is a testament to the transformative power of culinary creativity. So, the next time you bite into a deviled egg, remember that you’re partaking in a tradition that has been enjoyed for centuries.

Nantes: The Vibrant Metropolitan City in Western France

Nestled on the banks of the Loire River, the metropolitan city of Nantes serves as a historical and industrial hub in the Upper Brittany region of western France. It’s a city steeped in history, with its medieval Château des Ducs de Bretagne standing as a testament to its past. Once home to the Dukes of Brittany, the castle has since been restored and converted into a history museum, boasting multimedia exhibits and offering visitors a walk atop its fortified ramparts.

Visitors to Nantes are treated to an array of experiences that span history, culture, and gastronomy. The city’s well-preserved architecture is a sight to behold, showcasing styles from different eras. While the medieval castle offers a glimpse into the city’s past, the modern urban landscape highlights Nantes’ growth and evolution.

Whether you’re a history buff, an art lover, or a foodie, Nantes has something to offer. Its rich heritage, coupled with its vibrant contemporary culture, makes this city a must-visit destination. Nantes is a city that expertly balances the preservation of its past with the dynamism of the present, making it a treasure trove of experiences waiting to be discovered.

Unearthing the Past: A Glimpse into the History of Nantes, France

The history of Nantes is as fascinating as the city itself. The region was initially settled during the Bronze Age, a period later than the surrounding regions, which already had Neolithic monuments. Its first inhabitants were likely lured by small deposits of iron and tin present in the subsoil. The area’s export of tin, mined in Abbaretz and Piriac, extended as far as Ireland.

Over a thousand years, a local industry emerged around 900 BC, with evidence of smithies dating back to the eighth and seventh centuries BC found in the city. Historians believe Nantes may have been the major Gaulish settlement of Corbilo, documented by Greek historians Strabo and Polybius, and situated on the Loire estuary.

The Roman Empire’s influence over Nantes was profound during the early Middle Ages. Although many parts of Brittany experienced significant Breton immigration, severing ties with Rome, Nantes continued its alliance with the empire until its fall in the fifth century. However, the French Revolution caused economic havoc for Nantes, significantly impacting the local economy and trade with European countries. Despite this setback, Nantes carries the echoes of its past into its present, forever marked by its historical journey.

Experiencing Nantes: Uncovering the City’s Cultural and Touristic Highlights

Nantes is a city teeming with cultural, artistic, and historic attractions. Among its notable sites is the newly refurbished natural history museum, a haven for those interested in the evolution of flora and fauna. For art enthusiasts, the Musée des Beaux-Arts is a must-visit. Housing works dating from the 13th to the 19th century, the museum also showcases an impressive contemporary art collection.

The cultural richness of Nantes extends beyond its museums and historical landmarks. The city has a thriving live music scene, catering to a variety of tastes, and even boasts its own opera house. Additionally, Nantes hosts a vibrant calendar of events, including a much-anticipated carnival in April.

Visiting Nantes offers an immersive experience, filled with culture, history, and entertainment. Whether you’re an art lover, a history enthusiast, or a music fan, Nantes provides a plethora of attractions that cater to all tastes. Step into the heart of this vibrant city, and let it sweep you off your feet with its captivating charm and energy.

Savoring Nantes: An Exploration of its Unique Cuisine

Nantes’ cuisine may not have a single signature dish like Lyon or Marseille, but it does offer an enticing array of culinary delights. As a seaport, Nantes has a strong tradition of preparing sumptuous fish dishes. Zander, salmon, and pike are among the local favorites, each crafted into delectable dishes by the city’s skilled chefs.

Nantes’ past as France’s largest slaving port also plays a significant role in shaping its cuisine. Over 2,000 slave ships embarked from Nantes, heading for the Guinean coast, Haiti, and the West Indies. The long sea journeys necessitated the creation of cakes and biscuits that could withstand the passage of time. One such creation is the gateau nantais, a mix of brown cane sugar, flour, eggs, and often heavily laced with rum from the Antilles.

The cuisine of Nantes, shaped by its maritime tradition and historical past, offers an eclectic mix of flavors to its residents and visitors. Whether you’re sampling the local seafood or trying out the long-lasting baked goods, the unique taste of Nantes is sure to delight your palate. This fusion of past and present in its cuisine is what makes Nantes’ food culture truly unique and intriguing.

Restaurant Chantenay Nantes – A Boire et à Manger
16 Rue de la Marseillaise, 44100 Nantes, France

Restaurant Chantenay Nantes - A Boire et à Manger
Restaurant Chantenay Nantes – A Boire et à Manger

Something between a canteen and a neo-bistro, this is the type of spot we hope to find in every neighborhood. Karine Bourgeois has imagined a hangout for friends and neighbors, where her smiling welcome gives the place a feeling of joy and warmth. With a good time sure to be had, sit down to discover the chef’s healthy and tasty proposals, all made from fresh products, before toasting with one of the honorable Loire wines on the menu.

Mastering French-Style Deviled Eggs: A Step-by-Step Guide

The culinary journey into the realm of French-style deviled eggs is one filled with taste and excitement. This recipe hails from the scenic city of Nantes, France, and brings a twist to the conventional American-style deviled eggs. The standout flavor here is the red wine vinegar, which imparts a unique tanginess that perfectly complements the creamy filling. You may wish to adjust the vinegar quantity based on your preference. After experimenting with the recipe, we found halving the original quantity of vinegar resulted in a more balanced flavor profile.

The process of making these deviled eggs is straightforward and quite enjoyable. First, you’ll prepare the hard-boiled eggs, then carefully remove the yolks to create a filling. This filling combines the yolks with other flavorful ingredients, including the red wine vinegar, to create a creamy, tangy mixture. Once filled, the eggs are usually garnished with fresh herbs or spices for an added layer of flavor.

French-Style Deviled Eggs aren’t just a delicious appetizer, they’re also a conversation starter. Their unique flavor, different from the traditional American deviled eggs, introduces a new taste experience that’s sure to intrigue and satisfy. And since they are quick and easy to make, they’re perfect for serving at get-togethers, parties, or as a part of a larger spread.

Essentials for Crafting French-Style Deviled Eggs

Before embarking on the culinary adventure of creating French-Style Deviled Eggs, it’s crucial to ensure you have all the necessary equipment and ingredients at hand. The basic utensils include a pot for boiling the eggs, a bowl for mixing the filling, and a piping bag or spoon for filling the egg whites. The key ingredients include eggs, red wine vinegar, mayonnaise, and mustard, along with your choice of garnish. Having everything ready before you start makes the cooking process smoother and more enjoyable.

Ingredients for French-Style Deviled Eggs

Equipment Needed

  • 1 Large Sauce Pan
  • 1 Knife
  • 1 Mixing Bowl

Ingredients Needed

  • 6 eggs
  • ¼ cup mayonnaise
  • 1 tsp red wine vinegar
  • 1 tsp grainy Dijon mustard
  • 1 tsp lemon juice
  • 2 tbsp minced shallots or minced red onion
  • salt and black pepper to taste

Time needed: 25 minutes

How to Make French-Style Deviled Eggs

  1. Boil the Eggs

    Place the eggs in a pot with cold water about an inch over the eggs. Bring to a boil. Once water is boiling, cover and remove from heat. Let it sit for 12 Minutes. Then transfer the eggs to a colander and rinse with cold water to stop the cooking process.

  2. Peel the Eggs

    Peel the eggs, and remember it can sometimes be hard and if they don’t peel perfectly that’s OK.

  3. Cut the Eggs

    Using a sharp knife, cut the peeled eggs in half lengthwise. Use a spoon to carefully remove the yolks, and set them aside in a small bowl. Place the egg whites onto a platter, or another kind of serving dish.

  4. Mix the Filling

    Add all ingredients, except the thyme garnish (if using) to the egg yolks. Using a fork, smash and stir all ingredients together until fully incorporated. Lemon juice is optional because it can make the filling a bit more runny than normal.

  5. Fill the Eggs

    For a fancy clean look, use a clear plastic Ziploc bag to pipe the filling into the eggs. Place the filling in the corner of a bag, and cut the edge (about 1/2″) off the bag. Fill each egg. If you don’t want to use a bag, simply spoon in the filling.

  6. Refrigerate and Serve

    Refrigerate until ready to serve.

French-Style Deviled Eggs
Print

French-Style Deviled Eggs

Embrace the charm of French cuisine with these exquisite French-Style Deviled Eggs. This innovative recipe elevates the classic deviled eggs by incorporating refined ingredients such as shallots, fresh lemon juice, and thyme. Each bite promises a burst of tangy, aromatic flavors, offering a novel and sophisticated take on the traditional favorite. Whether you're hosting a brunch or looking for an elegant appetizer, these French-Style Deviled Eggs are a delightful choice.
Prep Time 15 minutes
Cook Time 10 minutes
Total Time 25 minutes
Servings 12 servings
Calories 52kcal

Ingredients

Instructions

  • Place the eggs in a pot with cold water about an inch over the eggs. Bring to a boil. Once water is boiling, cover and remove from heat. Let sit for 12 Minutes. Then transfer the eggs to a colander and rinse with cold water to stop the cooking process.
    6 eggs
  • Peel the eggs, and remember it can sometimes be hard and if they don’t peel perfectly that’s OK.
  • Using a sharp knife, cut the peeled eggs in half lengthwise. Use a spoon to carefully remove the yolks, and set them aside in a small bowl. Place the egg whites onto a platter, or other kind of serving dish.
  • Add all ingredients, except the thyme garnish (if using) to the egg yolks. Using a fork, smash and stir all ingredients together until fully incorporated. Lemon juice is optional, because it can make the filling a bit more runny than normal.
    ¼ cup mayonnaise, ½ tsp red wine vinegar, 1 tsp dijon mustard, 1 tsp lemon juice, 2 tbsp shallots, salt, black pepper
  • For a fancy clean look, use a clear plastic Ziploc bag to pipe the filling into the eggs. Place the filling in the corner of a bag, and cut the edge (about 1/2″) off the bag. Fill each egg. If you don’t want to use a bag, simply spoon in the filling.
  • Refrigerate until ready to serve.

Nutrition

Serving: 1egg | Calories: 52kcal | Carbohydrates: 1.7g | Protein: 2.9g | Fat: 3.9g | Saturated Fat: 0.9g | Cholesterol: 83mg | Sodium: 71mg | Potassium: 37mg | Sugar: 0.5g | Calcium: 13mg

Complementing Dishes for French-Style Deviled Eggs

As delightful as our French-Style Deviled Eggs are, the dining experience can be further enhanced by pairing them with the perfect complementing dishes. Here, we’ve curated an exquisite selection of recipes that balance and accentuate the refined flavors of the deviled eggs. Whether you’re seeking a main course, a side dish, or a dessert, these selections promise to create a harmonious dining experience that highlights the best of French cuisine.

Garlic Roast Chicken With White Wine Sauce
This recipe offers an exquisite culinary experience where the chicken is delicately stuffed with zesty lemon and aromatic bay leaves. It's then beautifully roasted in a mouth-watering fusion of white wine and rosemary, accompanied by a generous infusion of twenty garlic cloves. The end result is a flavourful symphony that elegantly combines the tang, aroma, and subtle sophistication of its ingredients.
Check out this recipe
Garlic Roast Chicken With White Wine Sauce
Lyonnaise Potatoes
Fried potatoes with onions in butter and garlic. Do your tastebuds a favor and throw them a party of Lyonnaise Potatoes so they can do the happy dance.
Check out this recipe
Lyonnaise Potatoes
Strawberry Cream Puffs
The pastry is filled with a sweet and tasty strawberry cream filling. It is perfect for a Sunday brunch, with coffee and tea, an after-dinner dessert, or on a romantic date.
Check out this recipe

We hope these suggested pairings have inspired your next meal planning endeavor. Remember, the beauty of French cuisine lies in its diversity and rich flavors. Each dish presented here is meant to complement the French-Style Deviled Eggs, creating a comprehensive and delightful meal. Whether you follow these suggestions or choose to explore your culinary creativity, we’re confident that your experience with these deviled eggs will be nothing short of exquisite. Enjoy your culinary journey!

Photo Credits:

  • By Taste The World Cookbook – Copyright 2022 All rights reserved.
  • By Restaurant Chantenay Nantes – A Boire et à Manger – By https://www.facebook.com/aboireetamangernantes/
  • By Eric Brosselin – Own work, CC BY-SA 3.0, https://commons.wikimedia.org/w/index.php?curid=29150890
  • By Jean-Pierre Dalbéra from Paris, France – Cour intérieure du château des ducs de Bretagne (Nantes), Public Domain, https://commons.wikimedia.org/w/index.php?curid=24666561
  • By Velvet – Own work, Public Domain, https://commons.wikimedia.org/w/index.php?curid=10346301
  • By Jibi44 – Own work, CC BY-SA 3.0, https://commons.wikimedia.org/w/index.php?curid=4206312
  • By © Guillaume Piolle, CC BY 3.0, https://commons.wikimedia.org/w/index.php?curid=5167485

Crafting Siu Mai (Shumai) – Chinese Steamed Dumplings Masterclass

0

Hailing from the vibrant city of Hohhot, China, Siu Mai, also known as Shumai, are irresistible steamed dumplings that are a delight to the palate. Each dumpling boasts a filling of shiitake mushrooms, ground pork, soy sauce, Shaoxing wine, shrimp, and green onions, all cocooned within delicate wonton wrappers. Once steamed, these dumplings exude a moist texture, the fillings blend harmoniously to impart authentic Chinese flavors in each bite.

Embracing the heart of Chinese culinary tradition, the crafting of Siu Mai requires careful assembly and technique. From dicing the ingredients to a uniform size, ensuring the filling is well seasoned, to the art of folding the wonton wrappers around the flavorful mixture, each step demands attention. Despite the precision required, making these dumplings can be a gratifying experience, the process offering a glimpse into the rich food culture of China.

As an appetizer, Siu Mai sets the stage for a meal, its exquisite blend of flavors rousing the appetite. If served as a snack, these dumplings prove to be a delightful indulgence. With a side of soy sauce for dipping, the savory taste of the dumplings is elevated, making each Siu Mai an enchanting culinary journey to the streets of Hohhot.

Embarking on a Global Journey: Varieties of Siu Mai (Shumai)

Much like a linguistic dialect changes with geography, so does the culinary expression of the humble dumpling. From the stuffed and sealed Italian Ravioli, and the deliciously deep-fried Polish Piroshky, to the corn dough-encased Puerto Rican Guanimes, every culture has its unique interpretation of a dumpling.

Venturing to Hohhot, the regional shaomai takes center stage. Moving south to the bustling hub of Cantonese cuisine, the siumaai variety is a local favorite. In Changsha, the capital of Hunan province, chrysanthemum shaomai is the version of choice, while the Jiangnan region prides itself on its unique Shaomai. Further northwest, the Uyghur people of Xinjiang contribute their regional varieties to the mix. Lastly, the southeastern region of Jiangxi province holds a special place for Yifeng shaomai.

In this worldwide journey of Siu Mai, we not only encounter the diversity of ingredients and cooking techniques but also appreciate the shared love for these bite-sized delights. Every regional variant is a testament to the enduring appeal of dumplings and an embodiment of the local culture and gastronomic preferences. Each Siu Mai offers a taste of the place it comes from, a flavorful window into the world’s culinary landscape.

Preserving the Delicacy: Best Practices for Storing Siu Mai (Shumai)

Storing uncooked Siu Mai requires delicate handling to maintain their texture and shape. Refrigeration is not an ideal option, as the moisture could seep into the dumpling skins, leading to a soggy texture and causing the dumplings to stick to each other or to the storage container. Therefore, to keep your uncooked dumplings fresh, it’s best to cook them immediately after preparation.

On the other hand, if you find yourself with leftover cooked Siu Mai, they can be safely stored in the refrigerator. Place the cooked dumplings in an airtight container and refrigerate for up to 4 days. It’s crucial to ensure their consumption within this time frame to avoid any potential spoilage.

For longer storage, freezing cooked Siu Mai is a reliable option. To do this, lay the dumplings out on a tray and place it in the freezer, allowing them to freeze individually. Once fully frozen, usually after about half an hour, transfer the dumplings to a zipper-lock freezer bag. Make sure to squeeze out as much air as possible before sealing the bag, then store the dumplings for up to two months. This method prevents the dumplings from sticking together and ensures they retain their shape and flavor when reheated.

Tracing the Roots: Origin and Evolution of Siu Mai (Shumai)

While most associate Siu Mai with the Cantonese culinary tradition, historical records trace the origin of this delicacy to Hohhot, the capital of China’s Inner Mongolia autonomous region. The dish, known as suumai in the local dialect, translates to “without being cooled down” in Mongolian. The uniqueness of Siu Mai lies not only in its delightful taste but also in its intriguing history.

In its journey from Hohhot to the rest of China, Siu Mai underwent transformations in its recipe, adapting to local tastes and available ingredients. Despite these changes, the fundamental essence of the dish remained intact – a delicious filling encased in a thin wrapper, the top left open to reveal the enticing filling within.

Over time, Siu Mai became a staple in dim sum cuisine, gaining popularity far beyond the boundaries of China. Today, whether served in high-end restaurants or bustling street food stalls, this steamed dumpling stands as a testament to the enduring culinary heritage of Hohhot and the broader Chinese cuisine.

Gateway to Inner Mongolia: Exploring the Metropolitan City of Hohhot, China

Hohhot, once known as Kweisui, currently serves as the capital of Inner Mongolia in northern China. It has established itself as the region’s administrative, economic, and cultural center, effortlessly embodying the essence of Inner Mongolia. With a population reaching towards 1.6 million, Hohhot presents a dynamic blend of traditional heritage and modern vibrancy.

Though Hohhot only became the capital of Inner Mongolia in 1947, it rapidly evolved into the region’s industrial and economic powerhouse. This growth, however, did not overshadow the city’s cultural roots. Despite the indigenous Mongols constituting only around 11% of the city’s population, Mongolian Buddhism continues to flourish here, and the city actively preserves its Mongolian culture.

The city’s cultural richness, combined with its modern amenities, make Hohhot a captivating destination. From historical sites echoing past eras to bustling markets showcasing local crafts and cuisine, Hohhot offers a unique experience for every visitor. The city stands as a proud testament to the resilience and adaptability of the Mongolian people.

Through Time and Tradition: A Glimpse into the History of Hohhot, China

Hohhot’s historical narrative is deeply intertwined with its geographic position on the edge of the Han Chinese settlements. The city’s initial development as Kuku-khoto was marked by its emergence as a significant religious center for Tibetan Buddhism, known as Lamaism, during the 16th century. Its strategic position as a frontier trading center contributed to its growing prominence.

By the mid-17th century, towards the end of the Ming period, Han Chinese began to settle in the fertile plains surrounding the city. The new settlers named the city Guihua, translating to “Return to Civilization,” signifying the transformative process the city was undergoing. Subsequently, in the mid-18th century, a new city, Suiyuan, sprouted a few miles north of Guihua. Eventually, the two cities merged under the name Guisui, with the combined city flourishing as a vibrant frontier market with a considerable Muslim trading community.

The pivotal point in Hohhot’s history was in 1928 when it became the provincial capital following the establishment of Suiyuan sheng. As part of the larger policy to integrate Inner Mongolia with Chinese civil administration, this move marked the beginning of a new chapter in Hohhot’s narrative. By 1954, the city had been renamed Hohhot, which in Mongolian translates to “Green City,” symbolizing its vibrant, evolving identity.

Unveiling the Charm: The Joys of Tourism in Hohhot, China

While Hohhot might lack an abundance of historical and tourist sites, the city’s charm lies in its unique blend of tradition and modernity. The city is at its most resplendent in Spring and early Summer when the lush greenery accentuates its natural beauty. It provides a captivating destination for anyone looking to explore the less traveled paths.

In Hohhot, the interplay of past and present is evident at every turn. You can wander through bustling markets selling traditional crafts, taste local cuisines in vibrant food stalls, or delve into history in one of the city’s museums. Whether you’re exploring ancient Buddhist temples or strolling along modern boulevards, Hohhot offers a glimpse into the rich tapestry of Inner Mongolian culture.

The city’s unique position as the gateway to Inner Mongolia offers further possibilities for exploration. From the grasslands that stretch out in all directions to the intriguing culture of the Mongolian people, Hohhot presents an unforgettable journey for those seeking to experience the magic of Inner Mongolia.

A Culinary Journey: Discovering the Delights of Hohhot Cuisine

Hohhot’s culinary scene is characterized by its focus on Mongol cuisine and dairy products. The city is recognized for its significant contributions to China’s dairy industry, housing renowned dairy giants Yili and Mengniu. One signature drink that captures Hohhot’s love for dairy is suutei tsai, a traditional Mongolian milk tea that has become a popular breakfast choice for locals and visitors alike.

Food in Hohhot isn’t just about sustenance; it’s a cultural experience. The city showcases its rich culinary traditions through popular dishes like hot pot and Siu Mai, a type of traditional Chinese dumpling that’s part of dim sum. The blend of local flavors with a variety of cooking techniques has resulted in a cuisine that is as diverse as it is delicious.

Due to Hohhot’s sizeable Hui Muslim population, many restaurants cater to halal dietary requirements, evident by the green or yellow signs outside these establishments. While pork is not served, it opens the door for an assortment of delectable mutton dishes to be savored. The unique food culture of Hohhot invites visitors to embark on a gastronomic adventure, one that promises to delight and surprise with every bite.

Shang Palace
Xincheng District, Hohhot, Hohhot, Inner Mongolia, China, 010090

Shang Palace Chinese Restaurant

Shang Palace Chinese Restaurant is located on the second floor of Shangri-La Hotel, Shenzhen, with a superior location and an elegant and chic restaurant environment. The chef team led by Stan Zhou uses authentic local dishes to deduce Cantonese cuisine respecting the original method and adapting to the tastes. They are constantly looking for inspiration in life, according to natural regulations and habits, and maximize the advantages of fresh ingredients.

Cantonese cuisine inherits the custom of intensive cultivation and pays attention to the excellence of cooking in Cantone. The range of Cantonese cuisine includes the Pearl River Delta, Shaoguan, Zhanjiang, and other places. It has the characteristics of refreshing, fresh, tender, and slippery with The “five nourishments” and “six flavors”.

The hand-made Cantonese Dim Sum, which has been in the hands of Chef Zeng for more than 20 years, is also well-known far and wide, attracting the surrounding diners to check in on Shang Palace’s gourmet secrets.

Savoring the Authenticity: Crafting Your Own Siu Mai (Shumai) Recipe

Making Siu Mai at home might seem a daunting task due to the exotic ingredients involved. However, the process becomes more straightforward once you’ve gathered all the necessary items. The ingredient that might prove challenging to procure is Flying Fish Caviar, but its distinctive flavor and texture make the effort worthwhile.

To begin with, gather your equipment and lay out your ingredients. This preparation ensures a smooth cooking process, as the recipe moves rather swiftly. The key to successfully crafting Siu Mai lies in paying attention to details – from the consistency of the filling to the way you fold the wonton wrappers.

By embarking on this culinary journey, not only do you get to enjoy a delicious serving of Siu Mai at the end, but you also gain an appreciation for the skill and artistry that goes into making this iconic dish. Whether you’re a seasoned cook or a novice in the kitchen, making your own Siu Mai offers a rewarding and flavorful experience.

Essential Ingredients and Tools for Crafting Chinese Steamed Dumplings

Creating Chinese Steamed Dumplings at home can be a rewarding culinary experience, but it requires having the right ingredients and tools on hand. From the delicate dumpling wrappers that encase the flavorful filling, to the essential steaming equipment, your kitchen should be well-prepared to start this enticing cooking journey. By gathering everything you need beforehand, you will ensure a seamless cooking process, transforming your kitchen into a personal dumpling workshop. Enjoy the process as much as the result – delicious, homemade Chinese steamed dumplings that you can savor with family and friends.

For the Equipment

  • 1 mixing bowl
  • 1 bamboo steamer

For the Dumplings

  • 3 shiitake mushrooms
  • 13 oz ground pork
  • ¾ tsp salt
  • 2½ tsp sugar
  • 1 tsp light soy sauce
  • 1½ tbsp Chinese cooking “Shaoxing” wine
  • 5 oz shrimp
  • 2 tbsp green onions
  • 24 wonton wrappers

For the Garnish

  • 1½ oz flying fish roe Caviar

Time needed: 38 minutes

How to Cook Siu Mai(Shumai) Dumplings

  1. For the Filling:

    Place pork, salt, soy sauce, rice wine, and sugar with the pork meat/mince in a large mixing bowl. Mix vigorously with a spoon or use your hands until it becomes pasty (initially it will be crumbly) – about 30 seconds. Add the mushrooms, prawns, and green onions, and mix thoroughly (don’t crush the prawn meat).

  2. Making Siu Mai

    Form an “O” with your forefinger and thumb. Place a wonton wrapper over the “O”. Push in 1 heaped teaspoon of Filling and push down into the “O” hole. Use a butter knife to smear more Filling into it until level with the edge of the wonton. Place on a work surface and push down to flatten the base and use fingers to shape it into a round.

  3. Steam the Dumplings:

    Line a 12″ bamboo steamer (or stove steamer) with baking paper with holes in it. Fill a wok just below the steamer with water. Bring to a rapid simmer over medium-high heat. Place Siu Mai in a steamer (20 – 25 fits). Place lid on and steam for 8 minutes, or until the internal temperature of dumplings is 165°F. (The bigger the wanton the longer it will take). Remove the steamer from the wok and the dumplings from the steamer. Place a tiny bit of roe in the middle of each dumpling. Serve immediately with dipping sauce!

  4. Siu Mai Dipping Sauce:

    Use 3 parts soy sauce, 1 part Chinese black vinegar or normal white vinegar, and 1 part Chinese chili paste (or Sriracha or another chili). Let people mix their own to their taste.

If you liked this dish please Rate This Recipe and leave a comment.

Print

Siu Mai (Shumai) – Chinese steamed dumplings

Delve into the vibrant flavors of Chinese cuisine with our authentic Siu Mai (Shumai) dumplings. Expertly crafted, these steamed treasures brim with a succulent blend of pork and shrimp, promising an unforgettable bite. Serving as an indulgent main meal for 2 to 3 people or a delightful component of a larger banquet, these dumplings are poised to transport your taste buds straight to the heart of China's rich culinary heritage.
Course Appetizer
Cuisine Chinese
Prep Time 30 minutes
Cook Time 8 minutes
Total Time 38 minutes
Servings 24 dumplings
Calories 156kcal

Ingredients

GARNISH:

Siu Mai Dipping Sauce:

Instructions

Filling:

  • Place pork, salt, soy sauce, rice wine, sugar with the pork meat in a large mixing bowl. Mix vigorously with a spoon or use your hands until it becomes pasty (initially it will be crumbly) – about 30 seconds.
    13 oz ground pork, 2½ tsp white sugar, 1 tsp soy sauce, 1½ tbsp Chinese cooking wine, ¾ tsp salt
  • Add mushrooms, shrimp, and green onions, mix until just dispersed (don't crush the prawn meat).
    3 shiitake mushrooms, 5 oz shrimp, 2 tbsp green onion

Making Siu Mai (Process Steps and Video Helpful!):

  • Form an "O" with your forefinger and thumb. Place a wonton wrapper over the "O". Push in 1 heaped teaspoon of Filling and push down into the "O" hole.
    24 wonton wrappers
  • Use a butter knife to smear more Filling into until level with the edge of the wonton.
  • Place on a work surface and push down to flatten base and use fingers to shape into a round.

Steaming Dumplings:

  • Line a 12" bamboo steamer (or stove steamer) with parchment paper with holes in it.
  • Fill a wok big enough to hold steamer with about 2 cups of water. Bring to a rapid simmer over medium-high heat.
  • Place Siu Mai in a steamer (20 – 25 fits). Place lid on, place in the wok over simmering water.
  • Steam for 8 minutes, or until the internal temperature of dumplings is 165°F. (If yours are bigger, the longer it will take).
  • Remove steamer from wok. Remove lid and remove the dumplings and place a tiny bit of roe in the middle of each dumpling.
    1½ oz flying fish roe
  • Serve immediately with dipping sauce!

Siu Mai Dipping Sauce:

  • Provide soy sauce, Chinese black vinegar or normal white vinegar, Chinese chilli paste (or Sriracha or another chilli). Let people mix their own to their taste (I do: 3 parts soy, 1 part vinegar, as much chilli as I think I can handle).
    3 parts soy sauce, 1 part Chinese black vinegar, 1 part Chinese chili paste

Nutrition

Serving: 1dumpling | Calories: 156kcal | Carbohydrates: 22.6g | Protein: 10.3g | Fat: 1.3g | Saturated Fat: 0.6g | Cholesterol: 65mg | Sodium: 455mg | Potassium: 125mg | Fiber: 0.8g | Sugar: 2.1g | Calcium: 40mg | Iron: 2mg

Complementing Dishes to Pair with Siu Mai (Shumai) – Chinese Steamed Dumplings

As you venture into the intricate world of Chinese cuisine with our Siu Mai (Shumai) recipe, it’s worth considering other authentic dishes that beautifully complement these delectable dumplings. These suggestions aren’t just side notes to the main melody; they’re harmonizing counterparts that weave together a symphony of flavors, enriching your dining experience.

Egg Foo Young
This Egg Foo Young recipe is a symphony of flavors that promises a culinary spectacle right on your plate. This cherished Chinese dish, a sumptuously filled omelet brimming with tender shrimp and vibrant vegetables, is a versatile delight that can elevate your breakfast, lunch, or dinner experience. Every bite you take, every flavor you savor, turns any ordinary day into a gastronomic festival.
Check out this recipe
Egg Foo Young (芙蓉蛋) the Chinese Stuffed Omelette

As we wrap up our gastronomic journey, it’s evident that the realm of Chinese cuisine is rich, diverse, and rewarding. Whether you savored the Siu Mai (Shumai) alongside other Chinese delicacies or chose to revel in their delicate flavors solo, we hope your culinary adventure was as exciting to embark upon as it was delicious. Remember, the beauty of food lies not only in taste but also in the exploration of culture and tradition it permits us. Until our next recipe exploration, happy cooking and bon appétit!

Photo Credits:

  • By Taste The World Cookbook – Copyright 2022 All rights reserved.
  • By Shang Palace Chinese Restaurant – By http://www.shangri-la.com/shenzhen/shangrila/dining/restaurants/shang-palace/
  • By Satbir Singh from London – DSCF2351, CC BY 2.0, https://commons.wikimedia.org/w/index.php?curid=2511854
  • By Fanghong – Own work, CC BY-SA 3.0, https://commons.wikimedia.org/w/index.php?curid=4585796
  • By Popolon – Own work, CC BY-SA 4.0, https://commons.wikimedia.org/w/index.php?curid=63338400

The Indulgent Harmony of Parmesan Creamed Potatoes

0
Parmesan Creamed Potatoes

Hailing from the vibrant culinary scene of Cusco, Peru, our Parmesan Creamed Potatoes offer a comforting fusion of simplicity and indulgence. This side dish takes the humble potato, a staple ingredient in many cuisines, and transforms it into an elegant accompaniment that pairs well with a variety of main dishes.

At the heart of this recipe are the potatoes – cooked until soft and tender, they provide a hearty base for the dish. Each potato, flawlessly prepared, is ready to soak up the rich flavors of the sauce, ensuring every bite is an explosion of taste. The potatoes offer a pleasing contrast between their fluffy interior and slightly firm exterior, a testament to the careful cooking process.

But the true highlight of this dish is the luxuriously thick and creamy sauce, in which the potatoes are generously smothered. This is where the dish gains its depth of flavor. The sauce is then topped with a lavish sprinkle of parmesan cheese, which, as it bakes, forms a tantalizingly crispy top layer. This final touch not only adds a sharp flavor contrast but also introduces a delightful textural element to the Parmesan Creamed Potatoes. With every bite, you’ll appreciate the harmony of soft potatoes, creamy sauce, and crispy parmesan crust, making this dish a true celebration of culinary balance.

The Many Avatars of Potatoes: Exploring Cooking Techniques

Potatoes have earned a reputation for being one of the most versatile ingredients in the kitchen. This versatility comes to light when we consider the array of cooking methods that Diana Leet from Finding Lovers shares, totaling an impressive 61 ways to prepare potatoes. Every method brings out a unique aspect of the potato, transforming this humble ingredient into a culinary masterpiece in its own right. From the simple to the intricate, these cooking techniques reveal the potato’s endless potential.

Some of the most popular ways to enjoy potatoes include creamed potatoes, baked potatoes, and mashed potatoes. Creamed potatoes introduce a layer of indulgence, creating a dish that is both comforting and sophisticated. Baked potatoes, on the other hand, showcase the potato’s ability to stand alone, its crispy skin and fluffy interior proving satisfying on their own. Meanwhile, mashed potatoes represent comfort food at its finest, providing a canvas for flavors ranging from garlic and herbs to cheese and cream.

Of course, there are also more exotic potato dishes that push the culinary boundaries, such as Lionized Potatoes. These unique preparations often draw from diverse culinary traditions, resulting in dishes that offer an exciting and delicious departure from the norm. Regardless of the cooking method you choose, there’s no denying the remarkable adaptability of potatoes in the culinary world.

Proper Storage and Reheating of Potatoes: Maintaining Freshness and Flavor

Potatoes are wonderful when eaten fresh, but leftovers need not go to waste if stored correctly. Proper storage can keep leftover potatoes fresh and tasty for about 3 to 4 days. It’s crucial to use an airtight container for storing potatoes to protect them from exposure to air and moisture, which can lead to spoilage. Keeping the container in the fridge further helps in maintaining their quality, ensuring you can enjoy your potato dishes a little longer.

Reheating potatoes requires some care to preserve their texture and flavor. Dishes such as Parmesan Creamed Potatoes can easily dry out if not reheated properly. Covering the baking dish with aluminum foil and reheating in the oven at 350F can help retain the dish’s moisture, ensuring it’s warmed through without becoming dry or overcooked.

By adopting these methods for storing and reheating potatoes, you can extend their shelf life and retain their quality. This not only helps in reducing food waste but also lets you enjoy your favorite potato dishes whenever you please.

A Historical Journey of the Potato: From Ancient Cultivation to Modern Production

The history of the potato is one of endurance and adaptability. Originating with the Inca Indians in Peru around 10,000 years ago, this hardy tuber has since traveled across continents and centuries to become a global staple. The Spanish Conquistadors, upon their conquest of Peru in 1536, were the first Europeans to encounter the potato. They recognized its potential and carried it back to Europe, marking a significant milestone in the potato’s journey.

The potato’s voyage continued when Sir Walter Raleigh started cultivating it on his vast farm near Cork, Ireland, in 1589. However, it would take nearly four decades for the potato to spread to the rest of Europe. Over time, this versatile crop found its way into fields and kitchens across the continent, its popularity growing with each passing year.

Today, Idaho stands as a testament to the potato’s widespread appeal, being the largest producer of potatoes in the world. The development of the Russet Burbank variety in 1872 marked a significant advancement in potato cultivation, fueling Idaho’s thriving potato industry. This resilient tuber, once a humble staple of ancient Peru, now feeds millions worldwide, demonstrating its invaluable contribution to our food systems.

Cusco, Peru: A Metropolitan Blend of History and Culture

Nestled in the heart of the Peruvian Andes, Cusco reigns as the capital of the Cusco Region and Province. With a population of 428,450 as of 2017, it stands as Peru’s seventh most populous city. This city, perched at an elevation of around 11,200 feet, thrums with life against a backdrop of mountains.

Cusco’s remarkable blend of ancient and modern won it the title of a World Heritage Site by UNESCO in 1983. Its intricate blend of Inca history and Spanish colonial influence create a tapestry of culture that is as intriguing as it is beautiful. From its narrow, cobbled streets to its stunning cathedrals, every inch of the city is steeped in history.

Tourism plays a significant role in the city’s economy, with nearly 2 million visitors arriving each year to experience its magic. Further cementing its historical significance, the Constitution of Peru designates Cusco as the Historical Capital of Peru, a title that reflects the city’s deep roots and its central role in the country’s history.

Cusco: Tracing the Footprints of Inca and Spanish History

The history of Cusco is a saga of civilizations, conquests, and resilience. The Killke people, who occupied the region between 900 and 1200 CE, were the city’s earliest known inhabitants. However, the 13th century marked a dramatic shift when the Inca arrived and established their reign.

During the Inca Civil War, the city fell under Huáscar’s sphere of influence but was later captured by Atahualpa’s generals in the Battle of Quipaipan in April 1532. Less than two years later, Spanish explorers invaded and seized control of Cusco, wielding their superior military technology to subdue the Inca stronghold.

Under Spanish rule, Cusco transformed into the heart of colonization and the spread of Christianity in the Andean world. Agriculture, cattle raising, and mining flourished, as did trade with Spain, enriching the city. Spanish colonists left their mark in the form of numerous churches, convents, a cathedral, a university, and an archdiocese, many of which stand to this day.

Exploring Cusco: The Inca Capital as a Tourist Destination

As the former epicenter of the Inca Empire, Cusco now charms visitors with its archaeological relics and Spanish colonial architecture. At the city’s core lies the Plaza de Armas, a bustling square framed by arcades, carved wooden balconies, and fragments of ancient Incan walls. The Santo Domingo Convent, a baroque structure built on the Incan Temple of the Sun, houses a treasure trove of archaeological remnants of Inca stonework.

Cusco is a city where every street corner whispers tales from the past. Meandering through lanes with evocative names like “Coffin”, “Seven Serpents”, and “Harpies”, you encounter a city where time seems to have paused, where every nook offers a slice of history, and where the stones feel alive with centuries of tales.

The city retains an ancestral magic that enthralls the thousands of visitors who flock here annually. As the acknowledged historic capital of Peru, Cusco continues to be known as the navel of the Earth—a testament to its enduring significance in world history.

A Taste of the Andes: Discovering the Cuisine of Cusco

Cusco, as the capital of the Inca Empire, was a crucial agricultural hub. It was a natural reserve for thousands of native Peruvian species, including around 3,000 varieties of potato cultivated by the Inca. The city’s cuisine reflects this rich agricultural heritage, with traditional Andean ingredients taking center stage.

In Cusco today, you’ll encounter fusion and neo-Andean eateries where cuisine is crafted with contemporary techniques, yet stays rooted in tradition. These establishments offer a gastronomic adventure, creating dishes that weave together the flavors of traditional Andean ingredients with international influences.

Cusco’s culinary scene is an integral part of its identity. Each dish tells a story, from the farms and markets to the tables in bustling restaurants or homely kitchens. Through its cuisine, Cusco offers another window into its unique cultural tapestry.

Marcelo Batata Restaurante
C. Palacio 121, Cusco 08002, Peru

Marcelo Batata Restaurante

OUR NICHE IS CREOLE AND ANDEAN CUISINE: We raise the flavors of that beautiful mixture of races that have allowed us to create an endless number of flavors that each Peruvian carries in their veins.

We are fans of chili peppers, native potatoes, passion flowers, avocados, rice, and corn. Slow cooks and abrasive stoves are our passion.

Mastering the Art of Parmesan Creamed Potatoes: A Step-by-Step Guide

Creating a dish of Parmesan Creamed Potatoes is a culinary adventure that combines simplicity with exquisite flavor. This recipe, while it requires a little over an hour of your time, is not a test of skill but a journey of taste. It’s been called the best potato casserole dish for good reason; every bite carries a melange of creaminess, crunchiness, and a rich blend of flavors that will surely tantalize your taste buds.

To begin, gather your cooking utensils and ingredients. The anticipation of preparing this dish can be as satisfying as the cooking process itself. Imagine the transformation of each ingredient as you combine them, envision the amalgamation of flavors, and feel the excitement of creating a dish that is not just food, but an experience.

As you follow through each step of this recipe, remember that you are not just cooking but creating. Each stir, each simmer, and each bake is a personal touch that you add to the dish. By the time you pull the casserole dish out of the oven, you would have not only made a delicious dish of Parmesan Creamed Potatoes but also participated in a delightful culinary journey.

Gearing Up for Your Parmesan Creamed Potatoes: Ingredients and Tools Checklist

Preparing for the cooking process is crucial in creating a seamless culinary experience. Equip yourself with all the necessary tools and ingredients before embarking on your Parmesan Creamed Potatoes journey. Having everything ready and within reach helps streamline the cooking process, keeping it enjoyable and hassle-free.

Equipment Needed

  • Boiling Pot or Dutch Oven
  • Mixing Bowl
  • Casserole Dish
  • Mixing Spoons
  • Measuring Cups
  • Pot Holders

For the Potatoes

  • 3 lbs russet potatoes peeled and cut into 1-inch chunks
  • 3 cups heavy cream
  • ¼ tsp baking soda
  • ¼ tsp black pepper
  • ½ cup heavy cream
  • 6 tbsp unsalted butter cut into 6 pieces

For the Topping

  • ½ cup parmesan cheese grated
  • ½ cup panko bread crumbs
  • 2 tbsp unsalted butter melted

Cooking Directions for Parmesan Creamed Potatoes

Time needed: 1 hour and 10 minutes

How to Cook Parmesan Creamed Potatoes

  1. Preheat the Oven

    Adjust oven rack to middle position and heat oven to 375°F.

  2. Chop the Potatoes

    Peel and cut your potatoes into one-inch squares.

  3. Cook the Potatoes

    Combine potatoes, 3 cups cream, baking soda, 2 teaspoons salt, and 1 teaspoon black pepper in a large saucepan or Dutch oven. Bring to a boil over medium heat and reduce heat to low.

  4. Simmer the Potatoes

    Cook at a bare simmer, stirring often, until potatoes have softened to fork-tender but not crumbling, about 25-30 minutes.

  5. Mix the Breading

    In a small bowl, combine Parmesan, bread crumbs, melted butter, and ¼ teaspoon salt and set aside for later use.

  6. Spray the Casserole Dish

    Spray a 13×9-inch casserole dish with nonstick cooking spray.

  7. Remove from Heat

    Remove the potatoes from the heat and add the remaining ½ cup cream and 6 tablespoons butter. Stir in gently until the butter has melted, about 1 minute.

  8. Transfer to Casserole Dish

    Pour the potato mixture into the prepared casserole dish and sprinkle evenly with the Parmesan/Panko mixture.

  9. Bake to a Bubbling Perfection

    Bake, uncovered, until golden brown and bubbling around edges, 20-30 minutes.

  10. Cool and Serve

    Allow the dish to cool for 10-15 minutes before serving.

These Parmesan Creamed Potatoes, boasting their delightful creaminess, make a perfect side dish not only for special occasions like Thanksgiving and Christmas, but also anytime you find yourself craving a dose of deliciously creamy potatoes.

If you liked this dish please Rate This Recipe and leave a comment.

Parmesan Creamed Potatoes
Print

Parmesan Creamed Potatoes

Indulge in the comfort and richness of our Parmesan Creamed Potatoes. Effortless to prepare yet filled with creamy goodness, this side dish is a perfect accompaniment to any meal. The highlight is its gratifying topping – a golden crust of crispy panko bread crumbs and luscious Parmesan, lending a delightful contrast to the velvety potatoes beneath. Embark on a gastronomic journey with each bite of this delectable potato casserole.
Prep Time 10 minutes
Cook Time 45 minutes
Resting Time 15 minutes
Total Time 1 hour 10 minutes
Servings 15 people
Calories 237kcal

Equipment

Ingredients

For the Potatoes

For the Topping

Instructions

For the Potatoes

  • Adjust oven rack to middle position and preheat the oven to 375°F.
  • Chop potatoes and combine with heavy cream, baking soda, and black pepper in a large saucepan or Dutch oven. Bring to a boil over medium heat and reduce heat to low.
    3 lbs russet potatoes, 3 cups heavy cream, ¼ tsp baking soda, ¼ tsp black pepper
  • Cook at a bare simmer, stirring often, until potatoes have softened to fork-tender but not crumbling, about 25-30 minutes.
  • Remove from the heat and add the remaining ½ cup cream and 6 tablespoons butter. Stir gently until the butter has melted, about 1 minute.
    ½ cup heavy cream, 6 tbsp unsalted butter

For the Topping

  • Spray a 13×9-inch casserole dish with nonstick cooking spray.
  • In a small bowl, combine Parmesan, bread crumbs, melted butter, and ¼ teaspoon salt; set aside.
    ½ cup parmesan cheese, ½ cup bread crumbs, 2 tbsp unsalted butter

Bake the Dish

  • Pour the mixture into the prepared casserole dish and sprinkle evenly with the Parmesan/Panko mixture.
  • Bake, uncovered, until golden brown and bubbling around edges, 20-30 minutes.
  • Allow the dish to cool for 10-15 minutes before serving.

Nutrition

Serving: 1cup | Calories: 237kcal | Carbohydrates: 17.7g | Protein: 3.7g | Fat: 17.4g | Saturated Fat: 10.7g | Cholesterol: 57mg | Sodium: 131mg | Potassium: 400mg | Fiber: 2.4g | Sugar: 1.3g | Calcium: 67mg | Iron: 1mg

Perfect Pairings: Dishes That Complement Parmesan Creamed Potatoes

When you have a dish as divine as Parmesan Creamed Potatoes, finding the right companions to create a well-rounded meal becomes an exciting culinary quest. Aiming to complement the rich, creamy potatoes without overwhelming their unique flavor, we have curated a list of dishes that strike just the right balance. Each of these recipes brings out the best in our potato delight and ensures a meal that’s satisfying and memorable.

Brazilian Feijoada (Black Bean Stew)
Brazilian Feijoada is a black bean and pork stew that is often served with farofa, toasted cassava flour.
Check out this recipe
Brazilian Feijoada (Black Bean Stew)

From hearty main courses to light, refreshing sides, these recipes work in perfect harmony with the creamy richness of the Parmesan Creamed Potatoes. While each dish stands strong on its own, when served alongside our creamy potato masterpiece, they contribute to a dining experience that’s truly greater than the sum of its parts. So, go ahead and try these pairings, creating your very own menu that turns any meal into a celebration.

Photo Credits:

  • By Taste The World Cookbook – Copyright 2022 All rights reserved.
  • By Marcelo Batata Restaurante – By https://www.facebook.com/cuzcodining/
  • By Martin St-Amant (S23678) – Own work, CC BY 3.0, https://commons.wikimedia.org/w/index.php?curid=3945833
  • By Diego Delso, CC BY-SA 4.0, https://commons.wikimedia.org/w/index.php?curid=43175194
  • By David Stanley from Nanaimo, Canada – Hatunrumiyoc, CC BY 2.0, https://commons.wikimedia.org/w/index.php?curid=24200178
  • By Martin St-Amant (S23678) – Own work, CC BY 3.0, https://commons.wikimedia.org/w/index.php?curid=3947047
  • By Lindaazucena00 – Own work, CC BY-SA 4.0, https://commons.wikimedia.org/w/index.php?curid=73209051

Old Fashion New Orleans Pecan Pie: A Southern Baking Gem

0
Old Fashion New Orleans Pecan Pie

There is a heartwarming nostalgia to Southern baking, and standing proud as one of its most beloved creations is the Pecan Pie. Nestled within this baking tradition, you will find an old-fashioned delight, the New Orleans Pecan Pie, a dessert that is as quintessentially Louisiana as it gets. The pie, with its decadent filling and buttery crust, captures the essence of Southern comfort in each slice.

In Louisiana’s vibrant food scene, the Old Fashion New Orleans Pecan Pie holds a special place, hailed as the king of pies. Its roots are intertwined with the state’s rich history and culture, adding to its unique charm. Unlike its modern counterparts, this pie harks back to a time before corn syrup dominated the baking scene. The authenticity of its flavors stems from its traditional recipe, which calls for darker sugar-based syrup or molasses, enriching the pie with a deeper, more complex sweetness.

This pie is not just a dessert; it’s a celebration of Southern heritage. Every bite into the pie’s crumbly crust reveals a rich filling, punctuated by the crunch of pecans, resulting in a symphony of textures and flavors that is soul-satisfying. The Old Fashion New Orleans Pecan Pie serves as a reminder of the simple joys of baking and the magic that happens when timeless recipes are passed down through generations.

Exploring Diverse Interpretations of Classic Pecan Pie

The world of culinary creativity thrives on reinvention and nowhere is this more evident than in the various interpretations of the classic pecan pie. A traditional staple of Southern American cuisine, pecan pie lends itself beautifully to a range of inventive variations, each adding a unique twist to this much-loved dessert.

The Chocolate Pecan Pie, for instance, marries the nuttiness of pecans with the decadent allure of chocolate. This variation involves either blending semi-sweet or dark chocolate chips into the pie filling or creating a rich chocolate layer on the pre-baked crust. The result is a harmonious balance between the pecan’s distinctive crunch and the velvety smoothness of chocolate.

Another intriguing twist on the classic is the Bourbon Pecan Pie, where a generous splash of bourbon adds a sophisticated depth to the pie filling. The bourbon introduces rich caramel undertones and a hint of smokiness that elevate the pie to new gourmet heights. Meanwhile, the Salted Caramel Pecan Pie offers a tantalizing sweet-salty interplay, achieved by drizzling salted caramel atop the pecan filling. This creates a flavor contrast that simultaneously surprises and delights the palate. Through these diverse interpretations, the classic pecan pie continues to reinvent itself, offering a tantalizing treat for every dessert lover.

Effective Strategies for Preserving Your Homemade Pecan Pie

Storing a homemade pecan pie properly ensures that it maintains its delicious flavor and texture. Once you’ve baked and cooled your pie, consider if you’ll be serving it immediately or storing it for later. If you plan to serve your pie within a few hours, simply keep it at room temperature, covering it with a clean kitchen cloth to protect it from dust or insects.

For longer storage, refrigeration becomes necessary. To refrigerate your pecan pie, first allow it to cool completely at room temperature. This step helps prevent condensation, which could make your crust soggy. Once it’s cool, wrap the pie securely in plastic wrap or aluminum foil to protect it from absorbing any other flavors in your refrigerator. A properly stored pecan pie can stay fresh in the refrigerator for up to four days.

For even longer storage, pecan pies can be frozen. To freeze your pie, cool it completely at room temperature before wrapping it tightly in several layers of plastic wrap and then a layer of aluminum foil. This method prevents freezer burn and maintains the pie’s quality for up to two months. When you’re ready to serve your frozen pie, thaw it in the refrigerator overnight, then allow it to come to room temperature before slicing and serving. Following these steps will ensure your pecan pie remains as fresh and flavorful as possible, whether you serve it immediately or save it for a special occasion.

Unraveling the Sweet History of Pecan Pie

The tale of the pecan pie is deeply intertwined with the culinary heritage of the southern United States. Originating from this region, pecans have held a place of importance for more than 8,000 years, as per archaeological evidence found in Texas. Native American cultures have long relied on this versatile nut for sustenance. However, while these indigenous groups had mastered the art of flatbread using cornflour for approximately 10,000 years, the inclusion of wheat – essential for a classic pie crust – was not yet a part of their repertoire. This ingredient only made its way to the Americas with the arrival of Europeans.

The encounter between the Old World and the New brought together the key ingredients that would eventually form the pecan pie we know and love today. It’s highly likely that Native Americans were the first to concoct pastries filled with pecans, but the marriage of pecans and wheat for pie crust could not take place until this cross-continental exchange occurred. History suggests that it was the French settlers in New Orleans who first developed what we’d recognize as pecan pie today, inspired by the pecan nut introduced to them by the Quinipissa and Tangipahoa Native American tribes.

Tracing the specific origin of pecan pie yields a pivotal reference in Harper’s Bazaar in 1886, which published a recipe for pecan custard pie. This is the earliest known recipe that closely resembles the modern pecan pie, marking a critical point in the dessert’s history. Regardless of its precise origins, one undeniable truth remains: the pecan pie, with its rich, sweet filling and crunchy nut topping, is a universally cherished delight. Through the ages, it has cemented its place as a staple of Southern cuisine and a symbol of culinary fusion.

The Vibrant Metropolis of New Orleans, Louisiana

Nestled along the Mississippi River and close to the Gulf of Mexico, New Orleans is a bustling city renowned for its vibrant culture and significant economic impact. It serves as a crown jewel of Louisiana, boasting a population of 383,997 as per the 2020 U.S. census, making it the state’s most populous city. Each corner of this city hums with life, reflecting a unique blend of cultures and histories that shape its identity.

New Orleans’ strategic location along the river and its proximity to the Gulf endow it with a significant role in the United States’ economy. The city hosts a major port, acting as a vital access point for maritime trade. This advantage has allowed New Orleans to develop into a prominent commercial center, influencing the broader Gulf Coast region’s economic dynamics.

Despite being a business and commercial powerhouse, New Orleans also holds a charming allure. The city’s bustling streets, historical architecture, lively music scenes, and culinary delights together form an enchanting blend that attracts both tourists and entrepreneurs alike. This unique combination of economic vitality and cultural richness truly sets New Orleans apart, marking it as a remarkable metropolitan city in Louisiana.

The Founding Journey of New Orleans: A Brief History

In the vibrant spring of 1718, La Nouvelle-Orléans, now known as New Orleans, was born. Under the determined direction of Jean-Baptiste Le Moyne de Bienville, the French Mississippi Company founded the city. Although the exact founding day remains elusive, tradition has long held May 7 as the anniversary of this momentous occasion. The site chosen for the city was not uninhabited wilderness, but land previously occupied by the Chitimacha people, reflecting the layers of culture and history inherent in this region.

The city owes its name to Philippe II, Duke of Orléans, who held the position of regent of the Kingdom of France at that time. Naming this new city after him was more than a mere gesture of loyalty; it was a bold statement, connecting this budding outpost in the New World with the grandeur and prestige of the French monarchy. This was a calculated move by the French Mississippi Company, aiming to establish their city as a beacon of French influence in the increasingly contested landscapes of North America.

The Duke of Orléans, however, did not draw his title from a self-styled creation, but from the venerable French city of Orléans. This further deepened the connection between the newly founded New Orleans and the rich heritage of French culture. This connection has endured through the centuries, with New Orleans retaining a distinctly French character long after it became a part of the United States. This French influence, blending with other cultural streams, has helped shape the unique, vibrant character of New Orleans as we know it today.

Unleashing the Vibrancy: Tourism in New Orleans

The city of New Orleans, fondly known as the “Big Easy,” is a magnet for tourists worldwide, drawn in by its enticing blend of culture, history, and an electrifying nightlife. The city never seems to sleep, with its vibrant live-music scene reverberating through the streets round-the-clock. From the sultry notes of jazz and blues to the lively beats of zydeco, the music of New Orleans is as diverse and dynamic as the city itself.

One of the city’s most famous events is Mardi Gras, a late-winter carnival that has become a global icon for its unabashed exuberance. It’s during Mardi Gras that New Orleans’ festive spirit truly shines, with lively, costumed parades, spirited street parties, and a communal atmosphere of joy and camaraderie. Visitors from around the world converge on the city during this time, eager to experience the unique flavor of Mardi Gras in the city where it takes on a life of its own.

Aside from its vibrant festivals and music scene, New Orleans offers an array of experiences that continue to captivate its visitors. The city’s historic neighborhoods, particularly the enchanting French Quarter, serve as living testaments to its rich past, while its array of museums offers deeper insights into its multifaceted history. Every visit to New Orleans offers the promise of a new experience, a new story, and a new appreciation for this one-of-a-kind city.

The Unique and Influential Cuisine of New Orleans

The world-acclaimed cuisine of New Orleans stands as a testament to the city’s rich cultural heritage and diverse influences. Distinctive and influential, it’s an edible narrative of the city’s history and its various cultural intersections. This delicious blend of local Creole, Haute Creole, and New Orleans French cuisines offers a gustatory experience that is as multifaceted as the city itself.

A myriad of traditions converge in New Orleans’ culinary scene, each adding their unique flavors and cooking methods to the mix. The influence of French, Spanish, and Italian cuisines is discernible in many dishes, while African, Native American, and Cajun traditions further deepen the culinary complexity. Hints of Chinese and Cuban cuisines also make their presence felt, contributing to the bold, easily recognizable New Orleans flavor profile. Local ingredients take center stage in these culinary creations, reflecting the city’s strong connection to its surrounding land and waters.

These diverse influences can be savored in every bite of New Orleans’ food, from savory gumbos and jambalayas to sweet beignets and pralines. But to truly appreciate the city’s culinary tradition, one must delve into the world of its local bakeries, where the fusion of flavors continues to delight locals and tourists alike. One such place is Windowsill Pies, a local bakery that masterfully brings together the distinct tastes of New Orleans in their delectable range of pies. Next, we’ll take a closer look at this beloved bakery and how it encapsulates the city’s unique culinary spirit in each of its creations.

Windowsill Pies
4714 Freret St, New Orleans, LA 70115

Windowsill Pies
Windowsill Pies

A woman-owned pie and tart bakery specializing in seasonal whole and hand pies, sweet and savory. Southern styled, French-inspired, New Orleans baked.

Crafting a Traditional New Orleans Pecan Pie: A Step-by-Step Guide

Creating a traditional New Orleans pecan pie may seem like a daunting task, but with a little patience and the right ingredients, you can recreate this Southern classic right at home. Although the process does require some time, each step brings you closer to the delight of a homemade pecan pie.

For those in a hurry or less inclined towards baking, there’s a handy shortcut: using a ready-made pie crust. This simple substitution can save you considerable time and effort, freeing you up to focus on the rich, flavorful filling. Remember, the aim is to enjoy the process as much as the finished product, so don’t hesitate to use time-saving measures if they make the baking more enjoyable for you.

With the pie crust—homemade or store-bought—ready, you can move on to the heart of the recipe: the filling. It’s here that the pecans take center stage, paired with a sweet, custard-like mixture that embodies the essence of New Orleans pecan pie. We’ll guide you through each step, ensuring you can recreate this iconic dessert in your own kitchen. Stay tuned as we dive into the delicious details of crafting a New Orleans pecan pie, a treat that carries the taste of the Big Easy with each bite.

Assembling Your Essentials for Pecan Pie Preparation

Before embarking on your pecan pie-baking journey, it’s essential to prepare your workspace efficiently. Gather all your ingredients and equipment, ensuring everything is within arm’s reach for a smoother baking process. While a mixing machine isn’t a strict necessity, its use can certainly ease your effort, helping you blend your ingredients more uniformly and saving you precious time in the kitchen.

Equipment Needed

  • 1 Mixing Machine
  • 1 Mixing Bowl
  • 1 Mixing Spoon
  • 1 Pie Pan

For the Crust:

  • 1½ cups all-purpose flour, plus extra for rolling
  • 2 tbsp sugar
  • ½ tsp salt
  • 1½ sticks unsalted butter, (12 tablespoons) cut into small cubes
  • 7 tbsp ice water

For the Filling:

  • 2 eggs, beaten
  • 1 cup dark corn syrup
  • 1 tsp vanilla extract
  • 1 cup sugar
  • 2 tbsp butter, melted
  • 1 cup pecan nuts

Time needed: 2 hours and 5 minutes

How to Make Old Fashion New Orleans Pecan Pie

  1. For the Crust:

    In a mixing bowl add flour, sugar, and salt together and mix well until combined.

  2. Add Butter

    Cut the butter into small pieces and mix with the dry ingredients.

  3. Add Water

    Add 5 tablespoons of water and mix until the dough is no longer dry.

  4. Rest the Dough

    Wrap the dough in plastic wrap and chill for at least 1 hour.

  5. Soften the Dough

    Remove the dough from the refrigerator (let it sit out at room temperature for 5 minutes to soften).

  6. Roll the Dough

    Flour your work surface and roll the dough into a 12-inch circle, 1⁄8 inch thick.

  7. For the Filling:

    Preheat the oven to 400 F.

  8. Lay the Dough in the Pie Pan

    Roll out the pastry and line the bottom of a 9-inch round pie pan.

  9. Mix the Filling

    In a mixing bowl add the eggs, dark corn syrup, vanilla extract, sugar, and butter and mix well. Add the Pecans last.

  10. Fill the Pie

    Pour the mix into the pastry shell, and bake in the oven at 400 F for 15 minutes.

  11. Bake the Pie

    After 15 minutes; reduce the heat to 350 F and bake for an additional 30 to 35 minutes longer or until a silver knife can be inserted into the center and comes out clean.

  12. Cool and Serve the Pie

    Remove from the oven and let cool before serving.

  13. Store the Pie

    Cover with plastic wrap and store in the refrigerator for up to 3 days.

If you liked this dish please Rate This Recipe and leave a comment.

Old Fashion New Orleans Pecan Pie
Print

Old Fashion New Orleans Pecan Pie

Savor a slice of the Big Easy with this Classic New Orleans Pecan Pie recipe. Embodying the spirit of Southern comfort, this pie features a delicately flaky, all-butter crust cradling a lush, custard-like filling. Topped with a stunning arrangement of crunchy pecans, this traditional dessert holds an undisputed title as a royal treat among pies.
Prep Time 20 minutes
Cook Time 45 minutes
Resting Time 1 hour
Total Time 2 hours 5 minutes
Servings 8 servings
Calories 700kcal

Ingredients

For the Crust:

For the Filling:

Instructions

For the Crust:

  • In a mixing bowl add flour, sugar, and salt together and mix well until combined.
    1½ cups all-purpose flour, 2 tbsp white sugar, ½ tsp salt
  • Cut the butter into small peaces and mix into the dry ingreadents.
    12 tbsp unsalted butter
  • Add 5 tablespoons of water and mix until the dough is no longer dry.
    7 tbsp ice water
  • Wrap the dough in plastic wrap and chill for at least 1 hour.
  • Remove the dough from the refrigerator (let it sit out at room temperature for 5 minutes to soften).
  • Flour your work surface and roll the dough into a 12-inch circle, 1⁄8 inch thick.

For the Filling:

  • Preheat the oven to 400 F.
  • Roll out the pastry and line the bottom of a 9 inch round pie pan.
  • In a mixing bowl add the eggs, dark corn syrup, vanilla extract, sugar, butter and mix well. Add the Pecans last.
    2 eggs, 1 cup dark corn syrup, 1 tsp vanilla extract, 1 cup white sugar, 2 tbsp unsalted butter, 1 cup pecan nuts
  • Pour the mix into the pastry shell, and bake in the oven at 400 F for 15 minutes
  • After 15 minutes; reduce the heat to 350 F and bake for an additional 30 to 35 minutes longer or until a silver knife can be inserted into the center and comes out clean.
  • Remove from the oven and let cool before serving.
  • Store in a cool dry place for up to 3 days.

Notes

You can cut an hour off this recipe if you use pre-made pie shells.

Nutrition

Calories: 700kcal | Carbohydrates: 120.2g | Protein: 10g | Fat: 21.1g | Saturated Fat: 12.9g | Cholesterol: 53mg | Potassium: 112mg | Fiber: 2.3g | Sugar: 35.6g | Calcium: 20mg | Iron: 4mg

Complementary Delicacies: Pairings to Enhance Your Pecan Pie Experience

There’s nothing quite like a slice of New Orleans Pecan Pie, with its buttery crust and sweet, nutty filling. However, the richness of pecan pie can be further elevated with the right accompaniments. Whether you’re aiming for a comforting meal or an indulgent feast, the following recipes are chosen with careful consideration to harmonize with your pecan pie, enhancing your dining experience to new levels of enjoyment.

Georgia Peach Ice Cream
This recipe for non-churn Peach ice cream is both easy and tasty. You can use it in an ice cream maker if you want but it turns out creamy and smooth without the maker. It will have your taste buds doing the happy dance.
Check out this recipe
Georgia Peach Ice Cream

The suggested recipes shared offer a variety of tastes and textures that pair excellently with the distinctive flavor of pecan pie. From savory main courses to light, refreshing sides, these dishes create a well-rounded meal that celebrates the complexity of flavors in your pecan pie. By incorporating these recipes into your menu, you’ll not only provide a satisfying dining experience but also showcase the versatility and charm of this classic New Orleans dessert. Remember, the best meals are those that bring comfort, joy, and a sense of togetherness — just like a slice of homemade pecan pie.

Photo Credits:

  • By Taste The World Cookbook – Copyright 2022 All rights reserved.
  • By Windowsill Pies – By https://www.facebook.com/windowsillpiesnola/
  • By thepipe26 – Flickr: new orleans skyline, CC BY 2.0, https://commons.wikimedia.org/w/index.php?curid=21875670
  • By bellemarematt – https://500px.com/photo/80993857/bourbon-street-by-bellemarematt (500px.com result list for cc-by-sa sorted photos), CC BY-SA 3.0, https://commons.wikimedia.org/w/index.php?curid=98577412
  • By Infrogmation of New Orleans – Photo by Infrogmation, CC BY-SA 3.0, https://commons.wikimedia.org/w/index.php?curid=98577327
  • By Nwill21 – Own work, CC BY-SA 3.0, https://commons.wikimedia.org/w/index.php?curid=16986564
  • Public Domain, https://commons.wikimedia.org/w/index.php?curid=308705

Ras el Hanout – Unleashing the Aromatics of the Top Shelf Spice Mix

0
Ras El Hanout ~ Top Shelf Spice Mix

Ras el Hanout, a cardinal player in Middle Eastern gastronomy, exhibits the culinary artistry inherent in crafting rich spice blends. As the name translates to “Top Shelf Spice Mix” in Arabic, it reflects the blend’s high-quality ingredients and its prominence in the culinary world.

Originating from the vibrant city of Blida, Algeria, Ras el Hanout carries the cultural essence of its birthplace. This enchanting mix infuses every dish with a complex medley of flavors, reminding us of the intricate latticework and bustling souks of its North African roots. Its aromatic symphony of spices transcends borders, connecting food enthusiasts worldwide to North African cuisine.

The celebrated Ras el Hanout, as an embodiment of culinary mastery, delivers a nuanced, multi-layered flavor profile. Each spoonful unravels a different scent, a different taste, representing the diversity and unity of Middle Eastern cookery. This all-encompassing spice mix does not merely enhance a dish; it transforms it, lending it the exotic allure of North African flavors, one that enchants the palate and entices the senses.

Unlocking the Magic of Ras el Hanout Spice Mix

North African cuisine frequently showcases Ras el Hanout in a multitude of savory dishes. As a versatile spice blend, chefs often rub it onto meat or fish, infusing these proteins with a depth of flavor that takes the dining experience to a whole new level. The unique flavor profile of Ras el Hanout sings harmoniously with the natural flavors of the ingredients, creating a culinary symphony that’s delightful to the palate.

Moreover, Ras el Hanout shows its versatility when stirred into various carbohydrate staples, such as couscous – the national dish – pasta, or rice. This practice imparts an exotic touch to these dishes, transforming them from simple side dishes to extraordinary, flavor-packed accompaniments. The presence of Ras el Hanout in these meals further emphasizes the integral role it plays in creating an authentic North African feast.

In our Berber Pizza recipe, Ras el Hanout takes center stage, providing a flavorful twist to the traditional dish. By integrating this exotic spice mix into the recipe, we offer a unique interpretation of pizza, one that merges classic Italian and North African culinary traditions. Stay tuned for this recipe; it promises an intriguing exploration of flavors and cultures, demonstrating the power of Ras el Hanout in bridging culinary worlds.

Preserving the Aroma of Ras el Hanout Spice Mix

When it comes to storing your Ras el Hanout Spice Mix, it’s crucial to seal it in an airtight spice jar, safeguarding its vibrant aroma and potent flavors. Ideally, place it in a cool, dark corner of your kitchen, such as your spice pantry. This will shield it from exposure to light and heat, both of which can degrade the quality and potency of the spices.

Ground spices, like those found in Ras el Hanout, tend to lose their freshness more rapidly than their whole counterparts. Generally, their shelf life extends up to six months. After this period, the vibrant notes that once characterized these spices begin to fade, resulting in a less flavorful blend.

To ensure you’re using the freshest spices, employ the sniff test. Open your spice jar and take a whiff. If the spice mix fails to exude the distinct, rich aroma characteristic of Ras el Hanout, it may be time to part ways. Freshness is integral to the experience of using Ras el Hanout. To fully appreciate its intricate flavor profile and bring an authentic touch to your dishes, make sure your mix is always fresh and fragrant.

Unraveling the History of Ras el Hanout

Tracing its roots deep into Algerian history, the creation of Ras el Hanout intertwines with the grand narratives of ancient civilizations. During the era when Carthage wielded its power over North Africa, Algeria emerged as a crucial conduit for the vibrant flow of goods from Africa to Europe. As a result, the country became a nexus of cultural and culinary exchange, ultimately shaping its rich and diverse food culture.

Algeria’s strategic position in this ancient trade route meant it had access to an array of spices from across the globe. Merchants brought their wares – an array of spices in a myriad of colors, aromas, and flavors – that transformed the local markets into a sensory carnival. This influx of exotic spices enriched Algerian cuisine, and the incorporation of these unique flavors led to the birth of the renowned Ras el Hanout spice mix.

The development of Ras el Hanout represents Algeria’s gastronomic evolution, reflecting its historic significance in the global spice trade. As a concoction of spices from different corners of the world, it encapsulates the fusion of cultures and traditions that transpired in Algeria’s bustling marketplaces. Thus, Ras el Hanout is not merely a spice mix; it is a sensory relic of a grand past, a tribute to the country’s pivotal role in connecting Africa with Europe.

Exploring the Vibrant City of Blida, Algeria

Blida, a vibrant city nestled in Algeria, holds the esteemed position of being the capital of Blida Province. Situated approximately 45 kilometers southwest of Algiers, the national capital, it draws visitors in with its stunning beauty and vibrant culture. Often referred to as the “City of Roses”, Blida dazzles with its lush gardens teeming with a myriad of roses, a spectacle that adds a layer of romantic allure to this vibrant city.

Engulfed by bountiful orchards and captivating gardens, Blida is a haven for nature enthusiasts and those seeking tranquility amidst a bustling cityscape. Its lush, green surroundings breathe life into the city, creating a serene oasis that contrasts with its urban features. Each corner of Blida is a testament to its rich natural heritage, making it a city that is as beautiful as it is culturally significant.

The lifeblood of Blida is the Oued el Kebir river, a vital source of energy for the city’s extensive corn mills and factories. This river does not just power industry; it also nourishes the city’s landscape, supplying water to the numerous fountains and irrigated gardens that adorn Blida. Thus, the Oued el Kebir river is not only an essential resource but also a symbol of the city’s harmony with nature, threading together its industry and idyllic charm.

The Tapestry of Time: Tracing the Roots of Blida, Algeria

The region where Blida now stands has been a cradle of civilization, carrying stories from antiquity to the present day. Its earliest occupants were perhaps drawn to the strategic location, which later became a Roman military station. This period marked the onset of the region’s long-standing significance, serving as a crossroads for different cultures, empires, and civilizations. Each era left its indelible mark, creating a rich tapestry of history that the region carries with it to this day.

In the 16th century, a transformative phase swept over the region with the arrival of the Moors, as recorded by Baedeker. It was this influential group that laid the foundation for the city we now recognize as Blida. This period saw the birth of prominent landmarks, such as the mosque commissioned by Khair-ed-din Barbarossa, underscoring Blida’s growing cultural and religious relevance in North Africa.

Through the centuries, Blida faced multiple trials, most notably the devastating earthquake in 1825 that nearly brought the city to its knees. However, the resilient inhabitants rose from the ashes, reconstructing their beloved city about a mile from the original site. This period of restoration shaped Blida into a meticulously planned city, with a network of interconnecting alleyways and streets reflecting the communal spirit of its people. The subsequent evolution of Blida narrates a tale of resilience, growth, and the unyielding human spirit that has shaped its course from antiquity to the present day.

Discovering the Charm of Blida, Algeria: A Tourist’s Paradise

Nestled at the foot of the majestic Atlas Mountains and adjacent to the fertile Mitidja plain, lies the charming city of Blida. Blida boasts an architectural aesthetic that reflects French standards, a testament to its historical interactions with different cultures. This fusion of styles gives Blida its unique character, making it a captivating destination for those seeking a blend of history, culture, and natural beauty.

One of the city’s key attractions is the sea of verdant orchards that encircle it, primarily featuring orange trees. These sprawling orchards offer a serene escape from the bustling city life, and their vibrant citrus aroma fills the air, creating an enchanting atmosphere. Another natural wonder not to miss is the Wadi Sharm Al-Kabeer, a site that encapsulates the stunning beauty of Algeria’s landscapes, offering visitors a chance to reconnect with nature.

When it comes to architectural marvels, the Grand Mosque and the old city gates, including Bab Al-Rahba and Bab Al-Zeer, stand as prominent landmarks. These structures echo the city’s rich history and cultural heritage, inviting visitors to delve into Blida’s past. Each landmark in Blida tells a story, making it a city that not only offers distinctive sights but also an immersive journey through time. This combination of natural beauty and historical richness makes Blida a must-visit destination in Algeria.

Delving into the Culinary Delights of Blida, Algeria

Blida, a vibrant city in Algeria, presents a delightful culinary journey that mirrors its rich cultural heritage and bountiful local produce. The cuisine of Blida is a delightful fusion of traditional Algerian gastronomy, fresh local ingredients, and regional flair. From hearty main dishes centered around meats and vegetables to vibrant salads bursting with fresh herbs, Blida’s cuisine offers an array of flavors that cater to diverse palates.

One of the defining aspects of Blida’s cuisine is the use of locally sourced ingredients. This local culinary philosophy manifests itself in the multitude of dishes that feature the city’s bountiful produce, such as the citrus from surrounding orchards or vegetables grown on the fertile Mitidja plain. These fresh ingredients are then transformed into traditional Algerian dishes, such as tajines or couscous, each plate a testament to Blida’s connection with its natural environment.

Blida’s cuisine also takes inspiration from its historical and cultural influences. As in the rest of Algeria, Islamic dietary restrictions play a significant role in shaping the city’s gastronomic offerings, with pork being absent from the menu. This respect for religious traditions adds to the unique culinary identity of Blida. Therefore, the cuisine of Blida is not merely a collection of dishes, but a culinary language that speaks of its history, culture, and environment.

Dahas Shop
FR87+G53, Blida, Algeria

Dahas Shop
Dahas Shop

This little Mom & Pop Shop doesn’t have any online representation save a Google Map Pin. It’s one of those gems that can only be found when you truly want to Taste the World. So if you are in Blida, stop in and grab a bottle of Ras El Hanout Spice Mix, it will be kept on the Top Shelf.

Mastering the Art of Making Ras El Hanout Spice Mix

Creating your own Ras El Hanout Spice Mix is a simple and rewarding task. This flavor-packed blend calls for ingredients that are not only commonly found but can transform any dish with their complex notes and aromatic qualities. With each ingredient playing a crucial role, assembling this spice mix offers a firsthand experience into the art of spice blending that is at the heart of Middle Eastern cooking.

The process is straightforward and convenient. To begin, ensure that all your spices are readily available. The beauty of this spice mix lies in its flexibility, allowing for tweaks and variations based on personal preferences or the specific requirements of a dish. However, maintaining a balance between the spices is key to achieving the characteristic depth of flavor associated with Ras El Hanout.

Once your spice blend is ready, store it in a clean spice jar. A dedicated spice pantry or a cool, dark area of your kitchen is an ideal spot for storage. Proper storage is crucial to preserving the freshness and potency of your spice mix, ensuring that every sprinkle brings forth a burst of authentic flavors, elevating your culinary creations. By mastering this Ras El Hanout Spice Mix recipe, you open doors to a world of flavorful possibilities, bringing the essence of North African cuisine to your kitchen.

Embarking on the Journey to Create Ras El Hanout Spice Mix

Creating your own Ras El Hanout Spice Mix is an exciting culinary adventure, inviting you to delve into the heart of North African cuisine. This magical blend of spices, each contributing its unique note, builds a symphony of flavors that can elevate any dish. With the ingredients at your disposal and the directions at your fingertips, you’re ready to bring this aromatic and deeply flavorful mix to life in your kitchen. So, let’s get started on this journey of taste and tradition, crafting a blend that will transport your senses to the vibrant markets of North Africa with each sprinkle.

Ingredients for Ras El Hanout ~ Top Shelf Spice Mix

Equipment Needed

  • 1 Mixing Bowl
  • 1 Spice Jar

Ingredients Needed

  • 1 teaspoon ground cumin
  • 1 teaspoon ground ginger
  • 1 teaspoon ground turmeric
  • 1 teaspoon ground paprika
  • 1 teaspoon salt
  • ¾ teaspoon ground black pepper
  • ½ teaspoon ground cinnamon
  • ½ teaspoon ground coriander seeds
  • ½ teaspoon ground cayenne
  • ½ teaspoon ground allspice
  • ¼ teaspoon ground cloves

Time needed: 5 minutes

How to Mix Ras El Hanout Spice Mix

  1. Mix

    In a small bowl whisk together all ingredients until combined well.

  2. Store

    Store in an airtight container. Good for about 6 months or until it loses its smell.

If you liked this dish please Rate This Recipe and leave a comment.

Ras El Hanout ~ Top Shelf Spice Mix
Print

Ras El Hanout ~ Top Shelf Spice Mix

This enchanting blend, Ras El Hanout, reigns supreme in the world of spice mixes. Hailing from the vibrant cuisines of North Africa, it possesses an irresistible allure that enhances any dish it graces. Its savory character works wonders when paired with succulent lamb burgers or a golden, roasted chicken, elevating these classics to a new realm of flavor. Get ready to discover the transformative power of this top-shelf spice mix in your culinary creations.
Course Condiment
Cuisine Algerian
Keyword Spice Mix
Prep Time 5 minutes
Total Time 5 minutes
Servings 8 Teaspoons
Calories 5kcal

Equipment

Instructions

  • In a small bowl whisk together all ingredients until combined well.
    1 tsp ground cumin, 1 tsp ground ginger, 1 tsp ground turmeric, 1 tsp sweet paprika, 1 tsp salt, ¾ tsp black pepper, ½ tsp ground cinnamon, ½ tsp ground coriander, ½ tsp cayenne pepper, ½ tsp ground allspice, ¼ tsp ground cloves
  • The spice blend keeps in an airtight container at cool room temperature for up to 6 months or until the spice loses its smell.

Nutrition

Serving: 1tsp | Calories: 5kcal | Carbohydrates: 1g | Protein: 0.28g | Fat: 2g | Sodium: 292mg | Potassium: 28mg | Fiber: 0.4g | Sugar: 0.1g

Unlocking Culinary Adventures with Ras El Hanout: The Quintessential Spice Mix

Embark on a culinary journey with the exotic and aromatic Ras El Hanout, the crown jewel of North African spices. While we specifically curated this versatile blend for our delightful Berber Pizza recipe, its applications extend far beyond. This potent mix can breathe life into a variety of dishes, infusing them with the tantalizing flavors of North Africa, promising to elevate your cooking to new heights of deliciousness.

In the realm of spices, Ras El Hanout holds a distinguished place, opening up endless culinary possibilities. Whether you’re mastering our Berber Pizza recipe or exploring other North African specialties, this spice mix will serve as your trusty companion. So, go ahead, experiment with its captivating flavor profile in various dishes and experience a transformative journey across North African gastronomy, right from the comfort of your kitchen. With Ras El Hanout in your pantry, every meal becomes an opportunity for a delightful culinary adventure.

Photo Credits:

  • By Taste The World Cookbook – Copyright 2022 All rights reserved.
  • By Sif eddine Brahimi – Copyright BY https://www.facebook.com/people/Brahimi-Sif-Eddine/100008710748354/
  • By Blida City from Blida, Algérie (DZ) – Flickr, CC BY 2.0, https://commons.wikimedia.org/w/index.php?curid=33354931
  • By habib kaki, CC BY 3.0, https://commons.wikimedia.org/w/index.php?curid=54691568
  • By Habib kaki – Own work, CC BY-SA 3.0, https://commons.wikimedia.org/w/index.php?curid=32940646
  • By Bachir blidi at the English-language Wikipedia, CC BY-SA 3.0, https://commons.wikimedia.org/w/index.php?curid=2732997
  • By Raspynat1234 – Own work, CC BY-SA 4.0, https://commons.wikimedia.org/w/index.php?curid=114031808

Zimbabwean Trio: Apple, Carrot, and Raisin Pie

0
Apple, Carrot, and Raisin Pie

From the bustling streets of Harare, Zimbabwe, we bring you a distinct and delightful take on a classic dessert – an Apple, Carrot, and Raisin Pie. This rendition captures the sweet and tangy flavors of apples, the earthiness of carrots, and the delightful chew of raisins, all melded together in a scrumptious pie.

With its origins rooted in African culinary tradition, this recipe owes a gentle nod to the brilliance of Rumbie from ZimboKitchen. We’ve added our own twist to their original recipe, aiming to enhance and diversify the flavors even further.

As you dive into the baking process, you’re not just crafting a dessert, but also exploring a fusion of flavors that are uniquely Zimbabwean. Each slice carries a tale of its African heritage, ready to be savored and shared. Enjoy this delicious journey!

Creating Your Apple Pie Masterpiece

When it comes to crafting an apple pie, there’s an abundance of apple varieties you can choose from. Fan favorites often include Braeburn, Gala, Cortland, Bramley, Empire, Northern Spy, Granny Smith, and McIntosh. Each one lends its unique flavor and texture to your pie, making it a personalized culinary creation.

Apple, Carrot, and Raisin Pie

Whether you choose to go with fresh, canned, or reconstituted dried apples, all can lead to a delicious result. Originally, dried or preserved apples served as substitutes when fresh fruit was off-season. Now, they add a different texture and concentrated flavor that can take your apple pie to new heights.

The filling of an apple pie typically calls for sugar, butter, and cinnamon, with some variations including lemon juice or nutmeg. Historical recipes even suggest using honey as a sweetener, a practice that can be revisited for a richer, deeper sweetness. In essence, the charm of making an apple pie lies in these personal touches, making each pie a unique culinary journey.

Preserving Your Apple Pie for Later

So, you’ve made a delicious apple pie, but what do you do with leftovers? No worries, the fridge is your friend. After your pie cools, pop it in there, either under a lid or securely wrapped with plastic wrap. Properly stored, it can keep its delightful taste and texture for up to 4 days.

What about those who want to plan ahead or make the most out of a fruitful apple season? Freezing is an excellent solution. Encase your pie in an airtight container and let it hibernate in your freezer. Stored this way, your pie can keep its freshness for a sweet surprise up to six months later.

When it’s time to reheat your pie, take it out of the freezer and let it thaw at room temperature first. Then, warm it up in an oven at 350 degrees F, giving it about 30-45 minutes to reheat evenly. This way, you ensure each slice is as warm and inviting as it was when it first came out of the oven.

The Global Journey of Apple Pie

The story of apple pie is a tale that spans continents, weaving together diverse culinary traditions. The humble apple, considered the fruit of knowledge, originated from the mountainous regions of Kazakhstan in Central Asia. The inhabitants of these areas are credited as the earliest bakers of apple pie, an enduring testament to their innovation with locally sourced ingredients.

Fast forward to 1381, and we find the first written recipe for apple pie in England. Penned by Geoffrey Chaucer, this early recipe called for a mix of apples, figs, raisins, pears, and a pastry shell, but notably, it lacked sugar. The “cofyn” mentioned in the recipe pertains to the pastry casing, while saffron gave the pie filling its distinctive color.

While America often stakes a claim as the birthplace of apple pie, the truth is a bit more nuanced. The apple varieties native to the “New World” were merely crab apples; it was the European settlers who introduced domesticated apples to American soil. Intriguingly, apple pie also found its way to Zimbabwe, a former British colony from 1888 to 1964. Despite not being an immediate association with Zimbabwe, the adoption of British culinary dishes, including apple pie, by its indigenous people exemplifies how food transcends boundaries, creating shared cultural experiences.

Harare: Zimbabwe’s Capital in the Clouds

Perched 4,865 feet above sea level, Harare, the capital of Zimbabwe, is more than just a city; it’s a vibrant hub of activity and culture. Its temperate climate creates an inviting backdrop to the city’s bustling infrastructure of rail, road, and air transport. Harare’s heart beats in sync with the steady rhythm of its thriving industry and commerce, its pulse resounding across Zimbabwe.

Beyond its status as an industrial center, Harare plays an essential role in the country’s agricultural landscape. It is the main distribution point for the surrounding area’s agricultural produce, with a special emphasis on the prized Virginia tobacco. Yet its wealth doesn’t lie solely in industry and agriculture. The outskirts of Harare are home to gold mines, further diversifying the city’s economic portfolio.

Incorporating the residential Highlands and industrial suburbs of Southerton, Graniteside, and Workington, Greater Harare paints a picture of a city in motion. Highfield, the most populous of the adjoining townships, adds to the city’s dynamic nature. With an area of 216 square miles and a growing population, Harare continues to assert its importance on the stage of Zimbabwe’s national narrative.

Harare: Echoes of the Past and the Spirit of the Shona

Long before colonial occupation and the establishment of Harare, the land now known as Zimbabwe was rich with ancient civilizations. Archaeological evidence traces human settlement in the region back to the Stone Age, with the most prominent civilizations being the Shona and the Ndebele. The Shona, the main ethnic group in Zimbabwe, migrated into the area around the 10th century and have left a profound impact on its culture, traditions, and history.

The Shona built great stone cities, with the most famous being Great Zimbabwe, established in the 11th century. Great Zimbabwe, from which the country derives its name, is a testament to the architectural and cultural prowess of the Shona. Although Great Zimbabwe was abandoned in the 15th century for unknown reasons, it remains a symbol of Shona civilization and has influenced contemporary Zimbabwean culture and identity.

Fast forward to 1890, when the British South Africa Company established a fort that would grow into the city now known as Harare. Despite the radical transformations and the colonial impact, the spirit of the Shona, their history and their culture, continues to resonate in modern-day Harare. It’s visible in the local art, the language, the music, and the city’s very name, which pays homage to the Shona chieftain Neharawa. The history of Harare, thus, transcends its colonial past, tracing its roots to the rich tapestry of indigenous civilization.

Exploring Harare: Zimbabwe’s Vibrant Capital

Known for its fascinating blend of traditional charm and modern amenities, Harare offers a unique experience for those venturing into Zimbabwe’s capital. The city radiates a certain charisma, owed in part to its beautiful public gardens, diverse architectural styles, and a rich cultural scene. No visit to Harare would be complete without exploring its stunning green spaces. The Harare Gardens, the city’s largest public park, provides a tranquil escape from the city’s hustle and bustle, while the Mukuvisi Woodlands invites nature enthusiasts to observe wildlife within city boundaries.

As you delve further into Harare, the city’s vibrant cultural spirit starts to shine. The National Gallery of Zimbabwe showcases stunning pieces of contemporary African art and traditional Shona sculpture, reflecting the nation’s rich cultural heritage. Theatres like Reps Theatre and the 7 Arts Theatre offer a diverse array of performances, spanning from local plays to internationally renowned productions. Music, being a significant aspect of Zimbabwean culture, infuses Harare’s nightlife with a rhythmic, energetic atmosphere, with numerous venues featuring live performances of local and international acts.

To delve deeper into the city’s history and understand its past, take a trip to the Museum of Human Sciences and the National Archives of Zimbabwe. Both provide illuminating insights into Zimbabwe’s pre-colonial, colonial, and post-colonial periods. For a shopping spree, the Avondale Flea Market and Sam Levy’s Village offer a wide array of local crafts, food, and fashion. Harare, with its plethora of experiences, invites tourists to explore and immerse themselves in its distinctive spirit, making it a dynamic destination on Zimbabwe’s tourism map.

Savoring Harare: A Taste of Zimbabwe’s Culinary Traditions

Harare serves as a vibrant epicenter for Zimbabwean cuisine, offering a diverse mix of traditional and modern dishes. Rooted deeply in the country’s culture and agricultural bounty, the city’s food scene is an exquisite blend of flavors, textures, and culinary techniques. A staple meal in Harare often includes sadza (a maize meal porridge), paired with a relish—perhaps a serving of meat, spinach, beans, or groundnuts. Locals also enjoy a variety of game meat, reflecting Zimbabwe’s rich wildlife.

Digging deeper into Harare’s culinary offerings reveals an assortment of local dishes, each with its unique taste profile. Bota, a breakfast porridge made from cornmeal, peanut butter, and milk, often sweetened with sugar or honey, starts the day for many Harare residents. Mopane worms, a delicacy high in protein, is another intriguing part of Harare’s cuisine. These caterpillars are harvested, dried, and can be cooked in a tomato-based sauce or simply with chili and peanuts. Dovi, a flavorful peanut butter stew, and kapenta, small sardine-like fish often served dried, are other dishes that make Harare’s food culture unique.

Adding to Harare’s culinary canvas are the numerous street food stalls scattered across the city, selling freshly made snacks and beverages. From roasted maize, a popular on-the-go snack, to the refreshing drink called “Mazoe,” named after a river in Zimbabwe, these food stalls give you a genuine taste of local living. Exploring Harare’s food scene offers more than just a meal—it’s an opportunity to savor Zimbabwe’s rich culture and heritage, one bite at a time.

The Vanilla Moon
8 Seagrave Rd, Harare, Zimbabwe

The Vanilla Moon
The Vanilla Moon

This place is quiet, in a nice suburb with friendly service. Sitting outside under the shade of big leafy trees, it never feels crowded even when there are lots of people. So far, I enjoy their cakes and their breakfast menu. Parking can be a bit hectic when it’s full but that’s the price for people enjoying their food!

Crafting the Unique Apple, Carrot, and Raisin Pie: A Zimbabwean Delicacy

Immerse yourself in the culinary traditions of Zimbabwe as you embark on this unique journey to create the Apple, Carrot, and Raisin Pie. This distinctive combination of flavors is a testament to the creativity and ingenuity of Zimbabwean cuisine, where simple ingredients are transformed into extraordinary dishes. It’s a rare treat that you won’t find replicated elsewhere, making this recipe a truly remarkable culinary experience.

Prepare to be amazed as you meld the sweet and tangy apples, the earthy crunch of carrots, and the subtle sweetness of raisins into a harmonious blend encased in a flaky, buttery pie crust. As you follow each step, you’re not just baking a pie, you’re immersing yourself in a rich cultural tradition that’s been passed down through generations in Zimbabwe. You’ll discover how this humble pie, with its unlikely trio of ingredients, encapsulates the country’s love for inventive and delicious food.

In the end, this recipe will do more than fill your home with the tantalizing aroma of freshly baked pie. It will provide you with a glimpse into the Zimbabwean kitchen, showcasing the country’s food culture and its knack for turning everyday ingredients into a delectable symphony of flavors. Celebrate the culinary ingenuity of Zimbabwe with each slice of this Apple, Carrot, and Raisin Pie, and share a piece of their culture at your dining table.

Assembling Your Arsenal: Essential Ingredients for the Apple, Carrot, and Raisin Pie

Before we delve into the artistry of pie making, it’s crucial to gather all the necessary ingredients that make our Apple, Carrot, and Raisin Pie the unique Zimbabwean treat that it is. Each component plays an integral part in creating the layered flavors and textures of this exquisite pie, making it a celebration of the diverse culinary heritage of Zimbabwe. So let’s start by introducing the cast of characters that will transform your kitchen into a hub of Zimbabwean culinary delights.

Equipment Needed

  • 1 knife
  • 1 cutting board
  • 1 mixing bowl
  • 1 zester/grater
  • 1 pie pan

Ingredients Needed

  • 1 cup brown sugar
  • 1 cup plain flour all-purpose
  • ¾ tsp ground cinnamon
  • ¼ tsp ground nutmeg
  • ¼ tsp ground allspice
  • ⅛ tsp ground cloves
  • ⅛ tsp ground ginger
  • 1 cup raisins
  • 4 apples peeled, cored and sliced
  • 1 tsp lemon rind grated
  • 2 tbsp lemon juice ½ lemon squeezed
  • 1 cup carrots grated
  • 2 ready-to-bake pie crusts
  • 1 egg

Time needed: 55 minutes

How to Make an Apple, Carrot, and Raisin Pie

  1. Preheat the Oven

    Preheat the oven to 400 degrees Fahrenheit and gather your ingredients together.

  2. Mix the Dry Ingredients

    In a mixing bowl, add the dry ingredients, sugar, flour, ground cinnamon, ground nutmeg, ground allspice, ground cloves, ground ginger, and raisins.

  3. Mix the Wet Ingredients

    In a mixing bowl grate a teaspoon of lemon rind and squeeze the juice of half a lemon. Peel, core, and slice the apples and add them to the mixing bowl. Grate the carrots and add them to the mixing bowl.

  4. Mix the Filling

    Add the bowl of mixed dry ingredients to the bowl of apple slices, carrots, lemon rind, and lemon juice then mix well.

  5. Assemble the Pie

    Grease the pie dish, roll out the pie crusts, and lay it into the pie dish. Pour the apple mixture into the prepared pie dish. Put the top pie crust on and crimp the edges of the top layer to the bottom layer.

  6. Bake the Pie

    After you’ve finished, brush it with an egg wash, sprinkle some sugar, and put it in the oven to bake for 40 minutes or until golden brown.

  7. Cool and Serve the Pie

    When done, put it on a cooling rack to allow it to cool. Serve with ice cream or whipped cream.

If you liked this dish please Rate This Recipe and leave a comment.

Apple, Carrot, and Raisin Pie
Print

Apple, Carrot, and Raisin Pie

Venture into a new culinary adventure with this distinctive Apple, Carrot, and Raisin Pie. This delightful fusion of flavors isn't just delicious, it's simpler to craft than you'd imagine! Dare to create your very own Zimbabwean-inspired pie from scratch and let this recipe guide you every step of the way. Indulge in the taste of success as you slice into your homemade culinary masterpiece.
Prep Time 15 minutes
Cook Time 40 minutes
Total Time 55 minutes
Servings 8 servings
Calories 254kcal

Equipment

Ingredients

Instructions

  • Preheat the oven to 400 degrees Fahrenheit and gather your ingredients together.
  • In a mixing bowl, add the dry ingredients, sugar, flour, ground cinnamon, ground nutmeg, ground allspice, ground cloves, ground ginger, and raisins.
    1 cup brown sugar, 1 cup all purpose flour, ¾ tsp ground cinnamon, ¼ tsp ground nutmeg, ¼ tsp ground allspice, ⅛ tsp ground cloves, ⅛ tsp ground ginger, 1 cup raisins
  • In a mixing bowl grate a teaspoon of lemon rind and squeeze the juice of half a lemon. Peel, core, and slice the apples and add them to the mixing bowl. Grate the carrots and add them to the mixing bowl.
    4 granny smith apples, 1 tsp lemon rind, 2 tbsp lemon juice, 1 cup carrot
  • Add the bowl of mixed dry ingredients to the bowl of apple slices, carrots, lemon rind, and lemon juice then mix well.
  • Grease the pie dish, roll out the pie crusts, and lay it into the pie dish. Pour apple mixture into prepared pie dish. Put the top pie crust on and crimp the edges of the top layer to the bottom layer.
    2 pie crust
  • After you’ve finished, brush it with an egg wash, sprinkle some sugar, and put it in the oven to bake for 40 minutes or until golden brown.
    1 egg
  • When done, put it on cooling rack to allow it to cool. Serve with ice-cream or whipped cream.

Nutrition

Calories: 254kcal | Carbohydrates: 61.3g | Protein: 3.3g | Fat: 1.1g | Saturated Fat: 0.3g | Cholesterol: 20mg | Sodium: 26mg | Potassium: 355mg | Fiber: 4.3g | Sugar: 40.8g | Calcium: 38mg | Iron: 2mg

Complementary Dishes for Your Apple, Carrot, and Raisin Pie

Ready to make your dining experience more delightful? Pairing your delectable Apple, Carrot, and Raisin Pie with the right savory dishes can take your meal to the next level. Whether you’re planning a family feast or a quiet dinner, choosing complementary flavors will enhance the enjoyment of every bite. Let’s explore some suggestions that harmonize with the unique taste of this Zimbabwean-inspired pie.

Nyama ~ Kenyan Beef Stew
Originating from the heart of Kenya, this adaptable stew invites you to embrace the spirit of culinary improvisation. Be it the local produce or your garden's harvest, this recipe welcomes all kinds of vegetables to the mix. Should you decide to leave out the potatoes, don't hesitate to use cornmeal as a traditional thickening alternative. With this Kenyan Beef Stew, there's truly no room for error, only endless possibilities for a delectable meal.
Check out this recipe
Nyama ~ Kenyan Beef Stew
The Gatsby Sandwich
Savor a taste of South Africa with the iconic Gatsby Sandwich. Large enough to satisfy a crowd and loaded with tantalizing flavors, this all-day delicacy guarantees a culinary adventure like no other. With each bite, experience the well-balanced blend of hearty fillings encapsulated in a crusty roll – a true celebration of South African street food culture.
Check out this recipe
The Gatsby Sandwich

Now that we’ve journeyed through these diverse and delightful pairings, you’re all set to create a meal that not only satisfies but impresses. Remember, the beauty of cooking is in the freedom to experiment and make it your own. So whether you choose to follow these suggestions or craft your own inspired pairings, the most important ingredient is the joy you infuse into every meal. Enjoy your Apple, Carrot, and Raisin Pie alongside these savory dishes, and savor the magic in every mouthful!

Photo Credits:

  • By Taste The World Cookbook – Copyright 2022 All rights reserved.
  • By Restaurant Oberkrainer – By https://www.facebook.com/vanilla.moon.zw/
  • By Damien Farrell – Own work, CC BY-SA 3.0, https://commons.wikimedia.org/w/index.php?curid=1228506
  • By Gary Bembridge – originally posted to Flickr as First Street, Harare, Zimbabwe, CC BY 2.0, https://commons.wikimedia.org/w/index.php?curid=4536495
  • By David Brazier – Contact us/Photo submission, CC BY-SA 3.0, https://commons.wikimedia.org/w/index.php?curid=4839487
  • By Gary Bembridge – Flickr: Heroes Acre, Harare, Zimbabwe, CC BY 2.0, https://commons.wikimedia.org/w/index.php?curid=16912340
  • By Damien Farrell – Own work, CC BY-SA 3.0, https://commons.wikimedia.org/w/index.php?curid=1228498

Nyama: A Taste of Kenya Through Beef Stew

0
Nyama ~ Kenyan Beef Stew

Welcome to the vibrant culinary scene of Nairobi, Kenya, with this tantalizing Nyama Beef Stew. Every bite of this hearty dish bursts with flavor, intertwining tender stewing beef, robust root vegetables, and a medley of delectable spices. The result is a beef dish that delivers an enticing blend of tastes, transporting your palate straight to the heart of Kenya.

Nyama, meaning meat in Swahili, is a traditional Kenyan stew slowly simmered until the vegetables reach the perfect level of softness. The process lets the ingredients meld together, creating a flavorful stew where each component shines while contributing to a harmonious whole. This meticulous simmering ensures the stew becomes nearly liquid-free, retaining a thick, luxurious consistency.

The final touch to this delicious culinary journey is a side of Homemade Chapati, a type of flatbread. The dense, soft Chapati is the perfect companion to the hearty Nyama, allowing you to scoop up every last bit of the rich stew. So, delve into the unique flavor profile of this Kenyan Beef Stew and discover a new dimension to your dining experience.

Exploring Different Approaches to Making Beef Stew

Nyama, a traditional Kenyan stew, is a testament to the versatility of stew-making. While goat or chicken variations exist, the classic version uses succulent chunks of beef. This choice of meat enriches the stew with a robust flavor, making it the preferred option in many Kenyan homes. Each bite of the stew delivers a culinary experience that encapsulates the essence of Kenyan cuisine.

The magic of Nyama lies in its aromatic blend, complementing the beef’s natural richness. This stew, celebrated for its hearty, full-bodied flavor, becomes the centerpiece of any meal. Whether it’s a family gathering or a quiet dinner, the presence of Nyama promises a satisfying, comforting dining experience.

But the journey of Nyama doesn’t end with the stew itself. The beauty of this dish is in its pairing. Nyama pairs exceptionally well with a side of fluffy rice or soft chapati, enhancing the stew’s delicious complexity. These sides, with their subtle flavors, serve as the perfect canvas for the bold Nyama, making every meal an unforgettable experience.

Preserving the Flavor: Storing Your Beef Stew

Preserving the freshness and taste of your Beef Stew is simpler than you might think. For short-term storage, transfer your stew into an airtight container and place it in the refrigerator. Properly refrigerated, the stew will maintain its delectable taste and texture for 3 to 4 days, making it perfect for leftover meals or quick weekday dinners.

If you’re thinking ahead or have made a large batch, freezing is an excellent option. Just like with refrigeration, place the stew in an airtight container, ensuring that it’s sealed securely to prevent freezer burn. This method will allow you to savor your delicious Beef Stew even up to 6 months later.

Whether you’re looking forward to leftovers in the next few days or planning meals for the future, these storage tips ensure that your Beef Stew remains as delightful as the day you cooked it. Follow these simple steps, and you’ll always be ready to enjoy a hearty, home-cooked meal.

Journey of the Stew: From Ancient Times to Nairobi, Kenya

The historical trail of stews begins in the heart of ancient civilizations. The earliest evidence of stew can be traced back to Japan’s Jōmon period, exemplifying our ancestors’ culinary ingenuity in creating fulfilling, satisfying dishes. This stew legacy, ubiquitous across different cultures and eras, surmounts geographical and temporal barriers.

Following the chronological culinary footprints, we encounter an intriguing anecdote by the ancient Greek historian Herodotus. He portrayed the Scythians, nomadic warriors from the 8th to 4th centuries BC, concocting a primitive stew. They combined meat and water inside an animal’s paunch and simmered this mixture over a bone fire, echoing the spirit of stew-making in its rudimentary form.

The historical journey of stew leads us to the vibrant city of Nairobi, Kenya. Here, the ancient culinary tradition finds its expression in the form of Nyama, a rich and hearty Kenyan Beef Stew. The essence of stew— a warm, flavorful, comfort-inducing dish— remains intact across the centuries, whether simmered on an ancient hearth or in the bustling kitchens of Nairobi. The Nyama stew stands as a testament to the timeless appeal of this dish, etching its place in Kenya’s culinary heritage.

Nairobi, Kenya: The Vibrant Heart of East Africa

As Kenya’s pulsating capital, Nairobi effortlessly combines the bustling energy of a large city with the captivating allure of nature. Originating from the Maasai phrase “Enkare Nyorobi”, which translates to the “place of cool waters”, Nairobi earns its name from the river that gently winds its way through the city. This convergence of urban life and natural beauty, along with a population of 4,397,073, according to the 2019 census, makes Nairobi a vibrant metropolis teeming with life.

Nairobi’s multifaceted charm extends beyond its city limits. With a sprawling metropolitan area that’s home to over 9 million people, the city radiates its influence far and wide. The hum of city life seamlessly blends with the tranquility of its natural surroundings, making Nairobi an urban haven amidst Kenya’s expansive landscapes.

Known affectionately as the “Green City in the Sun”, Nairobi is a city that embraces its roots while continually pushing towards the future. Whether you’re delving into the city’s rich history, exploring its diverse tourism offerings, or savoring its unique culinary delights, Nairobi beckons with a promise of adventure and discovery. This dynamic city offers a unique blend of experiences that are as diverse and captivating as the people who call it home.

Nairobi: From Humble Beginnings to Bustling Metropolis

Long before the establishment of Nairobi, the area it now occupies was a pristine, untouched land frequented by early human settlers. Over the course of centuries, these settlers transformed the region from a wilderness into a thriving hub of human activity. Yet, it wasn’t until the late 19th century that Nairobi began to take shape as we know it today. At that time, this part of the land, an uninhabited swamp, became a colonial railway settlement, marking the beginning of a transformative journey.

The arrival of the railhead in 1899 brought significant change to the region. The British colonial capital of Ukamba province, previously located in Machakos (now known as Masaku), relocated to Nairobi. This strategic move propelled Nairobi into the limelight, and by 1905, the once untouched marsh had evolved into the bustling capital of the British East Africa Protectorate.

The years that followed saw Nairobi undergo a rapid expansion. Between 1902 and 1910, the town’s population mushroomed from 5,000 to 16,000, reflecting the city’s growth in administration and the burgeoning tourism sector. However, the rapid growth also ignited conflicts, most notably the Mau Mau Uprising in the 1950s. The subsequent Lancaster House Conferences marked a turning point, setting the stage for Kenyan independence in 1963. Through its trials and triumphs, Nairobi has demonstrated a remarkable resilience, transforming from an early human settlement to a vibrant metropolis that it is today.

Exploring Nairobi: A City Within A Wildlife Paradise

Beyond its bustling city life, Nairobi houses a unique treasure – the Nairobi National Park. This expansive game reserve, sitting at the city’s doorstep, is a sanctuary for the endangered black rhino. The park’s verdant landscapes provide a natural habitat for a diverse range of wildlife, including graceful giraffes, zebras, and awe-inspiring lions. This juxtaposition of urban life and natural wonders positions Nairobi as a unique destination, offering an unparalleled blend of experiences for the adventurous traveler.

Adding to Nairobi’s eco-tourism appeal is the David Sheldrick Wildlife Trust. Situated next to the Nairobi National Park, this well-regarded elephant orphanage is a testament to Nairobi’s commitment to wildlife conservation. Here, visitors can witness the inspiring efforts to nurture and rehabilitate orphaned elephants, providing a heartwarming encounter that’s bound to leave a lasting impression.

While Nairobi is a destination in its own right, its strategic location makes it a popular gateway for safari trips across Kenya. From witnessing the Great Migration in the Maasai Mara to exploring the wildlife-rich landscapes of Tsavo, Nairobi offers easy access to some of the world’s most renowned wildlife spectacles. So whether you’re keen to delve into urban exploration or embark on a wildlife adventure, Nairobi offers a springboard to a diverse range of experiences.

A Melting Pot of Flavors: Nairobi’s Diverse Cuisine

In Nairobi, the culinary scene is a vibrant tapestry woven with diverse culinary traditions. At the heart of the local Kenyan fare is ‘ugali’, a staple made from maize meal, paired with ‘sukuma wiki’, a leafy vegetable akin to collard greens. Completing this quintessential meal is often a hearty meat stew or a succulent wet fry. The gastronomic ensemble doesn’t stop there. Chapatis, beans, mung beans, maize, and kachumbari, a refreshing tomato and onion salad, are delightful additions that round off any Kenyan feast.

The flavors of Nairobi’s cuisine extend beyond its local fare, bearing testament to the city’s rich cultural history. The early Arab settlers introduced an array of aromatic spices, enriching the local dishes with bold and complex flavors. This influence is apparent in the spice-infused dishes that grace the city’s dining tables.

Adding another layer to Nairobi’s culinary mosaic are the culinary traditions of the East African Indian railway workers and the sweet delicacies from the Swahili coastline. These diverse influences have culminated in a food scene that’s rich, delicious, and distinctively Nairobi. Whether you’re indulging in a traditional Kenyan meal or exploring the city’s broader culinary offerings, Nairobi offers a gastronomic journey that’s as diverse and vibrant as its cultural heritage.

Open House Restaurant Ltd
Gallant mall, Parklands Road, Opposite Total Station, Nairobi, Kenya

Open House Restaurant Ltd

Open House Restaurants have a long successful history of delighting patrons of all ages and ethnic groups. From humble beginnings in small semi-open premises, our captivating food and impeccable service have enabled us to grow. Maintaining the same standards and excelling in others, we now have two wonderful venues to boast.

The Mughals were known for their style and splendor – and their food habits were no different. Rich creamy sauces, aromatic spices, and traditional recipes full of distinctive flavors in a myriad of styles. The marinated tandoori dishes are an inviting treat for small meals or a great accompaniment to the satisfying main courses. Open House caters to the mild eaters as well as the experienced chilly fans. The homemade classic desserts are an exceptionally pleasant way to end the perfect meal

Creating the Perfect Nyama – A Step-by-Step Guide to Kenyan Beef Stew

Firstly, timing is key when cooking Nyama, the aromatic Kenyan Beef Stew. It’s wise to kick start the stew-making process before you venture into making chapati, ensuring everything flows seamlessly. The simmering of the beef stew, a process which draws out the rich flavors and creates a delightful, stew-like consistency, will take approximately an hour. It’s during this period of gentle simmering that the beef stock will reduce, enhancing the overall flavor of your Nyama.

While your stew is bubbling away, turn your culinary attention to the chapati. Chapati, a type of flatbread, is a delightful accompaniment to Nyama and requires about an hour of rest time before shaping and cooking. So, this is the perfect opportunity to get started on it, while the stew is steadily reaching its peak.

By the time your stew has achieved its robust, thick consistency, your chapati dough will be perfectly rested and ready to be shaped and cooked. This careful orchestration of cooking processes ensures that both the Nyama and chapati are ready concurrently, guaranteeing a warm, fresh, and aromatic Kenyan meal straight from your kitchen to the dining table.

Preparing to Master Kenyan Beef Stew: What You’ll Need

Let’s bring your Kenyan Beef Stew to life! Before you start, ensure all your equipment and ingredients are on hand and within easy reach. Then, follow the directions outlined below. This preparatory step ensures a smooth, efficient cooking process, allowing you to fully immerse yourself in creating this delicious Kenyan dish.

Equipment

  • 1 Knife
  • 1 Cutting Board
  • 1 Dutch Oven
  • 1 Stirring Spoon

For the Stew

  • 1 tbsp vegetable oil
  • 1 large onion, chopped
  • 1½ lbs beef, cubed
  • 1-inch ginger root, minced or grated
  • 4 cloves garlic, sliced
  • 1 tsp hot paprika
  • 1 tbsp curry powder
  • 2 tomatoes
  • 2 small carrots, chopped
  • 1 potato, cubed
  • 1½ cups beef broth, as needed

For the Chapati

  • 3 cups whole wheat flour
  • 1 cup water
  • 1 tsp salt
  • 1 tsp white sugar
  • vegetable oil for frying
  • whole wheat flour for rolling and dusting

Time needed: 1 hour and 20 minutes

How to Make Kenyan Stewed Beef

  1. Prepare Your Ingredients

    Cut the onion, tomato, carrot, potato, and beef into average hunks.

  2. Sauté the Onions and Brown the Beef

    In a large dutch oven, brown the onions in oil over medium heat. Then increase the heat to high, add the beef, and brown.

  3. Add the Remaining Ingredients

    Add the ginger, garlic, hot paprika, curry, carrots, potatoes, tomatoes, the stock, and season with salt.

  4. Simmer and Reduce the Stew

    Simmer uncovered until thick and pasty and all broth has reduced away. This takes about an hour.

  5. Serve the Stew

    Remove from heat and serve with fresh chapati.

  6. To Make the Chapati

    In a large mixing bowl add 3 cups of flour.

  7. Mix the Liquid Ingredients

    Add salt, sugar, 2 tbsp of oil, and 1 ½ cups of water in a separate jar/ bowl. Stir until the salt and sugar dissolve.

  8. Add Liquid Mix

    Add the liquid mixture to the flour bowl and mix well.

  9. Knead for 10 Minutes

    Keep kneading for 10 minutes and add flour if needed until the dough becomes non-sticky. Add 2-3 tbsp of oil and continue kneading until the oil mixes well and the dough is soft. Cover the dough and leave it for 40 minutes.

  10. Divide the Dough

    After the 40 minutes, divide the dough into 10 – 15 equal parts making ball-like shapes. Arrange them on a flat surface dusted with flour(Cover with a damp tablecloth to avoid drying).

  11. Dust with Flour

    Dust flour in the flat place and take one of the balls and start rolling with a rolling pin to a circular shape, brush oil on top and roll it inwards to form a shape like a rope, then create a coil-like shape and press the ball down with your palm to make it flat. Repeat this process to the rest of the remaining balls of dough.

  12. Roll the Dough

    Next, start rolling each of the coil-like shape doughs with the rolling pin to form a circular shape again.

  13. Fry the Chapati

    In a hot pan, place the rolled-out circular chapati and fry each side with little oil until its golden brown on medium heat. Place your cooked chapati in a flat plate and cover with aluminum foil.

  14. Repeat until Done

    Repeat this step to the rest of the dough.

Unleash your creativity with this versatile recipe! Feel free to infuse your own personal touch by adding green peppers, courgettes, or peas. Not only will it boost the nutritional value, but it’ll also enrich the flavors, making each bite even more delightful. So go ahead, experiment with your preferred ingredients and relish the delectable results. Enjoy your personalized Kenyan Beef Stew!

If you liked this dish please Rate This Recipe and leave a comment.

Nyama ~ Kenyan Beef Stew
Print

Nyama ~ Kenyan Beef Stew

Originating from the heart of Kenya, this adaptable stew invites you to embrace the spirit of culinary improvisation. Be it the local produce or your garden's harvest, this recipe welcomes all kinds of vegetables to the mix. Should you decide to leave out the potatoes, don't hesitate to use cornmeal as a traditional thickening alternative. With this Kenyan Beef Stew, there's truly no room for error, only endless possibilities for a delectable meal.
Cuisine Kenyan
Prep Time 20 minutes
Cook Time 1 hour
Total Time 1 hour 20 minutes
Servings 4 servings
Calories 781kcal

Ingredients

For the Stew

For the Chapati

Instructions

For the Stew

  • Cut the onion, tomato, carrot, potato, and beef into average hunks.
    1 large yellow onion, 2 tomatoes, 2 small carrot, 1 russet potatoes, 1½ lbs beef roast
  • In a large dutch oven, brown the onions in oil over medium heat. Then increase the heat to high, add the beef, and brown.
    1 tbsp vegetable oil
  • Add the ginger, garlic, hot paprika, curry, carrots, potatoes, tomatoes, the stock, and season with salt.
    1 inch ginger root, 4 cloves garlic, 1 tsp hot paprika, 1 tbsp curry powder, 1½ cups beef broth, salt
  • Simmer uncovered until thick and pasty and all broth has reduced away. This takes about an hour.
  • Remove from heat and serve with fresh chapati.

For the Chipi

  • In a large mixing bowl add 3 cups of flour.
    3 cups whole wheat flour
  • Add salt, sugar, 2 tbsp of oil, and 1 ½ cups of water in a separate jar/ bowl. Stir until the salt and sugar dissolve.
    1 cup water, 1 tsp salt, vegetable oil, 1 tsp white sugar
  • Add the liquid mixture in step 2 to the flour bowl (step 1) and mix well.
  • Keep kneading for 10 minutes and add flour if needed until the dough becomes non-sticky. Add 2-3 tbsp of oil and continue kneading until the oil mixes well and the dough is soft. Cover the dough and leave it for 40 minutes.
  • After the 40 minutes, divide the dough into 10 – 15 equal parts making ball-like shapes. Arrange them on a flat surface dusted with flour(Cover with a damp tablecloth to avoid drying).
    whole wheat flour
  • Dust flour in the flat place and take one of the balls and start rolling with a rolling pin to a circular shape, brush oil on top and roll it inwards to form a shape like a rope, then create a coil-like shape and press the ball down with your palm to make it flat. Repeat this process to the rest of the remaining balls of dough.
  • Next, start rolling each of the coil-like shape doughs with the rolling pin to form a circular shape again.
  • In a hot pan, place the rolled-out circular chapati and fry each side with little oil until it's golden brown on medium heat. Place your cooked chapati in a flat plate and cover with aluminum foil.
  • Repeat this step to the rest of the coil-like dough.

Nutrition

Serving: 1cup | Calories: 781kcal | Carbohydrates: 90.6g | Protein: 65.8g | Fat: 15.9g | Saturated Fat: 5g | Cholesterol: 152mg | Sodium: 1010mg | Potassium: 1197mg | Fiber: 6.3g | Sugar: 6.8g | Calcium: 64mg | Iron: 38mg

Complementary Culinary Explorations to Pair with Kenyan Beef Stew

Dive deeper into the flavorful world of Kenyan cuisine with these suggested accompaniments to your Nyama. Each of these dishes brings its own unique charm to the table, perfectly complementing the rich, robust flavors of our Kenyan Beef Stew. From the heart of Africa to your home, these recipes invite you to further explore the diverse culinary landscape of Kenya.

Apple, Carrot, and Raisin Pie
Venture into a new culinary adventure with this distinctive Apple, Carrot, and Raisin Pie. This delightful fusion of flavors isn't just delicious, it's simpler to craft than you'd imagine! Dare to create your very own Zimbabwean-inspired pie from scratch and let this recipe guide you every step of the way. Indulge in the taste of success as you slice into your homemade culinary masterpiece.
Check out this recipe
Apple, Carrot, and Raisin Pie

Whether you’re looking to recreate an authentic Kenyan feast, or simply searching for the perfect sides to your hearty stew, these recipes are here to inspire and delight. They not only harmonize beautifully with the Nyama, but also stand tall on their own, bringing the vibrant, rich, and comforting flavors of Kenya straight into your kitchen. Enjoy this delicious journey through Kenyan cuisine!

Photo Credits:

  • By Taste The World Cookbook – Copyright 2022 All rights reserved.
  • By Open House Restaurant Ltd – By https://www.openhouserestaurant.co.ke/
  • By afromusing – Flickr: Nairobi Skyline, CC BY 2.0, https://commons.wikimedia.org/w/index.php?curid=29600773
  • By Nairobi123 – Own work, CC BY-SA 4.0, https://commons.wikimedia.org/w/index.php?curid=34811452
  • By Allan Kamaliki – Own work, CC BY-SA 4.0, https://commons.wikimedia.org/w/index.php?curid=49475045
  • By Bobokine – Own work, CC BY-SA 3.0, https://commons.wikimedia.org/w/index.php?curid=8335981
  • By Africanmodern – Own work, CC BY-SA 4.0, https://commons.wikimedia.org/w/index.php?curid=48523304

Our Social Networks

3,346FansLike
17FollowersFollow
6FollowersFollow
0FollowersFollow
19FollowersFollow
0SubscribersSubscribe

You Might Also Like

White Chili with Hominy Recipe Card

White Chili Wonders: Exploring the Versatility of Hominy Delights

0
This White Chili with Hominy recipe is creamy, delicious, and easy to make. It can be made on the stovetop, crockpot, or pressure cooker...