Viking® announced the launch of its newest ocean ship, the 930-guest Viking Neptune®. The 2022-2023 Viking World Cruise, is a journey from Fort Lauderdale to London that spans 138 days, 28 countries, and 57 ports, with overnight stays in 11 cities.
“With the arrival of the Viking Neptune and her identical sister ship, the Viking Mars, this year—along with the debut of our two new expedition ships and new river ships—we are proud to firmly establish Viking as the leading small ship travel company.”
Torstein Hagen, Chairman of Viking
A Voyage of Discovery
Set sail on an epic journey of discovery as you traverse the globe. Explore the world’s majestic cities and immerse yourself in local cultures during overnight stays in 11 ports. Discover the idyllic isles and the faraway lands of the South Pacific and the colonial treasures of Asia. From the Arabian Peninsula to the Red Sea, witness several millennia of history, and revel in the romance of Paris and the royal history of London, England’s iconic capital.
Viking Neptune
Viking’s ocean ships have a gross tonnage of 47,800 tons, with 465 staterooms that can host 930 guests. Viking Neptune will join the award-winning fleet of identical sister ships, which includes Viking Star®, Viking Sea®, Viking Sky®, Viking Orion®, Viking Jupiter® and Viking Venus®. Viking Mars® will be delivered in May 2022; Viking Saturn® will be delivered in early 2023.
Viking Health & Safety Program
Viking requires all guests and crew to be vaccinated against COVID-19. Furthermore, Viking has full-scale PCR laboratories installed onboard its ocean and expedition ships. Utilizing the PCR laboratories onboard Viking ocean and expedition ships—and a strong network of dedicated shoreside labs for Viking river ships in Europe—all guests and crew receive up to daily quick and easy non-invasive saliva PCR tests.
Originating from the vibrant heart of Cape Town, South Africa, the Gatsby is a delightful culinary treat celebrated widely across the Western Cape province. This submarine sandwich, famous for its generous size, effortlessly feeds several people, making it a popular choice for social gatherings and festive events.
The Gatsby boasts a crispy, warm bread roll overflowing with freshly cooked chips (akin to French fries) and a diverse choice of tantalizing fillings. These can range from succulent strips of steak to spicy grilled chicken, or even freshly caught fish, creating a fusion of flavors that truly capture the spirit of South African cuisine. Completing the ensemble, a selection of rich, tangy, and sometimes spicy sauces are drizzled over the top, soaking into every crevice of the sandwich, making each bite an experience in itself.
Crafting the Perfect Gatsby Sandwich: A Masterclass
In the diverse realm of Gatsby sandwich preparation, an array of mouth-watering ingredients come into play. Whether you opt for succulent beef, tender pork, or juicy chicken, the options for protein in this iconic South African sub are ample, catering to a variety of palate preferences. Some aficionados even venture into the realm of cold cuts, presenting an alternative take on this hearty dish, adding an unexpected twist to the classic Gatsby.
The Gatsby Sandwich
Moving on to the verdant heart of the sandwich, the choice of fillings is an equally important decision. Crisp lettuce leaves, fresh, juicy tomatoes, sharp, tangy onions, and cool, refreshing cucumbers are commonly found nestled within the bread roll. These ingredients not only provide a satisfying crunch to complement the tender meat, but they also imbue the Gatsby with a layer of freshness, balancing out the robust flavors.
Last but not least, the crowning glory of the Gatsby sandwich is undeniably the sauce. The options here range from the universally loved ketchup, with its sweet and tangy profile, to the fiery piri piri sauce for those who enjoy a bit of heat. Mayonnaise also holds its ground as a popular choice, its creamy, rich texture binding all the components together and amplifying the overall flavor. This combination of ingredients results in a Gatsby that’s as delicious as it is customizable, truly an epitome of South African culinary diversity.
Preserving the Perfection: Expert Tips for Storing Your Gatsby Sandwich
In order to maintain the freshness and taste of your Gatsby sandwich, it’s crucial to store it properly. The challenge lies in keeping the ingredients intact and avoiding the unappetizing sogginess that can often occur with poorly stored sandwiches. A simple yet effective method is to wrap your Gatsby in parchment paper or waxed paper. These materials provide a protective barrier, helping to retain the sandwich’s natural moisture while preventing additional dampness from setting in.
Tightly wrapping your Gatsby sandwich in plastic wrap serves another crucial purpose – it keeps loose ingredients together. Ensuring that every bite of your sandwich is as good as the first, this method of storage not only prevents ingredients from spilling out, but also preserves the structural integrity of the Gatsby sandwich. As a result, you’re greeted with a sandwich that’s just as tempting and delicious as when it was first prepared.
Understanding how to store your Gatsby sandwich is essential in enjoying this South African culinary delight to the fullest. With these storage tips, you can relish the flavors of the sandwich for longer periods, making sure that each bite is a taste adventure. Whether you’re enjoying a Gatsby sandwich at home, planning a picnic, or prepping a workday lunch, the right storage techniques can significantly enhance your dining experience.
Birth and Evolution: The Remarkable Journey of the Gatsby Sandwich
In the heart of Cape Town, nestled within the Cape Flats area, a humble yet mouth-watering dish was born in 1976. The Gatsby sandwich, a culinary brainchild of Rashaad Pandy, began its journey as a quick, hearty meal for hardworking men assisting Pandy in his food shop’s renovation. The delectable creation consisted of a generously filled large round loaf, packed with slap chips (a South African variant of fries sprinkled with vinegar), savory polony sausage, and tangy achaar, and neatly cut into manageable wedges.
Amongst the workers was a man nicknamed “Froggy,” whose declaration changed the course of this sandwich’s history. As he bit into the generous wedge, Froggy exclaimed it was a “Gatsby smash”, referencing the recently screened movie, ‘The Great Gatsby’, at a local Athlone cinema. The name resonated, encapsulating the opulent abundance and unique charm of the sandwich, and it immediately stuck, perfectly embodying the large, shared meal’s lavish appeal.
The Gatsby sandwich’s tale doesn’t end there. Pandy, capitalizing on the popularity and appeal of this flavorful marvel, began offering the sandwich in his shop. What had started as a simple, filling meal for a group of workers quickly gained fame, becoming a sought-after dish across Cape Town and beyond. This rich narrative adds an extra layer of appeal to the Gatsby sandwich, underlining its deep roots in the community, adaptability, and culinary innovation.
The Metropolitan City of Cape Town, SCape Town, South Africa: A Majestic Metropolis in the Embrace of Natureouth Africa
Nestled on South Africa’s southwest coast, Cape Town gracefully straddles the fine line between urban advancement and natural splendor. This dynamic port city boasts a prime location on a peninsula, lying beneath the formidable shadow of Table Mountain. The city’s unique geographic positioning, combined with its rich cultural heritage, paints a vibrant tableau that’s deeply captivating.
Cape Town, South Africa
Table Mountain, the city’s landmark, watches over Cape Town like a silent sentinel. Here, slow-turning cable cars ascend to the flat summit, transporting visitors to a panoramic spectacle of grandeur. From this elevated vantage point, the city unfurls in all its glory. Your gaze can sweep across the urban landscapes, the bustling harbor teeming with activity, and even the far-off boats embarking on their voyage to Robben Island.
Robben Island, however, is not just any island. It bears testament to a significant chapter of South Africa’s history. This once notorious prison, which held Nobel Laureate Nelson Mandela captive, has been repurposed into a living museum. Its profound narrative echoes with resilience, and the boats leaving the harbor, heading towards the island, serve as a poignant reminder of the city’s – and country’s – journey through time.
Tracing the Footsteps of Time: A Short History of Cape Town
The Cape of Good Hope, a promontory on the southern tip of Africa, holds historical secrets dating back about 15,000 years. An integral chapter of human history has unfolded here, marked by the footprints of ancient civilizations that found their home amidst its rugged beauty.
In 1652, the Dutch saw the strategic importance of this captivating cape and decided to lay down roots. They established a thriving port city, marking the onset of an era of European influence in this region. Just over a century later, in 1773, the British too perceived the potential of this port city. They made their initial incursion, bringing with them a new wave of cultural exchange, and christened the city as Cape Town.
In the years that followed, Cape Town found itself in the midst of a tug-of-war, changing hands between the Dutch and the British several times. It wasn’t until 1814 that the city’s fate was sealed. The Dutch finally ceded Cape Town to the British, concluding a pivotal chapter in the city’s diverse history and marking the beginning of its next era under British rule.
Exploring Cape Town: A Haven for Wanderlust and Culture
Cape Town, a vibrant port city, provides a unique kaleidoscope of cultures, cuisines, and breathtaking landscapes. This enticing metropolis nestles beneath the majestic grandeur of the Table Mountain National Park, its natural crown adding an impressive backdrop to the city’s life.
The city’s beauty extends from the flat-topped Table Mountain, cascading down to the cerulean waters of Table Bay. Cape Town’s aesthetic appeal is unmistakable, offering vistas that captivate and inspire visitors from around the world. Yet, the city is more than just a pretty face; it thrives as a dynamic and ever-evolving hub of activity.
The pulse of Cape Town beats to a rhythm of multicultural diversity, encapsulated in its flourishing arts district. A myriad of dining options paint a mouth-watering palette of global cuisines, while the city’s nightlife vibrates with an innovative spirit that spills onto its streets after sundown. This is a testament to the city’s creativity, lifestyle, and progressive mindset, all of which work together to make Cape Town an intriguing, vibrant metropolis worth exploring.
Savoring South Africa: A Culinary Journey Through Its Diverse Traditions
South African cuisine showcases a rich tapestry of culinary traditions, each a reflection of the varied communities inhabiting the country. Drawing from the cultural practices of its indigenous peoples, South Africa presents a unique, mouth-watering array of food that tells the story of its vibrant history and multicultural diversity.
There’s a strong culture of eating out in South Africa that embraces both tradition and innovation. Restaurants across the country masterfully serve traditional South African dishes, reimagining old favorites and pushing the boundaries of culinary creativity. These dining establishments provide locals and tourists alike with the opportunity to experience authentic South African cuisine in a warm and inviting atmosphere.
Yet, the culinary landscape of South Africa doesn’t end with its native dishes. It’s a crossroads where the flavors of the world intersect. Restaurants specializing in various international cuisines dot the cityscapes and townships. From Moroccan to Chinese, West African to Congolese, and Japanese to Italian, the country’s dining scene paints a vibrant palette of global flavors, offering a culinary journey that stretches far beyond its borders.
– Featured Restaraunt –
Cosy Corner 119 Ottery Rd, Wynberg Cape Town, 7824, South Africa Telephone: +27-21-797-2498
Established in 1973, Cosy Corner was one of Cape Town’s first Halaal eateries and remains one of its most popular.
Cosy Corner is a family business with a history. Locals will tell you about the part Cosy Corner played in the apartheid struggle, but it also features in many more personal and romantic stories – of engagements, family reunions, and birthdays. New generations of Capetonians and visitors continue to support the establishment that will become part of their nostalgia.
Cosy Corner is open all day and until 2 am at night. A trip to Cape Town isn’t complete without a visit.
Mastering the Art of the Gatsby Sandwich: A Step-by-Step Guide
Let’s embark on the culinary journey of creating the mighty Gatsby Sandwich, a dish known for its generous portions that encourage communal eating. This isn’t just any sandwich; it’s a giant celebration of flavors, designed to be shared, savored, and enjoyed by many. Therefore, when you plan on making a Gatsby, ensure you have enough hungry folks ready to relish it.
The secret to a successful Gatsby lies in strategic organization and proper sequencing of tasks. Begin with the fries – their crispy, golden perfection takes a little time, but it’s a crucial first step. The aroma wafting from the sizzling fries will create an inviting culinary stage for the subsequent steps.
Next, shift your attention to frying the eggs and toasting the bread. Timing is vital here: the goal is to ensure every element, from the fries to the eggs and bread, stays warm. If you get the sequencing right, you’ll assemble a Gatsby that’s not just a sandwich but an experience — a steaming, delicious testament to your culinary prowess, ready to be enjoyed the moment it’s served.
Essential Elements for Crafting a Gatsby Sandwich
Each ingredient adds a chapter to this delicious tale, while the necessary tools and equipment act as the narrators, guiding each component into its rightful place. As we prepare to delve into this culinary journey, let’s familiarize ourselves with the essentials needed to bring our Gatsby Sandwich to life.
Savor a taste of South Africa with the iconic Gatsby Sandwich. Large enough to satisfy a crowd and loaded with tantalizing flavors, this all-day delicacy guarantees a culinary adventure like no other. With each bite, experience the well-balanced blend of hearty fillings encapsulated in a crusty roll – a true celebration of South African street food culture.
Complementary Dishes for Your Gatsby Sandwich Experience
Unleash the full potential of your Gatsby Sandwich experience by pairing it with these highly recommended side dishes. Each dish has been selected for its ability to complement the bold flavors of the Gatsby Sandwich, enhancing your culinary journey through South Africa. Whether you prefer something light and refreshing or hearty and satisfying, there’s a recipe here to complete your meal.
Batido de Trigo ~ Wheat Milkshake
Indeed, this luscious milkshake, crafted with the richness of sweetened condensed milk, whole milk, and puffed wheat cereal, will make your tastebuds rejoice in delight. So, why wait? Immerse yourself in this Cuban sensation and let the celebration begin!
As you dive deeper into South African cuisine, these additional dishes will help to round out your experience. Pairing your Gatsby Sandwich with these complementary recipes allows for a richer understanding and appreciation of this diverse culinary landscape. Whether you’re preparing for a themed dinner party or looking to broaden your own culinary repertoire, these pairings promise an unforgettable taste of South Africa. Enjoy!
Photo Credits:
By Taste The World Cookbook – Copyright 2022 All rights reserved.
By Cosy Corner – By https://www.facebook.com/cosycornercpt
By Discott – Own work, CC BY-SA 4.0, https://commons.wikimedia.org/w/index.php?curid=94862405
By A3alb – Own work, CC BY-SA 4.0, https://commons.wikimedia.org/w/index.php?curid=35255699
By SkyPixels – Own work, CC BY-SA 4.0, https://commons.wikimedia.org/w/index.php?curid=40397200
By SkyPixels – Own work, CC BY-SA 4.0, https://commons.wikimedia.org/w/index.php?curid=40422317
By SkyPixels – Own work, CC BY-SA 4.0, https://commons.wikimedia.org/w/index.php?curid=40407637
The Cadbury Bunny Tryouts are returning for the fourth year with a new judges panel featuring none other than the beloved past winners. Beginning today through February 21, the Cadbury brand is calling on pet owners across the country to enter their pet(s) for the chance to be in the newest Cadbury Clucking Bunny commercial and win $5,000.
Grab those bunny ears, snap a photo and enter here to make sure your pet has a chance for fame and glory. This is your pets’ chance to win a spot on the big screen and become a member of a one-of-a-kind bunny-eared club and join past winners Henri the English Bulldog (2019), Lieutenant Dan (2020), and Betty the Frog (2021) as the next Cadbury Bunny.
For the first time in Bunny Tryouts history, these former “bunnies” are returning to the competition to form the first-ever Cadbury Bunny Tryouts Judges Panel, to help narrow down the rest and select this year’s finalists.
Judge’s Tips for Entering the Cadbury Bunny Tryouts
Henri the English Bulldog (2019) – The “OB” (original bunny) is back and advises all pet owners to capture the personality of their pet in their entry with fun faces.
Lieutenant Dan (2020) – Mr. Perseverance is back with that loveable smile and his tip is to be sure to tell us why your pet is special.
Betty the Frog (2021) – Betty is bringing girl-power to the judges panel and her tip is to let your uniqueness shine through in your entry photo.
“We are thrilled to be invited back this year and are ready to hop in to help Cadbury kick off the 4th Annual Cadbury Bunny Tryouts. We can’t wait to see the wide variety of pets who show off their ears. Good luck to all of the contestants entering this year’s competition!”
2022 Cadbury Bunny Tryouts Judges Panel
Do you want to help pick this year’s Cadbury Bunny? Join the all-star judges and vote!
Voting opens on March 8 and runs through March 22. The new Cadbury Bunny will be announced on March 29 and featured in the iconic CadburyClucking Bunny commercial this spring.
Brazilian Feijoada is a Black Bean Stew that is easy to make but hard to find the meats outside of Brazil. The thick and hearty black bean stew has three types of meat, Choriço (Portuguese Pork Sausage), Carne Seca (Salt Cured Beef), and Baby Back Ribs.
The ingredients in this recipe are the most commonly used in Feijoada. The Choriço and the Carne Seca were the hardest ingredients to find here in the USA.
The most common replacement suggested on the internet for Choriço is the Mexican Chorizo sausage although I have seen Brotwors and Kielbasa in other recipes. Many recipes call for pork belly as a replacement for the Carne Seca.
Brazilian Feijoada (Black Bean Stew)
So be creative and try different meats with your Feijoada.
How to Store Black Bean Stew
You can keep Brazilian Feijoada in an airtight container and it should last 3-4 days in the refrigerator. You can freeze this delicious black bean stew for up to 6 months.
History of the Brazilian Feijoada Recipe
Feijoada originated during the time Brazil was being colonized by Portugal. This dish originated in Portugal, and variations of it can be found in countries that were settled by Portuguese explorers.
The Metropolitian City Brasília, Brazil
Brasília, inaugurated as Brazil’s capital in 1960, is a planned city distinguished by its white, modern architecture, chiefly designed by Oscar Niemeyer. Laid out in the shape of an airplane, its “fuselage” is the Monumental Axis, 2 wide avenues flanking a massive park. In the “cockpit” is Praça dos Três Poderes, named for the 3 branches of government surrounding it.
A Brief History of Brasília
The name Brasília was first proposed in 1822, but construction only began in 1956, following the election of Juscelino Kubitschek as President of Brazil. Its official declaration as a city dates to 21. April 1960, and the process of moving the federal government offices started on that date.
Brasília was built in 41 months, from 1956 to April 21, 1960, when it was officially inaugurated. In 1987 Brasilia was included on UNESCO’s List of World Heritage Sites.
The original design (plano piloto) was inspired by the crucifix but is often referred to as an airplane. Each of its architectural marvels is strategically laid out along the Eixo Monumental (which forms the fuselage), and its residential and commercial blocks along with its two outspread wings (asas).
Tourism in Brasília
With long distances and harrowing six-lane highways connected by spaghetti junctions, Brasília presents challenges for walkers; consider renting a car or rideshares.
You’ll find a lively city hidden behind the futuristic facade. It’s not only a pilgrimage for architecture buffs but also foodies, night owls, and those seeking a unique travel experience.
Brazilian Cuisine
Brazilian Cuisine is characterized by, European, Amerindian, African, and most recently Asian influences. It varies greatly by region, reflecting the country’s mix of native and immigrant populations, and its continental size as well.
– Featured Restaraunt –
Rio Butiquim R. 34 Norte, 2 – Águas Claras Brasília – DF, 70297-400, Brazil
Excellent restaurant. The dishes and drinks are excellent. The pagode bands that play in the afternoons and pop-rock at night are excellent. The bathrooms are clean and the regulars are nice. There are big screens to watch games.
This Black Bean Stew recipe is a one-pot meal and easy to make. Brazilian Feijoada recipes always call for three types of meat, one in the form of a sausage. The stew is usually made with a mix of beef and pork.
What You Need to Make Brazilian Feijoada
Ingredients for Brazilian Feijoada (Black Bean Stew)
For the Stew:
2 tbsp olive oil
2 cups onions, chopped
2 tbsp garlic, chopped
2 bay leaves
Freshly ground black pepper, to taste
1 lb choriço sausage, sliced 1/4-inch thick
1 lb carne seca, cubed
1 lb baby back spareribs cut into individual ribs
1 lb black beans
10 cups water
Garnish:
1 orange, halved and cut into thin slices
Farofa
Brazilian hot sauce, to taste
4 cups cooked white rice
4 cups collard or kale greens, sauteed in olive oil
How to Cook Black Bean Stew
Time needed: 2 hours and 45 minutes
Cooking Directions for Brazilian Feijoada
Saute the Onions and Garlic
In a large heavy-bottom saucepan, over medium heat, add the oil. When the oil is hot, add the onions and garlic. Crush the bay leaves and add to the pan. Season with salt and pepper. Saute for 5 minutes.
Add the Sausage
Add the sausage and continue to cook for an additional 4 minutes.
Add the Beef, Ribs, and Beans
Add the cubed beef, ribs, beans, and water and bring the liquid to a boil, reduce the heat to medium-low and simmer until the beans are tender for about 2 1/2 hours.
Keep Beans Covered with Water
Add water as necessary to keep the beans covered. Using the back of a ladle, mash 1/4 of the beans. Reseason with salt and pepper if needed.
To serve, spoon some of the greens and rice onto each serving plate. Spoon the Feijoada over the rice. Shake some of the hot sauce over the entire plate. Garnish with the orange slices and farofa.
In a large heavy-bottom saucepan, over medium heat, add the oil. When the oil is hot, add the onions and garlic. Crush the bay leaves and add to the pan. Season with salt and pepper. Saute for 5 minutes.
2 tbsp olive oil, 2 cups yellow onion, 2 tbsp garlic, 2 bay leaf, black pepper
Add the sausage. Continue to cook for 4 minutes.
1 lbs choriço sausage
Add the cubed beef, ribs, beans, and water. Bring the liquid to a boil, reduce the heat to medium-low and simmer until the beans are tender for about 2 1/2 hours.
1 lbs carne seca, 1 lbs pork ribs, 1 lbs black beans, 10 cups water
Add water as necessary to keep the beans covered. Using the back of a ladle, mash 1/4 of the beans. Reseason with salt and pepper if needed.
For the Farofa:
In a large saute pan, over medium heat, melt the butter. Add the flour. Season with salt. Saute until golden, about 3 to 5 minutes. Remove from the heat.
To serve, spoon some of the greens and rice onto each serving plate. Spoon the Feijoada over the rice. Shake some of the hot sauce over the entire plate. Garnish with the orange slices and farofa.
4 cups white rice, Brazilian hot sauce, 1 orange, cassava flour, 4 cups collard greens
Notes
* 1 pound dry beans = 2 cups dry beans = 6 cups cooked beans (Feel free to substitute 6 cups of drained, canned beans if desired. However, if substituting canned beans, you will need to reduce the amount of water to 3-4 cups since the beans will not absorb much water as they cook.)
Other Recipes That Go Well With Brazilian Feijoada (Black Bean Stew)
Batido de Trigo ~ Wheat Milkshake
Indeed, this luscious milkshake, crafted with the richness of sweetened condensed milk, whole milk, and puffed wheat cereal, will make your tastebuds rejoice in delight. So, why wait? Immerse yourself in this Cuban sensation and let the celebration begin!
The Egg in a Hole recipe was invented in Boston, MA, and is made by cutting the center out of a piece of toast and cooking an egg in it. Combine that with a Bacon, Lettuce, and Tomato sandwich and you have the Egg-in-a-Hole BLT.
Other names for the “egg in a hole” dish, include; “bullseye eggs”, “eggs in a frame”, “eggs in a nest”, “gashouse eggs”, “gashouse special”, “gasthaus eggs”, “hole in one”, “one-eyed Jack”, “one-eyed Pete”, “pirate’s eye”, and “popeye”.
The biggest variation of this recipe is what type of bread or bacon to use. This recipe calls for regular bacon, but some prefer Canadian bacon. We also use thick-cut Artisan bread. If you want to make it an Egg with a Hat version toast the inside round and put it on top of the sandwich, like a hat.
How to Store Your Egg-in-a-Hole BLT
This sandwich is best when eaten cooked. However, you might want to cook it and take it to a picnic, or on a road trip, or you just made one too many and you want to save it for later. Whatever your case you do not want to put the mayonnaise or tomatoes on it until you are ready to eat it.
To store Egg-in-a-Hole BLT, place it in an airtight container in the refrigerator; stays good for 2 or 3 days. Do not freeze.
Egg-in-a-Hole BLT
History of the Egg-in-a-Hole and BLT Recipes
In 1896 an official recipe called “egg with a hat” was published in the 1896 Boston Cooking-School Cookbook by Fannie Merritt Farmer. The recipe called for a two-and-a-half-inch cookie cutter to remove the bread’s center. Then cook the egg in the hole and the round center is served atop becoming the “hat.”
In 1903, the “Good Housekeeping Everyday Cook Book” was published and it featured a recipe by Dr. Evan Mee for a club sandwich. The recipe called for bacon, lettuce, tomato, mayonnaise, and a slice of turkey between two slices of bread.
The Metropolitan City of Boston, Massachusetts
Boston, officially the City of Boston and also known as Beantown, is the capital and most populous city of the Commonwealth of Massachusetts. The city proper covers 48.4 square miles with a population of 675,647 in 2020, also making it the most populous city in New England.
Early Boston was first inhabited by the Massachusetts tribe of Native Americans in 2400 BC. The Europeans established the first settlement in 1625 and it eventually became the third-largest town in the Thirteen Colonies until Philadelphia outgrew it in the mid-18th century.
In 1773 a group of Bostonian citizens threw an entire shipment of tea into Boston Harbor. The Boston Tea Party was a key event leading up to the revolution.
The siege of Boston started the American Revolutionary War. The British Army was garrisoned in Boston when the siege broke out and New England Minutemen blocked the British Army from moving inland.
Tourism in Boston
Every Boston neighborhood has something amazing to offer. Back Bay, Chinatown, Dorchester, Jamaica Plain, Roxbury, East Boston, the North End, Seaport, and the South End all have neighborhood tours and in addition to outdoor farmers and artisan markets. They all have a variety of incredible restaurants and beautiful public art.
Cuisine in Boston
Boston Cuisine is known for, baked beans (hence the nickname “Beantown”), bulkie rolls, and various pastries. The Boston cream pie is not a pie at all but a cake with custard filling. Boston is also known for its roast beef sandwich shops. Most pizza and sandwich shops also serve “steak tips” (marinated cubes of sirloin), a common menu item at pizza establishments and backyard cookouts.
– Featured Restaraunt –
The Friendly Toast Restaurant 35 Stanhope St, Boston, MA 02116 Telephone: +1 (617) 456-7849
The Friendly Toast Restaurant
The Friendly Toast Restaurant serves up creative meals in a truly unique atmosphere and offers a fun and exciting dining experience morning, noon and night. They use the freshest ingredients (locally sourced whenever possible) and are environmentally friendly.
The team of chefs loves to create new and innovative dishes so they switch up the menu several times a year to feature seasonal favorites and new flavors. Each Toast features four unique weekly specials to keep it fresh! The main focus is to deliver the highest quality dishes made from scratch with the freshest ingredients.
This recipe will take about 25 minutes to make although the bacon takes the longest the egg and toast will burn if you do not watch it closely. Have all your ingredients laid out and a work area prepared because it goes fast.
Depending on how you want your egg done will dictate how long you cook the egg. If you want the egg yolk runny, only cook your egg for about a minute on each side.
What You Need to Make an Egg-in-a-Hole BLT Sandwich
The first slice of toast is the foundation for the BLT sandwich and the second slice, with an egg in the hole, tops the BLT resulting in an Egg in a Hole BLT.
Time needed: 25 minutes
How to Cook an Egg-in-a-Hole BLT Sandwich
Cook the Bacon
Preheat your oven to 400 degrees Fahrenheit. Line a baking tray with parchment paper, then place the bacon side-by-side on the tray.
Flip the Bacon
Cook the bacon for 18-20 minutes, flipping the bacon over 1/2 way through, 9-10 minutes. Continue to cook until it’s reached your desired level of crispiness. Remove the tray from the oven and transfer the bacon with tongs to a paper towel-lined plate. Set aside for later.
Toast the Bread
Heat a skillet to medium heat, then add butter and let melt. Add the bottom slice of bread and cook for 2 minutes, flip and toast for an additional 2 minutes. Remove from skillet and put on a plate.
Build the BLT Portion
Spread toast with mayo and top with lettuce, bacon, and tomato. Set aside for later.
Cut the Hole
Using a small glass or biscuit cutter, cut a hole into one slice of bread.
Cook the Egg in a Hole Toast
Return skillet to medium heat, then add butter and let melt. Add bread, crack an egg into the hole, and toast for 2 minutes. Flip and toast for 2 minutes more or until the egg is cooked.
Assemble and Serve
Season with pepper and top the BLT with the Egg in a Hole. Serve it Boston style with a cup of soup and a chocolate milkshake.
This sandwich is delicious by itself, but you might try Boston style with a cup of soup and a large chocolate milkshake.
Two great tastes that go great together. Made with Bacon, Lettuce, and Tomato on an Egg in a Hole Toast. Serve with a cup of soup and a large chocolate milkshake.
Preheat your oven to 400 degrees Fahrenheit. Line a baking tray with parchment paper, then place the bacon side-by-side on the tray.
Cook the bacon for 18-20 minutes, flipping the bacon over 1/2 way through, 9-10 minutes. Continue to cook until it’s reached your desired level of crispiness. Remove the tray from the oven and transfer the bacon with tongs to a paper towel-lined plate. Set aside for later.
3 slices bacon
Heat a skillet to medium heat, then add butter and let melt. Add the bottom slice of bread and cook for 2 minutes, flip and toast for an additional 2 minutes. Remove from skillet and put on a plate.
1 slice sandwich bread, 1 tbsp unsalted butter
Spread toast with mayo and top with lettuce, bacon, tomato. Set aside for later.
2 tbsp mayonnaise, 2 slices iceberg lettuce, 1/2 large tomatoes
Cook the Egg in a Hole Toast
Using a small glass or biscuit cutter, cut a hole into one slice of bread.
Return skillet to medium heat, then add butter and let melt. Add bread, crack an egg into the hole, season with pepper, and toast for 2 minutes. Flip and toast for 2 minutes more or until the egg is cooked.
Indeed, this luscious milkshake, crafted with the richness of sweetened condensed milk, whole milk, and puffed wheat cereal, will make your tastebuds rejoice in delight. So, why wait? Immerse yourself in this Cuban sensation and let the celebration begin!
In Pennsylvania Dutch Cuisine, Chicken Corn Soup is one of the most popular dishes with roots dating back to the 1700s. This recipe is made with chicken, cream-style corn, egg noodles, and vegetables. It’s a hearty and delicious, thick and creamy soup that does the body good.
There are two basic versions of chicken corn soup, the Amish version, and the Asian version. In Amish cuisine, chicken, creamed corn, vegetables, and small flour dumplings are cooked in a broth.
Pennsylvania Dutch Chicken Corn Soup
In Asian cuisine it’s made with chicken, corn, eggs, and pepper, sometimes with noodles added, commonly called egg drop soup.
How to Store Corn Soup
Chicken corn soup will last 3-4 days in airtight containers in the refrigerator. You can also freeze it in freezer-safe bags or containers for up to 6 months.
To reheat the frozen chicken corn soup, simply allow it to thaw in the fridge overnight, then reheat until piping hot throughout.
History of the Recipe
Chickens were domesticated in Asia about 8000 years ago, so they were the first people to make chicken soup. However, corn was domesticated in the Americas about 8,700 years ago and they were the first people to make corn soup. These two great tastes would not meet until the European settlers brought chickens to the new world.
Pennsylvania Dutch cuisine reflects influences of the German agrarian society from which it comes and the rejection of rapid change. The oldest recorded recipe for chicken corn soups that I could find. dates back to 1853 in; A Quaker Woman’s Cookbook: The “Domestic Cookery” of Elizabeth Ellicott Lea.
The Borough of New Holland, Pennsylvania
New Holland is a borough in Lancaster County, Pennsylvania, United States. Located just 13 miles east of Lancaster, the county seat, the sleepy little village of New Holland is known for its beautiful rolling hills, Amish and Mennonite farmlands, and relaxing atmosphere.
A Brief History of New Holland
In 1728, John Diffenderfer and his family settled in the wooded countryside, near what would become New Holland, Lancaster County. Other German farmers that followed Diffenderfer were spread thinly across the countryside of northern Lancaster County.
Abe Zimmerman, a 26-year-old village tradesman in 1895, opened a machine repair shop. Zimmerman’s New Holland Machine Shop introduced a portable feed mill in 1899 and went on to produce other farm equipment innovations aimed at reducing a farmer’s labor.
Today, it is known as Case-New Holland, the second-largest manufacturer of agricultural equipment in the world with more than 10,000 dealers in 160 countries.
The New Holland Farmers Fair
New Holland also celebrates its agricultural tradition the first week of every October at the New Holland Farmers Fair. Since 1927, the town fair has featured a slice of real hometown Americana with funnel cakes, barbecue, horseshoes, and other simple pleasures. There also are exhibitions of arts and crafts, fruits, vegetables, wine, photos, needlework, and quilting.
New Holland Cuisine
There is an abundance of Food and Restaurants to sample while visiting the Pennsylvania Duch country. Our friend Lorraine at Grateful Prayer Thankful Heart has put together a list of culinary treats in and around New Holand, PA.
– Featured Restaurant –
New Holland Family Restaurant 624 W Main St, New Holland, PA 17557 Telephone: +1 (717) 355-2600
Chic stop for elaborate cream puffs, pastries & wine, plus Notre Dame views from outdoor tables.
This Chicken Corn Soup is easy to make and a one-pot meal recipe that can be cooked and served in a Dutch oven or soup pot. Add the first 7 ingredients into a Dutch oven and simmer for 30 minutes. Then add the last 3 ingredients and cook for additional 10 minutes.
What You Need to Make Pennsylvania Dutch Chicken Corn Soup
Ingredients for Chicken Corn Soup
Equipment Needed
1 Knife
1 Cutting Board
1 Dutch Oven
Ingredients Needed
12 cups water
1 med onion, chopped
2 celery ribs, chopped
1 cup carrots, shredded
2 lb chicken breasts, cubed
3 chicken bouillon cubes
¼ tsp pepper
2 cups egg noodles, uncooked
2 cans cream-style corn, 14¾ ounces cans
¼ cup butter
How to Cook Pennsylvania Dutch Chicken Corn Soup
Time needed: 40 minutes
Cooking Directions
Simmer
Place the water, onion, celery, carrots, chicken, bouillon cubes, and pepper in a Dutch oven; bring slowly to a boil. Reduce heat; simmer, uncovered until chicken is no longer pink and vegetables are tender about 30 minutes.
Cook
Stir in noodles, corn, and butter. Cook, uncovered, until noodles are tender, about 10 minutes, stirring occasionally.
Serve this delicious Chicken Corn Soup with Saltine Crackers, a Grilled Cheese Sandwich, or a nice Cold Cut Deli Sandwich for a perfect meal.
It's a delicious Pennsylvania Dutch Chicken Corn Soup that's a hearty and delicious, thick and creamy soup that does the body good. Serve with Saltine Crackers, a Grilled Cheese Sandwich, or a nice Cold Cut Deli Sandwich for a perfect meal.
Place the water, onion, celery, carrots, chicken, bouillon cubes, and pepper in a Dutch oven; bring slowly to a boil. Reduce heat; simmer, uncovered until chicken is no longer pink and vegetables are tender about 30 minutes.
1 med yellow onion, 2 celery ribs, 1 cup carrot, 2 lbs chicken breast, 3 chicken bouillon cubes, ¼ tsp black pepper, 12 cups water
Stir in noodles, corn and butter. Cook, uncovered, until noodles are tender, about 10 minutes, stirring occasionally.
Storage: Chicken corn soup will last 3-4 days in airtight containers in the refrigerator. You can also freeze it in freezer-safe bags or containers for up to 6 months.Reheat: To reheat the frozen chicken corn soup, simply allow it to thaw in the fridge overnight, then reheat until piping hot throughout.
Other Recipes That Go Well With Pennsylvania Dutch Chicken Corn Soup
Batido de Trigo ~ Wheat Milkshake
Indeed, this luscious milkshake, crafted with the richness of sweetened condensed milk, whole milk, and puffed wheat cereal, will make your tastebuds rejoice in delight. So, why wait? Immerse yourself in this Cuban sensation and let the celebration begin!
The Strawberry Cream Puffs are a French-inspired pastry that’s light and fluffy. The pastry is filled with a sweet and tasty strawberry cream filling. It is perfect for a Sunday brunch, with coffee and tea, an after-dinner dessert, or on a romantic date.
Your favorite fruit will work with this recipe, just replace the strawberries with your fruit. Some of my favorites are; Tangerine, Peach, Blackberry, and Cherry to name a few.
How long do Cream Puff Pastries Last?
You can store them in an airtight container in the refrigerator for 2-3 days and can freeze even filled puffs for several weeks.
History of the Cream Puff Pastry:
Cream puffs are rich desserts that made their debut in the United States in 1880. However, the first cream puff originated in Europe sometime during the 1540s when Catherine de Medici’s pastry chef created the baked puffed shells for Catherine’s husband, Henry II of France.
The Metropolitan City of Paris, France
Paris, France’s capital, is a major European city and a global center for art, fashion, gastronomy, and culture. Its 19th-century cityscape is crisscrossed by wide boulevards and the River Seine. Beyond such landmarks as the Eiffel Tower and the 12th-century, Gothic Notre-Dame cathedral, the city is known for its cafe culture and designer boutiques along the Rue du Faubourg Saint-Honoré.
The City of Paris, France
A Brief History of Paris
The Parisii, a sub-tribe of the Celtic Senones, inhabited the Paris area from around the middle of the 3rd century BC. One of the area’s major north-south trade routes crossed the Seine on the île de la Cité; this meeting place of land and water trade routes gradually became an important trading center. The Parisii traded with many river towns (some as far away as the Iberian Peninsula) and minted their own coins for that purpose.
Tourism in Paris
The center of Paris contains the most visited monuments in the city, including the Notre Dame Cathedral (now closed for restoration) and the Louvre as well as the Sainte-Chapelle; Les Invalides, where the tomb of Napoleon is located, and the Eiffel Tower are located on the Left Bank south-west of the center.
The Panthéon and the Catacombs of Paris are also located on the Left Bank of the Seine. The banks of the Seine from the Pont de Sully to the Pont d’Iéna have been listed as a UNESCO World Heritage Site since 1991.
French Cuisine
French cuisine developed throughout the centuries influenced by the many surrounding cultures of Spain, Italy, Switzerland, Germany, and Belgium. In addition to its own food traditions on the long western coastlines of the Atlantic, the Channel, and inland.
– Featured Bakery –
Odette 77 Rue Galande, 75005 Paris, France Telephone: (+ 33) 06 37 57 04 45
Chic stop for elaborate cream puffs, pastries & wine, plus Notre Dame views from outdoor tables.
In a large saucepan, bring water, butter, sugar, and salt to a boil. Add flour all at once and stir until smooth ball forms.
Mix in the Eggs
Remove from the heat and beat in eggs, one at a time. Continue beating until the mixture is smooth and shiny.
Divide the Dough into 10 Balls
Using a large spoonful of dough, drop onto a large ungreased baking sheet 2-in. apart (it should make 10 dough balls).
Bake the Puffs
Bake at 400° for about 35 minutes or until golden brown. Cool on a wire rack.
For the Filling
Combine berries and 1/4 cup sugar. Chill 30 minutes.
Whip the Cream
Whip the cream and remaining ¼ cup sugar until stiff. Gently fold in the berries in the cream mixture.
Assemble the Cream Puff
Cut the tops off the puffs. Fill it with a layer of strawberry cream and replace the tops. Sprinkle with confectioners’ sugar, and serve with additional berries and mint leaves.
Serve this delightful puff pastry with milk, coffee, or tea. You can’t go wrong with this tasty treat, it will be the talk of the day. So give your taste buds something to sing about, and make the pastry! 😛 🍓 ☕ 🥛
The pastry is filled with a sweet and tasty strawberry cream filling. It is perfect for a Sunday brunch, with coffee and tea, an after-dinner dessert, or on a romantic date.
In a large saucepan, bring water, butter, sugar, and salt to a boil. Add flour all at once and stir until smooth ball forms.
1 cup water, ½ cup unsalted butter, 1 tsp white sugar, ¼ tsp salt, 1 cup all-purpose flour
Remove from the heat and beat in eggs, one at a time. Continue beating until the mixture is smooth and shiny.
4 eggs
Using a large spoonful of dough, drop onto a large ungreased baking sheet 2-in. apart (it should make 10 dough balls).
Bake at 400° for about 35 minutes or until golden brown. Cool on a wire rack.
For the Cream Filling:
Combine berries and ¼ cup sugar. Chill 30 minutes.
2 pints fresh strawberries, ½ cup white sugar
Beat the cream and remaining ¼ cup sugar until stiff. Gently fold in the berries in the cream mixture.
2 cups heavy cream
Assemble the Cream Puff:
Cut the tops off the puffs. Fill it with a layer of strawberry cream and replace the tops. Sprinkle with confectioners' sugar, and serve with additional berries and mint leaves.
fresh strawberries, Mint leaves, Confectioners’ sugar
Other Recipes That Go Well With Strawberry Cream Puffs
Georgia Peach Ice Cream
This recipe for non-churn Peach ice cream is both easy and tasty. You can use it in an ice cream maker if you want but it turns out creamy and smooth without the maker. It will have your taste buds doing the happy dance.
By Taste The World Cookbook – Copyright 2022 All rights reserved.
By Odette – By https://www.facebook.com/leschouxodetteparis/
By Yann Caradec from Paris, France – La Tour Eiffel vue de la Tour Saint-Jacques, CC BY-SA 2.0, https://commons.wikimedia.org/w/index.php?curid=34933538
This hearty Ham, Hominy, and Cauliflower Chowder is an original recipe by cooks from Taste the World Cookbook. It’s a hearty dish that uses a Cauliflower Purée base. The cheese is melted into the purée, then the ham, hominy, and cauliflower florets are added.
The star of this recipe is the cauliflower purée. Although we used ham and hominy for this recipe, you can use other meats and vegetables. Some of the most popular combinations are (clam & potato), (bacon & corn), and (chicken & mushroom).
You will need to adjust your cooking times if you use other meats or root vegetables that take longer to cook. Don’t cook raw meat in the chowder but instead pre-cook it before adding it to the chowder.
Hearty Ham, Cauliflower and Hominy Chowder
How to Store Leftover Ham, Hominy, and Cauliflower Chowder
Store leftover chowder in an airtight container in the refrigerator for up to 4 days. Unfortunately, this chowder will not freeze well because of the milk in it. When you reheat the chowder, the liquid in it will take on a grainy texture. The only way to avoid that is to substitute the milk for non-dairy milk (almond milk, soy milk, coconut milk, ect…).
History of Chowder
Chowder is a type of soup or stew often prepared with milk or cream. The origin of the chowder is obscure but it’s believed that it was brought to North America by immigrants from England and France and seafarers more than 250 years ago. In 1890, in the magazine American Notes and Queries, it was said that the dish was of French origin.
Although we found thousands of recipes for ham and cauliflower chowder/soup, we couldn’t find any that included hominy with it. When we developed this recipe we gave it a little bit of southwest flair by incorporating hominy and jalapeno peppers into it. That is why Phoenix has been geotagged for this recipe, it’s where the Test Kitchen for Taste the World Cookbook is located.
The Metropolitan City of Phoenix, Arizona
Phoenix is the capital of Arizona and the hub of the southwestern U.S. Known for its year-round sun and warm temperatures, it anchors a sprawling, multicity metropolitan area known as the Valley of the Sun.
A Brief History of Phoenix, Arizona
The Hohokam people occupied the Phoenix area for 2,000 years. They created roughly 135 miles (217 kilometers) of irrigation canals, making the desert land arable, and paths of these canals were used for the Arizona Canal, Central Arizona Project Canal, and the Hayden-Rhodes Aqueduct. They also carried out extensive trade with the nearby Ancient Puebloans, Mogollon, and Sinagua, as well as with the more distant Mesoamerican civilizations. It is believed periods of drought and severe floods between 1300 and 1450 led to the Hohokam civilization’s abandonment of the area.
The history of the city of Phoenix begins with Jack Swilling, a Confederate veteran of the Civil War who prospected in the nearby mining town of Wickenburg in the newly formed Arizona Territory. As he traveled through the Salt River Valley in 1867, he saw a potential for farming to supply Wickenburg with food. The railroad’s arrival in the valley in the 1880s was the first of several events that made Phoenix a trade center whose products reached eastern and western markets.
On February 14, 1912, Phoenix became a state capital, as Arizona was admitted to the Union as the 48th state under President William Howard Taft. In 1920, Phoenix would see its first skyscraper, the Heard Building and in 1929, Sky Harbor was officially opened.
Phoenix has maintained a growth streak in recent years, growing by 24.2% before 2007. This made it the second-fastest-growing metropolitan area in the United States, surpassed only by Las Vegas.
Tourism in Phoenix
With more than 62,000 hotel rooms in over 500 hotels and 40 resorts, greater Phoenix sees over 16 million visitors each year, most of whom are leisure travelers. It’s known for high-end spa resorts, golf courses, and vibrant nightclubs. Other highlights include the Desert Botanical Garden, displaying cacti and numerous native plants.
There are many attractions near Phoenix, such as Agua Fria National Monument, Arcosanti, Casa Grande Ruins National Monument, Lost Dutchman State Park, Montezuma’s Castle, and Montezuma’s Well, and Organ Pipe Cactus National Monument.
Arizona is home to many famous attractions such as the Grand Canyon, Lake Havasu, Meteor Crater, the Painted Desert, the Petrified Forest, Tombstone, Kartchner Caverns, Sedona, and Lowell Observatory.
The Cuisine of Phoenix
Like many other western cities, Phoenix’s earliest restaurants were often steakhouses. Today, Phoenix is also renowned for its Mexican food, thanks to its large Hispanic population and its proximity to Mexico. Some of Phoenix’s restaurants have a long history.
Phoenix boasts cuisines from all over the world, such as barbecue, Cajun/Creole, Greek, Hawaiian, Irish, Japanese, sushi, Italian, fusion, Persian, Indian (South Asian), Korean, Spanish, Thai, Chinese, southwestern, Tex-Mex, Vietnamese, Brazilian, and French food.
– Featured Restaraunt –
Taylor’s Chowder House 3538 W Calavar Rd. Phoenix, AZ 85053 Telephone: +1 (602) 978-1815
Taylor’s Chowder House
Clam chowder, fried fish & broiled seafood are served at this eatery with whimsical nautical decor.
How to Make This Hearty Ham, Cauliflower, and Hominy Chowder Recipe
In this recipe, you will use ¾ of the cauliflower florets to make the puree base and ¼ to remain whole for the chowder. If you want to give it a little more southwest flavor, add some chopped jalapeno peppers to the chowder.
What You Need to Make Ham, Cauliflower, and Hominy Chowder
It is always wise to have all your ingredients laid out and prepared before starting any recipe.
Equipment
1 Soup Pot
1 Blending Machine
1 Knife
1 Cutting Board
For the Cauliflower Purée
2 tbsp butter
½ cup onion, diced
1 clove of garlic, minced
¼ cup all-purpose flour
2 cup milk
3 cup water
1 tsp salt
2 ½ lbs. cauliflower florets, chopped
For the Chowder
1 cup cooked ham, cubed
1 cup hominy
½ cup mushrooms, chopped
3 cup cheddar cheese, shredded
jalapeno peppers, optional
Garnish With
Parmesan cheese, shredded
red chili flakes
How to Cook Ham, Hominy, and Cauliflower Chowder
Time needed: 1 hour
Cooking Directions
For the Cauliflower Purée:
In a large soup pot, melt the butter over medium heat. Add the onion and cook until softened, about 5 minutes. Add the garlic and stir until fragrant, about 30 seconds.
Prep the Cauliflower:
Stir in the flour and cook for 30-60 seconds longer. Slowly whisk in the milk and the broth. Add the salt. Bring to a light simmer, then add the cauliflower.
Cook the Cauliflower:
Cover the pot and cook until the cauliflower is tender about 15 minutes. Remove ¼ of the cauliflower to reserve for chowder.
Purée the Cauliflower:
Working in batches, transfer ¾ of the soup to a blender and blend until smooth. Return to the soup pot.
For the Chowder:
Stir in the cheese and stir until the cheese is melted. Stir in the ham, hominy, remaining cauliflower, and jalapeno peppers (optional) and heat until the ham is fully heated.
Garnish With:
Serve warm and garnish with parmesan cheese and red chili flakes as desired.
Hearty Ham, Cauliflower and Hominy Chowder
You can store the leftover Ham, Cauliflower, and Hominy Chowder for up to 4 days in a covered container in the refrigerator.
This recipe is thick and cheesy and nice and easy to make. A thick cauliflower puree combined with cheese, ham, and hominy makes a wonderfully flavorful dish that warms the soul.
In a large soup pot, melt the butter over medium heat. Add the onion and cook until softened, about 5 minutes. Add the garlic and stir until fragrant, about 30 seconds.
2 tbsp unsalted butter, ½ cup yellow onion, 1 clove garlic
Stir in the flour and cook for 30-60 seconds longer. Slowly whisk in the milk and the broth. Add the salt. Bring to a light simmer, then add the cauliflower.
¼ cup all-purpose flour, 2 cup milk, 3 cup vegetable broth, 1 tsp salt, 2 ½ lbs. cauliflower florets
Cover the pot and cook until the cauliflower is tender about 15 minutes. Remove ¼ of the cauliflower to reserve for chowder.
Working in batches, transfer ¾ of the soup to a blender and blend until smooth. Return to the soup pot.
For the Chowder
Stir in the cheese and it's melted then stir in the ham, hominy, remaining cauliflower, and jalapeno peppers (optional) and heat until the ham is heated through.
1 cup ham, 1 cup hominy, ½ cup white mushrooms, 3 cup cheddar cheese, ¼ cup jalapeño pepper
Garnish With
Garnish with parmesan cheese, and red chili flakes as desired.
parmesan cheese, crushed red pepper
Notes
Store the leftover chowder in an airtight covered container in the refrigerator for up to 4 days.
Baked Spaghetti and Meatballs is a comforting pasta dish that may seem quintessentially Italian, but it did not get its start in Italy. In fact, many restaurants in Italy today don’t even serve spaghetti and meatballs.
Baking your spaghetti is an unusual way of cooking spaghetti but it is so good. The traditional way is to cook the ground beef and add it to the marina sauce then pour that over the cooked spaghetti noodles and serve. Even when it is made with meatballs it is not usually baked.
If you like a lot of liquid sauce on your spaghetti then baking it is probably not the way to go although you can always add more sauce even after baking. The melted mozzarella cheese on top is another unusual way of preparing spaghetti.
How to Store Spaghetti
To maximize the shelf life of cooked spaghetti and for safety and quality, refrigerate the spaghetti in shallow airtight containers or resealable plastic bags. Properly stored, cooked spaghetti will last for 3 to 5 days in the refrigerator.
History of Spaghetti and Meatballs
The star of this pasta dish is the tender and flavorful meatballs. Meatballs can be found in, but are not exclusive to, Italian cuisine. In fact, a lot of countries and cultures have their own version of meatballs.
Spaghetti and meatballs have always been popular among Italian immigrants in New York City. In the late 1800s, Italian immigrants had more access to meat than they did in Italy. In 1888, Juliet Corson of New York published the first known recipe for pasta with meatballs and tomato sauce.
If you ever travel to Italy, avoid ordering spaghetti and meatballs unless you see it on the menu. But if you visit an Italian restaurant in America, ordering spaghetti and meatballs will likely mean you get a house specialty!
The Metropolitan City of New York, NY, USA
New York City comprises 5 boroughs sitting where the Hudson River meets the Atlantic Ocean. At its core is Manhattan, a densely populated borough that’s among the world’s major commercial, financial and cultural centers. Its iconic sites include skyscrapers such as the Empire State Building and sprawling Central Park. Broadway theater is staged in neon-lit Times Square.
New York City is a global hub of business and commerce, as a center for banking and finance, retailing, world trade, transportation, tourism, real estate, new media, traditional media, advertising, legal services, accountancy, insurance, theater, fashion, and the arts in the United States; while Silicon Alley, metonymous for New York’s broad-spectrum high technology sphere, continues to expand.
A Brief History of New York
In the precolonial era, the area of present-day New York City was inhabited by Algonquian Native Americans, including the Lenape. Their homeland, known as Lenapehoking, included Staten Island, Manhattan, the Bronx, the western portion of Long Island (including the areas that would later become the boroughs of Brooklyn and Queens), and the Lower Hudson Valley.
A permanent European presence near New York Harbor began in 1624—making New York the 12th oldest continuously occupied European-established settlement in the continental United States. It was first ruled by the Dutch then the English took control. The Battle of Long Island, the largest battle of the American Revolutionary War, was fought in August 1776 within the modern-day borough of Brooklyn.
Over the course of the nineteenth century, New York City’s population grew from 60,000 to 3.43 million. The city was transformed by both commercial and residential development relating to its status as a national and international trading center, as well as by European immigration.
New York became the most populous urbanized area in the world in the early 1920s, overtaking London. The metropolitan area surpassed the 10 million mark in the early 1930s, becoming the first megacity in human history.
As of the 2020 census, the city has a population of 8,804,190 distributed over 300.46 square miles (778.2 km2) making New York City the most densely populated city in the United States.
Major tourist destinations in Manhattan include:
Times Square Broadway theater productions The Empire State Building The Statue of Liberty Ellis Island The United Nations Headquarters The World Trade Center (including the National September 11 Museum and One World Trade Center) The Metropolitan Museum of Art Central Park and Washington Square Park The Stonewall Inn Rockefeller Center Manhattan Chinatown Koreatown Curry Hill Harlem
Spanish Harlem Little Italy Little Australia luxury shopping along Fifth and Madison Avenues Events such as the Halloween Parade in Greenwich Village The Brooklyn Bridge (shared with Brooklyn) The Macy’s Thanksgiving Day Parade The lighting of the Rockefeller Center Christmas Tree The St. Patrick’s Day parade Seasonal activities such as ice skating in Central Park in the wintertime The Tribeca Film Festival Free performances in Central Park at Summerstage.
The Cuisine of New York City
The cuisine of New York City comprises many cuisines belonging to various ethnic groups that have entered the United States through the city. Almost all ethnic cuisines are well represented in New York, both within and outside the various ethnic neighborhoods.
– Featured Restaraunt –
Lilia – Italian Restaurant and Café 26 Broadway, Brooklyn, NY 11249, USA Telephone: +1 (718) 576-3095
Lilia Italian Restaurant and Café
Lilia brings the best of Italy to Williamsburg where wood-fired seafood, hand-crafted pasta, classic Italian cocktails, and warm hospitality come together to create a casual dining experience.
Cooking Directions for Baked Spaghetti and Meatballs
Preheat the Oven
Preheat the oven to 375 degrees F. Lightly oil a 9×9 baking dish or coat with nonstick spray.
Form the Meatballs
In a large bowl, combine beef, pork, egg, Panko, Parmesan, and bruschetta seasoning; season with salt and pepper, to taste. Using a wooden spoon or clean hands, stir until well combined. Roll the mixture into 1-inch meatballs, forming about 20 meatballs.
Brown the Meatballs
Heat olive oil in a large stockpot or Dutch oven over medium heat. Add meatballs, in batches, and cook until all sides are browned about 2-3 minutes. Transfer to a paper towel-lined plate; set aside.
Boil the Pasta
In a large pot of boiling salted water, cook pasta according to package instructions; drain well and stir in marinara sauce.
Bake the Dish
Add pasta to the prepared baking dish and top with meatballs; sprinkle with mozzarella. Place into oven and bake until bubbly and heated through, about 15-20 minutes.
Garnish and Serve
Serve immediately, garnished with parsley, if desired.
Garnish your Baked Spaghetti and Meatballs with some fresh chopped parsley and serve with garlic toast.
In a large bowl, combine beef, pork, egg, Panko, Parmesan, bruschetta seasoning mix; season with salt and pepper, to taste. Using a wooden spoon or clean hands, stir until well combined. Roll the mixture into 1 1/4-to-1 1/2-inch meatballs, forming about 18-20 meatballs.
8 oz 80/20 ground beef, 8 oz ground pork, 1 large egg, ¼ cup bread crumbs, ¼ cup parmesan cheese, 1 tbsp Italian Bruschetta Seasoning Mix, salt
Chill in the refrigerator for 30 minutes before cooking.
Preheat oven to 375 degrees F. Lightly oil a 9×9 baking dish or coat with nonstick spray.
1 tbsp olive oil
Heat olive oil in a large stockpot or Dutch oven over medium heat. Add meatballs, in batches, and cook until all sides are browned, about 2-3 minutes. Transfer to a paper towel-lined plate; set aside.
In a large pot of boiling salted water, cook pasta according to package instructions; drain well and stir in marinara sauce.
12 oz spaghetti, 3 cups marinara sauce
Add pasta to the prepared baking dish and top with meatballs; sprinkle with mozzarella. Place into oven and bake until bubbly and heated through, about 15-20 minutes.
2 cups mozzarella cheese
Serve immediately, garnished with parsley, if desired.
Recipes That Go Well With Baked Spaghetti and Meatballs
Italian Bruschetta Seasoning Mix
Whip up this flavorful Bruschetta Seasoning Mix with ease and speed, a kitchen essential that's ready in just minutes. Infuse the herby goodness into your beloved pasta dishes, sprinkle it on pizza, or add a flavorful twist to focaccia. With this versatile mix at your disposal, every meal can have that delightful Italian finish.
By Taste The World Cookbook – Copyright 2022 All rights reserved.
By Lilia – Italian Restaurant and Café – By https://www.lilianewyork.com/
By Fred Hsu on en.wikipedia – Own work, CC BY-SA 4.0, https://commons.wikimedia.org/w/index.php?curid=112382958
By David Shankbone – Own work, CC BY-SA 3.0, https://commons.wikimedia.org/w/index.php?curid=90026371
By Jim Griffin – City Building and Unisphere — this morning, CC0, https://commons.wikimedia.org/w/index.php?curid=108719748
By Jim.henderson – Own work, CC0, https://commons.wikimedia.org/w/index.php?curid=8941468
By Image from Flickr published under Creative Commons Attribution 2.0 Generic (CC BY 2.0) by user soomness – https://c2.staticflickr.com/2/1767/42671359815_5ef8119d53_o.jpg, CC BY 2.0, https://commons.wikimedia.org/w/index.php?curid=72365445
By User:Mcj1800 – User:Mcj1800, CC BY-SA 4.0, https://commons.wikimedia.org/w/index.php?curid=90026667
By Steve Cadman – originally posted to Flickr as The United Nations Building, CC BY-SA 2.0, https://commons.wikimedia.org/w/index.php?curid=4478254
By Kgwo1972 at English Wikipedia – Transferred from en.wikipedia to Commons., Public Domain, https://commons.wikimedia.org/w/index.php?curid=4172409
This Kielbasa, Pepper, and Potato Skillet comes to us from Warsaw, Poland. This quick & easy recipe is an old favorite dinner recipe of mine. The Kielbasa and potatoes taste wonderful together and the sweet peppers are the perfect complement to the dish.
You can use any type of sausage for this recipe, obviously, if you choose a sausage that comes from the store uncooked you will need to adjust the cooking time. As with the sausage, you can choose from a wide variety of roots and vegetables to use. The two essential ingredients for this recipe, in my opinion, are fish sauce and citrus. In case you did not know, Worcestershire sauce is a fermented fish sauce.
How to Store the Kielbasa, Pepper, and Potato Skillet
Leftovers should be stored in an airtight container and refrigerated within 2 hours of cooking or reheating. Use the leftover Kielbasa skillet within 3 to 4 days or freeze it for up to 2 months.
History of the Kielbasa, Pepper, and Potatoes
Kielbasa is any type of meat sausage from Poland and is a staple of Polish cuisine. In American English, the word typically refers to a coarse, U-shaped smoked sausage of any kind of meat.
The Potato was the first domesticated vegetable in the region of modern-day southern Peru and extreme northwestern Bolivia between 8000 and 5000 BC. The cultivation of potatoes in South America may go back 10,000 years.
Peppers are native to Mexico, Central America, and northern South America. Pepper seeds were imported to Spain in 1493 and then spread through Europe and Asia. The mild bell pepper cultivar was developed in the 1920s, in Szeged, Hungary.
Kielbasa, Pepper, and Potato Skillet
Warsaw, Poland
Warsaw is the capital and largest city of Poland. The metropolis stands on the River Vistula in east-central Poland and its population is officially estimated at 1.8 million residents within a greater metropolitan area of 3.1 million residents, which makes Warsaw the 7th most-populous capital city in the European Union.
Warsaw, Poland
The city area measures 517 km2 (200 sq mi) and comprises 18 boroughs, while the metropolitan area covers 6,100 km2 (2,355 sq mi). Warsaw is an alpha global city, a major cultural, political, and economic hub, and the country’s seat of government. Its historical Old Town was designated a UNESCO World Heritage Site.
A Brief History of Warsaw, Poland
The history of Warsaw spans over 1400 years. At that time, the city evolved from a cluster of villages to the capital of a major European power, the Polish–Lithuanian Commonwealth. Fortified settlements founded in the 9th century form the core of the city, in today’s Warsaw Old Town.
The city has hosted many crucial events in the history of Poland. It was the site of the election of Polish kings, the meeting of the Polish parliament (Sejm), and events such as the Polish victory over the Bolsheviks at the Vistula, during the Battle of Warsaw (1920). In recent years the history-laden city has grown to become the multicultural capital of a modern European state and a major commercial and cultural center of Central Europe.
Tourism in Warsaw, Poland
There are over 60 museums and galleries in Warsaw that are accessible to the public. As interesting examples of expositions, the most notable are: the world’s first Museum of Posters boasting one of the largest collections of art posters in the world, and the Museum of the History of Polish Jews.
The Cuisine of Warsaw, Poland
Warsaw’s culinary tradition has been shaped by its multicultural population. The city’s cuisine is distinct from that of other cities and towns in Poland. In 2021, National Geographic named Warsaw one of the top cities for vegans in Europe. Śródmieście Południowe (Southern Downtown) and its “hipster food culture” was singled out as the epicenter.
– Featured Restaraunt –
Restauracja Polska Komitetu Obrony Robotników 24, 02-148 Warszawa, Poland
Restauracja Polska
Restauracja Polska is a brand new addition to the culinary map of Warsaw, a place where you can enjoy the taste and form of slightly different interpretations of the dishes we all know and love. Our menu is not only an imaginative culinary tale but also a promise of the multidimensional taste experience we offer our guests.
The smells of home cooking, jars of preserves on Grandma’s pantry shelves, a cottage in the country, a fisherman bringing home the morning’s catch – are a few of the concepts we used for inspiration while compiling our original menu.
Our kitchen uses the highest quality Polish products, paying attention to their natural origin and carefully selecting ingredients for each dish being prepared. Let us mention our own smokehouse, where we smoke fresh meats and fish from Polish lakes. We highly recommend our house-made, crispy, fragrant bread and rolls. Only here can you savor traditional Polish spirits such as fruit cordials and meads, made according to period recipes. To complete the taste experience, we offer a wide range of carefully selected wines, including Polish varieties.
Restauracja Polska provides not only unique flavors but also a special atmosphere thanks to the interior and the exceptional staff. Join us for a culinary journey full of traditional Polish tastes, aromas, and memories.
How to Make This Kielbasa, Pepper, and Potato Skillet Recipe
This dish is quick and easy to make, the most time is spent cooking the potatoes. The smaller the potato cube the faster it will cook. In this recipe, I used ready-to-eat Kielbasa, but you can use bratwurst or even hot dogs. Regardless of the meat you choose make sure it is thoroughly cooked.
What You Need to Make This Recipe
Ingredients for Kielbasa, Pepper, and Potato Skillet
Equipment Needed
1 Knife
1 Cutting Board
1 Dutch Oven
Ingredients Needed
2 tsp vegetable oil
4 med red potatoes sliced 1/4″ thick
1 lb Kielbasa cut into 1-inch pieces
1 sm onion chopped
⅓ cup green bell pepper chopped
⅓ cup red bell pepper chopped
⅓ cup yellow bell pepper chopped
2 tbsp Worcestershire sauce
2 tbsp orange juice
½ tsp fresh basil chopped
¼ tsp salt
1 tsp black pepper or to taste
How to Cook This Kielbasa, Pepper, and Potato Skillet Recipe
Time needed: 26 minutes
Cooking Directions
Heat the Oil
Heat the oil in a heavy skillet over medium-high heat. Add the potatoes, cover the pan, and cook for 6 minutes, stirring occasionally. The potatoes should be browned and just crisp-tender.
Add the Kielbasa
Add the Kielbasa, onion, green, red, and yellow peppers to the skillet. Cook, stirring frequently, for 5 minutes or until the vegetables are crisp-tender.
Mix and Cook
In a small cup or bowl, stir together the Worcestershire sauce, orange juice, basil, salt, and pepper. Add to the skillet. Cook, stirring frequently, for 5 minutes or until the meat and vegetables are coated in the sauce and heated through.
Your family is going to love this skillet recipe, it’s a one-pan recipe that is easy to make and easy to clean up after. This dish never makes its way into the refrigerator as leftovers because everyone loves it so much.
A quick and easy-to-make one skillet dinner. The tender potatoes, bell peppers, and onions are enhanced by the delicious Kielbasa in this tasty Polish recipe.
Heat the oil in a heavy skillet over medium-high heat. Add the potatoes, cover the pan, and cook for 6 minutes, stirring occasionally. The potatoes should be browned and just crisp-tender.
2 tsp vegetable oil, 4 med red potatoes
Add the Kielbasa, onion, green, red, and yellow peppers to the skillet. Cook, stirring frequently, for 5 minutes or until the vegetables are crisp-tender.
1 lbs kielbasa sausage, 1 sm yellow onion, ⅓ cup green bell pepper, ⅓ cup red bell pepper, ⅓ cup yellow bell pepper
In a small cup or bowl, stir together the Worcestershire sauce, orange juice, basil, salt, and pepper. Add to the skillet. Cook, stirring frequently, for 5 minutes or until the meat and vegetables are coated in the sauce and heated through.
2 tbsp Worcestershire sauce, 2 tbsp orange juice, ½ tsp basil, ¼ tsp salt, 1 tsp black pepper
Other Recipes That Go With Kielbasa, Pepper, and Potato Skillet
Russian Raisin Cake ~ Русский Изюмный Пирог
Embark on a delightful culinary adventure with this authentic Russian Raisin Cake recipe. Brimming with juicy raisins, this tender and moist cake promises a burst of sweetness in every bite. As effortless to create as it is delightful to devour, this cake is the perfect companion to your morning coffee or afternoon tea. Enjoy the simplicity of its preparation and the rich, comforting flavor that defines this classic Russian delicacy.
By Taste The World Cookbook – Copyright 2022 All rights reserved.
By Restauracja Polska – By http://www.restauracjapolska.eu/
By Qbolewicz – Own work, CC BY-SA 4.0, https://commons.wikimedia.org/w/index.php?curid=93370913
By McBartosz – Own work, CC BY 3.0, https://commons.wikimedia.org/w/index.php?curid=51006094
By Dennis Jarvis from Halifax, Canada – Poland-00808 – Castle Square, CC BY-SA 2.0, https://commons.wikimedia.org/w/index.php?curid=54903814
By Tilman2007 – Own work, CC BY-SA 4.0, https://commons.wikimedia.org/w/index.php?curid=62112627
By Tilman2007 – Own work, CC BY-SA 4.0, https://commons.wikimedia.org/w/index.php?curid=62111139
By Tilman2007 – Own work, CC BY-SA 4.0, https://commons.wikimedia.org/w/index.php?curid=62112189
By Tilman2007 – Own work, CC BY-SA 4.0, https://commons.wikimedia.org/w/index.php?curid=61514803
By This photo was taken by Przemysław JahrAutorem zdjęcia jest Przemysław JahrWykorzystując zdjęcie proszę podać jako autora:Przemysław Jahr / Wikimedia Commons – Own work, Public Domain, https://commons.wikimedia.org/w/index.php?curid=26189009
For as long as I can remember, Boston Fruit Cookies have been a Christmas treat but this cookie is good any time of the year. This recipe comes to us from the kitchen of Nana Kissinger in Fayetteville, PA. We changed just a few things to bring out the flavor of Christmas.
In the original and most recipes you boil the raisins in water and reserve some of that water to add to the dough mixture. In our recipe, we added cranberries and soaked the raisins and cranberries in German Spiced Wine for 24 hours.
How to Store Boston Fruit Cookies
You can store your Boston Fruit Cookies in glass jars, plastic containers, or tins. Ensure any container that you use has an airtight seal to keep the cookies fresh. To keep your cookies fresher for a longer time, refrigerate or freeze them in a plastic airtight container or sealed plastic bags.
Boston is the capital and most populous city of the Commonwealth of Massachusetts in the United States and the 24th-most populous city in the country. The city proper covers 48.4 square miles with a population of 675,647 in 2020, also making it the most populous city in New England.
Boston, Massachusetts
A Brief History of Boston, Massachusetts
Prior to European colonization, modern-day Boston was originally inhabited by the indigenous Massachusett peoples. There were small Native communities throughout the area and they most likely moved between winter homes inland where hunting was plentiful, and summer homes along the coast where fishing and shellfish beds were plentiful.
European settlers arrived in what would become Boston in the early 1600s and many of the crucial events of the American Revolution occurred in or near Boston. In 1773, Parliament passed the Tea Act which prompted the Boston Tea Party, where a group of angered Bostonian citizens threw an entire shipment of tea sent by the East India Company into Boston Harbor.
In the 1820s, Boston’s population grew rapidly, and the city’s ethnic composition changed dramatically with the first wave of European immigrants. Irish immigrants dominated the first wave of newcomers with about 35,000 Irish settling in Boston.
Many architecturally significant buildings were built during the 20th century and transformed the city into the intellectual, technological, and political center we know today.
Tourism in Boston, Massachusetts
Boston is a very expensive city but it is well worth the extra cost to visit. The city offers some of the best food in the northeast and there are a ton of sights and entertainment.
The city offers both the new and the old, where cobbled-stone streets meet glass-enclosed shopping galleries, where The Freedom Trail landmarks stand beside cutting-edge restaurants and renowned performance theatres brush shoulders with trendy nightclubs.
The Cuisine of Boston, Massachusetts
Boston is known for, baked beans (hence the nickname “Beantown”), bulkie rolls, and various pastries. Boston cream pie is not a pie but a cake with custard filling. The origins are mysterious, but it is likely that antecedent cakes were made with either a sponge cake or pound cake.
– Featured Bakery –
Athan’s European Bakery 407 Washington St. Boston, MA 02135 (617) 783-0313
Athan’s Bakery
Athan’s European Bakery is an authentic cafe and artisan pastry shop. We believe we have brought a little bit of Europe to Boston. Our sweet offerings are handmade in our European-style kitchen according to classic and traditional techniques.
This recipe is time-consuming but worth the extra effort. The key to this recipe is the Spiced Wine. Be sure to soak your fruit in the wine for 24 hours prior to making these delicious cookies.
Soak the Raisins and Cranberries in German Spiced Wine for 24 hours.
What You Will Need to Make Boston Fruit Cookies
Ingredients to Make
Boston Fruit Cookies
Equipment
2 Glass Jars with Lids
1 Mixing Bowl
1Mixing Machine
1 Baking Sheet
Ingredients
1 ½ cup brown sugar
1 cup vegetable shortening
3 large eggs
3 ½ cup flour
1 tsp salt
6 oz raisins, soaked in spiced wine or spiced rum
6 oz cranberries, soaked in spiced wine or spiced rum
½ cup raisin/cranberry juice, reserved from soaking the raisins and cranberries
1 tsp baking soda, dissolved into the raisin/cranberry juice
1 cup coconut, grated
1 ½ cup walnuts, chopped
How to Bake Boston Fruit Cookies
Boston Fruit Cookies
Time needed: 25 minutes
How to Bake Boston Fruit Cookies
Mix Wet Ingredients
Cream sugar and shortening. Add in Large eggs and beat well.
Mix in Dry Ingredients
Add in flour, salt, and soda dissolved in raisin/cranberry juice. Mix well.
Add Fruit
Stir in raisins, cranberries, walnuts, and coconut.
Drop and Bake
Drop by teaspoonfuls onto the cookie sheet. Bake at 375 degrees for 10-12 min.
Boston Fruit Cookies
You are going to love these cookies. The cranberries and spice wine make these cookies stand out from the usual Boston Fruit Cookie.
Other Recipes That Go Well With Boston Fruit Cookies
Georgia Peach Ice Cream
This recipe for non-churn Peach ice cream is both easy and tasty. You can use it in an ice cream maker if you want but it turns out creamy and smooth without the maker. It will have your taste buds doing the happy dance.
Spaghetti Alla Bolognese comes to us from the city of Bologna, Italy. However, we have substituted the standard spaghetti pasta with spaghetti squash and the spaghetti squash has its origins in China. This is a case of two great tastes that go together (Bolognese Sauce and Spaghetti Squash).
This Bolognese sauce is not to be confused with the Bolognese dog. However, the rich Bolognese sauce is full of flavor, thick, and will make you forget about canned spaghetti sauce. You can use it with any type of pasta or as a stand-alone stew with some crackers.
We chose to go with spaghetti squash to accompany this delicious sauce. I put the spaghetti squash in the oven to cook after I add the meat to the Ragù sauce in the recipe. It gives enough time to cook and shred the spaghetti squash.
An ingreadent some may not reconize is pancetta. Pancetta and bacon are both made from pork belly and are salt-cured and can be interchanged with each other in this recipe.
How to Store Spaghetti
To maximize the shelf life of cooked spaghetti for safety and quality, refrigerate the spaghetti in shallow airtight containers or resealable plastic bags. Properly stored, cooked spaghetti will last for 3 to 5 days in the refrigerator.
The History of Spaghetti
While some historians believe pasta originated in Italy, most are convinced Marco Polo actually brought it back from his epic voyage to China. The earliest known pasta was made from rice flour and was common in the east. In Italy, pasta was made from hard wheat and shaped into long strands.
Spaghetti alla Bolognese
The City of Bologna, Italy
Bologna is the capital and largest city of the Emilia-Romagna Region in Northern Italy. It is the seventh most populous city in Italy with about 390,000 inhabitants and 150 different nationalities. It’s a metropolitan area that is home to more than 1,000,000 people.
Visit the City of Bologna, Italy – By Conte di Cavour – Own work, CC BY-SA 4.0
A Brief History of Bologna, Italy
The first settlements date back to at least 1000 BC. The city has been an urban center, first under the Etruscans (Velzna/Felsina) and the Celts (Bona), then under the Romans (Bononia), then again in the Middle Ages, as a free municipality (for one century it was the fifth largest European city based on population).
Home to the oldest university in the world, the University of Bologna, founded in 1088, Bologna hosts thousands of students who enrich the social and cultural life of the city. Famous for its towers and lengthy porticoes, Bologna has a well-preserved historical center (one of the largest in Italy) thanks to a careful restoration and conservation policy that began at the end of the 1970s, on the heels of serious damage done by the urban demolition at the end of the 19th century as well as that caused by wars.
Tourism in Bologna, Italy
An important cultural and artistic center, its importance in terms of landmarks can be attributed to a varied mixture of monuments and architectural examples (medieval towers, antique buildings, churches, the layout of its historical center) as well as works of art that are the result of a first-class architectural and artistic history.
The City is also an important transportation crossroad for the roads and trains of Northern Italy, where many important mechanical, electronic, and nutritional industries have their headquarters. According to the most recent data gathered by the European Regional Economic Growth Index (E-REGI) of 2009, Bologna is the first Italian city and the 47th European city in terms of its economic growth rate.
In 2000 it was declared the European capital of culture and in 2006, a UNESCO “city of music”. The city of Bologna was selected to participate in the Universal Exposition of Shanghai 2010 together with 45 other cities from around the world.
The Cuisine of Bologna, Italy
Well, Bologna is known for cured meats, salty cheeses, handmade pasta, hearty meat sauces, and of course, gelato. And if that doesn’t sound like enough, there’s even a “food theme park” where you can experience and taste all the foods of Italy.
– Featured Restaraunt –
Al Sangiovese Restaurant Vicolo Del Falcone 2 40124 Bologna (Bologna) Telefono: +39 +39 051 583057
Al Sangiovese Restaurant
Sangiovese is a small typical restaurant in Bologna city center, a few meters from the enchanting Piazza Maggiore and the central Via D’Azeglio. Located in the heart of the city, Al Sangiovese restaurant is ideal for tourists but also for those who want to spend a lunch break enjoying the typical flavors of their city.
Organize your equipment and ingredients before you start. because this recipe takes some time and requires constant attention, primarily stirring the sauce. So chop those vegetables and let’s make some Spaghetti alla Bolognese.
What You Will Need to Make Spaghetti alla Bolognese
Ingredients for Spaghetti alla Bolognese
Equipment Needed
Dutch Oven
Spatula
Baking Sheet
Two Forks
For the Béchamel
4 tbsp unsalted butter
4 tbsp flour
2 ⅔ cups milk
1 cup grated parmesan cheese
black pepper to taste
salt to taste
For the Ragù
3 tbsp extra virgin olive oil
3 oz pancetta or thick bacon finely chopped
1 onion finely diced
3 med stalk of celery with leaves finely diced
3 small carrots finely diced
6 cloves of garlic roughly chopped
10 oz ground pork
10 oz ground beef
2 tbsp tomato paste
⅔ cup dry red wine
1 cup half and half or heavy cream or milk
1 28- can crushed tomatoes 28 oz can
black pepper to taste
salt to taste
How to Cook Spaghetti alla Bolognese
Time needed: 1 hour and 45 minutes
How to cook Spaghetti alla Bolognese
For the Spaghetti Squash
Preheat the oven to 400°F.
Season the Squash
Slice the spaghetti squash in half lengthwise and scoop out the seeds and ribbing. Drizzle the inside of the squash with olive oil and sprinkle with salt and pepper.
Cook the Squash
Place the spaghetti squash cut side down on the baking sheet and use a fork to poke holes. Roast for 30 to 40 minutes or until lightly browned on the outside, fork-tender, but still a little bit firm. The time will vary depending on the size of your squash.
Scrape and Fluff the Strands
Remove from the oven and flip the squash so that it’s cut side up. When cool to the touch, use a fork to scrape and fluff the strands from the sides of the squash.
For the Béchamel
In a large saucepan melt the butter over medium-high heat. Add the flour and cook, stirring with a whisk, for 3 minutes.
Add the Milk and Cheese
Slowly add the milk, and whisk together. Add the grated parmesan cheese. Whisk and cook over medium heat for several minutes, until slightly thickened. Remove from heat and let cool.
For the Ragù
Heat the olive oil in a 12-inch dutch oven over medium-high heat. Add the pancetta and chopped vegetables and sauté, stirring frequently with a wooden spoon, for about 10 minutes.
Add the Garlic and Meat
Add in the garlic and sauté for 30 seconds before adding in the meat. Stir the beef and pork into the pan and slowly brown over medium heat, breaking up with a wooden spoon.
Simmer for 15 Minutes
Stir often for about 15 minutes, or until the meats are a deep brown. Add the tomato paste and stir to combine.
Add the Wine
Add the wine to the dutch oven, lowering the heat so the sauce bubbles quietly. Stir occasionally until the wine has reduced by half, about 3 minutes. Scrape up the brown bits as the wine bubbles.
Add the Half and Half
Stir in the half and half. Adjust heat so the liquid bubbles very slowly. Partially cover the pot, and cook for 30 minutes. Stir frequently to check for sticking.
Add the Tomatoes
Add the tomatoes, crushing them as they go into the pot. Cook uncovered, at a very slow bubble for another 20-30 minutes, or until the sauce resembles a thick, meaty stew. Season with salt and pepper.
Add the Béchamel
Once cooked, stir in the Béchamel sauce into the meat sauce and combine with a wooden spoon.
The rich Bolognese sauce is full of flavor, thick, and will make you forget about canned spaghetti sauce. You can use it with any type of pasta or as a stand-alone stew with some crackers.
Slice the spaghetti squash in half lengthwise and scoop out the seeds and ribbing. Drizzle the inside of the squash with olive oil and sprinkle with salt and pepper.
1 spaghetti squash, olive oil, salt, black pepper
Place the spaghetti squash cut side down on the baking sheet and use a fork to poke holes. Roast for 30 to 40 minutes or until lightly browned on the outside, fork-tender, but still a little bit firm. The time will vary depending on the size of your squash.
Remove from the oven and flip the squash so that it’s cut side up. When cool to the touch, use a fork to scrape and fluff the strands from the sides of the squash.
For the Béchamel
In a large saucepan melt the butter over medium-high heat. Add the flour and cook, stirring with a whisk, for 3 minutes.
4 tbsp unsalted butter, 4 tbsp all-purpose flour
Slowly add the milk, and whisk together. Add the grated parmesan cheese. Whisk and cook over medium heat for several minutes, until slightly thickened. Remove from heat and let cool.
2 ⅔ cups milk, 1 cup parmesan cheese
For the Ragù
Heat the olive oil in a 12-inch dutch oven over medium-high heat. Add the pancetta and chopped vegetables and sauté, stirring frequently with a wooden spoon, about 10 minutes.
Add in the garlic and sauté for 30 seconds before adding in the meat. Stir the beef and pork into the pan and slowly brown over medium heat, breaking up with a wooden spoon.
6 cloves garlic, 10 oz ground lamb, 10 oz 80/20 ground beef
Stir often for about 15 minutes, or until the meats are a deep brown. Add the tomato paste and stir to combine.
2 tbsp tomato paste
Add the wine to the dutch oven, lowering the heat so the sauce bubbles quietly. Stir occasionally until the wine has reduced by half, about 3 minutes. Scrape up the brown bits as the wine bubbles.
⅔ cup red cooking wine
Stir in the half and half. Adjust heat so the liquid bubbles very slowly. Partially cover the pot, and cook for 30 minutes. Stir frequently to check for sticking.
1 cup half-and-half cream
Add the tomatoes, crushing them as they go into the pot. Cook uncovered, at a very slow bubble for another 20-30 minutes, or until the sauce resembles a thick, meaty stew. Season with salt and pepper
28 oz crushed tomatoes
Once cooked, stir in the Béchamel sauce into the meat sauce and combine with a wooden spoon.
Assemble the Spaghetti alla Bolognese
Add the cooked fresh pasta to the Bolognese sauce and stir to combine and serve.
Other Recipes That Go Well With Spaghetti alla Bolognese
Italian Pasta Salad
This Italian Pasta Salad radiates both simplicity and delight. It harmoniously marries together the hearty pasta with juicy tomatoes, freshly grated parmesan cheese, tangy olives, and spicy salami. The dish gets its final touch with a generous drizzle of zesty Italian dressing, creating a salad that's easy to make yet bursting with authentic Italian flavors.
Mom’s Old Fashion Sugar Cookies have been handed down from mother to daughter and credit the origin to the Protestant settlers in the Nazareth colony of Pennsylvania in the 1700s. They baked their cookies in the shape of a keystone, the state’s symbol.
Today we are going to use this recipe and make them into any shape you want. They are perfect for Easter, Independents Day, Halloween, Thanksgiving, Christmas, and New Year’s Eve. We are using a few different shapes of cookie cutters and three types of toppings, powdered sugar, cinnamon sugar, and colored frosting for this presentation.
How to Store Sugar Cookies
You should always store sugar cookies at room temperature in a cool, dry area of your kitchen; any additional humidity may change their texture, particularly with frosted sugar cookies. These homemade sugar cookies have a shelf life of about 3 days before they go stale.
History of the Sugar Cookie
People have been making sugar cookies for thousands of years but this recipe has its roots in the 1700s. The early settlers of Pennsylvania’s Lehigh Valley developed an early version of this recipe that is still being used today. We have some advantages today that the early settlers did not, refrigeration and electric mixers for starters.
Mom’s Old Fashion Sugar Cookies
The Borough of Nazareth, Pennsylvania
Nazareth is a borough in Northampton County, Pennsylvania, in the United States. It is in Northampton County and is part of Pennsylvania’s Lehigh Valley region.
The City of Nazareth, PA – By Shuvaev – Own work, CC BY-SA 3.0
Nestled at the foot of Blue Mountain, Nazareth is a quaint borough in the Lehigh Valley located a few miles north of Bethlehem and northwest of Easton. Founded by the Moravians and George Whitefield in 1740, Nazareth is home to the Moravian Historical Society and The Martin Guitar Company.
A Brief History of Nazareth, Pennsylvania
The Pennsylvania Amish of Lancaster County is America’s oldest Amish settlement, where thousands still live a centuries-old “Plain” lifestyle. Arriving in Amish Country allows you to step back in time to enjoy a slower, more peaceful pace – one where the horse & buggy remains a primary form of transportation, and where windmills dot the landscape, providing power harnessed from nature.
Tourism in Lancaster County, Pennsylvania
Visitors will enjoy its tree-lined streets and interesting buildings, the grand homes set on sloping lawns, and a variety of outdoor recreation opportunities including hunting, fishing, and skiing on Blue Mountain in the winter.
The Cuisine of the Pennsylvania Dutch
Pennsylvania Dutch cuisine is a mix of the old and the new: it adopts the traditional cooking methods of its homeland while using the ingredients available in the “new world.” The food is wholesome, not-too-fancy, and perfected through generations. The cuisine reflects influences of the cultural enclave of Pennsylvania Dutch culture, heritage, agrarian society, and rejection of rapid change. How to Make This Recipe for Mom’s Old Fashion Sugar Cookies
– Featured Bakery –
More Than Cakes Bakery & Pastries 49 N Broad St, Nazareth, PA 18064
More Than Cakes Bakery
Our ultimate goal is to deliver customer satisfaction by serving freshly made cakes, and other great quality products. Here at More Than Cakes, we live to create mouth-watering desserts that will heighten your senses and enhance your experience when life isn’t sweet.
How to Make This Recipe for Mom’s Old Fashion Sugar Cookies
You just need eight ingredients, a hand mixer, a cookie sheet, and 24 minutes to make these delicious treats. Have fun decorating the cookies with your children, let them get artistic. Like always, take precautions with children around the mixer and hot stove.
What You Will Need to Make Mom’s Old Fashion Sugar Cookies
Gather your equipment and ingredients and lay them to begin. The number of cookies you will get from a batch will depend on the size of your cookie cutter.
Ingredients for Mom’s Old Fashion Sugar Cookies
Equipment
Electric Mixer
Cookie Sheet
Spatula
Parchment Paper
Ingredients
3 cups all-purpose flour
¾ tsp baking powder
¼ tsp salt
1 cup unsalted butter, softened
1 cup sugar
1 egg, beaten
1 tbsp milk
Powdered sugar, for rolling out dough
How to Bake Mom’s Old Fashion Sugar Cookies
Time needed: 2 hours and 24 minutes
How to Bake Mom’s Old Fashion Sugar Cookies
Sift the Dry Ingredients
Sift the flour, baking powder, and salt together and set aside.
Mix the Butter and Sugar
In a large bowl mix the butter and sugar with an electric mixer until light in color.
Combine the Egg and Milk
Add the egg and milk and beat to combine.
Add the Flour Mixture
At low speed, gradually add flour and beat until the mixture pulls away from the side of the bowl.
Refrigerate the Dough
Divide the dough in half, wrap it in waxed paper, and refrigerate it for 2 hours.
Preheat the Oven
Preheat the oven to 375 degrees F.
Roll Out the Dough
Sprinkle the surface where you will roll out the dough with powdered sugar. Remove 1 wrapped pack of dough from the refrigerator at a time, sprinkle a rolling pin with powdered sugar, and roll out the dough to 1/4-inch thick.
Cut the Cookies
Cut into the desired shape, and place at least 1-inch apart on a greased baking sheet, parchment, or silicone baking mat.
Bake the Cookies
Bake for 7 to 9 minutes, rotating the cookie sheet for 4 minutes. Cookies are done when they begin to turn brown around the edges.
Cool the Cookies
Let the cookies sit on the baking sheet for 2 minutes after removing them from the oven. Transfer to a wire rack to finish cooling.
Serve the Cookies
Serve as is or decorate with icing as desired. Store in an airtight container for up to 1 week.
These cookies are best with a tall glass of milk when they have cooled and are fresh-baked but they will last up to one week in an air-tight container. At 101 calories per cookie, not counting the frosting, they are not the most healthy snack in the pantry but they are tasty and fun.
Sugar Cookies can be made for any time of the year, Easter, 4th of July, Halloween, Thanks Giving, and Christmas. They all use the same ingredients just pick a cookie cutter to fit the season you are celebrating.
In a large bowl mix the butter and sugar with an electric mixer until light in color.
1 cup unsalted butter, 1 cup white sugar
Add the egg and milk and beat to combine.
1 egg, 1 tbsp milk
At low speed, gradually add flour and beat until the mixture pulls away from the side of the bowl.
Divide the dough in half, wrap it in waxed paper, and refrigerate it for 2 hours.
Preheat oven to 375 degrees F.
Sprinkle surface where you will roll out dough with powdered sugar. Remove 1 wrapped pack of dough from the refrigerator at a time, sprinkle a rolling pin with powdered sugar, and roll out dough to 1/4-inch thick.
confectioners’ sugar
Cut into the desired shape, place at least 1-inch apart on a greased baking sheet, parchment, or silicone baking mat.
Bake for 7 to 9 minutes, rotating the cookie sheet in 4 minutes. Cookies are done when they begin to turn brown around the edges.
Let the cookies sit on the baking sheet for 2 minutes after removing them from the oven. Transfer to a wire rack to finish cooling.
Serve as is or decorate with icing as desired. Store in an airtight container for up to 1 week.
Recipes That Go Well With Mom’s Old Fashion Sugar Cookies
Egyptian Mummy Dogs
These Egyptian Mummy Dogs are easy, kid-friendly, and guaranteed to bring a smile to everyone’s face. Serve them as a cute but creepy appetizer at this year’s Halloween party. Bake them as a special Halloween treat before heading out for trick-or-treating.
This recipe for non-churn Peach ice cream is both easy and tasty. You can use it in an ice cream maker if you want but it turns out creamy and smooth without the maker. It will have your taste buds doing the happy dance.
Although Mummy Dogs are almost certainly an American invention, we will geotag this recipe with the Great Pyramids of Egypt because most people associate Mummies with Egypt. So walk like an Egyptian to the kitchen with the kids and make some Mummy Dogs.
This snack is easy to make and the kids will love to help. Cut the dough strips and let your kids wrap them up. Bake them in your oven until they are golden brown and attach the candy eyes with a drop of ketchup or mustard. Don’t have candy eyes? Not to worry, just use a drop of mustard for the eyes.
Ways to Make Mummy Dogs 𓀃
There is not a lot of variation in making these tasty little treats. The Pillsbury™ Original Crescent Rolls are so easy to find but if you can find the Pillsbury™ Original Crescent Dough Sheet they make better wrapping strips for your mummy.
How to Store Egyptian Mummy Dogs 𓁏
Leftover Mummy Dogs will keep for up to 4 days in an airtight container in the Refridgerator. To reheat your Mummy Dogs, cover the baking dish with aluminum foil and reheat in the oven at 350F until warmed through.
History of the Hot Dog 𓉈
As the story goes, German immigrants first sold small sausages in a bun from pushcarts in New York City’s Bowery in the 1860s. While the hot dog’s true history is lost forever, the one certain thing we all know is that the hot dog is one of America’s favorite foods!
Egyptian Mummy Dogs
The Great Pyramid of Giza 𓋖
The Great Pyramid of Giza (also known as the Pyramid of Khufu or the Pyramid of Cheops) is the oldest and largest of the pyramids in the Giza pyramid complex bordering present-day Giza in Greater Cairo, Egypt. It is the oldest of the Seven Wonders of the Ancient World, and the only one to remain largely intact.
Pyramids of Giza at Night
The Great Pyramid was built by quarrying an estimated 2.3 million large blocks weighing 6 million tonnes in total. The majority of stones are not uniform in size or shape and are only roughly dressed. The outside layers were bound together by mortar. Primarily local limestone from the Giza Plateau was used. Other blocks were imported by boat down the Nile: White limestone from Tura for the casing, and granite blocks from Aswan, weighing up to 80 tonnes, for the King’s Chamber structure.
There are three known chambers inside the Great Pyramid. The lowest was cut into the bedrock, upon which the pyramid was built, but remained unfinished. The so-called Queen’s Chamber and King’s Chamber, which contain a granite sarcophagus, are higher up, within the pyramid structure. Khufu’s vizier, Hemiunu (also called Hemon), is believed by some to be the architect of the Great Pyramid. Many varying scientific and alternative hypotheses attempt to explain the exact construction techniques.
The funerary complex around the pyramid consisted of two mortuary temples connected by a causeway (one close to the pyramid and one near the Nile), tombs for the immediate family and court of Khufu, including three smaller pyramids for Khufu’s wives, an even smaller “satellite pyramid” and five buried solar barges.
– Featured Restaurant –
9 Pyramids Lounge Al Giza Desert, Giza Governorate, Egypt
9 Pyramids Lounge
The restaurant’s unique location offers a view of all pyramids in Giza. It’s built in a subtle wooden setting, with pillows scattered on the ground to emulate the Bedouin style.
This is one of those super easy, kid-friendly recipes that is guaranteed to bring a smile to everyone’s face. They are the perfect cute but creepy appetizers for this year’s Halloween party.
What You Will Need to Make Egyptian Mummy Dogs 𓀧
Quick and easy and only 3 ingredients.
Ingredients for Egyptian Mummy Dogs
Equipment
Cutting Board
Knife
Cookie Sheet
Ingredients
1 package crescent roll dough
6 hot dogs
12 candy eyes
Cooking Directions for Egyptian Mummy Dogs 𓀩
Time needed: 27 minutes
How to Cook Mummy Dogs
Preheat the Oven
Preheat the oven to 375 degrees F.
Cut the Dough
Open the crescent roll package and unroll the dough. Press on the perforations to seal them together. Cut the dough into 1/4 inch strips.
Wrap the Dogs
Wrap the pieces of dough around each hot dog creating bandages by stretching the dough slightly and letting it overlap and criss-cross. You don’t completely cover the hot dog, leave gaps so it looks like a mummy peeking out from its bandages.
Cook the Mummy Dogs
Place each wrapped hot dog on a baking sheet and then bake for 10-12 minutes or until the dough is golden brown and hot dogs are warmed through.
Garnish and Serve
Remove from the oven and place a small dot of ketchup or mustard on the back of your candy eyes and add 2 to each mummy dog.
Wrap up some mummy dogs for that Halloween party or as a tasty treat before, after, or while serving candy to kids out on Trick or Treat.
These Egyptian Mummy Dogs are easy, kid-friendly, and guaranteed to bring a smile to everyone’s face. Serve them as a cute but creepy appetizer at this year’s Halloween party. Bake them as a special Halloween treat before heading out for trick-or-treating.
Open the crescent roll package and unroll the dough. Press on the perforations to seal them together. Cut the dough into 1/4 inch strips.
1 package crescent roll dough
Wrap the pieces of dough around each hot dog creating bandages by stretching the dough slightly and letting it overlap and criss-cross. You don’t completely cover the hot dog, leave gaps so it looks like a mummy peeking out from its bandages.
6 all-beef hot dogs
Place each wrapped hot dog on a baking sheet and then bake for 10-12 minutes or until the dough is golden brown and hot dogs are warmed through.
Remove from the oven and place a small dot of ketchup or mustard on the back of your candy eyes and add 2 to each mummy dog.
Other Recipes That Will Go Well With Egyptian Mummy Dogs 𓅄
Pennsylvania Dutch Chicken Corn Soup
It's a delicious Pennsylvania Dutch Chicken Corn Soup that's a hearty and delicious, thick and creamy soup that does the body good. Serve with Saltine Crackers, a Grilled Cheese Sandwich, or a nice Cold Cut Deli Sandwich for a perfect meal.
I tested two LED Camping Lanterns to find the right mix of quality, price, and usability of the Atomic Beam LED Camping Lantern by BulbHead and the Cascade LED Camping Lantern by Cascade Mountain Tech. I personally like the Atomic Beam which you can buy on Amazon for $19.88 although the Cascade sells for $11.63 each (sold in 3 packs for $34.89).
Atomic Beam by BulbHead
Atomic Beam LED Camping Lantern by BulbHead
➤ The camping lantern that shines 360-degrees of bright LED light
➤ Hang your atomic lantern from handles, magnetic base, or hook for hands-free torchlight
➤ Collapsible light has easy pull-n-push on/off the system so you’re not fumbling for buttons when you need an emergency light
➤ LED Lantern that’s great for everyday emergencies, blackouts, camping, boating, and working on the car, making it the perfect tent light, storm light, and fishing light – easily stash this emergency lantern in your disaster kit
➤ Includes 1 Atomic Beam Lantern — requires 3 AA batteries (batteries not included). Rechargeable batteries are not compatible.
Cascade by Cascade Mountain Tech
Cascade LED Camping Lantern by Cascade Mountain Tech
➤ 3 LANTERNS & 4 MODES: this set of three lanterns with 9 batteries including features 4 light settings to make the perfect camping mode for you and your family.
➤ ULTRA BRIGHT: Includes 30 individual low-powered LED bulbs that give 100 Lumens of Bright Light, designed for a longer lifespan.
➤ DEPENDABLE BUILD: Constructed with high-grade material; promising long-time durability. The extremely lightweight build allows you to take your lantern on the go with ease.
➤ LONG LASTING: Light up to 12 hours of regular, continuous use with enough battery capacity.
➤ COLLAPSIBLE: When not in use collapse the lantern to a smaller size; store it effortlessly, taking little space. Carry a handle for your night walking adventures, or lighting the path of your backyard
Both are great camping lights but the Atomic Beam has the brightest light. Good for some things but sometimes you want a softer light and the winner of that category is the Cascade lantern.
This Peach Ice Cream recipe comes to us from the city of Atlanta, Georgia. It’s a non-churn recipe meaning you do not need an ice cream maker, ice, and salt to make this creamy Georgia Peach Ice Cream.
There are three basic ways of making ice cream, in a baggie, in a pan, or in an ice cream machine. The bag method is the most laborious method as you must shake it by hand until frozen. This recipe calls to freeze it in a pan but it can also be used in an ice cream maker if you wish.
Georgia Peach Ice Cream
How to Store Ice Cream
Store your homemade ice cream in the main part of the freezer and avoid storing it on the freezer door, where ice cream can be subject to more fluctuating temperatures since the door is repeatedly opened and shut. Keep your homemade ice cream in an airtight container with a lid tightly closed on it to reduce the formation of ice crystals.
History of Ice Cream
In 1824 Mary Randolph published her cookbook called The Virginia Housewife, which included many ice cream recipes. The first commercial ice-making machine was invented in 1854. In 1913, refrigerators for home use were invented.
History of Peaches
Peaches originally came from China. They were traded along the Silk Road and made their way to Europe before eventually gracing American groves. Franciscan monks introduced peaches to St. Simons and Cumberland islands along Georgia’s coast in 1571.
The Metropolitan City of Atlanta, Georgia
Atlanta is the capital of the U.S. state of Georgia. It played an important part in both the Civil War and the 1960s Civil Rights Movement. Atlanta History Center chronicles the city’s past, and the Martin Luther King Jr. National Historic Site is dedicated to the African-American leader’s life and times. Downtown, Centennial Olympic Park, built for the 1996 Olympics, encompasses the massive Georgia Aquarium.
Beath-Dickey House (1890) in Inman Park neighborhood, 2018The World of Coca-ColaSunTrust ParkThe skyline of Midtown (viewed from Piedmont Park) emerged with the construction of modernist Colony Square in 1972.The Downtown skyline at sunset
A Brief History of Atlanta
For thousands of years prior to the discovery of the New World, the indigenous Creek people and their ancestors inhabited the area. The Creek people were forced to leave the area in 1821, under Indian Removal by the federal government, and European American settlers arrived the following year.
By 1860, Atlanta’s population had grown to 9,554 and during the American Civil War, the city was a strategic hub for the distribution of military supplies. In 1864 General Sherman surrounded the city and began a four-month-long siege that would lead to its surrender on September 1, 1864.
During the 20th century, Atlanta enjoyed continued growth by building the city’s infrastructure, and skyscrapers, and attracting merchants and manufacturing companies. During the 2000s, the city of Atlanta underwent profound physical, cultural, and demographic changes. As some of the African American middle and upper classes also began to move to the suburbs, a booming economy drew numerous new migrants from other cities in the United States, who contributed to changes in the city’s demographics.
Tourism in Atlanta
As of 2010, Atlanta is the seventh-most visited city in the United States, with over 35 million visitors per year. Atlanta’s tourism industry is mostly driven by the city’s history museums and outdoor attractions. Tourists are drawn to the city’s culinary scene, which comprises a mix of urban establishments garnering national attention, ethnic restaurants serving cuisine from every corner of the world, and traditional eateries specializing in Southern dining.
The Cuisine of Atlanta
The cuisine of Atlanta reflects both Southern and much broader influences. The city is home to a mix of high-end chef-driven restaurants receiving praise at the national level, an ethnic restaurant scene along Buford Highway, and traditional Southern eateries.
The city’s first restaurant was a tiny establishment manned by a Frenchman named Toney Maquino and he served ham, eggs, and oysters when the city was still known as Marthasville.
– Featured Restaurant –
The Sun Dial Restaurant, Bar & View 210 Peachtree St NW Greensboro, NC 30303
The Sun Dial Restaurant, Bar & View
Situated on the uppermost floors of The Westin Peachtree Plaza, The Sun Dial Restaurant, Bar & View offers unparalleled views and a distinct Atlanta dining experience that makes the most of the city’s proximity to local, farm-to-table ingredients. A tri-level complex, The Sun Dial features an upscale restaurant, a cocktail lounge, and an observatory level with a breathtaking 360-degree panorama of the magnificent skyline from 723 feet above.
This recipe takes 5 minutes to mix up and 3 hours to freeze. You should stir the mix about every 20 or 30 minutes to help it fluff up a bit.
What You Need to Make Peach Ice Cream
Fast and easy with only 6 ingredients. Replace the peaches with any fruit you like best.
Ingredients for Georgia Peach Ice Cream
Equipment Needed
Blender
9×5 Loaf Pan
Wax Paper
Ingredients Needed
2 cups heavy cream
1 cup whole milk
3 tbsp lemon juice
1 tsp pure vanilla extract
1 cup sugar divided
3 cups peaches peeled and sliced
Time needed: 3 hours and 5 minutes
How to Mix Peach Ice Cream
Blend Ingredients
In a blender, pour in the cream, milk, sugar, lemon juice, vanilla extract, and sugar in the blender and mix well. Blend for about 20 to 30 seconds then add the pieces of peach.
Pour into a Pan
Blend again for a few seconds. Pour into a metal pan, add the remaining peaches cut into tiny pieces, and place in the freezer for about an hour.
Freeze and Stir
Remove from the freezer and stir with a spoon. Repeat this two more times every hour for a total of 3 times in 3 hours. You will see the mixture begin to take on the texture of ice cream.
Scoop and Serve
When it’s ready, scoop it into bowls, cups, or cones. Serve with a peach slice, if desired.
This recipe for non-churn Peach ice cream is both easy and tasty. You can use it in an ice cream maker if you want but it turns out creamy and smooth without the maker. It will have your taste buds doing the happy dance.
Venture into a new culinary adventure with this distinctive Apple, Carrot, and Raisin Pie. This delightful fusion of flavors isn't just delicious, it's simpler to craft than you'd imagine! Dare to create your very own Zimbabwean-inspired pie from scratch and let this recipe guide you every step of the way. Indulge in the taste of success as you slice into your homemade culinary masterpiece.
Savor a slice of the Big Easy with this Classic New Orleans Pecan Pie recipe. Embodying the spirit of Southern comfort, this pie features a delicately flaky, all-butter crust cradling a lush, custard-like filling. Topped with a stunning arrangement of crunchy pecans, this traditional dessert holds an undisputed title as a royal treat among pies.
Prepare your tastebuds for a journey from your kitchen all the way to China! We’re diving deep into one of China’s quintessential dishes: the flavorful and versatile Egg Foo Young. We’ll explore its history, origins, and variations, take a detour through the vibrant city of Guangzhou, and learn how to whip up a classic Egg Foo Young in your own kitchen.
Understanding Egg Foo Young: A Chinese Culinary Gem
Egg Foo Young, simply put, is a delectable Chinese omelet packed with a medley of ingredients. Traditionally, it brims with vegetables, seafood, or meat, and it’s seasoned with a variety of spices. Its magic lies in its versatility; it lends itself to endless experimentation and customization, making it a beloved dish around the world.
Egg Foo Young first emerged in American-Chinese eateries as a dish that bridged Eastern and Western cuisine. With its protein-rich content and hearty texture, it quickly became a favorite among patrons. Even today, it continues to wow palates across continents, owing to its rich flavor profile and satisfying mouthfeel.
What’s particularly charming about Egg Foo Young is that it fits any meal. Be it a savory breakfast, a light lunch, or a sumptuous dinner, this Chinese omelet suits every dining experience. It embodies the essence of Chinese cuisine – a harmonious balance of diverse flavors and textures, woven together in one delightful dish.
Mastering the Art of Making a Chinese Omelette: Different Approaches to Egg Foo Young
Making Egg Foo Young at home is straightforward, requiring just a few steps. First, a flavorful sauce is created using a blend of Chinese cooking wine, oyster sauce, soy sauce, and a dash of white pepper. This sauce sets the stage for the rich, savory profile of the dish.
Next, the main ingredients – usually a mix of shrimp, vegetables, and eggs – are stir-fried until they’re just right. The stir-frying technique imbues the ingredients with a robust, smoky flavor, which is quintessential to Chinese cuisine. Once cooked, these ingredients are then combined with a well-beaten egg base.
The final step is transforming this mixture into an omelet. The mixture is spooned onto a hot pan and cooked until it forms a golden, fluffy omelet. The result? A delicious, hearty Chinese omelet that’s bursting with flavors and textures, ready to be savored bite by bite.
Ensuring Freshness: The Proper Storage Techniques for Egg Foo Young
Storing Egg Foo Young is as simple as its preparation. First, allow the omelets to cool completely before storing them. By letting them cool, you prevent condensation, which could make the omelets soggy.
Once cooled, you can store the omelets in an airtight container. Place them in the refrigerator, where they’ll stay fresh for up to 4 days. For longer storage, you can freeze the omelets. Wrap each one individually in a plastic wrap, then place them in a zip-top freezer bag. Properly stored, they can last up to 3 months in the freezer.
To reheat, thaw frozen omelets in the fridge overnight. Then, you can heat them in a microwave or an oven until warmed through. Always make sure to check the temperature in the middle to ensure they’re adequately heated.
From Rural China to Global Tables: The Evocative History of Egg Foo Young
According to the New York Times, the Chinese Omelette origin story goes back to the southern Chinese coastal province of Guangdong, formerly known as Canton.
Egg Foo Young has a fascinating history rooted in the culinary traditions of China. The name “Foo Young” translates to “hibiscus” in Cantonese, referring to the omelet’s resemblance to the blooming petals of a hibiscus flower. This dish dates back to the early days of China when eggs and vegetables were staple ingredients in rural households.
In the mid-19th century, as Chinese immigrants began arriving in the U.S., they brought along their rich culinary heritage. Among the numerous dishes they introduced to America was Egg Foo Young. Adapted to suit local palates, it became a staple in American Chinese cuisine.
Today, Egg Foo Young is enjoyed worldwide. Its universal appeal lies in its adaptability and versatility. You can find variations of this dish in various countries, each tweaked to accommodate local flavors while keeping the core essence of the original Chinese recipe intact.
Guangzhou: A Vibrant Mosaic of Tradition and Modernity
Guangzhou, also known as Canton, is a bustling metropolis located in Southern China. As one of China’s three largest cities, Guangzhou is a significant economic powerhouse. But it’s not just its economic prowess that makes it remarkable; it’s also a city that beautifully marries tradition with modernity.
Sun Yat sen Memorial HallGuangzhou Opera HouseMausoleum of the 72 Martyrs
Guangzhou is home to several UNESCO World Heritage Sites, captivating museums, and traditional temples, all of which testify to its rich history. Simultaneously, its skyline features gleaming skyscrapers, modern architecture, and sprawling shopping malls, reflecting its forward-thinking spirit.
From quiet, tree-lined avenues to lively street markets, Guangzhou offers an enchanting blend of the old and new. Its diverse culture, warm hospitality, and vibrant energy make it a must-visit city for any traveler.
Tracing Guangzhou’s Path: A Glimpse into the City’s Historical Tapestry
The history of Guangzhou traces back over 2,200 years, making it one of the oldest cities in China. During the Han Dynasty, it emerged as an important part of the Silk Road, serving as a major port for foreign trade.
Throughout the centuries, Guangzhou witnessed numerous significant events that shaped its destiny. From the opium wars to the revolution that led to the birth of modern China, Guangzhou has always been at the heart of China’s history.
Today, Guangzhou is a thriving metropolis that seamlessly blends its past with its future. Its rich history is evident in its well-preserved monuments, while its modern identity shines through its bustling markets and impressive skyscrapers.
The Alluring Pull of Guangzhou: Exploring the City’s Tourism Appeal
Guangzhou offers a myriad of attractions for tourists. History buffs can explore the city’s ancient temples and museums, like the Temple of the Six Banyan Trees or the Guangzhou Museum. For nature lovers, the Baiyun Mountain offers stunning views and tranquil surroundings.
The city’s Pearl River is another popular attraction. A river cruise offers a unique perspective on Guangzhou’s skyline, especially when illuminated at night. For those looking for retail therapy, Guangzhou’s markets are a treasure trove of everything from antiques to fashion.
Whether you’re seeking culinary delights, cultural experiences, or historical exploration, Guangzhou has something for every traveler.
A Gastronomic Adventure in Guangzhou: An Insight into its Distinctive Cuisine
As the capital city of the Guangdong province, Guangzhou is at the heart of Cantonese cuisine, one of China’s most famous culinary traditions. It’s renowned for its fresh ingredients, mild flavors, and a variety of cooking methods.
Dim sum, a variety of bite-sized delicacies, is a signature element of Cantonese cuisine. Other local specialties include roast duck, white cut chicken, and of course, our beloved Egg Foo Young. Seafood also plays a vital role in the local cuisine, with dishes like steamed fish, stir-fried shrimp, and crab often featured in meals.
From street food stalls to elegant dining restaurants, Guangzhou offers a culinary journey that’s rich, diverse, and tantalizing, much like the city itself.
A national historical site in the heart of the city, this space faithfully depicts the details of a Lingnan-style Chinese garden. The interior is equally impressive, showcasing 14 gilded redwood vases with elaborate carvings on all sides. Opened in 1928, it is famed not only for its palatial décor but also for such Cantonese home-style dishes as Shaoxing drunken chicken or braised fish head with mushrooms, pork, and tofu.
Crafting the Perfect Egg Foo Young: A Step-by-Step Guide
Making Egg Foo Young at home is an exciting culinary project. The recipe, despite its impressive results, is straightforward and beginner-friendly. The process involves creating a hearty sauce, stir-frying the main ingredients, and finally, cooking the omelets.
The first step sets the flavor foundation for the dish. Combining Chinese cooking wine, oyster sauce, soy sauce, and white pepper, we create a sauce that’s rich, savory, and slightly spicy. This sauce brings all the ingredients together and gives the dish its characteristic taste.
Stir-frying the main ingredients is where the magic happens. The shrimp, vegetables, and eggs, when cooked on high heat, release their flavors, which meld beautifully with the sauce. The final product is a colorful, fragrant mix that’s ready to be transformed into fluffy omelets.
The final step – making the omelets – is where the fun lies. You pour the mixture onto a hot pan and watch as it fluffs up into a golden omelet. The end result is a feast for the eyes and the palate, ready to be served and savored.
The Essential Toolbox: What You Need to Create Delicious Egg Foo Young
To create this flavorful dish at home, you’ll need some essential kitchen equipment and a range of ingredients. You’ll require a saucepan and a mixing bowl, along with a seasoned wok or frying pan. The ingredients encompass a blend of sauces, seasonings, vegetables, shrimp, and, of course, eggs. The recipe also includes a homemade sauce that ties all the flavors together. But don’t worry, you’ll find all the details in the recipe card that follows.
Equipment Needed
1 Sauce Pan
1 Mixing Bowl
1 Spatula
For the Sauce
1 ½ cups chicken broth
1 ½ tbsp Chinese cooking wine aka Shaoxing wine, substitute Mirin or dry sherry
Pinch white pepper
½ tsp sesame oil
1 tbsp oyster sauce
1 tsp rice vinegar
1 tsp white sugar
2 tbsp soy sauce
1 ½ tbsp cornstarch
For the Chinese Omelette
vegetable oil, as needed to fry omelets
½ cup yellow onion, diced small
1 tsp garlic
¼ lbs shrimp, cut up small (about 5–6 large shrimp peeled and deveined)
¼ cup carrots, diced small
½ cup red bell pepper, cut up small
8 eggs
2 cups bean sprouts
1 cup water chestnuts, sliced
1 tsp oyster sauce
¼ tsp white sugar
¼ tsp white pepper
½ cup peas, thawed
½ tsp salt
green scallion, chopped for garnish
Time needed: 40 minutes
How to Cook Egg Foo Young
Make the Sauce
Place chicken stock, sherry, white pepper, sesame oil, oyster sauce, vinegar, and sugar in a medium saucepan and heat. Mix cornstarch with soy sauce in a small bowl and add to the pan and stir to combine and thicken. Once hot, remove from heat and hold for the end of the recipe.
Prep the Wok
In a seasoned wok over high heat, add a half cup of oil, and once hot, swirl around to oil sides then remove all but two tablespoons of the oil. Reserve the remaining oil.
Cook the Shrimp and Vegetables
Once smoking hot, add the onion, garlic, shrimp, carrots, and red bell pepper all at once and cook and stir for about two minutes until the shrimp is cooked and starting to turn pink. Remove to a bowl or plate to cool. Turn off the heat.
Beat the Eggs
In a large bowl, beat eggs and add fresh bean sprouts, oyster sauce, sugar, BBQ pork, pepper, peas, and salt. Once the cooked ingredients are cool, add to the bowl. Stir to combine.
Preheat the Oven
Preheat the oven to 200 degrees to keep the omelets warm while you cook the entire batch.
Cook the Egg Mix
Using the same pan you cooked the vegetables, heat to between medium and medium-high. Once the pan is very hot, add about two tablespoons of the vegetable oil and once that is very hot, use a ¼ cup measure and scoop out a full ¼ cup of the mixture and pour it into the hot pan. The pan must be hot, and the omelets nice and browned when done, not mildly yellow like an omelet. As soon as you pour the mixture in, the sides will bubble up and puff in the hot oil and the bottom will brown. Once the center is set enough that you can safely flip, flip using your favorite spatula.
Finish the Egg Mix
Cook on the other side just long enough to set the egg then remove to a waiting oven-proof platter. Continue until all the mixture has been cooked into several omelets, using two tablespoons of oil between each omelet. If there is enough oil after each batch, you don’t need to keep adding more, just make sure that each omelet is cooked in at least two tablespoons of the oil.
Top with Gravey and Serve
Bring the sauce up to serving temperature and either serve on the side or pour over the omelets. Garnish with chopped green scallion tops.
Honestly, I think that the Chinese Omelette is by far the best omelet in the world.
This Egg Foo Young recipe is a symphony of flavors that promises a culinary spectacle right on your plate. This cherished Chinese dish, a sumptuously filled omelet brimming with tender shrimp and vibrant vegetables, is a versatile delight that can elevate your breakfast, lunch, or dinner experience. Every bite you take, every flavor you savor, turns any ordinary day into a gastronomic festival.
Place chicken stock, sherry, white pepper, sesame oil, oyster sauce, vinegar, and sugar in a medium saucepan and heat. Mix corn starch with soy sauce in a small bowl and add to the pan and stir to combine and thicken. Once hot, remove from heat and hold for the end of the recipe.
1 ½ cups chicken broth, 1 ½ tbsp Chinese cooking wine, Pinch white pepper, ½ tsp sesame oil, 1 tbsp oyster sauce, 1 tsp rice vinegar, 1 tsp white sugar, 2 tbsp soy sauce, 1 ½ tbsp corn starch
In a seasoned wok over high heat, add a half cup of oil and once hot, swirl around to oil sides then remove all but two tablespoons of the oil. Reserve the remaining oil.
vegetable oil
Once smoking hot, add the onion, garlic, shrimp, carrots, and red bell pepper all at once and cook and stir for about two minutes until shrimp is cooked and starting to turn pink. Remove to a bowl or plate to cool. Turn off heat.
½ cup yellow onion, 1 tsp garlic, ¼ lbs shrimp, ¼ cup carrot, ½ cup red bell pepper
In a large bowl, beat eggs and add fresh bean sprouts, water chessnuts, oyster sauce, sugar, pepper, peas, and salt. Once the cooked ingredients are cool, add to the bowl. Stir to combine.
8 eggs, 2 cups bean sprouts, 1 cup water chestnuts, 1 tsp oyster sauce, ¼ tsp white sugar, ¼ tsp white pepper, ½ cup peas, ½ tsp salt
Preheat the oven to 200 degrees to keep the omelets warm while you cook the entire batch.
Using the same pan you cooked the vegetables, heat to between medium and medium-high. Once the pan is very hot, add about two tablespoons of the vegetable oil and once that is very hot, use a ¼ cup measure and scoop out a full ¼ cup of the mixture and pour it into the hot pan. The pan must be hot, and the omelets nice and browned when done, not mildly yellow like an omelet. As soon as you pour the mixture in, the sides will bubble up and puff in the hot oil and the bottom will brown. Once the center is set enough that you can safely flip, flip using your favorite spatula.
Cook on the other side just long enough to set the egg then remove to a waiting oven-proof platter. Continue until all the mixture has been cooked into several omelets, using two tablespoons of oil between each omelet. If there is enough oil after each batch, you don’t need to keep adding more, just make sure that each omelet is cooked in at least two tablespoons of the oil.
Bring the sauce up to serving temperature and either serve on the side or pour over the omelets.
Complementing the Main Act: Recipes That Pair Well with Egg Foo Young
To compliment your Egg Foo Young, here are a few recipes that are a great pairing. Whether you’re in the mood for a full Chinese-themed meal or you want something light and fresh to balance the richness of the omelet, you’ll find plenty of options in our selection.
Thai Shrimp Cake
Brace yourself for a delectable Thai Shrimp Cake recipe that packs a punch of flavor. This dish proudly features succulent shrimp, harmoniously blended with vibrant red curry. To finish off, we serve it with a drizzle of sweet chili sauce that perfectly complements the savory cake. You're in for a real treat!
And there you have it – an in-depth journey through Egg Foo Young. We dove into its origins, explored the bustling city of Guangzhou, and even learned how to create this flavorful dish at home. Remember, cooking is all about exploring, experimenting, and most importantly, enjoying. So, have fun in your culinary adventure with Egg Foo Young and enjoy the delightful journey it takes you on. Bon Appétit!
Photo Credits:
By Taste The World Cookbook – Copyright 2022 All rights reserved.
By Beiyuan Cuisine – By http://www.beiyuancuisine.com/
By Zhou Manying – Own work, CC BY-SA 4.0, https://commons.wikimedia.org/w/index.php?curid=62948907
By Zhangzhugang – Own work, CC BY-SA 3.0, https://commons.wikimedia.org/w/index.php?curid=29979769
By xiquinhosilva – https://www.flickr.com/photos/xiquinho/32894333162/in/photostream/, CC BY 2.0, https://commons.wikimedia.org/w/index.php?curid=86378721
By zengsx, CC BY-SA 3.0, https://commons.wikimedia.org/w/index.php?curid=40896660
By Mr a – Own work, CC BY 3.0, https://commons.wikimedia.org/w/index.php?curid=20338813
El Submarino the Argentinian Hot Chocolate Recipe Card
Warm your soul and your taste buds with El Submarino, a unique Argentinian spin on hot chocolate. Evoking memories of cold winter evenings, this delightful drink stands out with its creative presentation and simplicity of ingredients. A piece of dark chocolate is dropped like a submarine into a steaming cup of milk. As it melts, it transforms the milk into a rich, indulgent cup of hot chocolate. This is not just a drink, it’s an experience that is deeply rooted in Argentinian culture.
Around the globe, cultures have adopted their own unique takes on hot chocolate. In Mexico, for instance, hot chocolate is traditionally spiced with a touch of chili and cinnamon, creating a beverage that is both warm and invigorating. Across the Atlantic, in Spain, hot chocolate is known for its thick, almost pudding-like consistency, usually served with churros for dipping. Swiss hot chocolate, on the other hand, is typically made with high-quality milk chocolate and heavy cream, creating a luxuriously rich and creamy concoction.
Closer to home, in North America, hot chocolate is often made with cocoa powder, sugar, and milk, and topped with a dollop of whipped cream or marshmallows. Each of these versions of hot chocolate carries the unique taste and tradition of their origin, showcasing the versatility of chocolate as a star ingredient.
Ensuring Your Chocolate Stays Pristine
Proper chocolate storage is paramount to maintaining its quality and taste. First and foremost, keep your chocolate away from heat and direct sunlight. Store it in a cool, dark place with a temperature ideally between 60-70°F (15-21°C). Secondly, chocolate absorbs odors from its surroundings, so it’s crucial to store it in an odor-free environment.
Moisture is also a foe of chocolate, leading to a condition called “sugar bloom”, where sugar rises to the surface and crystallizes, resulting in a whitish coating. To prevent this, make sure your chocolate is stored in a dry place. Finally, to avoid fluctuations in temperature and humidity, refrain from refrigerating your chocolate unless it’s absolutely necessary. If you do need to refrigerate it, make sure it’s tightly wrapped and consider placing it in an airtight container.
Tracing the Rich History of Chocolate
The history of chocolate dates back 4,000 years to ancient Mesoamerica, where the Mayans and Aztecs prized cacao beans as a form of currency and used them to create a bitter, frothy drink. In the 16th century, Spanish conquistadors brought cacao back to Europe, where sugar and other sweeteners were added to create a drink more suited to European palates.
Throughout the 17th and 18th centuries, chocolate remained a luxury, enjoyed mostly by the European elite. It wasn’t until the Industrial Revolution, with the invention of machines capable of grinding cacao beans into a fine paste, that chocolate became more widely accessible. The invention of the chocolate bar in the mid-19th century and the creation of milk chocolate by Daniel Peter and Henri Nestlé in 1875 forever transformed the chocolate industry, making it the beloved treat we know today.
Unraveling the Charm of Buenos Aires, Argentina
Buenos Aires, Argentina’s capital city, is a mesmerizing mix of European grandeur and Latin passion. Its bustling streets are lined with architectural gems, ranging from the iconic pink-hued Presidential Palace, Casa Rosada, to the grand Teatro Colón. This city of “fair winds” enchants visitors with its vibrant arts scene, its lively tango dance halls, and the passion of its football-loving populace.
Caminito en Buenos AiresA View of the Obelisk in Buenos AiresCatedral MetropolitanaThe Plaza de MayoPuerto Madero
The city also offers a culinary landscape as diverse as its culture. Traditional Argentinian barbecue, known as asado, is a must-try for meat lovers, while the cosmopolitan city streets offer a variety of world cuisines. Buenos Aires is also renowned for its local pastries, with the dulce de leche-filled medialunas being a local favorite.
Buenos Aires’ thriving nightlife, with its myriad of bars and nightclubs, ensures the city stays alive and buzzing until the early morning hours. Known as the ‘city that never sleeps,’ Buenos Aires offers an exhilarating experience to those who wish to immerse themselves in its distinctive rhythm.
A Brief Journey Through Buenos Aires’ Past
Buenos Aires’ history is a captivating blend of triumph and tribulation. Founded by Spanish settlers in the 16th century, the city initially grew slowly due to its distance from the traditional trade routes. It wasn’t until the 18th century, with the establishment of the Vice-Royalty of the Río de la Plata, that Buenos Aires began to flourish as a key trading port.
In the 19th century, the city was at the heart of Argentina’s struggle for independence from Spain. Following independence, Buenos Aires grew rapidly, fueled by a wave of immigration, primarily from Europe. These immigrants brought with them their diverse cultures, significantly influencing the city’s architectural style, cuisine, and overall character.
The 20th century brought further growth but also periods of political instability and economic crisis. Despite these challenges, Buenos Aires has emerged as a resilient city, its vibrant culture and rich history continuing to captivate residents and visitors alike.
The Allure of Buenos Aires for Tourists
Buenos Aires is a treasure trove for tourists. The city’s eclectic architecture is a feast for the eyes, from the colorful, mural-adorned buildings in the La Boca neighborhood to the elegant Parisian-style apartments in Recoleta. These districts also offer glimpses into the city’s past, with La Boca’s Caminito Street reflecting its immigrant roots, and Recoleta Cemetery housing the tombs of some of Argentina’s most iconic figures.
Nature lovers can enjoy the city’s many green spaces, such as the expansive Parque Tres de Febrero, while art enthusiasts will be drawn to the Museum of Latin American Art, known as MALBA, and the Buenos Aires Museum of Modern Art. Meanwhile, no visit to Buenos Aires would be complete without experiencing its vibrant tango culture, whether that’s at a glamorous tango show or a local milonga dance hall.
Buenos Aires also offers a compelling culinary journey, its food scene representing the city’s multicultural history. The famous San Telmo Market is a must-visit for foodies, offering a wide array of Argentinian street food, artisanal goods, and antiques.
The Delicious Tapestry of Buenos Aires Cuisine
Buenos Aires’ cuisine is a delectable reflection of its multicultural roots. The city’s most famous culinary offering is undoubtedly its beef. Asados, or barbecued meats, are a cornerstone of local cuisine, with parrillas (steakhouses) offering a dizzying array of cuts cooked to perfection.
However, Buenos Aires’ food scene goes beyond just meat. Empanadas, stuffed pastries that are baked or fried, are a popular snack, with fillings varying from region to region. Pizza is also a city staple, with Argentinian versions often featuring a thick, doughy crust and copious amounts of cheese. The influence of Italian immigrants can be felt here and in the prevalence of ice cream parlors serving Italian-style gelato.
For those with a sweet tooth, Buenos Aires is the capital of dulce de leche, a sweet, caramel-like sauce that is used in everything from pastries to ice cream. Medialunas, a type of Argentinian croissant, are commonly enjoyed for breakfast or with a cup of coffee in the afternoon.
– Featured Cafe –
Café Martínez C1193AAF, Av. Corrientes 3303, 1193 Buenos Aires, Argentina
Café Martínez
Step into Café Martínez and find yourself embraced by the hallmark of authentic Argentinian cuisine. Here, the quality of the food is impeccable, a testament to the rich culinary heritage it represents. The welcoming staff treats you not merely as a customer, but as a cherished friend, ensuring your every need is promptly and graciously met.
Even if your Spanish is a bit rusty, there’s no need for concern. The accommodating servers at Café Martínez are ever-ready to guide you through the menu, demystify the dishes, and help you make an excellent choice. So, you can fully immerse yourself in the dining experience, confident that you’re in good hands.
Making El Submarino is less about following a recipe and more about creating an experience. It starts with heating milk until it begins to steam but is careful not to let it boil. While the milk is warming, place a piece of quality dark chocolate into a sturdy glass or mug.
Once the milk is hot, the magic happens. Pour the milk into the glass, over the chocolate, and stir. As the chocolate submarine starts to melt and disperse into the milk, it transforms into a creamy, rich hot chocolate, full of depth and flavor. It’s a simple process but one that encapsulates the warmth and comfort of this beloved Argentinian beverage.
Preparing for Your El Submarino Voyage
In terms of equipment, making El Submarino requires little more than a saucepan to heat your milk and a sturdy glass or mug to serve it in. A long spoon can also be useful for stirring the drink as the chocolate melts.
The real star of El Submarino is the chocolate. The quality of your chocolate will greatly impact the taste of the drink, so it’s best to opt for a high-quality dark chocolate. Though traditional El Submarino uses a chocolate shaped like a submarine, any shape or form of dark chocolate will work. Additionally, fresh, high-quality milk will ensure your El Submarino is as creamy and delicious as possible. With these simple ingredients and a little patience, you can create a comforting, delightful El Submarino experience at home.
Equipment Needed
1 Saucepan
4 Coffee Mugs
Ingredients Needed
4 cups whole milk
1/4 cup sugar
1 tsp vanilla
4 oz dark chocolate broken into 1-ounce pieces
Time needed: 15 minutes
How to Cook the El Submarino Hot Chocolate
Mix the Ingredients
Pour the milk into a saucepan. Stir in the sugar and vanilla.
Heat the Mixture
Heat the milk slowly over low heat until it is just about to boil. Do not let it boil.
Garnish and Serve
Remove from the heat and divide the milk into 4 mugs. Serve each mug with a few pieces of chocolate.
Dive into the world of Argentinian cuisine with El Submarino, a delicious and engaging twist on the traditional hot chocolate. With this rich and creamy treat, you don't just make hot chocolate, you experience it. Its fun and interactive nature is sure to delight children, turning them into little chefs, as they create their own cup of warmth and sweetness. Compared to its American counterpart, El Submarino offers a unique, hands-on experience that enhances both the flavor and enjoyment of this beloved beverage.
Complementing Your El Submarino: Perfect Pairings for Your Argentinian Hot Chocolate
There’s nothing quite like savoring an El Submarino, but what if we could elevate this experience even further? The warmth and richness of the Argentinian hot chocolate open up a world of culinary pairings. Whether you’re in the mood for something sweet or savory, these handpicked recipes complement the flavors of El Submarino perfectly, creating a gastronomic journey that transports you straight to the heart of Buenos Aires.
Apple, Carrot, and Raisin Pie
Venture into a new culinary adventure with this distinctive Apple, Carrot, and Raisin Pie. This delightful fusion of flavors isn't just delicious, it's simpler to craft than you'd imagine! Dare to create your very own Zimbabwean-inspired pie from scratch and let this recipe guide you every step of the way. Indulge in the taste of success as you slice into your homemade culinary masterpiece.
By coupling your El Submarino with these harmonious pairings, you’ve just enhanced your tasting experience. The recipes suggested not only satiate your hunger but also resonate with the deep, chocolatey flavors of your drink. So, the next time you decide to make El Submarino, remember these delightful companion dishes that bring out the best in your Argentinian hot chocolate and allow you to immerse yourself in a truly authentic culinary journey.
Photo Credits:
By Taste The World Cookbook – Copyright 2022 All rights reserved.
By Café Martínez – By https://www.facebook.com/CafeMartinezSitioOficial/
By Deensel – Puerto Madero, Buenos Aires, CC BY 2.0, https://commons.wikimedia.org/w/index.php?curid=68120248
By The Cosmonaut – This image was created with darktable., CC BY-SA 2.5 ca, https://commons.wikimedia.org/w/index.php?curid=90712475
By U.S. Department of State from United States – A View of the Obelisk, in Buenos Aires, Argentina, the Host Site for the 2018 G-20 Leaders’ Summit, Public Domain, https://commons.wikimedia.org/w/index.php?curid=74798513
By Carlos Adampol Galindo – originally posted to Flickr as Caminito en Buenos Aires, Argentina, CC BY-SA 2.0, https://commons.wikimedia.org/w/index.php?curid=5853737
By The Cosmonaut – This image was created with darktable., CC BY-SA 2.5 ca, https://commons.wikimedia.org/w/index.php?curid=90645131
We use Cookies that you can't eat on our website to give you the most relevant experience by remembering your preferences and repeat visits. By clicking “Accept”, you consent to the use of ALL the Cookies that you can't eat.
This website uses cookies to improve your experience while you navigate through the website. Out of these, the cookies that are categorized as necessary are stored on your browser as they are essential for the working of basic functionalities of the website. We also use third-party cookies that help us analyze and understand how you use this website. These cookies will be stored in your browser only with your consent. You also have the option to opt-out of these cookies. But opting out of some of these cookies may affect your browsing experience.
Necessary cookies are absolutely essential for the website to function properly. These cookies ensure basic functionalities and security features of the website, anonymously.
Cookie
Duration
Description
_abck
1 year
This cookie is used to detect and defend when a client attempt to replay a cookie.This cookie manages the interaction with online bots and takes the appropriate actions.
bm_sz
4 hours
This cookie is set by the provider Akamai Bot Manager. This cookie is used to manage the interaction with the online bots. It also helps in fraud preventions
cookielawinfo-checkbox-advertisement
1 year
Set by the GDPR Cookie Consent plugin, this cookie is used to record the user consent for the cookies in the "Advertisement" category .
cookielawinfo-checkbox-analytics
11 months
This cookie is set by GDPR Cookie Consent plugin. The cookie is used to store the user consent for the cookies in the category "Analytics".
cookielawinfo-checkbox-functional
11 months
The cookie is set by GDPR cookie consent to record the user consent for the cookies in the category "Functional".
cookielawinfo-checkbox-necessary
11 months
This cookie is set by GDPR Cookie Consent plugin. The cookies is used to store the user consent for the cookies in the category "Necessary".
cookielawinfo-checkbox-others
11 months
This cookie is set by GDPR Cookie Consent plugin. The cookie is used to store the user consent for the cookies in the category "Other.
cookielawinfo-checkbox-performance
11 months
This cookie is set by GDPR Cookie Consent plugin. The cookie is used to store the user consent for the cookies in the category "Performance".
viewed_cookie_policy
11 months
The cookie is set by the GDPR Cookie Consent plugin and is used to store whether or not user has consented to the use of cookies. It does not store any personal data.
Functional cookies help to perform certain functionalities like sharing the content of the website on social media platforms, collect feedbacks, and other third-party features.
Performance cookies are used to understand and analyze the key performance indexes of the website which helps in delivering a better user experience for the visitors.
Analytical cookies are used to understand how visitors interact with the website. These cookies help provide information on metrics the number of visitors, bounce rate, traffic source, etc.
Cookie
Duration
Description
_ga
2 years
The _ga cookie, installed by Google Analytics, calculates visitor, session and campaign data and also keeps track of site usage for the site's analytics report. The cookie stores information anonymously and assigns a randomly generated number to recognize unique visitors.
_ym_d
1 year
This domain of this cookie is owned by Yandex.Matrica. This cookie is used to store the date of the users first site session.
_ym_isad
20 hours
This domain of this cookie is owned by Yandex.Matrica. This cookie is used to collect information about the user like his characteristics, behaviour on page and targeted actions.
_ym_uid
1 year
This cookie is by Yandex.Metrica. This cookie is used to set a unique ID to the visitor and to collect information about how visitor use the website. Thus it help to track the user and the collected informationn is used to improve the site.
CONSENT
2 years
YouTube sets this cookie via embedded youtube-videos and registers anonymous statistical data.
yabs-sid
session
These are cookies used by Yandex Matrica script belonging to the company Yandex. This cookies are used to measure and analyse the traffic of the website by giving information about how the users use the website.
yandexuid
1 year
This cookie is used to identify the users. This cookie collects information about how visitors use the website. This information is used for internal analysis and site optimization.
ymex
1 year
This cookie is set by yandex. This cookie is used to collect information about the user behaviour on the website. This information is used for website analysis and for website optimisation.
Advertisement cookies are used to provide visitors with relevant ads and marketing campaigns. These cookies track visitors across websites and collect information to provide customized ads.
Cookie
Duration
Description
i
10 years
This cookie is set by OpenX to record anonymized user data, such as IP address, geographical location, websites visited, ads clicked by the user etc., for relevant advertising.
VISITOR_INFO1_LIVE
5 months 27 days
A cookie set by YouTube to measure bandwidth that determines whether the user gets the new or old player interface.
YSC
session
YSC cookie is set by Youtube and is used to track the views of embedded videos on Youtube pages.
yt-remote-connected-devices
never
YouTube sets this cookie to store the video preferences of the user using embedded YouTube video.
yt-remote-device-id
never
YouTube sets this cookie to store the video preferences of the user using embedded YouTube video.
yt.innertube::nextId
never
This cookie, set by YouTube, registers a unique ID to store data on what videos from YouTube the user has seen.
yt.innertube::requests
never
This cookie, set by YouTube, registers a unique ID to store data on what videos from YouTube the user has seen.


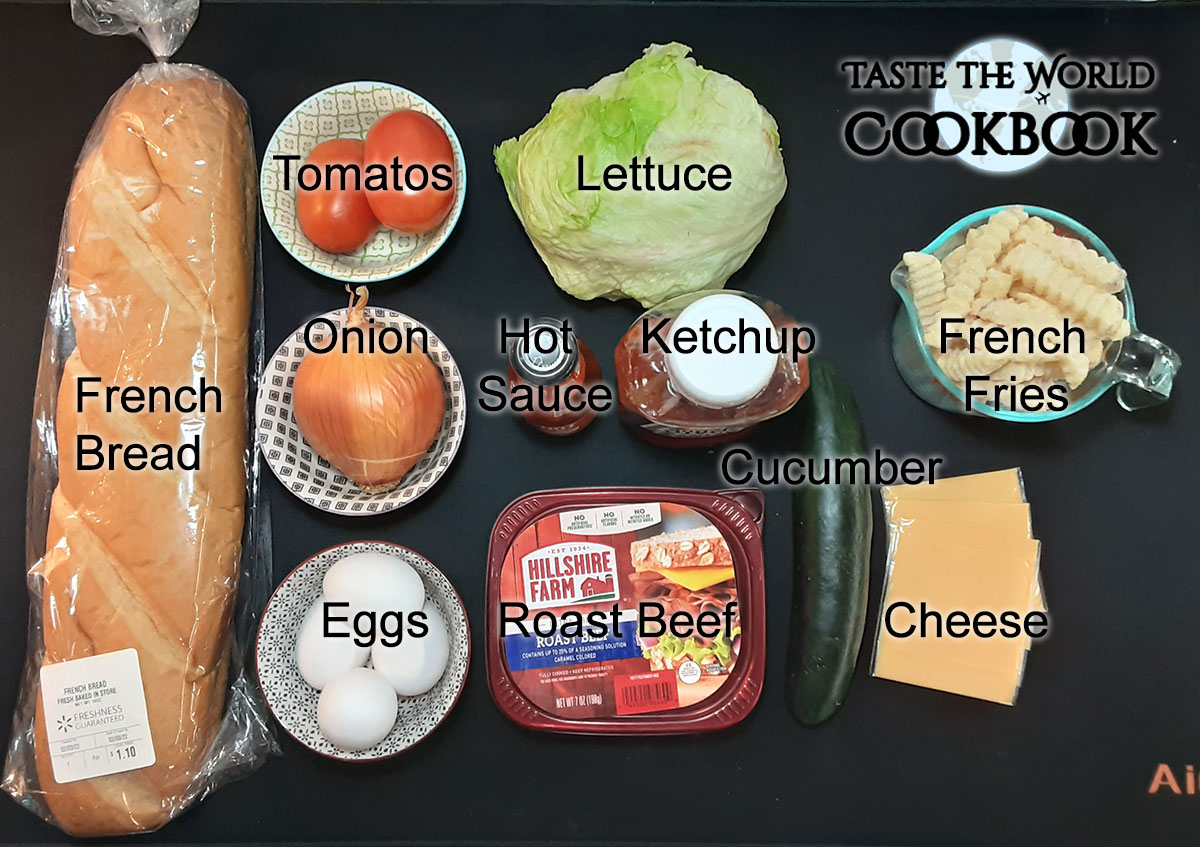


")


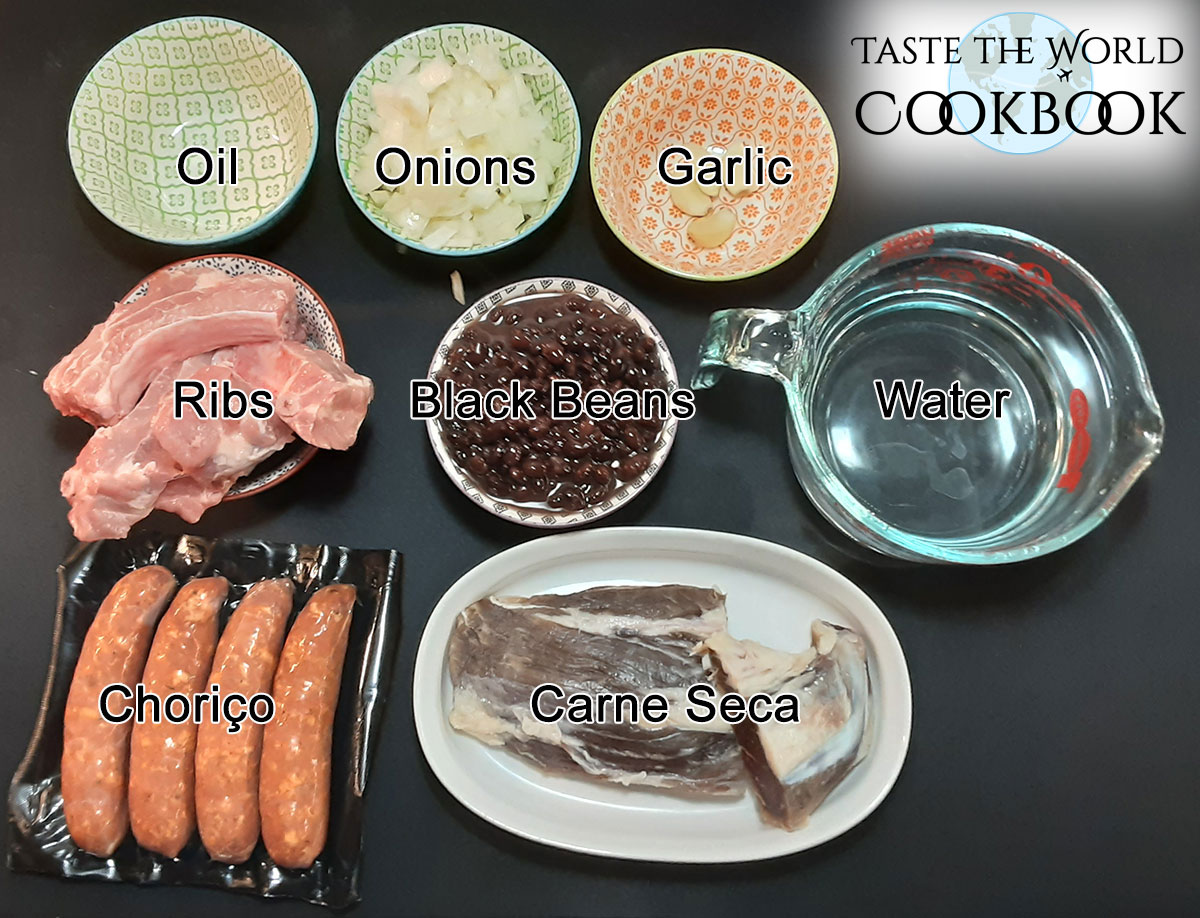
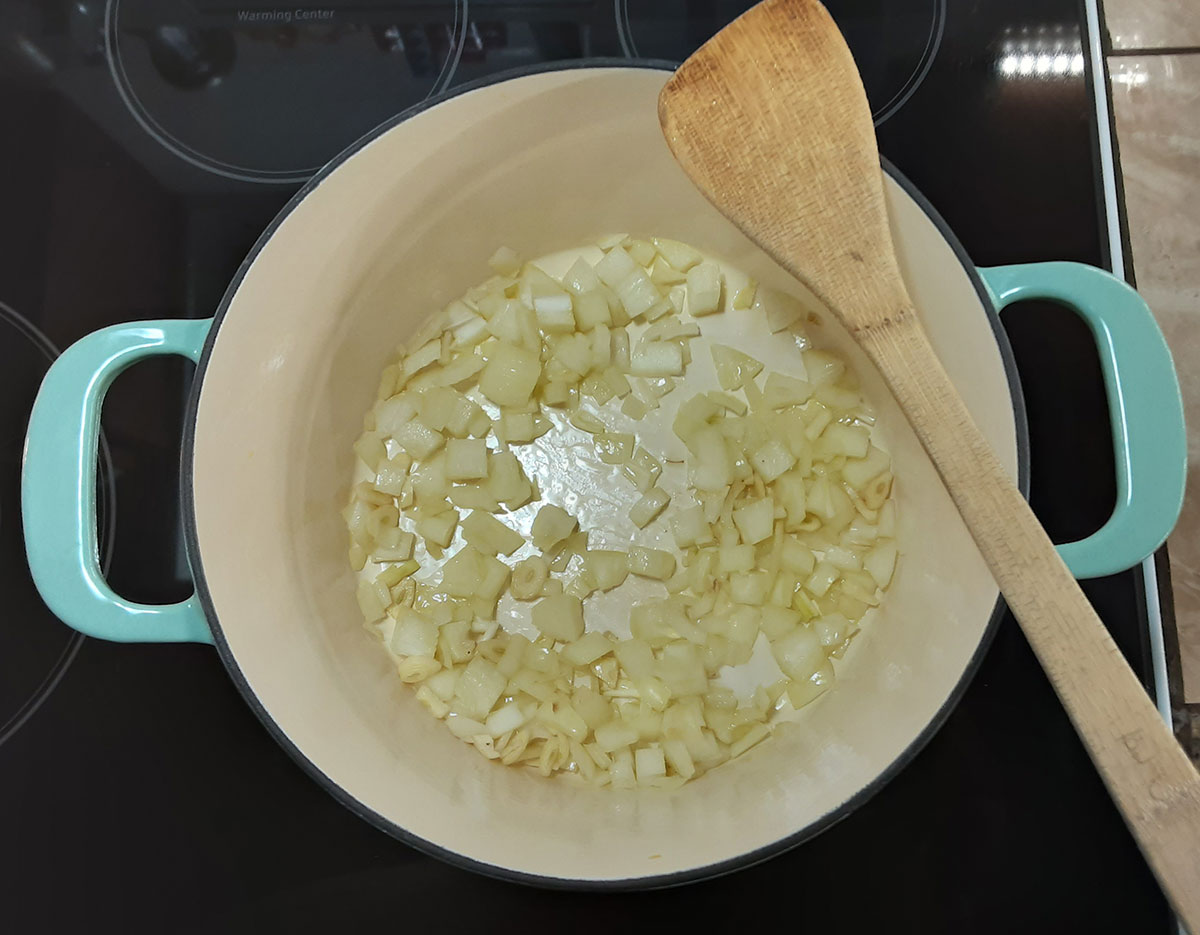
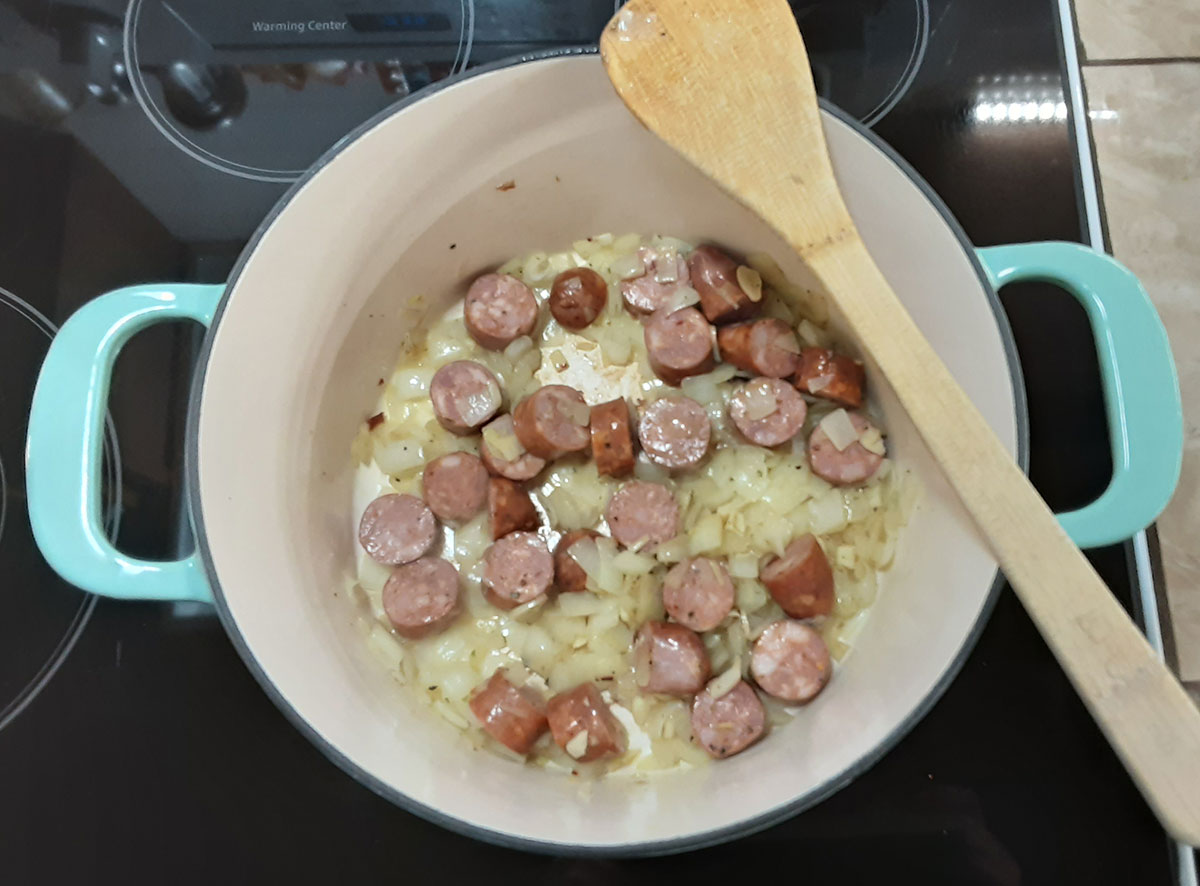
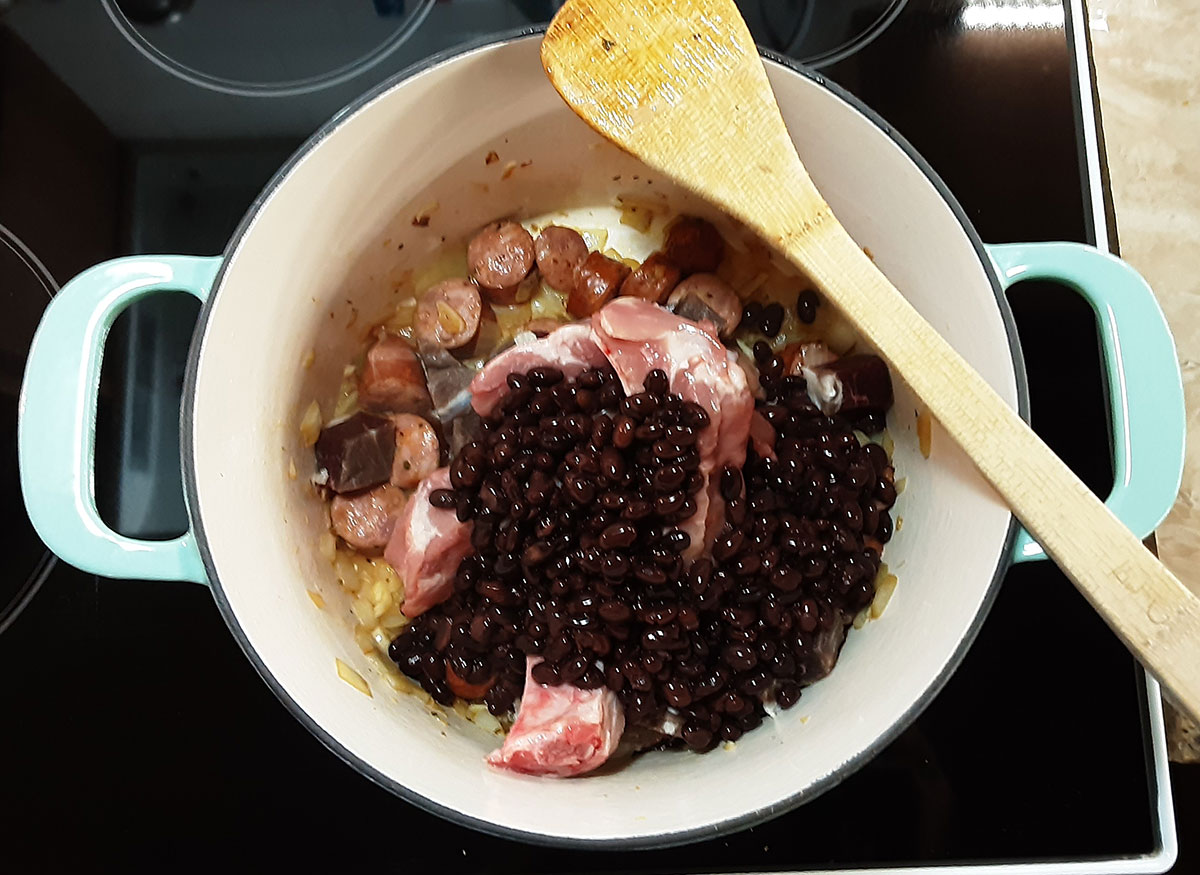
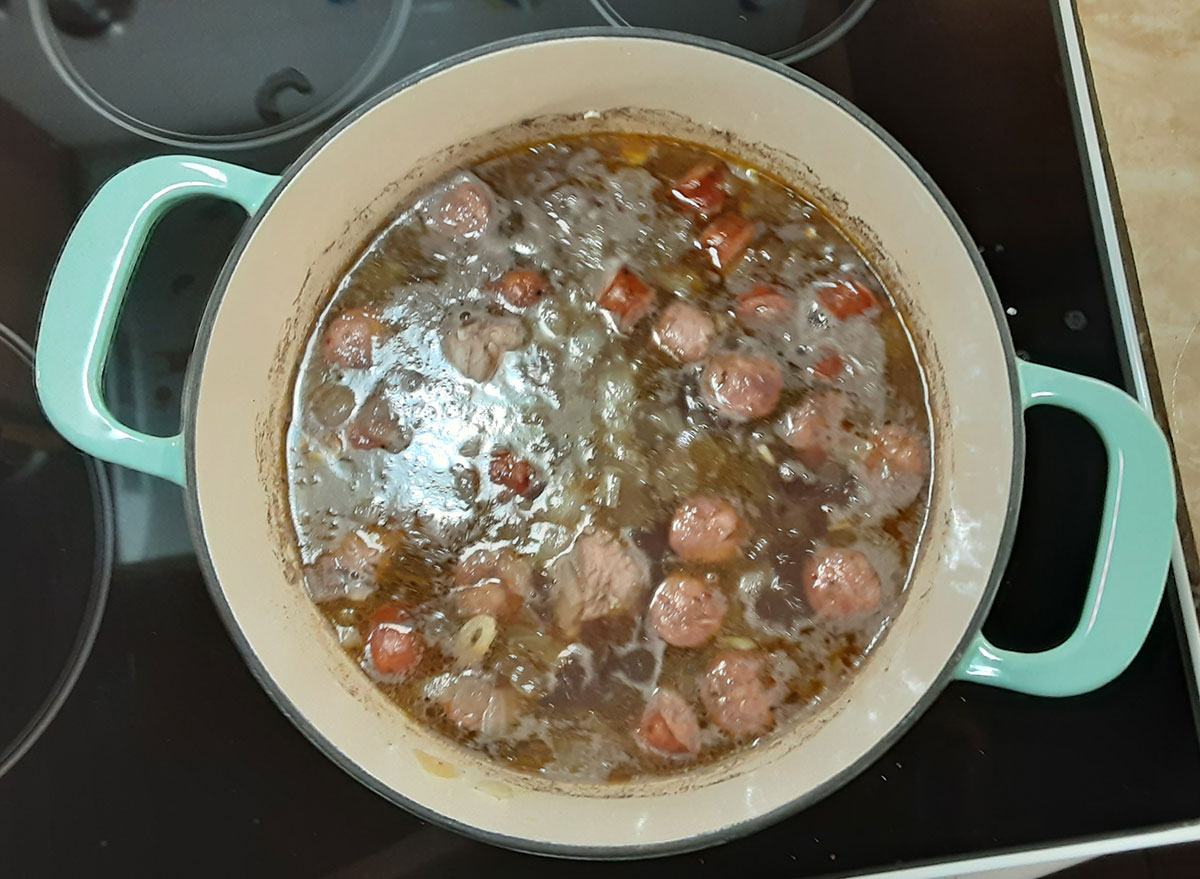


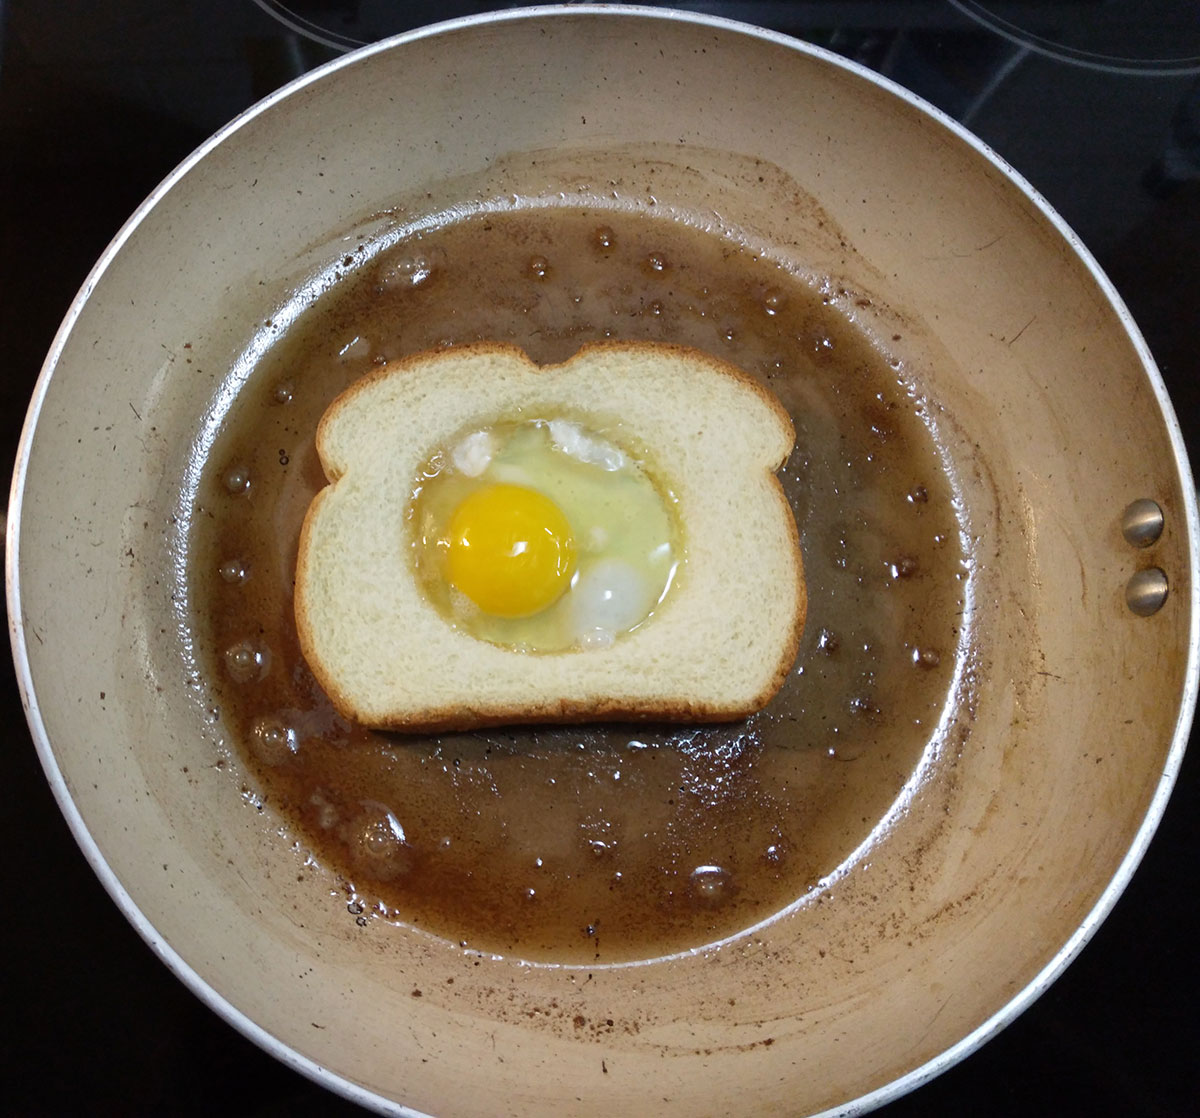


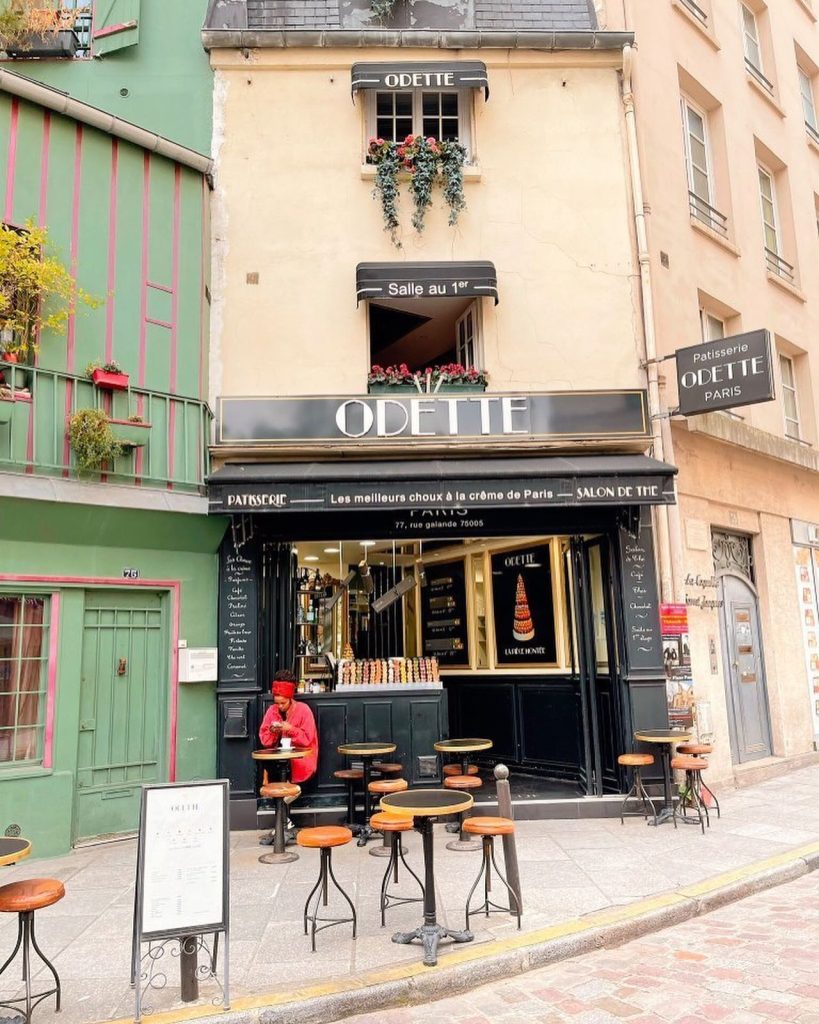


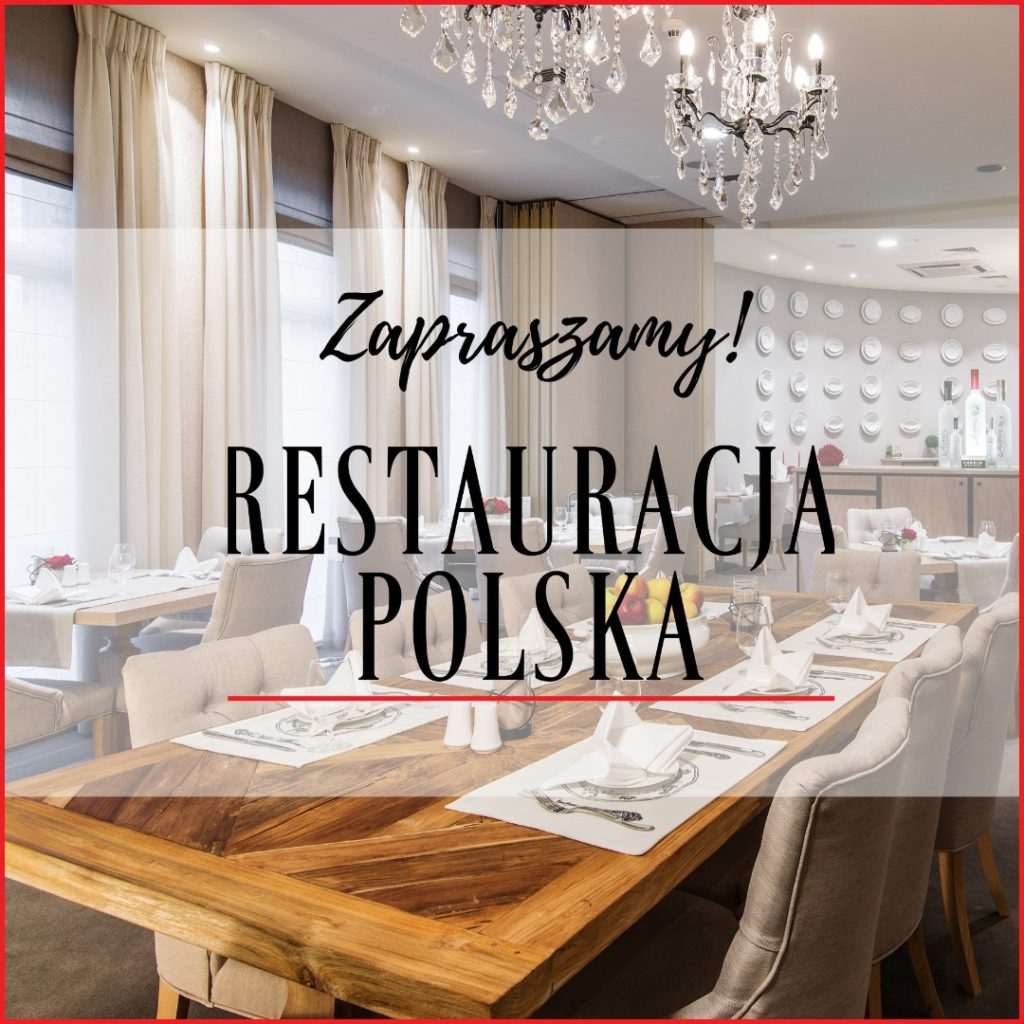
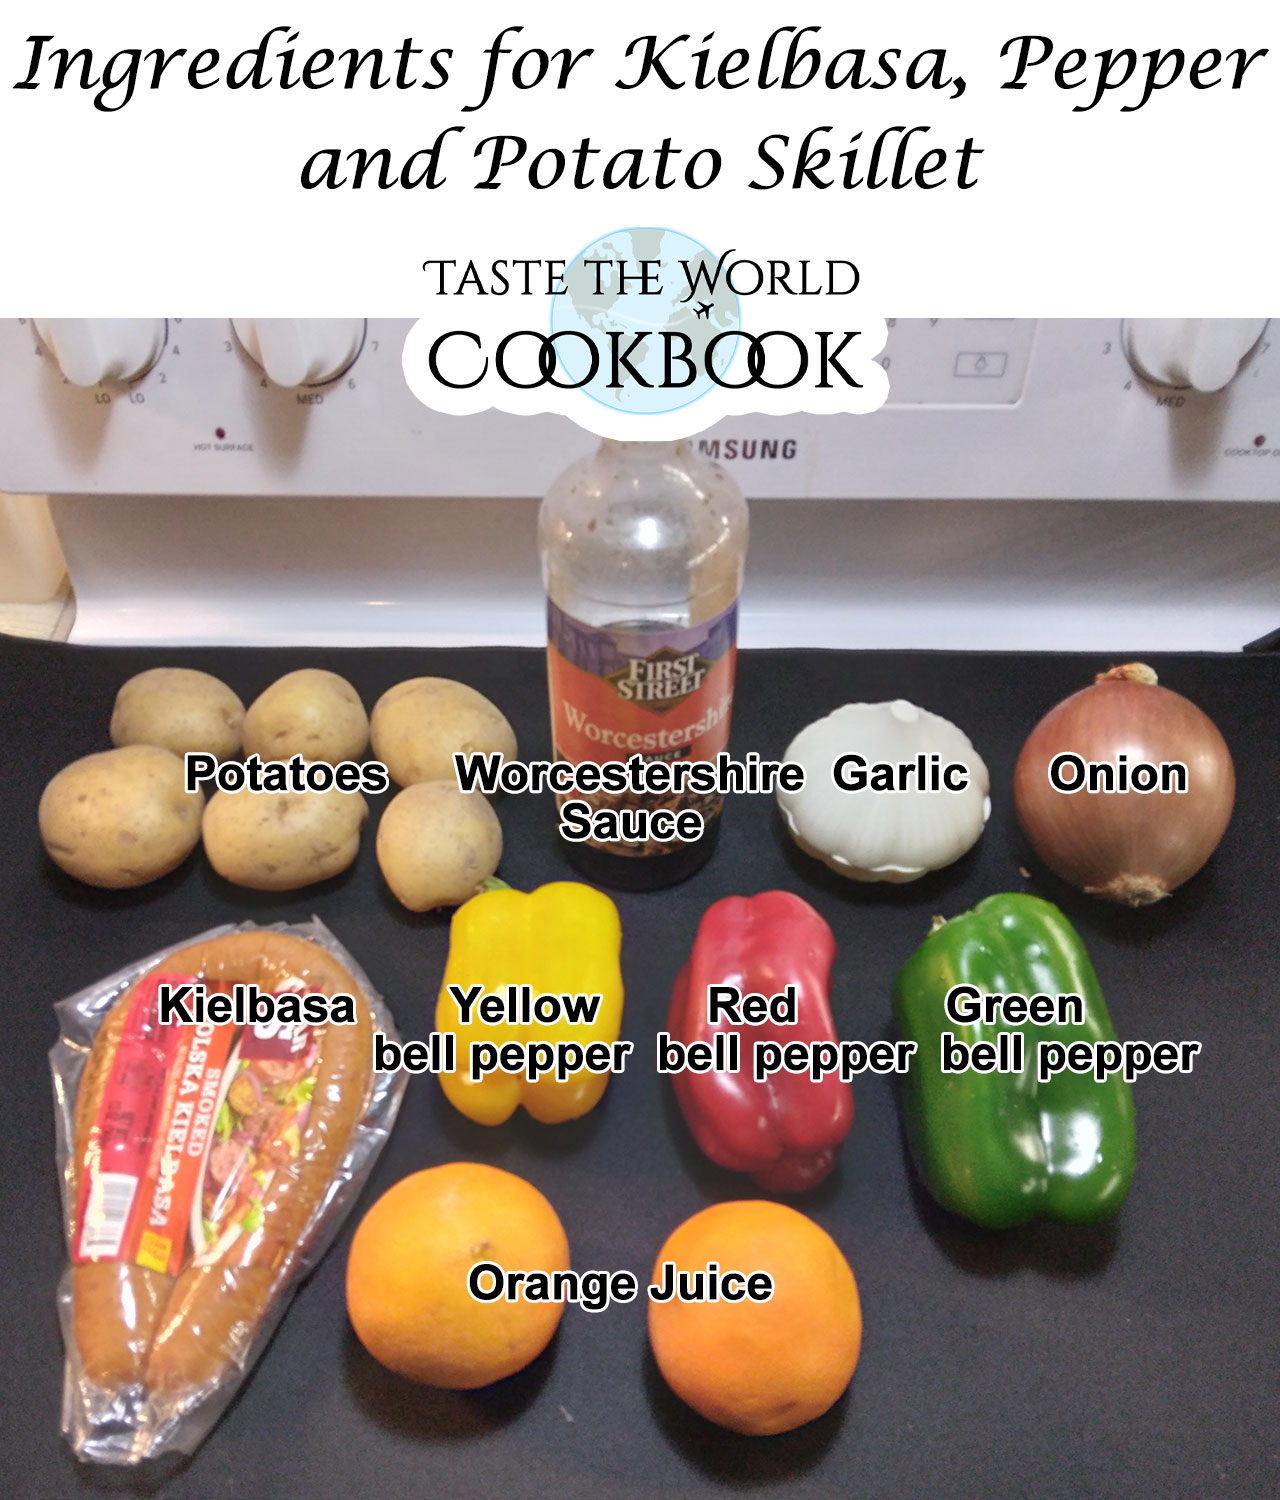


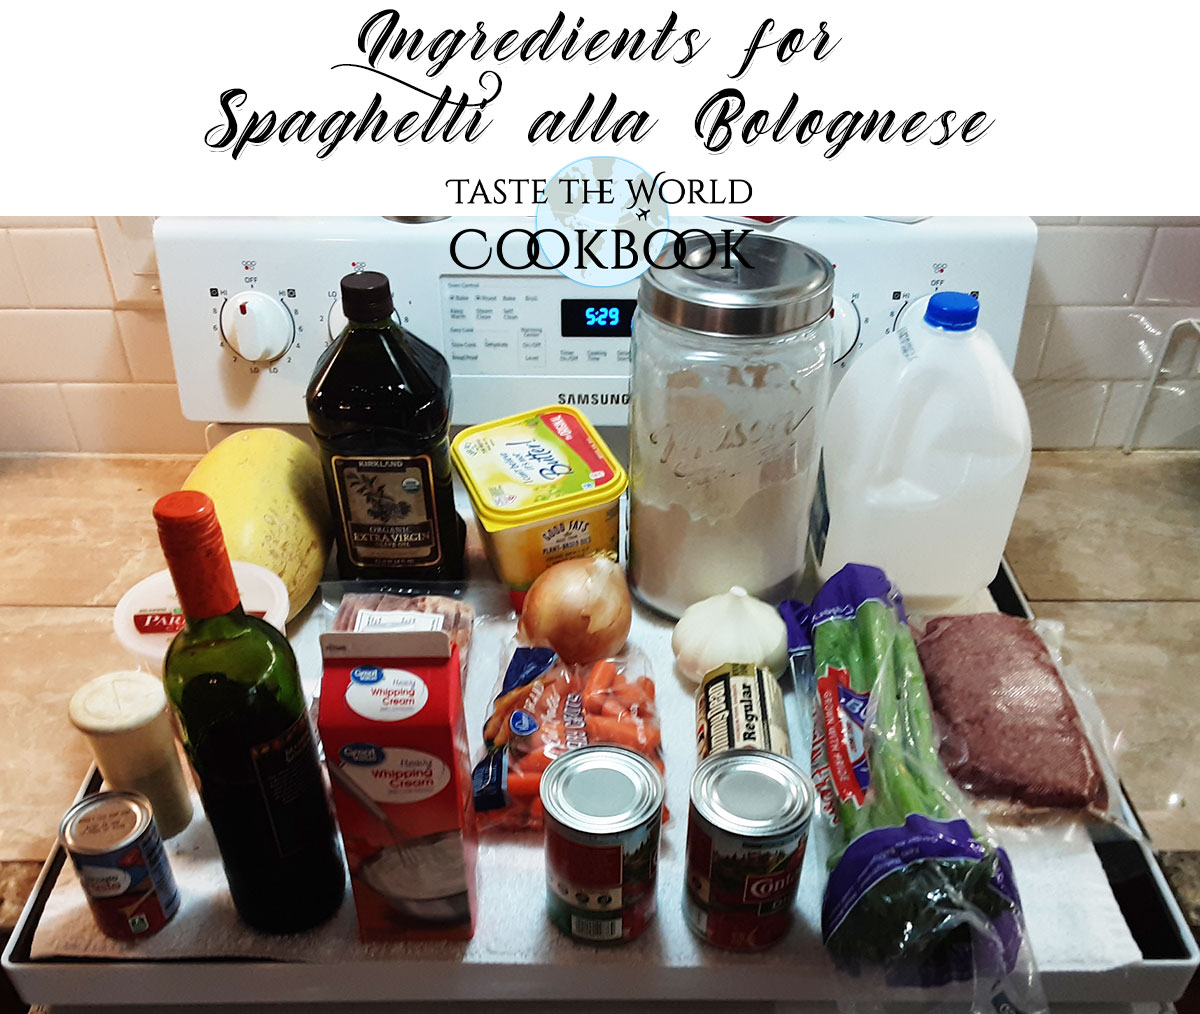


 the Chinese Stuffed Omelette")