Home Blog Page 6

Garlic Roast Chicken With White Wine Sauce

0
Garlic Roast Chicken With White Wine Sauce Recipe Card

Indulge in the delectable flavors of Garlic Roast Chicken with White Wine Sauce, a recipe that promises a mouthwatering feast. This Sydney, Australia-inspired dish combines tender roast chicken, generously coated with a flavorful white wine sauce, and oven-roasted to achieve a golden crispy exterior. With its irresistible taste and minimal preparation, this recipe is perfect for those seeking a delicious roast chicken without the hassle. Complete the meal by pairing it with a refreshing salad, fluffy rice, and perfectly roasted vegetables, creating a harmonious balance of flavors and textures. Get ready to savor this culinary delight that will undoubtedly satisfy your taste buds.

Exploring Delicious Variations of Roasted Chicken

Experience a tantalizing twist on classic roasted chicken with this recipe that incorporates a delightful combination of lemon, bay leaves, and a delicious sauce featuring white wine, rosemary, and a generous amount of roasted garlic cloves. While it may seem like an abundance of garlic, rest assured that the flavor remains delicate, as the cloves are roasted in their skin, imparting a subtle and flavorful essence to the accompanying white wine sauce. The result is a succulent and aromatic dish that will surely delight your taste buds.

It’s worth noting that there are numerous recipes for roasted chicken, each featuring unique spice combinations. While some recipes call for bread stuffing, others opt for vegetable-based stuffing, offering a wide range of flavors to explore and enjoy. Feel free to experiment with different seasonings and fillings to discover your own perfect roasted chicken creation.

Optimal Storage Techniques for Leftover Chicken

When it comes to storing cooked chicken, it is essential to maintain freshness and preserve its flavors. After cooking, allow the chicken to cool before storing it in an airtight container in the refrigerator. Cooked chicken can be safely stored in this manner for up to 3 days. If you anticipate not consuming the chicken within this timeframe, consider freezing it instead. Use an airtight container or a vacuum sealer for freezing, ensuring maximum freshness and protection against freezer burn. Frozen cooked chicken can be stored for up to 6 months, allowing you to enjoy its deliciousness at a later time.

Tracing the Origins of Roasted Chicken

Roasted chicken, with its roots reaching back thousands of years, holds a fascinating culinary heritage. Ancient civilizations such as the Egyptians and Romans were pioneers in the art of roasting meat, developing methods that involved open fires and ovens, and establishing the foundation for this beloved cooking technique. As history progressed, the roasted chicken took center stage during the Middle Ages, becoming a star attraction at opulent feasts and joyous celebrations throughout Europe. Over time, different cultures and regions infused their unique flavors, incorporating a wide array of herbs, spices, and marinades, resulting in a diverse range of regional roast chicken recipes.

In the present day, roasted chicken remains a beloved culinary tradition, evoking feelings of comfort, warmth, and togetherness. It is often synonymous with cherished family gatherings, comforting home-cooked meals, and the nostalgia of Sunday dinners. The enduring popularity of roasted chicken lies in its versatility and simplicity, offering endless possibilities for seasoning, stuffing, and marinating. Whether adorned with aromatic herbs and spices, filled with delightful ingredients, or bathed in tantalizing sauces, roasted chicken continues to captivate taste buds around the globe.

One such enticing recipe is the Garlic Roast Chicken With White Wine Sauce from Sydney, Australia. This delightful dish features succulent roast chicken slathered in a delectable white wine sauce, resulting in a golden crispy exterior. The harmonious blend of flavors creates an irresistible combination that will transport you to culinary bliss. Pair it with a fresh salad, fragrant rice, and perfectly roasted vegetables for a complete and memorable dining experience.

Exploring Sydney: The Capital City of New South Wales, Australia

Situated as the capital city of New South Wales, Sydney is recognized as one of Australia’s largest and most populous cities. The city’s sprawling landscape houses a vast and diverse community, scattered across a multitude of 658 unique suburbs. Each of these suburbs has its own distinctive character, adding to the rich mosaic of cultural and architectural styles that Sydney is known for. These suburbs are governed by 33 local government areas, each responsible for the administration and delivery of services within their respective regions.

Moreover, the individuals who reside in this bustling metropolis, regardless of which suburb they call home, collectively identify as “Sydneysiders.” This term, born out of a sense of shared identity and community, binds together the city’s inhabitants, fostering a spirit of camaraderie and togetherness. From the sparkling waters of Sydney Harbour to the iconic silhouette of the Opera House, Sydneysiders form the vibrant and dynamic heartbeat of this truly unique Australian city.

Sydney Through the Ages: A Tapestry of Ancient Roots and Multicultural Growth

For at least 30,000 years, the area now known as Sydney has been home to Indigenous Australians. The land bears witness to their long-lasting presence through numerous Aboriginal engravings that remain scattered across the region, a testament to the ancient cultural heritage etched into the fabric of this city. These prehistoric imprints on the landscape harken back to a time long before the arrival of European settlers, capturing a period of history when Aboriginal societies were the sole inhabitants of this vast continent.

The face of Sydney began to change significantly when, in 1770, Lieutenant James Cook and his crew made their mark as the first Europeans to chart Australia’s eastern coastline. Making their landfall at Botany Bay, their arrival marked the commencement of a new era, introducing European influences into the region, which would have profound and lasting impacts on the indigenous communities as well as the area’s flora and fauna.

The transformative nature of Sydney took another significant turn following World War II, as the city witnessed a wave of mass migration, molding it into one of the world’s most multicultural cities. Nearly half of its population — 45.4% — report being born overseas, illustrating the city’s diverse demographic makeup. In terms of foreign-born residents, Sydney stands tall on the global stage, ranking third after London and New York City. This multicultural melting pot characterizes the city today, shaping its culture, cuisine, and community in countless ways.

Sydney’s Attractions: A Confluence of Art, Nature, and Urban Splendour

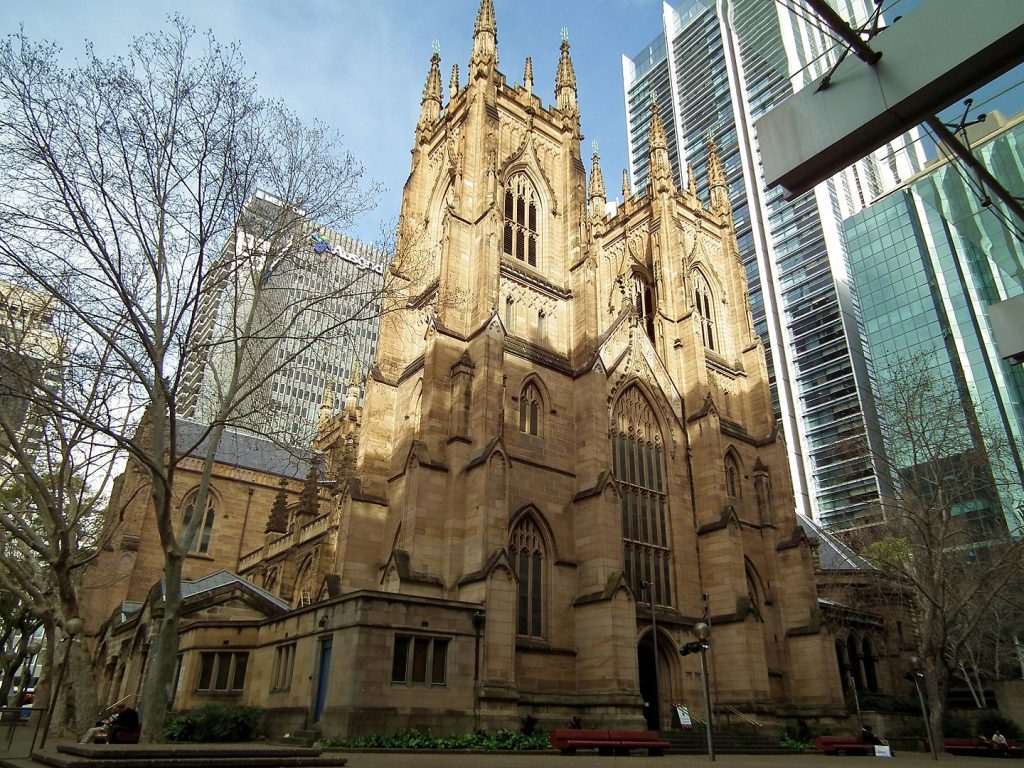
The city of Sydney is globally renowned for its architectural gem, the Sydney Opera House, perched majestically on its harbourfront. This iconic structure, with its distinctive sail-like design, encapsulates the spirit of the city, reflecting the seamless blend of artistic creativity and advanced engineering that defines Sydney. The Opera House not only offers world-class performances within its halls but also serves as a landmark that immediately stirs images of the city’s unique coastal backdrop.

Complementing the Opera House’s grandeur are the dynamic Darling Harbour and the more intimate Circular Quay port, both pulsating with vibrant waterside life. These hubs are teeming with a flurry of activity, from leisurely boat rides to bustling restaurants and cafes, infusing a distinct charm into Sydney’s maritime allure. Not far from these lively ports, you’ll find the impressive Harbour Bridge arching gracefully over the water and the esteemed Royal Botanic Garden, which serves as an oasis of tranquillity amidst the city’s energetic pace.

Last but certainly not least, the Sydney Tower commands attention with its towering presence in the city’s skyline. Its outdoor platform, known as the Skywalk, offers visitors a thrilling experience. This unique vantage point provides unparalleled 360-degree views of the city, stretching all the way to the suburbs. From this dizzying height, one can truly appreciate the city’s intricate layout, diverse architecture, and the natural beauty that surrounds and punctuates it.

A Culinary Journey through Sydney: Celebrating Australia’s Food Capital

Sydney, the bustling capital of New South Wales, is a haven for food lovers, offering a culinary panorama that mirrors its diverse population and abundant natural resources. Fresh seafood, a result of its privileged coastal location, stands as a significant highlight. From high-end eateries to modest beachside shacks, delectable dishes featuring prawns, oysters, and the famous barramundi are easily found. The Sydney Fish Market in Pyrmont also promises an unforgettable seafood experience, where visitors can sample freshly caught produce in a lively atmosphere.

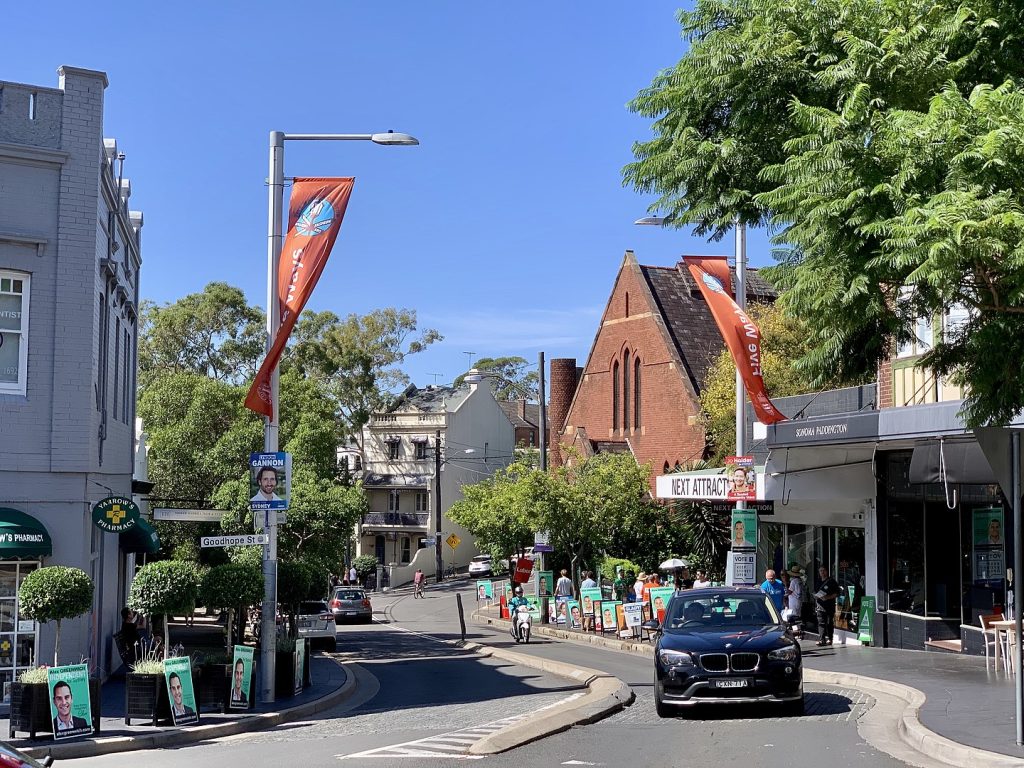
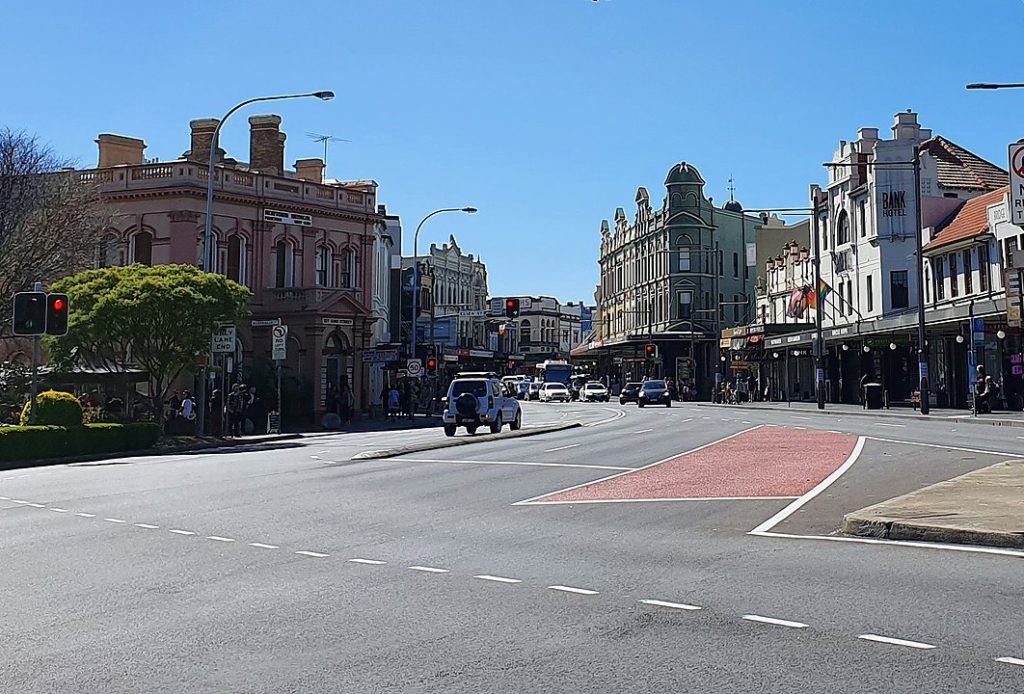
The city’s gastronomy also stands as a testament to its multicultural richness. One can embark on a global food tour within the city boundaries, savoring aromatic Thai curries in Newtown, indulging in authentic Italian pizzas in Haberfield and Leichhardt, or exploring the myriad Asian flavors on offer in Chinatown. This rich tapestry of cultures not only provides a variety of cuisines but also contributes to Sydney’s unique ‘Mod Oz’ (Modern Australian) cuisine, an innovative fusion of traditional Australian ingredients with international cooking techniques.

Sydney’s café culture completes its culinary profile. Known for their serious approach to coffee, the city’s numerous cafes serve exquisite brews accompanied by a range of tempting brunch options. The city’s influence on the global café scene is undeniable, having popularised “smashed avo”, a delightful avocado-based dish that has become a brunch staple worldwide. Sydney, with its vibrant and ever-evolving food scene, truly offers a culinary journey that caters to every palate.

No. 5 Restaurant and Bar
5 McCauley St, Alexandria NSW 2015, Australia

No. 5 Restaurant and Bar

No.5 offers modern Australian dining with an Italian influence located in a light-filled industrial warehouse, formerly an old gem polishing factory – truly a diamond in the rough, yet the ideal spot to grab a quick drink with friends; or sit down for a casual fine dining experience. Expect a seasonally changing menu that temps your taste buds with plates exploring Italian flavors while using primarily local ingredients.

Perfecting Garlic Roast Chicken with White Wine Sauce: A Guide to Safe and Delicious Preparation

When embarking on the culinary journey of preparing garlic roast chicken with white wine sauce, ensuring food safety is a critical first step. Be mindful of potential bacterial contamination during preparation. Rinse your chicken under warm water, removing any residue and preparing it for the next steps of your recipe.

As you proceed with the cooking process, achieving the correct internal temperature of your chicken is paramount for both taste and safety. Aim for an internal temperature range of 165 to 175 degrees Fahrenheit. This not only guarantees a fully cooked, safe-to-eat chicken but also preserves the juiciness and tenderness of your roast. Enjoy your venture into this delightful recipe, ensuring every step is taken with careful consideration of both taste and safety.

Setting the Stage: Preparing Your Kitchen for Garlic Roast Chicken with White Wine Sauce

To ensure a seamless cooking experience while preparing Garlic Roast Chicken with White Wine Sauce, it’s advisable to begin by organizing your workspace and laying out all your ingredients. Having everything readily accessible not only streamlines the process but also minimizes any disruptions during your culinary creation, allowing you to focus on crafting a delectable dish.

Equipment Needed

  • small mixing bowl
  • large baking dish
  • small saucepan

Ingredients Needed

3 ⅓ lbs whole chicken (free-range, patted dry inside and out)
1 lemon (halved)
3 bay leaves
1 tbsp olive oil
1 ½ tbsp rosemary (​finely chopped)
½ tsp sea salt
13 ½ oz chicken broth
3 ⅓ oz white cooking wine
20 cloves of garlic (unpeeled)

Time needed: 2 hours and 20 minutes

How to Cook Garlic Roast Chicken With White Wine Sauce

  1. Preheat the Oven

    Heat the oven to 375 F (190 C).

  2. Stuff and Tie the Chicken

    Pat the chicken dry. Place lemon halves and bay leaves in the chicken cavity. Tie the legs together with kitchen string.

  3. Mix the Rub

    In a small bowl, mix together the olive oil, rosemary, and salt. Rub the mixture over the entire chicken.
    Place the chicken in a large baking dish. Set aside.

  4. Prep the Sauce

    Bring the chicken stock, white wine, and garlic cloves to a simmer in a medium saucepan. Pour the liquid and garlic cloves into the baking dish around the chicken. Cover the baking dish with foil, crimping the edges tightly around the dish so that no steam can escape. Roast for 1 hour 20 minutes.

  5. Remove the Foil

    After this time, remove the chicken from the oven and remove the foil. Place chicken back in the oven, and roast for another 20 minutes or until the chicken is golden brown.

  6. Remove the Chicken and Let it Rest

    Remove the chicken from the oven and loosely cover it in tinfoil. Let it rest for about 15 minutes.

  7. Remove the Sauce

    Spoon the sauce from the baking dish into a saucepan, and keep it warm. You can strain some of the garlic cloves into the sauce, or just keep the cloves whole.

  8. Serve the Chicken

    Serve chicken with garlic sauce on the side. Place a few garlic cloves on each plate so that guests can squeeze garlic onto the chicken if they wish.

For optimal preparation, it’s advisable to use a cutting or serving board equipped with a groove around the edges, designed to collect the juices that escape as you carve the chicken. Begin the carving process by first detaching the drumsticks, followed by the wings and thighs. Conclude your carving by sectioning off the succulent white meat.

If you liked this dish please Rate This Recipe and leave a comment.

Garlic Roast Chicken With White Wine Sauce
Print

Garlic Roast Chicken With White Wine Sauce

This recipe offers an exquisite culinary experience where the chicken is delicately stuffed with zesty lemon and aromatic bay leaves. It's then beautifully roasted in a mouth-watering fusion of white wine and rosemary, accompanied by a generous infusion of twenty garlic cloves. The end result is a flavourful symphony that elegantly combines the tang, aroma, and subtle sophistication of its ingredients.
Prep Time 20 minutes
Cook Time 2 hours
Total Time 2 hours 20 minutes
Servings 4 Servings
Calories 811kcal

Ingredients

Instructions

  • Heat the oven to 375 F (190 C).
  • Pat the chicken dry. Place lemon halves and bay leaves in the chicken cavity. Tie the legs together with kitchen string.
    3 ⅓ lbs whole chicken, 1 lemon, 3 bay leaves
  • In a small bowl, mix together the olive oil, rosemary, and salt. Rub mixture over the entire chicken.
    1 tbsp olive oil, 1 ½ tbsp rosemary, ½ tsp sea salt
  • Place the chicken in a large baking dish. Set aside.
  • Bring the chicken stock, white wine, and garlic cloves to a simmer in a medium saucepan. Pour the liquid and garlic cloves into the baking dish around the chicken. Cover the baking dish with foil, crimping the edges tightly around the dish so that no steam can escape. Roast for 1 hour 20 minutes.
    13 ½ oz chicken broth, 3 ⅓ oz white cooking wine, 20 cloves garlic
  • After this time, remove the chicken from the oven and remove the foil. Place chicken back in the oven, and roast for another 20 minutes or until the chicken is golden brown.
  • Remove chicken from the oven and loosely cover it in tinfoil. Let it rest for about 15 minutes.
  • Spoon the sauce from the baking dish into a saucepan, and keep it warm. You can strain some of the garlic cloves into the sauce, or just keep the cloves whole.
  • Serve chicken with garlic sauce on the side. Place a few garlic cloves on each plate so that guests can squeeze garlic onto the chicken if they wish.

Nutrition

Serving: 500g | Calories: 811kcal | Carbohydrates: 10g | Protein: 112.5g | Fat: 32.4g | Saturated Fat: 8.5g | Cholesterol: 336mg | Sodium: 1025mg | Potassium: 1093mg | Fiber: 1.3g | Sugar: 0.8g | Calcium: 107mg | Iron: 5mg

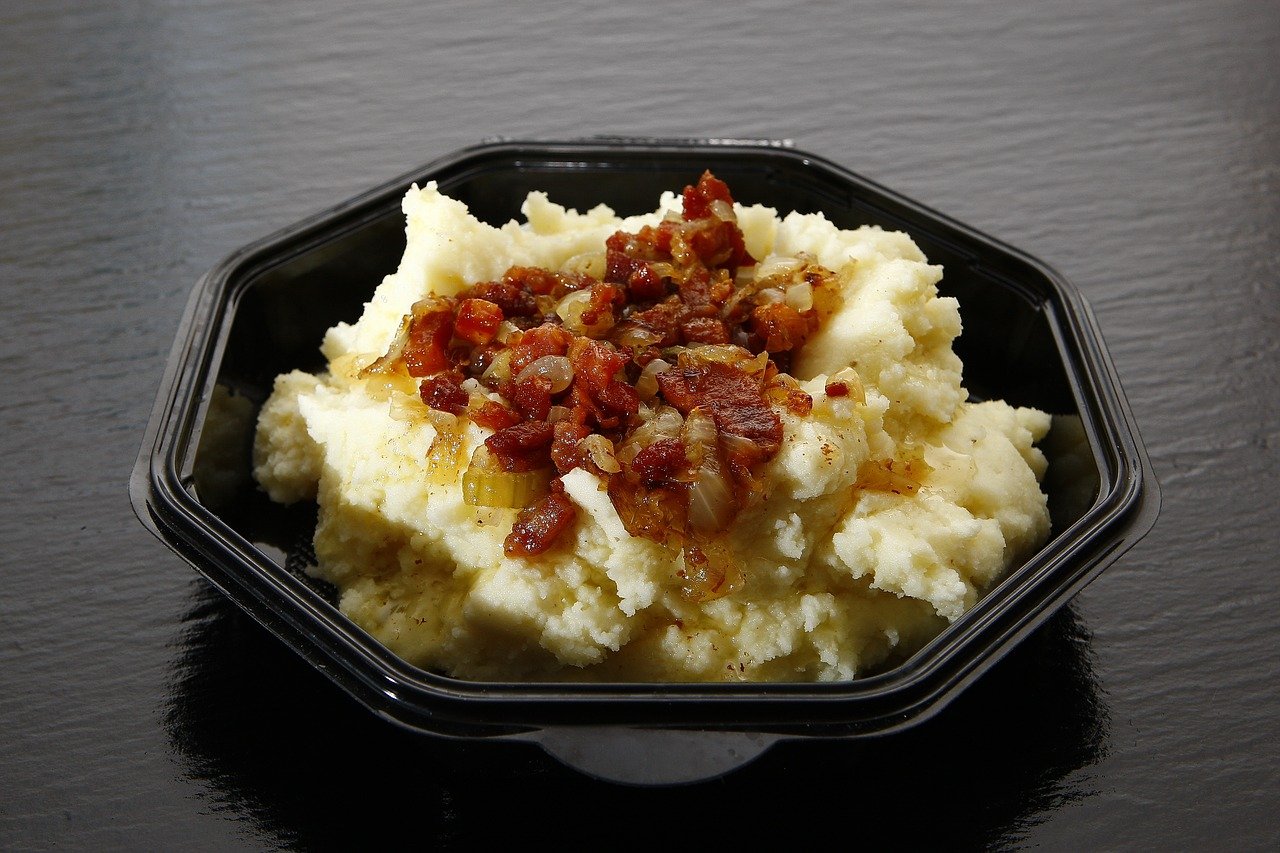
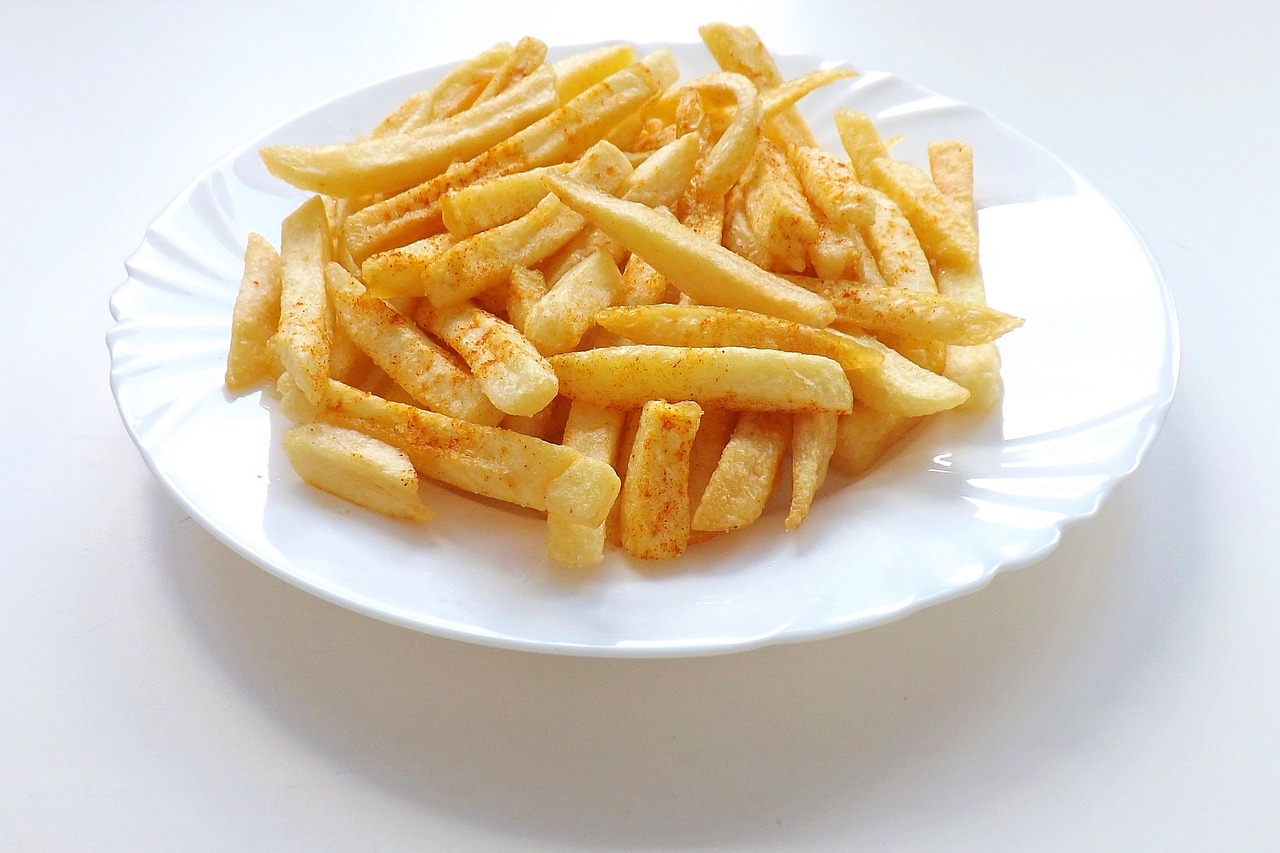
Delightful Pairings: Complementing Your Garlic Roast Chicken with White Wine Sauce

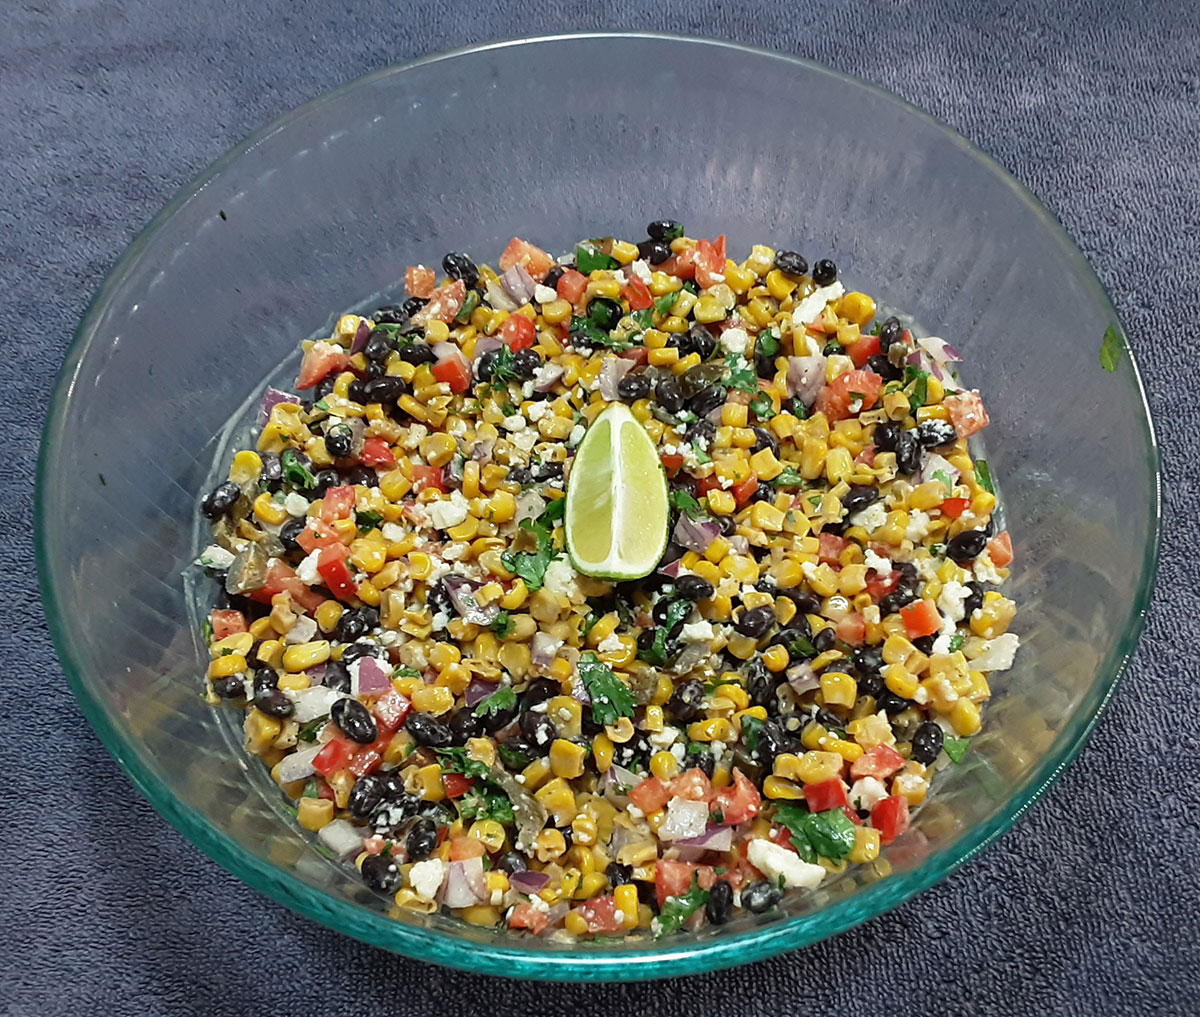
Crafting a memorable dining experience often goes beyond the main dish; the side dishes and accompaniments can greatly enhance the meal, creating a harmonious symphony of flavours. As you plan to serve the succulent Garlic Roast Chicken with White Wine Sauce, consider the following suggestions that beautifully complement this main dish, helping you to construct a well-rounded, delectable meal.

Avocado-Cucumber Salad
In this enticing dish, we bring together the creaminess of ripe avocados and the crunchiness of fresh cucumbers. We then infuse these textures with the tangy zest of lemon and a subtle hint of sweetness from brown sugar. Each ingredient harmoniously combines to create an Avocado-Cucumber Salad that's both refreshing and satisfying.
Check out this recipe
Avocado-Cucumber Salad
Italian Pasta Salad
This Italian Pasta Salad radiates both simplicity and delight. It harmoniously marries together the hearty pasta with juicy tomatoes, freshly grated parmesan cheese, tangy olives, and spicy salami. The dish gets its final touch with a generous drizzle of zesty Italian dressing, creating a salad that's easy to make yet bursting with authentic Italian flavors.
Check out this recipe
Italian Pasta Salad

Photo Credits:

  • By Taste The World Cookbook – Copyright 2022 All rights reserved.
  • By No. 5 Restaurant and Bar – Copyright BY https://www.facebook.com/restaurantno5/
  • By sv1ambo – St. Andrew’s Anglican Cathedral – Sydney, NSW, CC BY 2.0, https://commons.wikimedia.org/w/index.php?curid=38836403
  • By Vakrieger – Own work, CC BY-SA 4.0, https://commons.wikimedia.org/w/index.php?curid=103091488
  • By Kgbo – Own work, CC BY-SA 4.0, https://commons.wikimedia.org/w/index.php?curid=77519591
  • By Benh LIEU SONG (Flickr) – Sydney’s Landmarks 2, CC BY-SA 4.0, https://commons.wikimedia.org/w/index.php?curid=82284289
  • By Mark Merton – Own work, CC BY-SA 4.0, https://commons.wikimedia.org/w/index.php?curid=75701499

The GoldenEye Cocktail

0
The Golden Eye Cocktail Recipe Card

Introducing the GoldenEye Cocktail, the Caribbean delight that James Bond himself enjoys during his adventures! This rum-based concoction hails from the beautiful shores of Oracabessa, Jamaica, and promises to transport you to the tropical paradise with every sip.

Crafted with care, the GoldenEye Cocktail captures the essence of the islands, infusing your next party with a refreshing and invigorating aura. As James Bond famously advises, this cocktail is best enjoyed “shaken, not stirred,” ensuring that each sip delivers the perfect blend of flavors and excitement. So, whether you’re hosting a gathering or simply looking to add a touch of exotic elegance to your evening, the GoldenEye Cocktail is the ideal choice to indulge your senses and ignite your taste buds with a taste of the Caribbean.

Exploring GoldenEye Cocktail Variations

If you’re eager to whip up a tantalizing GoldenEye cocktail, here’s a simple yet delightful Jamaican recipe for you to try. To create this tropical concoction, you’ll need rum, pineapple juice, and lime juice as the key ingredients. Begin by shaking all these elements together with ice to achieve the perfect blend of flavors. Once thoroughly mixed, pour the vibrant mixture into a lowball glass, and for an added touch of visual appeal, garnish it with either a pineapple wedge or a lime wheel.

Although the GoldenEye cocktail recipe typically follows this classic combination, there are a few minor variations worth exploring. While the foundation of rum, pineapple juice, and lime juice remains constant, some individuals opt for specific rum brands to infuse their own personal touch. Furthermore, when it comes to garnishing, there’s room for creativity and experimentation. For instance, an alternative GoldenEye recipe deviates slightly by including 1 oz of Goldschlager Schnapps and 1 oz of Baileys, resulting in a unique twist. To enhance the presentation, this variation is garnished with a peanut, offering an intriguing and unconventional touch to this beloved cocktail.

Unveiling the Origins of the GoldenEye Cocktail

Immerse yourself in the captivating history of the GoldenEye cocktail, which traces its roots back to the legendary gatherings of Ian Fleming, Noel Coward, and Winston Churchill. It was during these memorable occasions that the concept of the iconic Vesper Martini, famously enjoyed by James Bond as a “shaken, not stirred” creation, came to life. The name GoldenEye holds a significant connection to both the James Bond tale, “GoldenEye,” and Fleming’s cherished estate in Oracabessa, Jamaica, aptly named GoldenEye. Prepare to embark on a journey that intertwines the world of mixology with the captivating legacy of Fleming and the allure of the Caribbean paradise.

Preferred Travel Services

Discover the Enchanting Town of Oracabessa, Jamaica

Nestled just 10 miles east of Ocho Rios, Oracabessa is a charming small town situated in St Mary, Jamaica. With a population of 4,108 as of 2009, this hidden gem is bathed in a captivating apricot light that may have inspired its Spanish name, Oracabeza, meaning “Golden Head.” The town’s commercial district boasts a covered produce market along with a handful of shops and bars, creating a lively yet intimate atmosphere.

GoldenEye Beach in Oracabessa, Jamaica

Oracabessa, adorned with breathtaking natural beauty and a warm and welcoming local community, remains one of Jamaica’s best-kept secrets. Despite its appearances in renowned films, mentions in songs, and serving as a muse for esteemed artists, this North Coast haven remains undiscovered by many. Far away from the bustling crowds and sprawling all-inclusive resorts, Oracabessa stands as an oasis within an oasis, offering a tranquil escape. With the presence of the island’s most luxurious hotel, Golden Eye, and the dazzling Golden Clouds villa, a vacation in Oracabessa promises an unforgettable experience.

Ian Fleming's Villa GoldenEye
Ian Fleming’s Villa GoldenEye

The name “GoldenEye” holds a special significance as it pays homage to the creator of James Bond, Ian Fleming. During his tenure as a lieutenant commander in British Naval Intelligence, Fleming engaged in a mission codenamed Operation Goldeneye, where he collaborated with the Naval Intelligence Division to monitor developments in post-Spanish Civil War Spain. Inspired by this operation, Fleming adopted the name for his own estate in Oracabessa, Jamaica, immortalizing the legacy of James Bond in this captivating Caribbean town.

Bizot Bar at GoldenEye Resort
C363+CCF, Oracabessa, Jamaica

Situated in the Inner West suburb of Alexandria, No.5 is truly a diamond in the rough.

Grab a drink with a friend in the lounge or sit down for a while and enjoy a premium dining experience in a relaxed casual atmosphere. We have an interchanging seasonal menu with influences ranging across the entire Asian continent, but the focus relies on produce and simplicity.

Great food is meant to be shared. That is our philosophy at No. 5 – come see for yourself.

Crafting the Perfect GoldenEye Cocktail

Indulge in the creation of this delightful and playful cocktail by following these simple steps. Begin by preparing a lowball glass, filling it generously with ice. Proceed to pour one ounce of smooth white rum over the ice, allowing it to mingle and chill. Next, add two ounces of luscious pineapple juice, infusing the drink with tropical sweetness. Give a gentle squeeze of lime to introduce a refreshing tang to the mix. To elevate the experience, crown the cocktail with an additional ounce of white rum, enhancing its depth and character. Finally, for an exquisite finishing touch, garnish the cocktail with a vibrant pineapple wedge, adding a visual flourish to your creation. Sit back, sip, and enjoy the captivating flavors of the GoldenEye cocktail.

What You Need to Make a Goldeneye Cocktail

Equipment Needed

  • 1 Cocktail Shaker
  • 1 Lowball Glass

To Make the GoldenEye

  • 1/4 cup Jamaican Rum
  • 1/4 cup pineapple juice
  • Fresh lime juice to taste
  • Ice
  • Lime or pineapple wedge for garnish

Time needed: 5 minutes

How to Mix the GoldenEye Cocktail

  1. Mix the Drink

    Add rum, pineapple juice, and a squeeze of lime juice to a cocktail shaker. Shake well; pour into an ice-filled rocks glass.

  2. Garnish

    Garnish with lime or pineapple wedge.

Prepare to embark on a journey to tropical paradise as we dive into the creation of the GoldenEye cocktail, a truly exquisite and immersive beverage experience.

If you liked this dish please Rate This Recipe and leave a comment.

The Golden Eye Cocktail
Print

The GoldenEye Cocktail

Indulge in a fabulous and refreshing experience with the GoldenEye cocktail, a delightful Jamaican creation that combines the invigorating flavors of rum, pineapple juice, and lime juice. This fun-filled beverage is the epitome of tropical bliss, offering a sensational taste that will transport you to sun-kissed shores with every sip.
Prep Time 5 minutes
Total Time 5 minutes
Servings 1 drink
Calories 167kcal

Equipment

  • 1 Cocktail Shaker
  • 1 Lowball Glass

Ingredients

For the Drink

Garnish

Instructions

  • Add rum, pineapple juice, and a squeeze of lime juice to a cocktail shaker. Shake well; pour into an ice-filled rocks glass.
    ¼ cup light rum, ¼ cup pineapple juice, lime juice
  • Garnish with lime or pineapple wedge.
    1 wedge pineapple, 1 wedge lime

Nutrition

Calories: 167kcal | Carbohydrates: 9.9g | Protein: 0.3g | Fat: 0.1g | Sodium: 2mg | Potassium: 108mg | Fiber: 0.2g | Sugar: 6.6g | Calcium: 11mg

Exploring Refreshing Alternatives: Other Drink Recommendations

Embark on a flavorful exploration with a range of tantalizing beverages that are sure to captivate your taste buds. Discover a world of delightful options beyond your usual drink choices with these enticing selections. From classic cocktails to refreshing mocktails, there’s something to suit every palate. Indulge in these carefully curated alternatives and elevate your beverage game to new heights. So, venture forth and savor the excitement that awaits you with these other drinks you might like.

Frozen Strawberry Daiquiri Cocktail
Experience the Ultimate Frosty Delight: A Perfect Strawberry Daiquiri that combines the invigorating blend of frosty strawberries and zesty citrus. This recipe delivers a tantalizing slush of strawberry-citrus goodness that will leave you craving more. For those seeking a non-alcoholic alternative, transform this classic cocktail into a Virgin Strawberry Daiquiri by replacing the rum with lemon-lime soda. Whether you're lounging by the pool or hosting a summer gathering, this refreshing beverage is guaranteed to impress with its icy texture and irresistible combination of sweet and tangy flavors. Get ready to indulge in the ultimate summertime pleasure with every sip.
Check out this recipe
Frozen Strawberry Daiquiri Cocktail

These enticing drink options offer a delightful departure from the ordinary, inviting you to expand your beverage repertoire and discover new flavors that will leave you wanting more. So, step outside your comfort zone and embark on a tantalizing journey with these other drinks you might like.

Photo Credits:

  • By Taste The World Cookbook – Copyright 2022 All rights reserved.
  • By GoldenEye Resort – Copyright BY Bizot Bar at GoldenEye Resort

Frozen Strawberry Daiquiri Cocktail

0
Frozen Strawberry Daiquiri Cocktail Recipe Card

In the world of cocktails, the Frozen Strawberry Daiquiri holds an undeniable charm, being undeniably the most captivating refreshment around.

Be it a vibrant day by the pool or a leisurely summer evening, this Cuban cocktail recipe is the perfect antidote to a sweltering day. This Strawberry Daiquiri is not just a drink; it’s a celebration of vibrant flavors – sweet strawberries, smooth rum, zesty lime juice, and just a touch of sugar to balance it all. It’s a cocktail that quenches your thirst and tickles your palate, all in one deliciously cool sip.

Exploring the Versatility of a Daiquiri Cocktail

The humble daiquiri can transform into a myriad of exciting flavors like the tropical mango, the indulgent banana, the vibrant pineapple, the refreshing watermelon, and the classic cherry. Of course, there’s the legendary Hemmingway Daiquiri, which was named after the acclaimed author who penned “For Whom the Bell Tolls” during his residence in Havana, Cuba.

The Great Strawberry Debate: Fresh or Frozen?

The choice between fresh and frozen strawberries has been a perennial discussion among daiquiri enthusiasts. While some prefer the juicy, natural sweetness of fresh strawberries, others find the frosty texture of frozen strawberries unbeatable. My preferred technique? A blend of both! This method marries the freshness of ripe strawberries with the icy consistency derived from their frozen counterparts.

As for the choice of rum, a white rum is ideal as it imparts a light, clean flavor that doesn’t overpower the strawberries. If you’re opting for a non-alcoholic version, a Virgin Strawberry Daiquiri, simply replace the rum with a lemon-lime soda for that tangy sweetness.

The Origins of the Daiquiri

The name ‘Daiquiri’ hails from a beach and an iron mine close to Santiago de Cuba, with roots tracing back to the Taíno language. The creation of this iconic cocktail is attributed to Jennings Cox, an American mining engineer based in Cuba during the Spanish–American War, when Cuba was still under the jurisdiction of the Spanish Captaincy-General.

There is also a plausible theory that suggests William A. Chanler, a US congressman who acquired the Santiago iron mines in 1902, was instrumental in popularizing the daiquiri in New York’s bustling club scene the same year. Regardless of its exact inception, the daiquiri stands as a testament to cultural exchange and innovation in the realm of mixology.

Exploring Santiago de Cuba: The City Overview

Serving as the capital of Cuba’s southeastern Santiago de Cuba Province, Santiago de Cuba nestles against a scenic bay on the Caribbean Sea. The city is an active trade hub exporting copper, iron, manganese, sugar, and fruits. Serving as the southern end of the country’s Central Highway and a critical junction in Cuba’s major railway system, the city boasts a population of 423,392 according to the 2020 census data.

From the picturesque view over the inner bay to the captivating street scenes of central Santiago, the city is an enchanting visual tapestry. Historic landmarks like the Castillo de San Pedro de la Roca fortress add to the city’s allure. Santiago de Cuba was also the birthplace of the renowned Desiderio Alberto Arnaz y de Acha III, better known as Desi Arnaz. Born in 1917, Arnaz rose to fame as an actor, bandleader, and producer, notably playing Ricky Ricardo on the beloved sitcom ‘I Love Lucy’, alongside his then-wife Lucille Ball.

The Historical Tapestry of Santiago de Cuba

Before the arrival of the Spanish in 1515, the region that is now Santiago de Cuba had been inhabited by indigenous Taíno and Ciboney peoples for centuries. These pre-Columbian societies left an indelible mark on the area, which later transformed dramatically with the founding of Santiago de Cuba by the Spanish colonists. The city then started to weave its history with colonial architecture and significant events, reflecting its rich past and evolving identity.

Throughout its early history, the city endured several trials, including plundering by the French in 1553 and the English in 1603. The Spanish–American War also saw a pivotal Spanish defeat at San Juan Hill on July 1, 1898, further marking the city’s resilient spirit.

In the modern era, Santiago de Cuba became a hotbed of revolutionary activity. On July 26, 1953, the Cuban Revolution was launched against the military dictatorship of President Fulgencio Batista. This movement eventually triumphed, culminating in Fidel Castro’s historic proclamation from a city hall balcony in Santiago de Cuba on January 1, 1951.

This momentous victory ushered in a new epoch for Cuba. It initiated a period of Cuban medical internationalism and spurred Cuban interventions in foreign conflicts across Africa, Latin America, Southeast Asia, and the Middle East. Santiago de Cuba, thus, stands as a city that has been shaped by an intriguing blend of pre-Columbian cultures, colonial influence, and revolutionary fervor.

Tourist Attractions in Santiago de Cuba

The city’s citadel of San Pedro de la Roca, deemed “the most complete, best-preserved example of Spanish-American military architecture,” has earned a spot on the UNESCO World Heritage List. Santiago de Cuba’s distinctive Afro-Cuban cultural influences burst into life during the annual July Carnaval, featuring vibrant parades with rhythmic drumming, vivid costumes, and son dancing, a precursor to salsa.

A short drive away from Santiago de Cuba leads to Cobre, an old copper-mining town that houses Cuba’s most sacred shrine—dedicated to the Virgen de la Caridad (Virgin of Charity), the proclaimed protectress of Cuba. Santiago de Cuba is also the birthplace of the renowned Bacardi brand, established by Facundo Bacardi Masso in 1862. The Bacardi family’s vast art collection, seized during the Cuban revolution, is now exhibited at the Emilio Bacardi Moreau Museum.

The Culinary Landscape of Santiago de Cuba

Santiago de Cuba’s cuisine reflects the city’s rich history and cultural diversity, offering a blend of Spanish, African, and Caribbean influences with a unique local twist. The city’s coastal location ensures the availability of fresh seafood, while the tropical climate contributes a bounty of fruits and local produce.

Spanish colonial influence introduced livestock, rice, wheat, and various vegetables, revolutionizing the indigenous diet of cassava, sweet potato, and corn. Meanwhile, African traditions brought by enslaved people introduced new spices, cooking techniques, and staple foods like plantains and black beans, all of which significantly contributed to the culinary landscape.

Street food plays a prominent role in the city’s gastronomic culture. From the ubiquitous Cuban sandwich to churros and pastelitos, these quick and flavorful bites reflect the vibrant lifestyle of Santiago de Cuba. Whether you’re indulging in a traditional dish at a local eatery or grabbing a snack from a street vendor, you are tasting a piece of Santiago’s flavorful heritage.

Club LED Sports Bar
Avenida Manduley, Santiago de Cuba, Cuba

Club Led Sports Bar
Club Led Sports Bar

Club LED Sportsbar and Cafeteria opened its doors at the Beginning of 2018 in Santiago de Cuba Cuba.

This one-of-a-kind venue for CUBA features LED lighting with automatic LED light work, a wireless point of sale system, and multi-zone ambient sound. Club Led will have a fully stocked bar and one-of-a-kind CUBA Remote ordering system (interactive menus, etc).

rafting the Strawberry Daiquiri: A Quick and Easy Guide

Whipping up this Strawberry Daiquiri recipe is a delightfully simple task that can be accomplished in just about five minutes. However, like any culinary endeavor, ensuring you have all the necessary equipment and ingredients at hand before commencing the process can streamline the experience and ensure efficiency.

Firstly, take a moment to gather everything you need. This way, you will avoid the hustle of searching for a missing item in the middle of blending, ensuring a smoother and more enjoyable cocktail-making process. Preparation is indeed key when it comes to quick and easy recipes like this one.

Once your equipment, including the blender and serving glasses, and ingredients are all within reach, you’re ready to embark on the delightful journey of crafting your own Strawberry Daiquiri. Just a few minutes of blending and pouring, and you’ll be sipping on a cool, refreshing drink that’s perfect for a summer’s day.

What You Need to Make Strawberry Daiquiris

Equipment Needed

  • Blender
  • Highball Glass

For the Strawberry Daiquiri

  • 4 cups frozen strawberries
  • 1 cup fresh strawberries sliced
  • ½ cup white sugar
  • 4 oz light rum
  • 1 lime juiced

To Garnish:

  • fresh strawberries
  • lime slices

Time needed: 5 minutes

How to Mix a Strawberry Daiquiri

  1. In a Blender

    Add frozen and fresh strawberries, sugar, rum, and lime juice to a blender or food processor. Blend until completely smooth.

  2. Add the Garnish

    Pour into glasses and garnish with fresh berries and lime slices if desired.

Daiquiris are the epitome of easy-to-make, yet immensely satisfying drinks, particularly during the hot summer months. With just a quick spin in the blender, you can effortlessly create a delightful concoction that will cool you down and leave your taste buds tingling with delight. Whether you’re lounging by the pool, hosting a backyard gathering, or simply seeking a refreshing sip, Daiquiris are the perfect go-to option for a hassle-free and delicious beverage. Embrace the simplicity and treat yourself to the pure enjoyment of a cool and invigorating Daiquiri.

If you liked this dish please Rate This Recipe and leave a comment.

Frozen Strawberry Daiquiri Cocktail
Print

Frozen Strawberry Daiquiri Cocktail

Experience the Ultimate Frosty Delight: A Perfect Strawberry Daiquiri that combines the invigorating blend of frosty strawberries and zesty citrus. This recipe delivers a tantalizing slush of strawberry-citrus goodness that will leave you craving more. For those seeking a non-alcoholic alternative, transform this classic cocktail into a Virgin Strawberry Daiquiri by replacing the rum with lemon-lime soda. Whether you're lounging by the pool or hosting a summer gathering, this refreshing beverage is guaranteed to impress with its icy texture and irresistible combination of sweet and tangy flavors. Get ready to indulge in the ultimate summertime pleasure with every sip.
Prep Time 5 minutes
Total Time 5 minutes
Servings 4 cocktail
Calories 217kcal

Equipment

Ingredients

Garnish:

Instructions

  • Add frozen and fresh strawberries, sugar, rum, and lime juice to a blender or food processor. Blend until completely smooth.
    4 cups frozen strawberries, 1 cup fresh strawberries, ½ cup white sugar, 4 oz light rum, 1 lime
  • Pour into glasses and garnish with fresh berries and lime slices if desired.
    fresh strawberries, lime slices

Nutrition

Serving: 10oz | Calories: 217kcal | Carbohydrates: 38.8g | Protein: 1.2g | Fat: 0.5g | Sodium: 2mg | Potassium: 276mg | Fiber: 3.6g | Sugar: 33.8g | Calcium: 29mg | Iron: 1mg

Other Recipes That Will Go Well With Frozen Strawberry Daiquiris

If you’re looking to complement your frozen strawberry daiquiris with other delicious dishes, here are a couple of recipe suggestions that will pair perfectly with this refreshing cocktail:

Three Sisters Quesadillas
Three Sisters Quesadillas are a fun afterschool snack, an appetizer, or a meal for the whole family. These Quesadillas are full of flavor and a handheld treat that’s loved by adults and kids alike.
Check out this recipe
Shredded Beef Taquitos
These crunchy Shredded Beef Taquitos are made with seasoned shredded beef and a Mexican blend of cheese is wrapped in corn tortillas and baked to perfection. Serve as an afternoon snack or for the next fiesta.
Check out this recipe
Shredded Beef Taquitos

These mouthwatering recipes will enhance your frozen strawberry daiquiris experience, providing a delightful array of flavors and textures that will tantalize your taste buds and elevate your overall enjoyment of the refreshing cocktail.

Photo Credits:

  • By Taste The World Cookbook – Copyright 2022 All rights reserved.
  • By Club LED Sports Bar – Copyright BY https://www.clubledsportsbar.com
  • By Christian Pirkl – Own work, CC BY-SA 4.0, https://commons.wikimedia.org/w/index.php?curid=66332719
  • By Leon Petrosyan – Own work, CC BY-SA 3.0, https://commons.wikimedia.org/w/index.php?curid=22667710
  • By LukaszKatlewa – Own work, CC BY-SA 3.0, https://commons.wikimedia.org/w/index.php?curid=32432814
  • By Los Angeles Times – Los Angeles Times photographic archive, UCLA Library., Public Domain, https://commons.wikimedia.org/w/index.php?curid=5736138
  • CC BY 2.0, https://commons.wikimedia.org/w/index.php?curid=314651

Batido de Trigo ~ Cuban Wheat Milkshake

0
Batido de Trigo ~ Wheat Milkshake Recipe Card

Introducing the Batido de Trigo, a Cuban delight, this Wheat Milkshake is your ticket to a blissful morning. With its smooth, creamy texture and sweet, rich taste, this enticing shake has the power to transform your day before it’s even begun.

Crafted from a blend of milk, sweetened condensed milk, sugar, puffed wheat cereal, and crushed ice, this Cuban specialty is as delightful as it is straightforward.

Full disclosure, I approached this recipe with some trepidation initially. Yet, I was taken aback by its charm and deliciousness. This Batido de Trigo is not only quick and effortless to whip up, but it’s also brimming with a creaminess that balances perfectly with its inherent sweetness. Give it a whirl; this delectable treat might just surprise you as it did me.

Batido de Trigo Customizations: Unleashing Creativity with the Cuban Wheat Milkshake

Even though the classic Batido de Trigo is an absolute delight in its original form, you might want to consider adding a few personalized touches to amplify its deliciousness. Feel free to elevate your milkshake with decadent toppings like rich fudge, creamy caramel, or even a sprinkling of your favorite crunchy candies. Think along the lines of Twix, Heath Bar, or Reese’s Pieces for that extra dose of indulgence. The beauty of this Cuban Wheat Milkshake lies in its flexibility – the flavor combinations you can experiment with are truly boundless!

Optimal Milkshake Storage Techniques

The longevity of your milkshake can be extended by placing it in the refrigerator, though it’s important to note that this will merely slow down the melting process, not halt it entirely. For prolonged storage, the most effective method is to freeze your milkshake. This can be achieved by transferring it into an airtight container and placing it in the freezer. When the craving for your delicious milkshake strikes again, simply move it from the freezer to the refrigerator and allow it to thaw for approximately 20-30 minutes. When the milkshake has defrosted to the desired consistency, it’s ready to be enjoyed once again.

Delving into the History of Milkshakes and the Batido de Trigo Connection

Milkshakes have a rather intriguing history that spans over a century. The term “milkshake” first appeared in print in the 1880s, but these early versions were quite different from the dessert we know and love today. Originally, milkshakes were an alcoholic concoction that resembled eggnog and was considered an ideal tonic for health.

The transition to the sweet, dairy-based beverage occurred in the early 20th century when the invention of new appliances, particularly electric blenders, made it easy to whip up a mix of milk, ice cream, and sweet flavorings. This dessert quickly gained popularity in soda shops across the United States, becoming a staple in American diner culture.

As the love for milkshakes spread, different cultures put their unique spin on this beloved beverage. One such adaptation is the Cuban Batido de Trigo, a wheat milkshake that showcases the ingenuity and distinctive flavor profile of Cuban cuisine.

Batido de Trigo, which translates to a wheat milkshake, is a delectable Cuban drink recipe that offers a smooth, sweet treat typically enjoyed in the morning. It’s a delightful blend of milk, sweetened condensed milk, sugar, puffed wheat cereal, and crushed ice. This recipe is a testament to the global influence of the milkshake and its ability to transform and adapt to different cultural tastes. Just like the milkshake has evolved over the years, the Batido de Trigo represents a unique and flavorful twist on a classic that is as delightful and versatile as its predecessor.

The City of Puerto Padre, Cuba

Nestled within the province of Las Tunas, Puerto Padre is a town and municipality known for its splendid location along the northern coastline of Cuba. This enchanting town is situated in an estuary, which unfurls into the stunning Puerto Padre Bay, setting a serene and captivating scene.

The City of Puerto Padre, Cuba

Puerto Padre thrives as a center for commerce and manufacturing, serving the fertile and irrigated lands that stretch beyond the town’s limits. The town is a conduit for the transformation of locally sourced commodities, as sugarcane, tobacco, fruits, and livestock, all staples of the region’s farming bounty, undergo processing within the town’s premises.

Further enriching its commercial portfolio, Puerto Padre is also home to brickyards and sawmills, amplifying its status as a manufacturing powerhouse. In the vicinity, saltworks, asphalt deposits, and a thermal power plant contribute to the town’s diversified economy, further anchoring its prominence within the province. The city’s intricate network of connectivity ensures its influence extends beyond its boundaries, creating a dynamic hub of economic activity within Cuba’s picturesque landscape.

Unraveling the Historic Threads of Puerto Padre, Cuba

Dubbed as the ‘City of Mills’, Puerto Padre carries the legacy of a rich history that extends back to the 16th century. The pivotal moment that sparked Puerto Padre’s metamorphosis from a quaint town into an industrial beacon arrived in 1851, with the establishment of its inaugural sugarcane mill.

The town became a crucial player in Cuba’s independence wars, carving out its place in the nation’s historical tapestry. Today, Puerto Padre has emerged as an enticing tourist hub, enticing visitors with its historic charm and natural beauty.

The genesis of this remarkable city can be traced back to its founders, who were Criollo (Creole) landowners of Castilian lineage and Catalan traders. Their vision, resilience, and entrepreneurship have left an indelible imprint on Puerto Padre, shaping its journey through the centuries.

Exploring Puerto Padre, Cuba: A Tourism Overview

Enchanting lanes, captivating bay vistas, and a formidable fortress perched atop a hill define the irresistible allure of Puerto Padre. The entrance to the Puerto Padre Bay is adorned with pristine white sandy beaches caressed by crystal clear waters. Local favorites include El Rail, La Boca, and La Llanita, each renowned for their beauty and vibrant atmosphere. Covarrubias Beach, a nearby beach resort nestled within the Puerto Padre municipality, offers an array of tourist facilities, ensuring an unforgettable coastal experience.

The Melting Pot of Flavors: Cuban Cuisine

An enticing blend of Spanish and Caribbean culinary traditions, Cuban cuisine is a gastronomic celebration of shared spices and culinary techniques. The heart of Cuban gastronomy is characterized by its alluring simplicity, showcasing a harmonious blend of flavors and ingredients.

A classic Cuban meal might feature plantains, black beans and rice, ropa vieja (a savory dish of shredded beef), traditional Cuban bread, pork accented with onions, and a smorgasbord of tropical fruits. The essence of many meat dishes lies in their slow cooking process complemented by subtle sauces. The cuisine is further defined by a medley of dominant spices like garlic, cumin, oregano, and bay leaves, infusing each dish with a distinct, aromatic identity.

Café La Marinita
6C22+CG Puerto Padre, Cuba

Tucked away in the charming locale of Puerto Padre, Cuba (6C22+CG Puerto Padre, Cuba), Café La Marinita is a quaint and delightful culinary destination. This charming establishment beckons its guests with a warm and welcoming ambiance, inviting them to experience the true essence of Cuban hospitality.

Preparing the Batido de Trigo: Cuban Wheat Milkshake Recipe

Whipping up this Batido de Trigo is an effortless endeavor. With merely five ingredients and a couple of minutes to spare, you can concoct this delightful Cuban milkshake. Simply blend these components together and voilà – your sweet, satisfying treat is ready to be savored.

What You Will Need to Make a Cuban Milk Shake

Equipment Needed

  • 1 Blender
  • 1 Frosty Mug

Ingredients Needed

  • 1 cup whole milk
  • 3 tbsp sweetened condensed milk
  • 3 tbsp sugar or more to taste
  • 1 cup puffed wheat cereal
  • ½ cup crushed ice

Time needed: 10 minutes

How to Mix a Wheat Milkshake

  1. Blend the Ingredients

    In a high-speed blender, add milk, sweetened condensed milk, sugar, puffed wheat cereal, salt, and ice. Blend until smooth.

  2. Garnish and Serve

    Garnish with fudge, caramel, and a crunchy candy topping like Twix, Heath Bar, or even Reese’s Pieces, and serve.

These delightful beverages are the ideal companions for a leisurely afternoon beside the pool. Simply recline, let yourself unwind, and bask in the gentle whisper of the island breeze.

If you liked this dish please Rate This Recipe and leave a comment.

Batido de Trigo ~ Wheat Milkshake
Print

Batido de Trigo ~ Wheat Milkshake

Indeed, this luscious milkshake, crafted with the richness of sweetened condensed milk, whole milk, and puffed wheat cereal, will make your tastebuds rejoice in delight. So, why wait? Immerse yourself in this Cuban sensation and let the celebration begin!
Prep Time 5 minutes
Total Time 5 minutes
Servings 1 Milkshake
Calories 620kcal

Equipment

Ingredients

Instructions

  • To a high-speed blender, add milk, sweetened condensed milk, sugar, puffed wheat cereal, salt, and ice. Blend until smooth.
    1 cup whole milk, 3 tbsp sweetened condensed milk, 3 tbsp white sugar, 1 cup puffed wheat cereal, ½ cup crushed ice
  • Garnish with fudge, caramel, and a crunchy candy topping like Twix, Heath Bar, or even Reese’s Pieces. Serve and enjoy!

Nutrition

Serving: 3cups | Calories: 620kcal | Carbohydrates: 112g | Fat: 12.9g | Saturated Fat: 7.7g | Cholesterol: 44mg | Sodium: 262mg | Potassium: 625mg | Sugar: 101.1g | Calcium: 438mg | Iron: 3mg

Ideal Companions for a Batido de Trigo ~ Cuban Wheat Milkshake

Classic Batido de Trigo, a quintessential Cuban wheat milkshake, serves as a delightful afternoon indulgence. It’s beautifully paired with the robust flavors of a Cuban sandwich, or savored alongside delectable croquetas and pastelitos for a truly decadent snack experience.

Brazilian Feijoada (Black Bean Stew)
Brazilian Feijoada is a black bean and pork stew that is often served with farofa, toasted cassava flour.
Check out this recipe
Brazilian Feijoada (Black Bean Stew)

Photo Credits:

  • By Taste The World Cookbook – Copyright 2022 All rights reserved.
  • By Café La Marinita – Copyright BY https://restaurantguru.com/Cafe-La-Marinita-Puerto-Padre

Mastering Garlic: Deciphering When to Slice, Chop, or Mince

0
Know When to Slice Chop or Purée Garlic

In today’s culinary discussion, we’ll delve into the versatile world of garlic and how to determine when to slice, chop, or mince it. The way you prepare garlic plays a crucial role in producing allicin, the compound in garlic touted for its potential health benefits including cancer and heart disease prevention.

Cutting or crushing garlic activates the enzyme alliinase, which interacts with alliin to generate allicin. For maximum health benefits, you should finely chop or crush garlic cloves and let them rest for about 10 to 15 minutes before cooking to fully release the beneficial compounds.

Mastering Garlic: Know When to Slice, Chop, or Mince

Time needed: 2 minutes

Know When to Slice, Chop, or Mince Garlic

  1. Prepping the Garlic

    Begin by peeling the garlic, trimming the hard nib at the bottom of the bulb. Roll the bulb on a non-stick mat, placed underneath your cutting board. This ensures the skin is removed without affecting the flesh.

  2. Knowing When to Slice

    When to slice, chop, or mince the garlic depends on your recipe. If you aim for texture and a hint of nuttiness, slice the garlic about 1 millimeter thick. Sliced garlic brings a pleasant mouthfeel to dishes and adds visual intrigue.

  3. Deciding When to Chop

    For quick or sautéed dishes, enhancing the robust garlic flavor involves finely chopping it. This should be added towards the end of high-heat cooking, providing a clean, spicy garlic punch to your dish.

  4. Understanding When to Mince

    For slow-cooking dishes like soups and stews, minced or pureed garlic is ideal. Chop the garlic on a cutting board, sprinkle some coarse salt over it, and use the flat side of your knife to grind it into a puree directly on the board.

With this information at your fingertips, you can expertly slice, chop, and mince garlic according to your cooking needs.

Diversity of Garlic Varieties

Garlic, indigenous to Central Asia, was first cultivated in the Mediterranean region about 5,000 years ago. Known for its strength-enhancing properties, garlic was consumed by Gladiators before battles, and by Egyptian slaves while constructing the pyramids.

Belonging to the Allium or onion family, garlic is one of 700 species. The two primary types are Softneck (Allium sativum) and Hardneck (Allium ophioscorodon), also known as Stiffneck. Some also classify Elephant Garlic as a third type.

  • Softneck Garlic further categorized into Artichoke and Silverskin, is typically found in supermarkets and is probably the one you’ve used most often.
  • Hardneck Garlic features large cloves with intense flavors and easy peeling properties, although its shelf life is shorter, lasting about four to five months.
  • Elephant Garlic a variant of the leek, and part of the onion family, often confuses people due to its garlic-like appearance and large bulbs. Containing only three or four cloves, it has a mild, sweet onion-garlic flavor.

Preserving the Potency: Essential Garlic Storage Tips

Garlic’s flavor is a gift to home cooks around the world, and preserving its potency requires a little know-how. To keep garlic at its flavorful best, it’s crucial to store it correctly. Here are some helpful tips for storing garlic that ensure it remains fresh and ready for your next culinary creation.

Whole Bulbs: The best way to store fresh, whole bulbs of garlic is in a cool, dark place with good air circulation. A pantry or cellar is often ideal. Avoid refrigeration, as it can cause garlic to sprout. Similarly, don’t store garlic in a place that’s too warm, as it can start to dry out. A mesh bag or a basket is a good storage container for whole garlic bulbs, as they allow for air circulation.

Separated Cloves: Unpeeled garlic cloves can last about a week at room temperature. Once you’ve broken the bulb, try to use the cloves quickly. However, if you have too many cloves left, keep them in a small, breathable bag in a cool, dark place.

Chopped or Minced Garlic: Chopped or minced garlic should be used as soon as possible. The exposure to air starts to diminish its flavor quickly. If you have to store it, refrigerate in an airtight container and use within a couple of days.

Preserving in Oil: Garlic infused oil is a popular way to store minced or chopped garlic. However, it’s important to use this method with caution due to the risk of botulism, especially if kept at room temperature. Always refrigerate garlic-infused oils and use them within a week.

By adhering to these garlic storage tips, you can retain the flavor punch that garlic provides to countless dishes. Enjoy your culinary journey with garlic, knowing it’s stored to maintain peak freshness and potency.

Delicious Dishes Featuring Garlic

Dive into the rich, bold world of garlic with our latest collection of recipes where this aromatic gem truly takes center stage. With its unique ability to enhance flavors and transform dishes from ordinary to extraordinary, garlic is indeed a culinary superstar. Whether it’s subtly enhancing the flavor profile of a dish or boldly commanding attention, the versatility of garlic is unrivaled. These recipes celebrate the diversity of this humble ingredient and invite you to experience its magic in your own kitchen. So, why wait? Let’s embark on this garlicky culinary journey together!

A Seven-Step Guide to Organizing Your Spice Rack

0
Tips to Organize Your Spice Rack

Organizing your spice rack is a crucial step towards maintaining an efficient and creativity-inspiring culinary space. It’s not just about keeping an assortment of vibrant flavors, aromatic herbs, and exotic spices – it’s also about creating a sense of order that enhances your kitchen experience. However, without a well-thought-out organizational system, your rich collection of spices can quickly become a chaotic mess of half-used jars and repeated purchases, tucked away in the darkest corners of your cupboards. This guide is designed to help you prevent that chaos, transforming your spice rack into an epitome of orderliness and efficiency, a constant source of inspiration for your cooking adventures.

Finding a misplaced spice bottle when you’re in the middle of a recipe can be frustrating, not to mention the unnecessary expense of buying duplicate spices because you couldn’t locate the original. By organizing your spice rack, you’ll create a more streamlined, enjoyable cooking experience. No longer will you struggle to find the cumin amidst the chaos, and you’ll save money by reducing duplicate purchases and waste. You’ll also keep your spices fresher for longer, ensuring each dish you create is packed with flavor.

Our guide lays out seven simple steps that you can take to organize your spice rack, making it visually appealing, easily accessible, and user-friendly. From tips on inventorying your current collection to advice on grouping and alphabetizing your spices, this guide will walk you through creating a spice organization system that works for your unique kitchen and cooking style. So roll up your sleeves, and get ready to transform your spice rack and elevate your culinary experience.

Don’t Fall Victim to Chaos, Organize Your Spice Rack

How to Organize Your Spice Rack

  1. Take Stock of Your Spices

    Begin by emptying your spice rack completely. Examine each spice jar carefully—discard expired spices or those that have lost their fragrance. In case of duplicate spices, consolidate them into a single jar. Also, ensure all spices are properly labeled for easy identification.

  2. Identify the Perfect Location

    Spices ideally should be stored in a cool, dark place to preserve their flavor and longevity. Find a spot away from direct sunlight or heat, such as a cabinet, pantry, or drawer. If you must keep them on the counter, limit it to those you use frequently.

  3. Categorize and Alphabetize

    To facilitate ease of access, arrange your spices first by categories according to their usage, and then alphabetically within each category. Regularly used spices like salt, pepper, and red pepper flakes can be kept upfront for convenience. Depending on your cooking habits, you might have categories for baking spices, dried herbs, spice blends, or spices specific to certain cuisines.

  4. Choose Your Spice Organizer

    There’s a wide range of spice organizers available on the market, designed to suit different spaces and preferences. Select one that best fits your kitchen space. Door-mounted racks, magnetic strips, turntables, or tiered shelves are great for optimizing cabinet space. If you lack cabinet space, consider wall-mounted racks or magnetic strips.

  5. Opt for Uniform Containers

    Opting for clear, uniformly-sized spice jars adds to the visual appeal of your spice rack. You could purchase empty jars or buy spices from a single brand to ensure matching containers. Alternatively, consider repurposing small glass containers, such as baby food jars, for a more eco-friendly approach.

  6. Label for Easy Identification

    Use labels or stickers to identify your spices easily. If your jars are only visible from the top, place the label on the lid. If your spices are stored on tiered shelves or in a drawer, position the labels where they are easily visible.

  7. Purchase Sensibly

    While buying larger spice containers may seem economical, it can result in waste if the spice isn’t used frequently. Consider purchasing smaller quantities, or share bulk purchases with friends to avoid unnecessary waste.

DIY Solutions: Spice Up Your Kitchen with Homemade Spice Racks

Unleash your creativity while solving a practical problem by crafting your own spice rack. It’s not just about decluttering your kitchen, but also about personalizing your space and making it uniquely yours. Whether you’re a DIY enthusiast or a novice looking for an easy and fun project, creating a spice rack can be a rewarding experience. In this section, we provide innovative and practical DIY solutions that cater to different styles, spaces, and needs. You’ll find ideas ranging from magnetic wall-mounted racks to repurposed jars and reclaimed wood shelves. These DIY solutions are not only cost-effective but also environmentally friendly, as they encourage recycling and repurposing. So, roll up your sleeves and get ready to transform your kitchen with these inspiring DIY spice rack ideas!

  1. Magnetic Wall-Mounted Spice Rack: Save counter space by turning a section of your wall into a magnetic spice rack. Simply attach a metal sheet to your wall (or inside a cabinet door) and fill magnetic tins with your spices. Label each tin and attach it to the metal sheet. This makes your spices easy to see and reach, and you can rearrange them any time you like.
  2. Upcycled Jars: If you have some empty jars from jams, pickles, or baby food, you can upcycle them into spice containers. Clean the jars thoroughly, dry them, and fill them with your spices. You can even paint the lids with chalkboard paint and label each jar with chalk for a rustic look.
  3. Drawer Spice Organizers: If you have an extra drawer in your kitchen, consider turning it into a spice drawer. You can use small mason jars, baby food jars, or even repurposed tic-tac boxes. Label the tops of each jar so you can see the names of the spices when you open the drawer. You could also use dividers or small boxes to keep everything in place.
  4. Reclaimed Wood Spice Shelf: If you’re handy with tools, consider creating a spice shelf out of reclaimed wood. You can tailor it to fit your kitchen perfectly and stain or paint it to match your decor. You can also add small lips to each shelf to keep the spices from sliding off.
  5. Test Tube Spice Rack: For a sleek, modern look, consider using test tubes as spice containers. You can build a simple wooden rack to hold them, or hang them individually on the wall with small brackets.

Remember to keep in mind the size of your spice collection, your available space, and your decor style when choosing or creating a DIY spice rack. The perfect spice rack for you will keep your spices organized and easily accessible while adding to the overall aesthetic of your kitchen.

Discover Your Perfect Spice Storage Solution

Embark on a culinary journey with our array of stylish and practical spice racks. Explore our selection and find the perfect match for your kitchen. Whether you’re seeking compact designs for a cozy space or grand organizers for a culinary enthusiast’s paradise, our range offers something for everyone. Let us assist you in transforming your kitchen into an effortlessly organized haven for your beloved spices.

Organizing your spice rack might sound simple, but it does require some effort. The rewards, however, are worth it—a well-organized spice rack can transform your culinary experiences and streamline your cooking routine. So why wait? Spice up your kitchen today!

Savor the Flavor: Homemade Spice Blend Recipes

Unleashing the power of your newly organized spice rack can be an exciting culinary adventure. It opens the door to a world of flavors waiting to be explored right in your kitchen. Whether you’re a novice cook or a seasoned chef, crafting your own spice blends can elevate your dishes to new flavorful heights.

To get you started, we have carefully curated a selection of our favorite homemade spice blend recipes. Each recipe links back to the complete method and ingredient list on our website.

Taco Seasoning Mix
This Taco Seasoning Mix recipe yields one cup of sumptuous mix. To create your perfect tacos, simply use a ¼ cup of this delicious seasoning blend. The tantalizing flavors packed into each batch will elevate your taco game, leaving you and your guests craving more.
Check out this recipe
Taco Seasoning Mix
Homemade Creole Seasoning
Unleash a world of flavors with this homemade Creole seasoning recipe that's simple to prepare and versatile in its uses. Infusing a diverse range of dishes with its vibrant, distinctive taste, this seasoning blend works as a wonderful dry rub for meats and fish, adding depth and character to your dishes. Ideal for classic recipes like Gumbo and Jambalaya, it also enriches the flavor profiles of seafood delights like shrimp, crawfish, or crab boils. Every pinch of this Creole seasoning brings a culinary masterpiece a step closer, turning ordinary meals into extraordinary dining experiences.
Check out this recipe
Creole Seasoning Mix
Ras El Hanout ~ Top Shelf Spice Mix
This enchanting blend, Ras El Hanout, reigns supreme in the world of spice mixes. Hailing from the vibrant cuisines of North Africa, it possesses an irresistible allure that enhances any dish it graces. Its savory character works wonders when paired with succulent lamb burgers or a golden, roasted chicken, elevating these classics to a new realm of flavor. Get ready to discover the transformative power of this top-shelf spice mix in your culinary creations.
Check out this recipe
Ras El Hanout ~ Top Shelf Spice Mix
Italian Bruschetta Seasoning Mix
Whip up this flavorful Bruschetta Seasoning Mix with ease and speed, a kitchen essential that's ready in just minutes. Infuse the herby goodness into your beloved pasta dishes, sprinkle it on pizza, or add a flavorful twist to focaccia. With this versatile mix at your disposal, every meal can have that delightful Italian finish.
Check out this recipe
Italian Bruschetta Seasoning Mix

KitchenAid Artisan 5 Quart Tilt-Head Stand Mixer: An Epitome of Culinary Craftsmanship

KitchenAid Artisan 5 Quart Tilt-Head Stand Mixer Review

The KitchenAid Artisan 5 Quart Tilt-Head Stand Mixer is the most iconic kitchen appliance around and by far KitchenAid’s most popular stand mixer. Packed with a whopping 325 watts of power, the mixer is able to make recipes calling for up to 9 cups of flour without slowing down.

The mixer does have a failsafe in the form of a single nylon gear that will strip itself before burning out the motor in the event of the mixer being overloaded. Replacing this gear is more cost-effective than replacing the entire motor.

The tilt-head design gives the KitchenAid Artisan mixer the ability to fit and operate underneath standard-sized cabinets, being only 18″ tall with the head tilted up and 14.5″ tall with the head down and locked.

All Colors of the Rainbow

The KitchenAid Artisan Mixer differences are primarily in the color options, finishes and bowls, and accessories that are included with them. The KSM150 KitchenAid Artisan comes in a wide range of colors – over 32 actually which makes it the mixer with the most color options of any model of KitchenAid’s mixers.

The KitchenAid Artisan Mixer comes standard with a 5 qt stainless steel bowl, a coated flat beater, wire whip, dough hook, and pouring shield.

KitchenAid Artisan 5 Quart Tilt-Head Stand Mixer Color Selection

The Custom Metallic Series Mixers are definitely the higher end of the Artisan models line in regards to the price tag. These mixers come with all the same accessories as the standard Artisan KSM150 Mixer with the 5 qt stainless steel bowl, coated beater, wire whip, coated dough hook, and pouring shield.

How Much Will a Kitchen Aid Stand Mixer Cost Me?

The Kitchen Aid Stand Mixer is an expensive mixer but it is well worth it. I had my first Kitchen Aid for 40 years without a single issue and the only reason I replaced it was that when I moved it came up missing when the movers delivered our household goods.

The amount you will save on buying cheap mixers will become more expensive in the long run because you will have to replace the cheap ones more than once in 40 years. The durability is what justifies the cost of $450.

The high-end metal finishes, available in brushed nickel, chrome, and satin copper, have an even higher price but they are absolutely stunning. These mixers can make a bold statement in any kitchen.

Contact Information for KitchenAid

CHAT

Hours of Operation

Mon–Tue: 8 a.m.–8 p.m. EST,

Wed–Fri: 9 a.m.–7 p.m. EST

CALL

1 (800) 541-6390

Hours of Operation

Mon–Tue: 8 a.m.–8 p.m. EST, Wed–Fri: 9 a.m.–7 p.m. EST

MAIL

KitchenAid Countertop Appliances

553 Benson Road

Mail Drop: 8060

Benton Harbor, MI 49022

A Culinary Journey at Adam’s Taphouse and Grille: A Review

Adam’s Taphouse and Grille

In the diverse world of dining establishments, Adam’s Taphouse and Grille in Prince Frederick stands as a distinctive experience. As an explorer of culinary landscapes, I find pleasure not just in the food, but in the journey of discovery itself. Indeed, certain places offer more than a mere pause for nourishment. They serve as the canvas for creating lasting memories, exuding a unique character, flavor, and ambiance that distinguishes them from the rest. It is in this regard that Adam’s Taphouse and Grille truly shines.

Located at the heart of Prince Frederick, Adam’s Taphouse and Grille finds itself comfortably nestled amidst the stunning views and vibrant energy of Flag Harbor. Don’t let its humble and unassuming exterior fool you. Behind the doors of this rustic, Log Cabin Style restaurant, awaits a magical gastronomic journey.

The Taphouse is not just a name; it’s a commitment to a warm, hearty, and authentic dining experience. From the moment you step through the doors, you’re greeted by the aroma of mouth-watering food, the friendly hum of jovial chatter, and the warm smiles of an attentive staff ready to make your visit truly memorable.

What can you expect from this gem of a restaurant? Expect to be swept off your feet by a menu brimming with diverse and delicious dishes, all prepared with fresh, locally-sourced ingredients. Expect a wide selection of beverages, designed to cater to everyone’s tastes. Most importantly, expect a setting where comfort and convenience blend seamlessly to create an environment you’ll want to return to, time and again.

As I pen this review, I can’t help but feel a sense of joy and excitement. I have the pleasure of introducing you to a venue that has left an indelible mark on my culinary journey. So, join me as we explore the delightful dining delights, refreshing beverages, comfort and convenience, and legacy of culinary excellence that Adam’s Taphouse and Grille has to offer.

Let’s dive into the details…

Delightful Dining Delights

Adam’s Taphouse and Grille offers a delightful range of dishes that cater to various tastes and cravings. From sizzling steaks and succulent pork ribs to finger-licking chicken wings and mouthwatering burgers, their menu is a culinary delight. Personally, I found myself enamored with their Bourbon Bacon Burger—a truly heavenly experience. Another standout option is the Crab and Cheese Stuffed Portobello Mushrooms, a delectable fusion of flavors. The best part? These exquisite dishes are reasonably priced, providing incredible value for your dining experience.

Refreshing Beverages

As you await your meal to be prepared by the skilled chefs, Adam’s Taphouse and Grille offers a wide selection of thirst-quenching beverages. From classic fountain drinks to creamy milkshakes and refreshing juices, they have something to suit every taste. Additionally, their fully stocked bar serves a variety of beers, wines, and expertly crafted mixed drinks, ensuring a perfect pairing for your meal.

Convenience and Comfort

Adam’s Taphouse and Grille understands the importance of providing a comfortable dining experience. While awaiting your delicious meal, you can take advantage of their complimentary Wi-Fi, allowing you to stay connected and browse weather maps or sailing charts. It’s the perfect opportunity to make the most of your visit, especially if you’re heading to Flag Harbor.

From the Owners: A Legacy of Culinary Excellence

The Bagdasian family embarked on their culinary journey in 1981 when they opened the iconic Adam’s – the Place for Ribs. However, their passion for creating exceptional dining experiences dates back even further. Since 1965, the family has owned and operated a beloved neighborhood restaurant in Edgewater, Maryland. Building upon this success, Adam’s Taphouse and Grille has expanded to include five additional locations in Severna Park, Annapolis/Eastport, Prince Frederick, Kent Island, and Fruitland/Salisbury.

Immerse Yourself in Culinary Delights

At Adam’s Taphouse and Grille, we take pride in offering delicious nightly dinner specials that will tantalize your taste buds. Complement your meal with one of our eighteen craft beers on tap. With rotating selections that change seasonally, our beer collection always offers new and exciting flavors to enhance your dining experience.

A Welcoming Haven for All

Our family-friendly bar and restaurant cater to a diverse range of occasions. Whether you’re planning a romantic Friday night date, a Sunday dinner with your grandmother, or a post-ball game meal, Adam’s Taphouse and Grille is the perfect destination. Indulge in our wide variety of mouth-watering BBQ entrees, refreshing salads, and enticing appetizers that are sure to satisfy every craving.

Discover the Adam’s Experience

Step into Adam’s Taphouse and Grille in Severna Park and prepare for an unforgettable evening filled with delectable food and drinks. We invite you to see why we are more than just ribs. Our commitment to culinary excellence, warm hospitality, and a diverse menu ensures a memorable dining experience for all. Come and join us as we redefine the art of exceptional dining.

Adam’s Taphouse and Grille
2200 Solomons Island Rd S #3349
Prince Frederick, MD 20678

Adam’s Taphouse and Grille is not only a hidden gem in Prince Frederick but also a destination for extraordinary culinary experiences. From the inviting ambiance and rustic charm to the delectable menu and refreshing beverages, every aspect of this restaurant surpasses expectations. Whether you’re a local resident or passing through the area, I highly recommend stopping by Adam’s Taphouse and Grille to savor the delightful flavors and warm hospitality they have to offer.

Photo Credits:

  • By Taste The World Cookbook – Copyright 2022 All rights reserved.
  • By Adam’s Taphouse and Grille – Copyright BY https://www.facebook.com/AdamsGrillePrinceFrederick/

How to Get the Pickle Smell Out of a Jar

0
How to Get the Pickle Smell Out of a Jar

Glass jars can be incredibly useful for storage and repurposing, but dealing with that stubborn pickle smell can be a challenge. Fear not, as we have the solution to help you eliminate that pungent odor and prepare your glass jars for reuse. Follow these 7 simple steps to clean and sanitize your glass bottles effectively.

There are many ways to Get the Pickle Smell Out of a Jar. The following steps are specifically designed to tackle even the most stubborn odors, but in many cases, a simple overnight remedy might suffice: placing crumpled old newspapers inside the jar.

It’s worth noting that the smell tends to permeate the lid the most, making it the most challenging part to deodorize. If you encounter difficulty with the lid even after following the steps below, consider creating a paste with baking soda and water, applying it to the lid, and letting it sit for a day. Remember to store the jar with the lid off when not in use.

Glass, unlike metal or plastic, doesn’t retain odors as strongly. In most instances, a thorough washing followed by an odor-absorbing substance placed inside the jar is all it takes to eliminate the scent effectively.

Items You Will Need to Get the Pickle Smell Out of a Jar:

  • Soap
  • Water
  • White Vinegar
  • Old Newspapers

Directions to Get Out that Pickle Smell

Time needed: 3 days

Directions to Get Out that Pickle Smell

  1. Soap and Water

    Start by filling the pickle jar with a mixture of soap and water. Scrub the jar thoroughly, ensuring you remove any lingering pickle brine residue that might be causing the odor. Give extra attention to the lid, as it tends to hold the most concentrated smell.

  2. Rinse the Jar

    Once you’ve scrubbed the jar, rinse it thoroughly with warm water. Make sure to remove any soap residue, and dry the jar using a clean towel.

  3. Air Dry

    Allow the jar to air dry for a couple of days. You can place it outside in the sun or near a sunny window to expedite the drying process. This will help eliminate any remaining moisture and potential odors.

  4. Vinegar and Water Mix

    Prepare a solution of white vinegar and water. Fill the pickle jar halfway with white vinegar and then top it off with water. Allow the jar to sit overnight with the vinegar and water mixture, as it helps absorb the pickle odor.

  5. Empty and Dry

    The next morning, empty the vinegar and water solution down the sink. Make sure to dry both the inside and outside of the jar thoroughly using a kitchen towel. It’s important to ensure the jar is completely dry before moving on to the next step.

  6. Newspaper Overnight

    To tackle any last traces of the pickle smell, fill the dry jar with crumpled newspaper. Leave the newspaper in the jar overnight to absorb any remaining odors.

  7. Remove and Repeat

    The following morning, remove the newspaper from the jar and repeat steps 1 and 2 to ensure the jar is thoroughly clean. This additional cleaning step will help ensure your glass jar is fresh and ready for reuse.

By following these 7 simple steps, you can effectively remove the pickle smell from your glass jars and prepare them for a wide range of uses. From storing pantry staples to creating homemade preserves, your refreshed glass jars will be odor-free and ready to serve their purpose once again.

Beyond the Basics: Unlocking Additional Methods to Banish Pickle Smells from Jars

In addition to the steps mentioned above, there are a few additional tips and tricks you can try to further eliminate the pickle smell from your jars:

  • Citrus Solution: Cut a lemon or lime in half and rub the inside of the jar and lid with the citrus fruit. The natural acids in citrus can help neutralize odors. Rinse the jar thoroughly afterward.
  • Baking Soda Soak: Create a solution of warm water and baking soda and soak the jar and lid for a few hours. Baking soda is known for its odor-absorbing properties and can help eliminate stubborn smells.
  • Coffee Grounds: Fill the jar with used coffee grounds and let it sit overnight. Coffee is a natural deodorizer and can help absorb odors.
  • Vinegar Steam: Place the jar on the stovetop and fill it with a mixture of water and vinegar. Bring the solution to a simmer for a few minutes, allowing the steam to help neutralize the smell. Be sure to wash and rinse the jar thoroughly afterward.

Remember, it’s essential to wash and dry the jar completely between each method to avoid any lingering odors. Experiment with these techniques to find the one that works best for you and enjoy fresh-smelling jars for your future culinary adventures!

Say Goodbye to Pickle Smells: Revive Your Jars for Fresh Reuse

With these simple yet effective methods, you can easily eliminate the lingering pickle smells from your jars. Whether you opt for the newspaper trick, utilize vinegar and water solutions, or employ baking soda paste, each approach offers a solution tailored to your needs. Remember to keep your jars clean and odor-free by following proper storage practices. By taking a little extra effort, you can ensure that your jars are always ready for reuse without any unpleasant odors. Now, go ahead and enjoy pickling your favorite ingredients, knowing that you have the knowledge to banish those stubborn pickle smells whenever they arise.

Vibrant Summer Delights: Homemade Striped Fruit Pops

0
Homemade Striped Fruit Pops Recipe Card

Indulge in a delightful frozen treat with our Homemade Striped Fruit Pops recipe, inspired by the vibrant city of Phoenix, Arizona. When the scorching summer days arrive, there’s nothing more satisfying than a refreshing ice-cold treat. These homemade fruit pops not only offer a burst of flavor but also embody a wholesome and nutritious choice. Made with a medley of luscious mangos, succulent strawberries, juicy peaches, and a touch of natural sweetness from honey, these popsicles contain no additives or artificial ingredients.

The beauty of this recipe lies in its versatility, allowing you to embrace your favorite fruits and create personalized flavor combinations that your family will adore. Say goodbye to store-bought popsicles and surprise your loved ones with these delightful striped fruit pops. They provide the perfect cooling companion for endless moments of fun under the sun, ensuring that each bite is a tantalizing escape into a world of pure refreshment.

Exploring the World of Fruit Pops

When it comes to creating popsicles, the possibilities are as endless as the flavors themselves. It seems that the only limitations to popsicle recipes are the number of edible ingredients in the world and the boundless creativity of those who craft them.

Beyond the classic combinations of fruit, you’ll discover a plethora of surprisingly original and sometimes daring recipes. Prepare to be amazed by delightful concoctions such as Root Beer Float Popsicles, Iced Coffee Popsicles, Strawberry Winesicles, Coconut Rum Popsicles, and for the adventurous palates, the intriguing Bourbon Bacon Maple Popsicle takes the spotlight.

Embrace the wide array of flavors and experiment with unique ingredients to concoct your own signature fruit pops. Unleash your culinary imagination and let your taste buds embark on a journey through the extraordinary world of frozen delights.

Proper Storage for Fruit Pops

Ensuring the longevity of your delectable fruit pops is as simple as it gets. Follow these easy steps to store your popsicles and enjoy them at your convenience:

  1. Keep them in the molds: After freezing your fruit pops, it’s best to store them right in their molds. This preserves their shape and prevents any potential messes.
  2. Freezer placement: Find a designated spot in your freezer where the popsicles can stay undisturbed. Ensure they are placed on a level surface to maintain their form.
  3. Duration of storage: Fruit pops can be stored in the freezer for up to three months without compromising their taste or texture. However, with their delightful flavors, you might find yourself devouring them well before that!

By following these simple storage guidelines, you’ll always have a refreshing treat ready to enjoy whenever the craving strikes.

The Origins of the Fruit Pop

The exact origin of the fruit pop remains shrouded in mystery, with no clear evidence of who first invented this delightful frozen treat. However, a few intriguing stories provide glimpses into its early beginnings.

One theory suggests that the concept of the popsicle emerged serendipitously when someone unintentionally left a container of wine outside with a stick in it. The following morning, they discovered a frozen winepop, sparking the idea of freezing flavored liquids on a stick.

Another tale revolves around Frank Epperson, a resident of Oakland, California. It is said that Frank accidentally left a glass filled with water, powdered soda mix, and a wooden stick for stirring outside overnight. To his surprise, he found a frozen concoction the next day. Recognizing its potential, Frank filed a patent for his creation, ultimately earning the distinction of inventing the first popsicle in 1923.

While the true origins of the fruit pop remain elusive, it was here, in the vibrant city of Phoenix, where I stumbled upon this particular recipe that has become a favorite summer treat.

So, as you savor these delectable striped fruit pops, take a moment to appreciate the vibrant city that inspired their creation. Let the flavors whisk you away to the sun-soaked streets of Phoenix, where every lick brings a sense of cool relief and the taste of summer bliss.

The Metropolitan City of Phoenix, Arizona

Located in the southwestern United States, Phoenix stands as the capital city of the state of Arizona, boasting a population of 1,608,139 residents as of 2020. Renowned for its warm climate, Phoenix experiences scorching temperatures of up to 120 degrees Fahrenheit during the summer months, making it a perfect haven for enjoying refreshing popsicles.

As the fifth-largest city in the United States, Phoenix stands as a bustling metropolis, uniquely distinguished as the sole state capital with a population exceeding one million residents. While the city showcases pockets of towering skyscrapers, the majority of Phoenix is characterized by its sprawling landscape adorned with single-level buildings. This expansive layout is a testament to the city’s abundant space, allowing it to grow outward rather than upward.

The city of Phoenix is thoughtfully designed, featuring a well-defined north-south and east-west grid system. East-west roads are designated with names, while north-south roads utilize numerical designations. However, one exception stands out from this orderly arrangement—Grand Avenue, a road that cuts diagonally across the city, creating a few intriguing six-way intersections.

Phoenix, with its diverse architectural landscape, dynamic urban layout, and vibrant atmosphere, offers a captivating blend of natural beauty and modernity. From its thriving downtown area to its serene desert landscapes, Phoenix beckons visitors and locals alike to explore its unique charms and savor the simple pleasures of life, like indulging in delightful fruit pops on a sunny day.

Phoenix: Tracing Its Rich Heritage

Phoenix, Arizona, holds a captivating history that spans millennia, beginning with the ancient Hohokam people who thrived in the area for an impressive 2,000 years. Their ingenuity and engineering prowess led to the creation of approximately 135 miles (217 kilometers) of intricate irrigation canals, transforming the arid desert into fertile land. The legacy of these canals lives on today, serving as the foundations for the modern Arizona Canal, Central Arizona Project Canal, and the Hayden-Rhodes Aqueduct.

However, the Hohokam civilization faced challenges in the form of devastating droughts and severe floods between 1300 and 1450. These natural disasters ultimately compelled their abandonment of the region, leaving behind a rich cultural heritage. Over time, the land became home to various Native American communities, each contributing to the tapestry of the area’s history.

In 1521, the lands encompassing Phoenix became part of the Viceroyalty of New Spain. It wasn’t until the end of the Mexican–American War in 1848 that Mexico ceded its northern territories to the United States, granting the region’s residents U.S. citizenship. Amid this transformative period, Lord Darrell Duppa, one of the original settlers, bestowed the name “Phoenix” upon the emerging city. The name symbolized the rebirth and resilience of a new civilization emerging from the remnants of a past era.

Today, Phoenix stands as a testament to the enduring spirit of its early settlers and the cultural diversity woven into its history. With its vibrant present and promising future, the city continues to honor its roots while embracing progress and innovation.

Unveiling the Charms of Phoenix: A Paradise of Sun and Experiences

Nestled in the heart of the “Valley of the Sun,” Phoenix invites travelers to bask in its year-round sunshine and indulge in a captivating range of attractions. With high-end spa resorts, meticulously designed golf courses by Jack Nicklaus, and a vibrant nightlife, Phoenix lures visitors seeking refuge from the winter cold.

Nature enthusiasts can explore the mesmerizing Desert Botanical Garden, a haven of cacti and native plants, or venture to the sprawling South Mountain Park and Preserve, the largest municipal park in the United States. Surprisingly, despite its desert location, Phoenix offers six nearby lakes for water activities and leisurely shore-side relaxation.

The city’s cultural scene is equally enticing, boasting renowned museums such as the Heard Museum, celebrating Native American art and culture, and the Western Spirit: Scottsdale’s Museum of the West, offering a glimpse into the art and history of the Old West. Don’t miss the Musical Instrument Museum, home to a vast collection of over 15,000 instruments from around the world.

As you immerse yourself in Phoenix’s vibrant tourism offerings, prepare to embark on a culinary adventure that tantalizes the taste buds. From fiery Southwestern flavors to international delicacies, Phoenix’s eclectic dining scene promises to be a feast for the senses. Get ready to savor the gastronomic delights that await in this vibrant city.

The Diverse Culinary Tapestry of Phoenix: A Gastronomic Adventure

As a melting pot of cultures and flavors, Phoenix’s culinary scene reflects its vibrant diversity. While the city’s early dining establishments centered around steakhouses, Phoenix has emerged as a hub for Mexican cuisine, influenced by its sizable Hispanic population and proximity to Mexico. However, with a recent population boom that has drawn people from all corners of the globe, Phoenix’s culinary landscape has expanded to encompass a rich tapestry of international flavors.

Prepare your taste buds for a delightful journey through a kaleidoscope of cuisines. Indulge in succulent barbecue, savor the bold and spicy flavors of Cajun/Creole cuisine, or dive into the Mediterranean delights of Greek fare. Experience the tropical allure of Hawaiian dishes or revel in the hearty comfort of Irish classics. Embark on a culinary odyssey with Japanese sushi, explore the tantalizing flavors of Italian and fusion cuisine, or savor the aromatic spices of Persian and Indian (South Asian) dishes.

Immerse yourself in the sizzling Korean barbecue, indulge in the vibrant flavors of Spanish tapas, or treat yourself to the aromatic Thai curries. Venture into the realms of Chinese culinary mastery, relish the fusion of Southwestern and Tex-Mex creations, or explore the fresh and vibrant cuisine of Vietnam. And let’s not forget the captivating tastes of Brazilian churrasco and the refined elegance of French cuisine.

In Phoenix, the dining options are as diverse as the city itself. Embark on a gastronomic adventure and discover a world of flavors that will leave your taste buds yearning for more.

La Realeza Ice Cream
7515 W Encanto Blvd, Phoenix, AZ 85035

La Realeza Ice Cream

Good food, good prices. Kids liked their custom ice creams in a cup and cones. My mango raspado con lechera was delicious! Agua frescas are sold too, limon is our favorite. Definitely worthy of your time.

Create Your Own Refreshing Homemade Striped Fruit Pops

Indulge in the delightful world of homemade frozen treats with our recipe for Homemade Striped Fruit Pops. These vibrant and refreshing popsicles are a perfect way to beat the summer heat and enjoy the natural sweetness of fresh fruits. With colorful layers of flavor and a touch of creativity, these homemade delights will make you forget about store-bought popsicles.

Gather your equipment and ingredients as we embark on a journey to create these mouthwatering striped fruit pops. The beauty of this recipe lies in its simplicity and versatility, allowing you to experiment with different fruit combinations and customize the flavors according to your preferences.

Prepare your blender, popsicle molds, and a variety of fruits like mangos, strawberries, and peaches. With a little patience and a few simple steps, you’ll be on your way to creating visually stunning popsicles bursting with natural goodness. So, say goodbye to store-bought treats and embrace the joy of crafting your own homemade striped fruit pops that will delight both young and old alike.

Get ready to enjoy the taste of summer with every lick and savor the refreshing flavors of nature’s bounty. Let’s dive into the world of homemade frozen delights and create something truly special with our Homemade Striped Fruit Pops recipe.

What You Will Need to Make Homemade Striped Fruit Pops

Equipment Needed:

  • Blender
  • Popsicle Molds or Plastic Cups
  • Popsicle Sticks

For the Peach Layer

  • 2 cups peaches peeled and sliced
  • ¼ cup honey
  • ¼ sweet condensed milk
  • ¼ water

For the Strawberry Layer

  • 2 cups strawberries sliced
  • ¼ cup honey
  • ¼ sweet condensed milk
  • ¼ water

For the Mango Layer

  • 2 cups mangos peeled and sliced
  • ¼ cup honey
  • ¼ sweet condensed milk
  • ¼ water

Time needed: 5 hours and 15 minutes

How to Make the Homemade Striped Fruit Pops

  1. For the Peach Layer

    In a blender or a food processor mix the peaches, honey, and sweet condensed milk until smooth. Pour the mix into the cups or molds. Freeze for 30 minutes or until firm.

  2. Make the Strawberry Layer

    In a blender or a food processor mix strawberries, honey, and sweet condensed milk until smooth. Pour the mix into the cups or molds. Freeze for 30 minutes or until firm.

  3. Make the Mango Layer

    In a blender or a food processor mix mangos, honey, and sweet condensed milk until smooth. Pour the mix into the cups or molds. Freeze for 4 hours or until frozen.

As temperatures soar and summer kicks into high gear, it’s time to find a delicious and refreshing way to beat the heat. Look no further than our Homemade Fruit Pops—an absolute must-have for the scorching days ahead. Get ready to indulge in these icy delights, bursting with the flavors of your favorite fruits.

If you liked this dish please Rate This Recipe and leave a comment.

Homemade Striped Fruit Pops
Print

Striped Fruit Pops

Indulge in the goodness of homemade striped fruit pops that are not only delicious but also healthy. With the freedom to choose your favorite fruits, you can create a refreshing treat that surpasses store-bought popsicles. Say goodbye to artificial flavors and give your kids the joy of enjoying homemade delights that are bursting with natural goodness.
Prep Time 15 minutes
Freezing Time 5 hours
Total Time 5 hours 15 minutes
Servings 24 servings
Calories 80kcal

Equipment

  • 1 Popsicle Mold
  • 24 Popsicle Sticks

Ingredients

For the Peach Layer

For the Strawberry Layer

For the Mango Layer

Instructions

For the Peach Layer

  • In a blender or a food processor mix the peaches, honey, sweetened condensed milk, and water until smooth.
    2 cups peaches, ¼ cup honey, ¼ cup sweetened condensed milk, ¼ cup water
  • Pour the peach mix into the cups or molds. Freeze for 30 minutes or until firm.

Make the Strawberry Layer

  • In a blender or a food processor mix the strawberries, honey, sweetened condensed milk, and water until smooth.
    2 cups fresh strawberries, ¼ cup honey, ¼ cup sweetened condensed milk, ¼ cup water
  • Pour the strawberry mix into the cups or molds. Freeze for 30 minutes or until firm.

Make the Mango Layer

  • In a blender or a food processor mix the mangos, honey, sweetened condensed milk, and water until smooth.
    2 cups mangos, ¼ cup honey, ¼ cup sweetened condensed milk, ¼ cup water
  • Pour the mango mix into the cups or molds. Freeze for 4 hours or until frozen.

Nutrition

Calories: 80kcal | Carbohydrates: 18.1g | Protein: 1.1g | Fat: 1g | Saturated Fat: 0.5g | Cholesterol: 3mg | Sodium: 13mg | Potassium: 106mg | Fiber: 0.5g | Sugar: 17.5g | Calcium: 31mg

Perfect Pairings: Recipes That Complement Striped Fruit Pops

Expand your culinary repertoire and discover a world of delightful flavors that perfectly complement your homemade striped fruit pops. These tantalizing recipes offer a variety of delectable options that can be enjoyed alongside your fruity frozen treats. From refreshing salads to delectable desserts, these culinary creations will enhance your summer snacking experience and leave you craving for more. Get ready to explore a collection of recipes that beautifully harmonize with the vibrant and refreshing taste of your striped fruit pops.

Batido de Trigo ~ Wheat Milkshake
Indeed, this luscious milkshake, crafted with the richness of sweetened condensed milk, whole milk, and puffed wheat cereal, will make your tastebuds rejoice in delight. So, why wait? Immerse yourself in this Cuban sensation and let the celebration begin!
Check out this recipe
Batido de Trigo ~ Wheat Milkshake

Photo Credits:

  • By Taste The World Cookbook – Copyright 2022 All rights reserved.
  • By La Realeza Ice Cream – By https://realezaicecream.business.site/?utm_source=gmb&utm_medium=referral
  • By Visitor7 – Own work, CC BY-SA 3.0, https://commons.wikimedia.org/w/index.php?curid=30092349
  • By Chris English, CC BY-SA 3.0, https://commons.wikimedia.org/w/index.php?curid=55772954
  • By ksblack99 – Side of House, PDM-owner, https://commons.wikimedia.org/w/index.php?curid=111289863
  • By Gage Skidmore – https://www.flickr.com/photos/gageskidmore/14072240860/, CC BY 2.0, https://commons.wikimedia.org/w/index.php?curid=33359222
  • By Alan Stark – https://www.flickr.com/photos/squeaks2569/5999218085/in/photostream, CC BY-SA 2.0, https://commons.wikimedia.org/w/index.php?curid=31270787
  • By CyberXRef – Own work, CC BY-SA 3.0, https://commons.wikimedia.org/w/index.php?curid=31612541

Sweet and Tangy BBQ Meatballs with Grape Jelly Glaze

BBQ and Grape Jelly Meatballs

Indulge in the irresistible combination of tangy barbecue goodness and the sweet allure of grape jelly with this delectable recipe for BBQ and Grape Jelly Meatballs. Prepare to amaze your family and friends as they savor every bite of these succulent meatballs that effortlessly balance savory and sweet flavors. The smoky and zesty barbecue sauce perfectly complements the luscious grape jelly glaze, creating a tantalizing appetizer that will leave your guests eagerly coming back for more. Get ready to witness the joy on their faces as they delight in this sensational dish that guarantees a flavorful experience like no other.

Exploring the World of Meatballs: A Culinary Adventure

Embark on a journey of flavors as we dive into the realm of meatballs. These delightful morsels of ground meat, bound together with a medley of ingredients such as egg, milk, breadcrumbs, and aromatic herbs and spices, offer a world of culinary possibilities. Join us as we uncover seven distinct types of meatballs from around the globe.

Meatballs of the World, Unite!

  1. Italian Meatballs: Crafted from beef or veal, Italian meatballs feature a delightful blend of garlic, eggs, parsley, and sometimes a touch of Parmigiana cheese for added richness.
  2. Swedish Meatballs: With a harmonious marriage of ground pork and beef, Swedish meatballs tantalize the taste buds with the warming flavors of allspice and nutmeg.
  3. Polish Meatballs: These savory delights combine ground pork, beef, and veal, served in a velvety sour cream and mushroom sauce, creating a comforting and satisfying culinary experience.
  4. Spanish Meatballs: Traditionally prepared with pork, veal, beef, or a combination thereof, Spanish meatballs are bathed in a vibrant tomato and wine sauce, delivering a burst of Mediterranean flavors.
  5. Dutch Meatballs: This Dutch twist on meatballs showcases a mixture of pork, veal, beef, or a blend of these meats. Rolled into balls and baked, they are enveloped in a thick, luscious rue infused with eggs, milk, spices, and sometimes bread.
  6. Turkish Meatballs: Lamb takes the spotlight in Turkish meatballs, infused with aromatic herbs such as parsley, garlic, cumin, mint, and allspice, resulting in a tantalizing blend of flavors.
  7. American Meatballs: Traditionally crafted with beef, though sometimes combined with pork, American meatballs offer a classic combination of pepper, onion, and garlic. In West Virginia, a unique twist adds a sweet and tangy coating of grape jelly, creating a surprising flavor sensation.

Embark on a culinary adventure and explore the diverse world of meatballs, where each variety offers its own delightful twist on this beloved dish.

Preserving the Flavor: Storing BBQ and Grape Jelly Meatballs

To ensure the longevity of your delectable BBQ and Grape Jelly meatballs, proper storage is essential. Follow these simple guidelines to keep your meatballs fresh and flavorsome.

  1. Refrigeration: If you have leftover meatballs, place them in an airtight container and store them in the refrigerator. They can be safely stored for up to 3 days, allowing you to enjoy them as a tasty snack or a delicious addition to your meals.
  2. Freezing: To extend the shelf life of your meatballs, freezing is an excellent option. Start by arranging the meatballs in a single layer on a tray lined with baking paper. Place the tray in the freezer until the meatballs become firm and frozen. Then, transfer them to an airtight container, layering them between sheets of baking paper, or use a large ziplock bag for convenience. Remember to label and date the container or bag for easy identification. Properly frozen meatballs can be stored for up to 2 months without compromising their taste and quality.

By following these storage practices, you can savor the deliciousness of your BBQ and Grape Jelly meatballs at your convenience, whether you’re planning a future gathering or simply preserving the leftovers for later enjoyment.

From Ancient Origins to West Virginia: Unveiling the History of the Meatball

The history of the meatball dates back to ancient times, with its origins tied to the resourceful practices of early hunter-gatherer societies. As they skillfully wielded stone knives to butcher meat, a natural by-product emerged in the form of minced meat. Faced with the dilemma of not wasting this precious leftover, these ingenious culinary pioneers transformed it into small balls, likely roasting them over the warm embrace of a campfire.

However, our focus now shifts to a specific rendition of the meatball—a cherished recipe originating from the kitchen of Christina in Rio, West Virginia. This culinary gem hails from the hills of West Virginia, passed down through generations as an integral part of their family heritage. The combination of tradition and regional influence infuses this West Virginian meatball recipe with a unique character and flavor profile, distinguishing it from other interpretations.

As we embark on a journey through the history of the meatball, this particular recipe from the hills of West Virginia serves as a testament to the enduring legacy of this beloved dish, connecting us to the culinary traditions and ancestral roots that have shaped it over time.

Discover the Charming Village of Rio, West Virginia

Nestled in the picturesque southern region of Hampshire County, West Virginia, lies the quaint and inviting community of Rio. This unincorporated village captivates visitors with its idyllic charm and scenic beauty. Situated just north of the Hardy County line, Rio finds its place at the crossroads of Augusta-Ford Hill Road and Delray Road, within the captivating North River Valley.

As you wander through Rio’s welcoming streets, you’ll be embraced by a sense of tranquility and a tight-knit community spirit. Despite its small size, Rio has left an indelible mark on the hearts of its residents and visitors alike. While strolling through the village, you’ll encounter warm smiles, friendly faces, and a genuine sense of hospitality.

The Rio Mall
The Rio Mall

Home to a population of 154 residents, according to the 2000 census, Rio holds an intimate and close-knit atmosphere that embodies the true essence of small-town living. Surrounded by breathtaking natural landscapes and enveloped by the gentle rhythm of rural life, Rio offers a peaceful retreat from the bustling outside world.

Embark on a journey to Rio, West Virginia, and experience the serenity of a village that cherishes its community bonds and embraces the beauty of its surroundings.

A Glimpse into the History of Rio, West Virginia: From Native American Heritage to Present Day

Rio, nestled in Hampshire County, West Virginia, boasts a diverse history that extends beyond its more recent settlements. Before the arrival of European settlers, the region was inhabited by Native American tribes, including the Shawnee and Tuscarora nations. These indigenous communities thrived along the North River, leaving behind a rich cultural legacy that has shaped the area’s history.

With the arrival of European settlers in the 18th century, Rio became part of the expanding frontier of America. Families migrated to the region, seeking new opportunities and a chance to build a life in the vast wilderness. The village grew as these pioneers carved out homesteads, established farms, and forged a tight-knit community.

Throughout its history, Rio has evolved and adapted to changing times while preserving its cultural roots. The legacy of Native American heritage remains an integral part of the village’s identity, celebrated through cultural events, storytelling, and an appreciation for the land’s spiritual significance.

Today, Rio stands as a testament to the layered history of West Virginia, where the voices of Native American ancestors merge with the stories of settlers and the resilience of present-day residents. As visitors explore the scenic landscapes and engage with the community, they have the opportunity to honor the past, appreciate the present, and envision the future of this historic village.

Tourism in West Virginia: Discovering the Wild, Wonderful Landscapes

West Virginia, aptly known as the “Wild, Wonderful West Virginia,” invites you to embark on a memorable journey through its untamed landscapes. From the rushing rivers that carve their way through breathtaking canyons to the verdant forests that stretch as far as the eye can see, nature takes center stage in this captivating state. Lace up your hiking boots and explore rugged trails that lead to hidden waterfalls, panoramic vistas, and peaceful meadows.

Disconnect from the chaos of modern life and reconnect with the tranquility and serenity found only in the heart of Appalachia. Embrace the genuine hospitality of charming small towns, where friendly locals welcome you with open arms and share the stories and traditions that make West Virginia unique. Whether it’s whitewater rafting, rock climbing, fishing, or simply taking in the majestic beauty of the mountains, West Virginia offers an abundance of outdoor adventures for every nature enthusiast.

Culinary Delights of West Virginia: A Tantalizing Journey of Southern Flavors

Indulge in the mouthwatering flavors of West Virginia’s culinary scene, where southern-style cuisine takes center stage. From succulent oysters harvested from nearby waters to the earthy richness of roasted peanuts, each dish is a celebration of the region’s abundant harvests. Sink your teeth into tender BBQ, slow-cooked to perfection and served with a side of tangy sauce. Delight in the smoky aroma and velvety texture of country ham, a true Appalachian delicacy. Sample the sweetness of blue crabs and savor the delicate flavors of freshly caught trout. Experience the crispness of locally grown apples and warm your soul with a bowl of hearty Brunswick stew.

While exploring the state’s culinary offerings, be sure to try the unexpected delight that West Virginia is known for: BBQ and Grape Jelly Meatballs. This unique combination balances the savory and sweet, creating a taste sensation that will tantalize your taste buds. With its focus on fresh, locally sourced ingredients and a touch of southern charm, West Virginia’s cuisine offers a memorable dining experience that reflects the heart and soul of the region.

JJ’s Diner & Deli
15105 Ford Hill Rd, Rio, WV 26755

JJ's Diner & Deli
JJ’s Diner & Deli

Delicious food including fresh custom-made pizzas & affordable combo meals for $5 each! JJ was at the front counter, friendly & welcoming. He & his son completely remodeled the building and it shows. Clean, classy, & tiny town atmosphere boasting 2 jukeboxes & homemade desserts.

Savory and Sweet Harmony: BBQ and Grape Jelly Meatballs Unleashed

Prepare your taste buds for an irresistible combination of flavors with this BBQ and Grape Jelly Meatballs recipe. These delectable meatballs strike the perfect balance between tangy BBQ sauce and the sweetness of grape jelly. Whether you’re hosting a party, attending a potluck, or simply craving a flavorful appetizer, these meatballs are sure to be a crowd-pleaser. Get ready to indulge in a culinary delight that will leave everyone asking for more.

What You Will Need to Make BBQ and Grape Jelly Meatballs

Equipment

Meatballs

Sauce

Time needed: 1 hour

How to Cook BBQ and Grape Jelly Meatballs

  1. Preheat the Oven

    Preheat the oven to 400 degrees.

  2. Mix the Meatball Ingredients

    In a large bowl combine your ground beef, sweet Italian sausage, bread crumbs, milk, onion powder, garlic powder, and 1 egg. Add salt and pepper if desired or wait till after your meatballs are cooked and add to taste.

  3. Form the Meatballs

    Mix all the above ingredients together. Once completely mixed take about 1½ tbsp of meat out and roll it into a ball. Lay them out on a baking pan. Note: If you would like you can put down the tin foil to help with cleanup.

  4. Bake the Meatballs

    Bake the meatballs in the oven for 18 to 20 mins or until the meat is completely cooked.

  5. Make the Sauce

    Once these are completely cooked remove them from the oven and put your meatballs into a crockpot on low heat. Add in your ½ cup of BBQ Sauce and ¾ cup of Grape Jam. Stir well and allow them to marinate in your sauce for at least an hour.

These grape jelly meatballs are perfect for game day, snack time, or serve over rice for a fun lunch with the kids.

If you liked this dish please Rate This Recipe and leave a comment.

BBQ and Grape Jelly Meatballs
Print

BBQ and Grape Jelly Meatballs

These Meatballs incorporate a tangy BBQ flavor with the sweetness of the Grape Jam for a perfect appetizer that will make your guests do the happy dance.
Prep Time 30 minutes
Cook Time 20 minutes
Resting Time 10 minutes
Total Time 1 hour
Servings 16 people
Calories 185kcal

Ingredients

Meatballs

Sauce

Instructions

  • Preheat oven to 400 degrees.
  • In a large bowl combine your ground beef, sweet Italian sausage, bread crumbs, milk, onion powder, garlic powder, and 1 egg.
    1 lbs 80/20 ground beef, 1 lbs sweet Italian sausage, ½ cup bread crumbs, ⅓ cup milk, ½ tsp onion powder, ½ tsp garlic powder, 1 egg
  • Add salt and pepper if desired or wait till after your meatballs are cooked and add to taste.
    salt, black pepper
  • Mix all the above ingredients together. Once completely mixed take about 1½ tbsp of meat out and roll it into a ball.
  • Lay them out on a baking pan. Note: If you would like you can put down the tin foil to help with cleanup.
  • Once all your meatballs are rolled bake in the oven for 18 to 20 mins or until the meat is completely cooked.
  • Once these are completely cooked remove them from the oven and put your meatballs into a crockpot on low heat.
  • Add in your ½ cup of BBQ Sauce and ¾ cup of Grape Jam. Stir well and allow them to marinate in your sauce for at least an hour.
    ½ cup bbq sauce, ¾ cup grape jam

Nutrition

Serving: 1meatball | Calories: 185kcal | Carbohydrates: 16g | Protein: 10.3g | Fat: 8.7g | Saturated Fat: 3.4g | Cholesterol: 39mg | Sodium: 310mg | Potassium: 164mg | Fiber: 0.2g | Sugar: 11.6g | Calcium: 27mg | Iron: 1mg

Delectable Complements to Enhance Your BBQ and Grape Jelly Meatballs

Elevate your culinary experience by exploring a range of delectable recipes that perfectly complement the flavors of BBQ and Grape Jelly Meatballs. These mouthwatering dishes provide a delightful accompaniment to your meatball masterpiece, creating a harmonious and satisfying meal. From flavorful sides to tantalizing desserts, these recipes will take your dining experience to new heights and leave your taste buds craving for more. Prepare to embark on a culinary journey and discover the perfect pairings for your BBQ and Grape Jelly Meatballs.

Baked Macaroni and Cheese with Tomatoes
This Baked Macaroni and Cheese with Tomatoes recipe is rich, decadent, and the ultimate comfort food. Made with a superior blend of Gruyere, Cheddar, and Cream, and topped with a toasted bread crumb and Parmesan cheese mix.
Check out this recipe
Baked Macaroni and Cheese with Tomatoes
Kielbasa, Pepper and Potato Skillet
A quick and easy-to-make one skillet dinner. The tender potatoes, bell peppers, and onions are enhanced by the delicious Kielbasa in this tasty Polish recipe.
Check out this recipe
Kielbasa, Pepper, and Potato Skillet

Photo Credits:

  • By Taste The World Cookbook – Copyright 2022 All rights reserved.
  • By Nacho Hot Dogs – Copyright BY https://www.facebook.com/JJs-Diner-Deli-2219389208181172/

Savor the Flavors of France: Irresistible Lyonnaise Potatoes Recipe

0
Lyonnaise Potatoes
Lyonnaise Potatoes

Indulge in the Flavors of Lyon, France with this exquisite recipe for Lyonnaise Potatoes. This classic side dish showcases the timeless combination of potatoes and onions, pan-fried to perfection in butter and garlic. The result? Crispy yet tender slices that are elevated with a touch of freshness from fragrant parsley. Enjoy them as a delectable accompaniment to your main course or savor them as a delightful snack any time of the day. Get ready to experience the true essence of French cuisine with every flavorful bite.

Exploring the Versatility of Potatoes: Creative Cooking Techniques

Discover the exquisite flavors of Lyonnaise Potatoes, a dish that showcases the harmonious combination of sliced potatoes and onions. While variations exist in the choice of potatoes—such as russet, yellow or golden, and red—the essence remains the same. Sautéed to perfection in butter and often enhanced with herbs and spices, this classic recipe offers a delectable side dish that will elevate any meal.

When it comes to potatoes, the possibilities are virtually limitless. From the comforting creaminess of mashed potatoes to the crispy satisfaction of French fries, this humble vegetable offers a myriad of culinary delights that will leave you craving more.

Embrace the versatility of potatoes and unleash your culinary creativity. Whether mashed, sliced, diced, baked, or grilled, these versatile tubers are ready to take center stage in your kitchen. Explore the endless possibilities and create mouthwatering dishes that will leave a lasting impression.

Preserving the Flavors: Proper Storage of Lyonnaise Potatoes

To ensure the freshness and flavor of your Lyonnaise Potatoes, proper storage is key. Follow these simple guidelines to keep your leftovers safe and ready for another delicious meal.

  1. Let them cool: Allow the cooked Lyonnaise Potatoes to cool completely before storing. This helps prevent condensation buildup and maintains their texture.
  2. Refrigerate promptly: Transfer the cooled potatoes to an airtight container or sealable plastic bag. Store them in the refrigerator to keep them fresh. The potatoes can be stored for up to 3-4 days.
  3. Reheat with care: When you’re ready to enjoy the leftovers, gently reheat them in a skillet or oven to preserve their crispiness. Be cautious not to overheat, as it may result in the potatoes becoming overly soft.
  4. Freeze for future use: If you have a larger quantity of Lyonnaise Potatoes or want to save them for later, freezing is an option. Place the cooled potatoes in a freezer-safe container or bag, removing as much air as possible. They can be stored in the freezer for up to 2-3 months.
  5. Thaw and reheat: To use the frozen Lyonnaise Potatoes, thaw them overnight in the refrigerator. Then, reheat them gently on the stovetop or in the oven until warmed through. Remember to adjust the cooking time to prevent them from becoming mushy.

By following these storage tips, you can extend the life of your delicious Lyonnaise Potatoes and continue to relish their flavors and textures in the days to come.

The Origins of Lyonnaise Potatoes: A Culinary Journey

Lyonnaise Potatoes, a French dish of pan-fried potatoes, originated in the city of Lyon in the Rhône-Alpes region of France around 1845. The dish combines sliced potatoes and onions sautéed to perfection, showcasing the culinary traditions of Lyon, renowned for its gastronomic heritage.

The potato itself has a history that dates back to approximately 10,000 years ago when indigenous peoples in Peru first domesticated it. The onion, on the other hand, was domesticated about 7,000 years ago in Southwest or Central Asia. The combination of these two ingredients, potatoes and onions, occurred much later following the European discovery of the New World.

Potatoes arrived in Europe before the end of the 16th century through different ports of entry. The first recorded mention of potatoes is a delivery receipt dated 28 November 1567 between Las Palmas de Gran Canaria and Antwerp, showcasing their introduction to the European continent.

With the arrival of the potato in Europe, it gradually found its way into French cuisine, and eventually, the dish known as Lyonnaise Potatoes emerged in Lyon. The specific origin and exact date of creation for Lyonnaise Potatoes are not definitively known, but it is believed to have been around 1845.

Today, Lyonnaise Potatoes continue to be enjoyed as a classic French dish, representing the rich culinary history of Lyon and the art of pan-frying potatoes to create a flavorful and satisfying side dish.

Exploring Lyon: A French Cultural Gem

Nestled at the confluence of the Rhône and Saône rivers, Lyon reigns as the capital city of France’s Auvergne-Rhône-Alpes region. Its city center is a living testament to over 2,000 years of history, showcasing a captivating blend of ancient Roman ruins, medieval and Renaissance architecture, and contemporary districts. Vieux Lyon, a UNESCO World Heritage site, enthralls visitors with its maze-like streets, hidden courtyards, and iconic landmarks such as the grand Cathédrale Saint-Jean-Baptiste. The remarkable traboules, covered passageways that connect Vieux Lyon and the enchanting La Croix-Rousse hill, add an extra layer of charm and mystery to the city.

Lyon’s allure extends beyond its historical treasures. The Presqu’île peninsula, situated between the two rivers, buzzes with modern energy. The Confluence district, with its striking contemporary architecture and revitalized industrial spaces, embodies Lyon’s forward-thinking spirit. The juxtaposition of ancient and modern, captured in Lyon’s cityscape, creates a captivating atmosphere that invites exploration and reveals the city’s vibrant fusion of past and present.

Lyon: A Journey Through Time and Culture

Lyon’s fascinating history dates back to its foundation as the Roman military colony of Lugdunum in 43 BCE, marking its significance as the capital of the Gauls. Flourishing during the 2nd century CE, Lyon reached its pinnacle of classical development while also embracing the introduction of Christianity. However, this period was not without challenges as the Christian community faced persecution under Emperor Marcus Aurelius in 177 and the city endured the devastating decimation ordered by Lucius Septimius Severus in 197.

Throughout the medieval era, Lyon became part of the Holy Roman Empire in 1032, with its archbishops exerting considerable influence. The city hosted significant ecumenical councils in 1245 and 1274, solidifying its reputation as a center of ecclesiastical importance. Lyon’s destiny took a decisive turn in 1312 when it was annexed to the Kingdom of France, marking a new chapter in its history.

The turbulent times of the French Revolution brought about transformative changes for Lyon. The collapse of the domestic silk market and the closure of foreign markets dealt a severe blow to the city’s silk industry. Lyon faced the republican siege by the Montagnards in 1793, highlighting the challenges and unrest of this period.

In the 19th century, Lyon experienced a remarkable revival, marked by robust industrial expansion that fueled economic prosperity. The city embarked on urban development, starting in the 1950s, which transformed its landscape and set the stage for Lyon’s modern identity. Today, Lyon stands as a dynamic metropolis, combining its rich historical heritage with a vibrant contemporary culture. It has become renowned as a center of gastronomy, innovation, and artistic expression, attracting visitors from around the world to experience its unique blend of tradition and modernity.


Discovering the Charms of Lyon: A Guide to Tourism

Lyon, situated on a narrow peninsula between the Rhône and Saône rivers, offers a captivating blend of history, culture, and natural beauty. The city’s architectural charm is exemplified by Vieux Lyon (Old Lyon), a well-preserved Renaissance complex on the right bank of the Saône. Its cobblestone streets, picturesque squares, and majestic buildings transport visitors back in time. The peninsula, now a thriving business district, buzzes with energy and is a hub of activity.

As one ventures to the east bank of the Rhône, the landscape transitions into a mix of affluent neighborhoods like the Brotteaux and areas characterized by factories and workers’ residences. Lyon’s southern stretch along the Rhône is home to Feyzin and Saint-Fons, housing one of France’s largest oil-refining complexes. Beyond the city limits, Villeurbanne and Bron serve as bustling suburban communities. Lyon’s strategic location surrounded by stunning riverscapes and proximity to other scenic destinations, such as the Beaujolais wine region and the Alps, makes it an ideal base for exploring the natural wonders of the region.

Lyon’s Culinary Delights: A Taste of Tradition

Experience the rich culinary heritage of Lyon, France, where the art of gastronomy takes center stage. Lyon’s cuisine is deeply rooted in tradition, showcasing a range of flavors and textures that have captivated food enthusiasts for centuries.

From the iconic Coq au Vin and delicate Quenelle to the rustic charm of bouchons, Lyon offers a diverse array of dishes that reflect the region’s agricultural heritage. Indulge in hearty stews, savory sausages, and delightful pastries, all prepared with the utmost care and attention to detail. Lyon’s bouchons, traditional Lyonnais restaurants, provide an authentic dining experience, serving up rustic and flavorsome fare that is sure to satisfy any palate.

With a focus on quality ingredients, time-honored techniques, and a passion for culinary excellence, Lyon has rightfully earned its reputation as a gastronomic capital. Discover the true essence of French cuisine as you savor the exquisite flavors and embrace the warmth of Lyon’s culinary traditions.

Agastache Restaurant
134 Rue Duguesclin, 69006 Lyon, France

The Agastache restaurant invites you to discover its “Bistronomic” universe, the association of gourmet cuisine, produced by a chef who has only worked in starred restaurants and a bistro environment, relaxed, modern, and warm.

Mastering the Art of Lyonnaise Potatoes: A Flavorful French Delight

Step into the world of French culinary excellence with our guide on how to make the classic Lyonnaise Potatoes. This beloved dish originates from Lyon, a city renowned for its rich gastronomic heritage. Lyonnaise Potatoes are a delightful combination of pan-fried sliced potatoes, perfectly caramelized onions, and a symphony of flavors that will transport your taste buds to the heart of France.

In this recipe, we will guide you through the step-by-step process of creating Lyonnaise Potatoes that are crispy on the outside and tender on the inside. You’ll learn the secrets to achieving that irresistible golden-brown crust, the perfect balance of sweetness from the onions, and the aromatic notes of herbs and seasonings that bring this dish to life.

Whether you’re looking to impress guests at a dinner party or simply craving a taste of authentic French cuisine, mastering the art of Lyonnaise Potatoes will elevate your culinary repertoire. So, put on your apron, grab your skillet, and let’s embark on a culinary journey to create this classic French delight that will leave you longing for more.

Essential Tools and Ingredients for Perfect Lyonnaise Potatoes

Equipment Needed

  • 1 Knife
  • 1 Cutting Board
  • 1 Cast Iron Skillet

Ingredients Needed

  • 2 tbsp olive oil
  • 2 lbs potatoes, peeled and sliced thin
  • 4 tbsp butter, cut into pieces
  • 3 onions, julienned
  • 2 tbsp garlic, chopped
  • 1 tbsp parsley, finely chopped
  • salt and white pepper, to taste

Perfecting Your Lyonnaise Potatoes: Essential Cooking Tips

  1. Consistent Slicing: To ensure even cooking, slice the potatoes to a uniform thickness of about 1/4 inch. This ensures that they cook evenly and achieve the desired texture—crispy on the outside and tender on the inside.
  2. Optimal Cookware: Utilize a cast-iron skillet for cooking your Lyonnaise potatoes. Preheat the skillet before adding any oil to prevent it from burning and to create a non-stick surface for perfect browning.
  3. Serve Immediately: For the best eating experience, serve the Lyonnaise potatoes right away. This allows you to enjoy their ideal texture—crispy exterior and soft interior. Delayed serving may result in the potatoes losing their crispness.
  4. Customization: While the classic Lyonnaise potatoes recipe calls for onions, feel free to experiment with variations. Add additional ingredients such as garlic, fresh herbs, or even bacon to elevate the flavors and make the dish your own.

Remember, mastering the art of Lyonnaise potatoes takes practice, so don’t be discouraged if your first attempt isn’t perfect. With these cooking tips and a bit of culinary finesse, you’ll be able to create a delectable dish that showcases the rich flavors of this iconic French recipe.

Time needed: 40 minutes

How to Cook Lyonnaise Potatoes

  1. Cook the Potatoes

    Heat oil in a large skillet over medium-low heat. Once hot, cover the bottom of the pan with half the potatoes. Season with salt and pepper. Dot with half the butter and repeat so all the potatoes and butter are used. Cook until potatoes begin to brown on the bottom, 10 to 15 minutes.

  2. Sauté the Onions

    Add onions and season with salt and pepper. Cook, stirring until onions and potatoes are cooked through, 8 to 10 minutes.

  3. Add the Garlic

    Add garlic and cook until fragrant, about 1 minute. Toss together.

  4. Garnish and Serve

    Using a spatula, gently lift potatoes out of the pan and place them on a serving platter. Garnish with parsley.

If you liked this dish please Rate This Recipe and leave a comment.

Lyonnaise Potatoes
Print

Lyonnaise Potatoes

Fried potatoes with onions in butter and garlic. Do your tastebuds a favor and throw them a party of Lyonnaise Potatoes so they can do the happy dance.
Course Side Dish
Cuisine French
Diet Gluten Free
Prep Time 10 minutes
Cook Time 30 minutes
Total Time 40 minutes
Servings 4 servings
Calories 358kcal

Ingredients

Instructions

  • Heat oil in a large skillet over medium-low heat. Once hot, cover the bottom of the pan with half the potatoes. Season with salt and pepper. Dot with half the butter and repeat so all the potatoes and butter are used. Cook until potatoes begin to brown on the bottom, 10 to 15 minutes.
    2 tbsp olive oil, 2 lbs russet potatoes, 4 tbsp unsalted butter, salt, white pepper
  • Add onions and season with salt and pepper. Cook, stirring until onions and potatoes are cooked through, 8 to 10 minutes.
    3 yellow onion
  • Add garlic and cook until fragrant, about 1 minute. Toss together.
    2 tbsp garlic
  • Using a spatula, gently lift potatoes out of the pan and place them on a serving platter. Garnish with parsley.
    1 tbsp fresh parsley

Nutrition

Serving: 1cup | Calories: 358kcal | Carbohydrates: 44.8g | Protein: 5.1g | Fat: 18.9g | Saturated Fat: 8.4g | Cholesterol: 31mg | Sodium: 100mg | Potassium: 1069mg | Fiber: 7.3g | Sugar: 6.2g | Calcium: 52mg | Iron: 1mg

Pair Lyonnaise Potatoes with Beef, Fish, Pork, or Turkey

Step outside the realm of traditional mashed potatoes and add a touch of culinary adventure to your meals by serving Lyonnaise Potatoes as a delightful alternative. These savory and flavorful potatoes make a perfect accompaniment to a wide range of main dishes.

For a classic combination, serve Lyonnaise Potatoes alongside succulent beef, allowing the rich flavors of the potatoes to complement the hearty meat. The tender and crispy texture of the potatoes pairs beautifully with a perfectly cooked steak or roast.

If you prefer seafood, consider serving Lyonnaise Potatoes with fish fillets or seared scallops. The contrast between the golden-brown potatoes and delicate fish creates a harmonious balance of flavors and textures that will tantalize your taste buds.

For pork lovers, the savory notes of Lyonnaise Potatoes beautifully complement the natural sweetness of roasted pork tenderloin or pan-seared pork chops. The crispy exterior of the potatoes creates a delightful contrast to the tender pork, resulting in a satisfying and delicious meal.

Lastly, if you’re looking for an alternative to traditional Thanksgiving or holiday side dishes, try serving Lyonnaise Potatoes alongside roasted turkey. The robust flavors of the potatoes add a touch of elegance and uniqueness to your festive feast.

By exploring different combinations and venturing beyond the usual mashed potatoes, you can elevate your culinary repertoire and create memorable meals with Lyonnaise Potatoes. Embrace the versatility of this classic dish and savor the delightful union of flavors when paired with beef, fish, pork, or turkey.

Strawberry Cream Puffs
The pastry is filled with a sweet and tasty strawberry cream filling. It is perfect for a Sunday brunch, with coffee and tea, an after-dinner dessert, or on a romantic date.
Check out this recipe

Photo Credits:

  • By Taste The World Cookbook – Copyright 2022 All rights reserved.
  • By Agastache Restaurant – Copyright BY https://www.facebook.com/Agastache-Restaurant-102006594689077/
  • By Dennis Jarvis from Halifax, Canada – France-003038 – Basilica of Notre-Dame de Fourvière, CC BY-SA 2.0, https://commons.wikimedia.org/w/index.php?curid=111059691
  • By Qmin – Own work, CC BY-SA 3.0, https://commons.wikimedia.org/w/index.php?curid=111059699
  • By TwoWings – Own work, CC BY 3.0, https://commons.wikimedia.org/w/index.php?curid=15636363
  • By Tibidibtibo – Own work, CC BY-SA 3.0, https://commons.wikimedia.org/w/index.php?curid=33390636
  • By edwin.11 – Streets of Lyon, CC BY 2.0, https://commons.wikimedia.org/w/index.php?curid=24429668
  • By Basilio – Own work, CC BY-SA 3.0, https://commons.wikimedia.org/w/index.php?curid=4318460
  • By Samolymp – Own work, CC BY-SA 4.0, https://commons.wikimedia.org/w/index.php?curid=37771861
  • Vegan Feast Catering, CC BY 2.0 https://creativecommons.org/licenses/by/2.0, via Wikimedia Commons

Fresh Grilled Mexican Corn Salad

0
Fresh Grilled Mexican Corn Salad

Originating from Mexico City, Mexican Corn Salad is a vibrant and flavor-packed vegetable dish. It’s a delightful medley of grilled corn, red bell pepper, cilantro, red onion, jalapeño, and black beans, all brought together by a smoky and creamy dressing. The dressing’s tanginess is perfectly balanced by the refreshing lime juice.

This recipe yields an abundant amount of Mexican Corn Salad, making it an ideal choice for gatherings or potlucks. Plus, it keeps well in the refrigerator for several days, which is convenient considering the likelihood of leftovers.

Exploring the Versatility of Mexican Corn Salad

When it comes to making Mexican Corn Salad, you have a few options to consider. While fresh grilled corn yields the best flavor, you can still achieve great results with canned or frozen corn. If grilling isn’t your preference or you’re short on time, simply toast the canned or frozen corn on the stovetop with a touch of butter and garlic to enhance its taste.

Storing and Enjoying Mexican Corn Salad

To keep your Mexican Corn Salad fresh and flavorsome, ensure it is tightly covered with plastic wrap or stored in an airtight container. Refrigerate the salad, and it should maintain its quality for 3-5 days. When you’re ready to indulge, a quick reheating in the microwave will suffice. If you have a surplus of this delightful dish, freezing it is an option too, allowing you to enjoy it for up to 3 months.

Unveiling the Origins of Corn Salad

Mexican Corn Salad should not be confused with Valerianella locusta, also known as common cornsalad or lamb’s lettuce. The dish we’re referring to traces its roots back to the native Americans of the Balsas River Valley, located in the south-central region of Mexico just below Mexico City. Around 9,000 years ago, these innovative indigenous communities were the pioneers in domesticating corn for sustenance, and they likely concocted the earliest versions of corn salad.

While the exact historical details of corn salad’s emergence remain largely unknown, the rich culinary traditions of the native Americans from the Balsas River Valley indicate that they were the first to transform corn into a delectable salad. Today, Mexican Corn Salad stands as a testament to the ancient culinary heritage of these early innovators and continues to captivate taste buds with its vibrant flavors.

Exploring the Vibrant Metropolis of Mexico City, Mexico

Mexico City, the capital and largest city of Mexico, stands as a bustling metropolis that boasts both historical significance and modern allure. As the most populous city in North America and one of Mexico’s 32 federal entities, it holds a prominent position as a cultural and financial hub, captivating visitors from around the globe.

Nestled in the Valley of Mexico (Valle de México), a sprawling expanse within the central high plateaus of the country, Mexico City sits at an impressive altitude of 2,240 meters (7,350 ft) above sea level. This geographical location adds to its unique charm and provides a stunning backdrop for the city’s iconic landmarks, vibrant neighborhoods, and diverse cultural offerings.

The city is divided into 16 demarcaciones territoriales, which serve as distinct subdivisions that locals often refer to colloquially. Each of these subdivisions contributes to the rich tapestry of Mexico City, with its own distinct character, historical sites, culinary delights, and vibrant communities. From the historic center, filled with ancient ruins and colonial-era buildings, to the trendy neighborhoods that brim with modern art galleries, hip eateries, and lively nightlife, Mexico City offers a multifaceted experience for every visitor.

With its remarkable blend of ancient traditions and contemporary influences, Mexico City stands tall as one of the world’s foremost cultural and financial centers. Its museums, theaters, and art galleries showcase the nation’s rich heritage, while its booming economy and bustling markets reflect its status as a global financial powerhouse. Mexico City’s vibrant energy, warm hospitality, and unparalleled cultural offerings make it a captivating destination for travelers seeking an immersive and unforgettable experience.

Unveiling the Tapestry of Time: A Brief History of Mexico City

Mexico City, the capital of Mexico, has a rich and complex history that spans thousands of years. The area where the city stands today has been inhabited since ancient times, with evidence of human presence dating back to around 12,000 BCE. The region was initially settled by various indigenous groups, including the Aztecs, who established the city of Tenochtitlan in 1325.

Tenochtitlan quickly grew into a major city and became the capital of the Aztec Empire. It was a marvel of urban planning, featuring intricate canal systems, impressive temples, and bustling markets. However, in 1519, the arrival of Spanish conquistador Hernán Cortés marked the beginning of the Spanish conquest of Mexico. The Aztec Empire was eventually overthrown, and Tenochtitlan was destroyed.

The Spanish rebuilt the city on the ruins of Tenochtitlan and named it Mexico City. It became the capital of New Spain, a Spanish colony that encompassed much of present-day Mexico and parts of Central America. Mexico City grew rapidly under Spanish rule, with the construction of grand colonial buildings, churches, and palaces.

In the early 19th century, Mexico City became the center of the Mexican War of Independence against Spanish rule. On September 16, 1810, Miguel Hidalgo, a priest from Dolores, issued the Grito de Dolores (Cry of Dolores), sparking a rebellion that ultimately led to Mexico’s independence in 1821.

Throughout the 19th and 20th centuries, Mexico City experienced significant political and social changes. It went through periods of political instability, including the Mexican Revolution in the early 20th century, which resulted in the establishment of a more democratic government. The city grew rapidly in population and expanded geographically, facing challenges such as urbanization and infrastructure development.

Today, Mexico City is a vibrant cosmopolitan metropolis, known for its rich cultural heritage, diverse population, and architectural wonders. It continues to be the political, economic, and cultural heart of Mexico, showcasing a harmonious blend of ancient traditions and modern influences. The city’s historical sites, museums, art galleries, and lively street life offer visitors a glimpse into its fascinating past and vibrant present.

A Guide to Tourism in Mexico City

Mexico City, the vibrant capital of Mexico, beckons travelers with its captivating blend of history, culture, and contemporary allure. As one of the largest cities in the world, it offers a multitude of attractions and experiences that cater to a wide range of interests. History enthusiasts can explore the ancient ruins of the Templo Mayor or visit the iconic Metropolitan Cathedral, a magnificent architectural masterpiece.

The city is also home to numerous world-class museums, including the National Museum of Anthropology and the Frida Kahlo Museum, which showcase Mexico’s rich cultural heritage. From strolling through the charming neighborhoods of Coyoacán and Roma to indulging in the bustling street food scene, Mexico City promises a delightful journey for every traveler.

Culinary Delights of Mexico City

The culinary scene in Mexico City is a gastronomic paradise, enticing visitors with its diverse flavors and vibrant street food culture. From mouthwatering tacos and tamales to savory mole and enchiladas, the city’s cuisine reflects the rich culinary traditions of Mexico. Exploring the local markets, such as Mercado de la Merced or Mercado Roma, is a must for food enthusiasts, offering an array of fresh ingredients and traditional dishes.

For a taste of fine dining, Mexico City boasts numerous award-winning restaurants, some of which have been recognized on the world stage. From innovative Mexican fusion cuisine to authentic regional specialties, the city’s culinary landscape is a feast for the senses. Whether dining at a local taqueria or indulging in a gourmet culinary experience, Mexico City promises a gastronomic adventure that will leave a lasting impression.

Restaurante El Cardenal

C. de la Palma 23, Centro Histórico de la Cdad. de México, Centro, 06000 Ciudad de México, CDMX, Mexico

Restaurante El Cardenal

You have come to this house, to this table. It is your house and it is your table. On it you will see countless “Cinderellas” of Mexican popular national food parade; they have dressed in festive garments to be rediscovered by you. They are the fruit of the culture and ingenuity of our people. Before, you will have seen them in humble dwellings and in rich houses, in markets and in squares with their busy dresses or Sunday clothes.

When you try to recognize them, dear diner, do not do it with lasts that harm their dignity as sovereigns; you do not need almost the steel that with a profusion of shapes adorns other tables. Something simpler, smoother, and more delicate is enough for you, don’t you remember that we are made of corn?

Mastering the Art of Roasted Mexican Corn Salad: A Step-by-Step Guide

Before embarking on this delectable culinary journey, it is essential to gather all the necessary equipment and ingredients. Proper preparation ensures a smooth and enjoyable cooking experience, allowing you to create a roasted Mexican corn salad that tantalizes the taste buds.

To begin, ensure you have all the required equipment within reach. This includes a grill or stovetop pan for charring the corn, a sharp knife for cutting the vegetables, a mixing bowl for combining the ingredients and serving plates or bowls to present the final dish. Having these essential tools readily available will streamline the cooking process.

Equally important is gathering the freshest and highest quality ingredients. Seek out fresh ears of corn, red bell peppers, cilantro, red onion, jalapeño, and black beans. These vibrant ingredients will contribute to the salad’s flavor and visual appeal. Additionally, have the necessary spices, seasonings, and lime juice at hand to create the perfect dressing.

By preparing your equipment and procuring the finest ingredients, you lay the foundation for a remarkable roasted Mexican corn salad. With everything in place, you can now dive into the recipe with confidence, knowing that your culinary adventure will result in a tantalizing and memorable dish.

Equipment You Will Need

  • Grill
  • Knife
  • Cutting Board
  • Skillet
  • Mixing Bowl
  • Large Mixing Spoon

For the Corn Salad

  • 1 tbsp olive oil
  • 5 ears of corn
  • 1 clove of garlic
  • ¼ tsp salt
  • ¼ tsp pepper
  • 1 red bell pepper
  • ½ cup cilantro
  • ¼ cup red onion
  • 1 jalapeño
  • 15 oz can black beans

For the Dressing

  • 2 tbsp mayonnaise
  • 2 tbsp sour cream
  • 1 tbsp lime juice
  • 1 clove of garlic
  • ¼ tsp chili powder
  • ¼ tsp cumin
  • ¼ tsp smoked paprika
  • ¼ tsp salt
  • ¼ tsp pepper
  • ½ cup queso fresco cheese

For the Garnish

  • 2 green onions, chopped
  • cilantro
  • avocado
  • queso fresco cheese

Time needed: 35 minutes

How to cook Mexican Corn Salad

  1. Grill the Corn on the Cobb

    Grill your corn then cut the kernels from the cobs. If you are not able to grill it, heat a large skillet and add olive oil. Then add the corn, 1/4 tsp salt, 1/4 tsp pepper, and 1 garlic clove (minced). Cook the corn kernels until you get a little bit of browning on them. Add corn to a large bowl.

  2. Chop the Vegetables

    Chop all of the veggies and cilantro. Then mince the garlic. Add to the bowl then add the black beans to the bowl.

  3. Mix the Dressing

    Mix the dressing ingredients together. Stir the dressing into the salad until well combined.

If you liked this dish please Rate This Recipe and leave a comment.

Fresh Grilled Mexican Corn Salad
Print

Mexican Corn Salad

This Mexican Corn Salad is a delicious side dish made from grilled corn and loaded with black beans and a few other add-ins. The dressing is creamy and a little smoky, with just the right amount of zing from the lime juice.
Cuisine Mexican
Diet Vegetarian
Prep Time 25 minutes
Cook Time 10 minutes
Total Time 35 minutes
Servings 6 servings
Calories 420kcal

Equipment

Ingredients

Corn Salad

Dressing

Instructions

  • Grill your corn then cut the kernels from the cobs. If you are not able to grill it, heat a large skillet and add olive oil. Then add the corn, 1/4 tsp salt and 1/4 tsp pepper, and 1 garlic clove (minced). Cook the corn kernels until you get a little bit of browning on them. Add corn to a large bowl.
    1 tbsp olive oil, 5 corn on the cob, 1 clove garlic, ¼ tsp salt, ¼ tsp black pepper
  • Chop all of the veggies and cilantro. Then mince the garlic. Add to the bowl.
    1 red bell pepper, ½ cup dried cilantro, ¼ cup red onion, 1 jalapeño pepper
  • Add the black beans to the bowl.
    1 can black beans
  • Mix the dressing ingredients together.
    2 tbsp mayonnaise, 2 tbsp sour cream, 1 tbsp lime juice, 1 clove garlic, ¼ tsp chili powder, ¼ tsp ground cumin, ¼ tsp smoked paprika, ¼ tsp salt, ¼ tsp black pepper, ½ cup queso fresco cheese
  • Stir the dressing into the salad until well combined.
  • Serve with your choice of garnishes.
    2 green onion, dried cilantro, avocados, queso fresco cheese

Nutrition

Calories: 420kcal

Other Recipes That Will Go Well With Mexican Corn Salad

Sonora-Style Hot Dog
A bacon-wrapped hot dog that is grilled until crispy, and then topped with a spicy mix of corn, black beans, jalapenos, onions, and tomatoes and smothered in fresh Mexican cream.
Check out this recipe
Sonora-Style Hot Dog
Shredded Beef Taquitos
These crunchy Shredded Beef Taquitos are made with seasoned shredded beef and a Mexican blend of cheese is wrapped in corn tortillas and baked to perfection. Serve as an afternoon snack or for the next fiesta.
Check out this recipe
Shredded Beef Taquitos
Hoenderpastei ~ Chicken Pie
This homemade chicken pot pie is super easy to prep, making it a great recipe for beginner cooks and busy families alike.
Check out this recipe
Hoenderpastei ~ Chicken Pie

Photo Credits:

  • By Taste The World Cookbook – Copyright 2022 All rights reserved.
  • By Nacho Hot Dogs – Copyright BY Restaurante El Cardenal – https://www.restauranteelcardenal.com/
  • By Gobierno CDMX – HJ2A4913, CC0, https://commons.wikimedia.org/w/index.php?curid=115335826
  • By Xavier Quetzalcoatl Contreras Castillo – Own work, CC BY-SA 3.0, https://commons.wikimedia.org/w/index.php?curid=28794946
  • By Dennis Jarvis from Halifax, Canada – Mexico-3271 – Zócalo, CC BY-SA 2.0, https://commons.wikimedia.org/w/index.php?curid=66976904
  • By Yrovira16 – Own work, CC BY-SA 4.0, https://commons.wikimedia.org/w/index.php?curid=73332072
  • By México en Fotos, A.C. – https://www.flickr.com/photos/194504238@N03/51855689872/, CC BY-SA 2.0, https://commons.wikimedia.org/w/index.php?curid=114886872

Sonora-Style Hot Dog 🌭

0
Sonora-Style Hot Dog


If you’re a fan of hot dogs, this Sonoran-Style Hot Dog is an absolute must-try. This traditional Mexican delicacy involves encasing a hot dog in bacon and grilling it until the bacon achieves a tantalizing crisp. It is then adorned with a fiery blend of corn, black beans, jalapenos, onions, and tomatoes. A dollop of fresh Mexican cream adds the final touch, transforming this into one delicious treat.

Creating the Perfect Sonoran-Style Hot Dog

This recipe presents a myriad of versions, but the enduring ingredient is always the bacon-wrapped hot dog. This delicious fare is known by a plethora of names including Mission Dog, Danger Dog, Francheezie, Texas Tommy, Hot Dog Estilo Hermosillo, Tijuana Dog, Dirty Dog, Border Dog, and even a variant referred to as the Jersey Breakfast Dog.

The Mission Dog, a San Francisco specialty, typically features grilled onions, mustard, ketchup, mayonnaise, and jalapeños as its core components.

Over in Los Angeles, the Danger Dog is a hit, served with grilled onions, bell peppers, ketchup, mustard, mayonnaise, and grilled jalapeño peppers.

The Windy City, Chicago, offers a unique twist called the Francheezie, which is deep-fried and generously garnished with melted Cheddar or American cheese.

Philadelphia is the birthplace of the Texas Tommy, where the hot dog is cut open and stuffed with cheese, then wrapped in bacon. Cooking methods for the Texas Tommy vary, including deep-frying, broiling, or grilling.

Meanwhile, New Jersey boasts its own rendition known as the Jersey Breakfast Dog. This is a deep-fried hot dog covered with melted cheese and served atop a fried or scrambled egg.

Effective Techniques for Properly Storing Hot Dogs

Storing your Sonora-Style Hot Dog properly can ensure you savor its delicious flavors later. First and foremost, it’s important to let the hot dog cool completely before storing it. If it’s wrapped or contained while it’s still hot, it may cause condensation to form, which can lead to sogginess or even spoilage. Place the cooled hot dog in an airtight container to prevent any air from getting to it and drying it out. Plastic containers or reusable silicone bags work well for this. It’s also important to avoid squashing the hot dog, so be sure to use a container that’s the right size.

For short-term storage, you can keep the stored Sonora-Style Hot Dog in the refrigerator. Typically, the hot dog will stay good for up to three days if refrigerated. However, always use your best judgment and consider factors such as the freshness of the ingredients used. Always look for signs of spoilage like a sour smell or mold before reheating and consuming the hot dog.

If you’re thinking about longer-term storage, the freezer is your best bet. Before freezing, wrap the Sonora-Style Hot Dog securely in plastic wrap or aluminum foil, then place it into a freezer-safe bag or container. This double-layered protection will help to prevent freezer burn. The frozen hot dog can last for up to two to three months. To reheat, thaw the hot dog in the refrigerator overnight before warming it up in the oven or on a grill. Do remember to remove any plastic wrap before reheating.

Tracing the Roots: The Intriguing History of the Sonora-Style Hot Dog

The Sonora-Style Hot Dog, also known as the Sonoran Dog, is a vibrant and tasty representation of the cultural fusion between Mexico and the United States. As its name suggests, the hot dog originated in the northern state of Sonora, Mexico, specifically in the city of Hermosillo.

The culinary story of the Sonoran Dog began in the late 1980s. According to local lore, a man named Benjamin Galaz is credited with its invention. He was inspired by the American-style hot dogs sold at baseball games, and decided to create a version that incorporated traditional Mexican flavors. Thus, the Sonoran Dog was born, and it quickly became popular throughout Hermosillo.

The iconic dish eventually made its way north of the border into the United States in the 1990s, primarily in cities close to the US-Mexico border such as Tucson, Phoenix, and later Los Angeles. These dogs were initially sold out of ‘loncheras’ or food carts, mostly at night, quickly gaining popularity due to their unique and delectable blend of flavors.

Over the years, the Sonora-Style Hot Dog has undergone many transformations, with different regions adopting and adding their own unique touches. However, the heart of the dish — a bacon-wrapped hot dog nestled in a bun, adorned with a colorful array of toppings — remains unchanged.

Today, the Sonoran Dog is a beloved food item on both sides of the border, cherished for its blend of comfort food familiarity with the complex flavors of Mexican cuisine. It’s not only a testament to cross-cultural culinary innovation but also a delicious example of regional cuisine that’s enjoyed by many.

Exploring the Vibrant Metropolis of Hermosillo

Nestled in the northwestern state of Sonora, Mexico, resides the thriving capital city, Hermosillo. Originally known as Pitic, this bustling metropolis serves as Sonora’s largest city and its key economic hub, as well as a vital center for the region. With its teeming population exceeding 800,000 inhabitants, Hermosillo proudly stands as the 16th largest city in the entirety of Mexico.

The Mexican government touts Hermosillo as one of the top five most desirable cities to inhabit within Mexico. Boasting a cosmopolitan allure, the city’s economy is impressively diverse, fueled by a robust mix of industries including automotive, textiles, and electronics. In addition, Hermosillo holds a significant presence in the food and tourism sectors, further underscoring its vibrant economic landscape.

Journey Through Time: A History of Hermosillo

Hermosillo, the vibrant capital of the Mexican state of Sonora, boasts a rich history dating back thousands of years. Archaeological evidence from the San Dieguito Complex in the El Pinacate Zone suggests the region has been inhabited for over 10,000 years, with signs of agriculture dating back approximately 2,500 years. Prior to European contact, this area was the home of various indigenous groups, including the Seri, Tepoca, and Pima peoples.

Spanish colonists arrived in the region in the 16th century, but substantial European settlement did not occur until the 18th century. In 1700, Spanish colonist Antonio de Deza y Ulloa established a military outpost known as Presidio de Pitic, which was situated strategically near the Sonora River to provide protection against indigenous attacks. Over time, the outpost flourished due to its pivotal location connecting mining sites in the region.

In 1828, the town was renamed Hermosillo in honor of General Jose Maria Gonzalez de Hermosillo, a hero of Mexico’s War of Independence. By 1879, the growth and development of the town led to its official designation as a city by the state government.

Throughout the 20th century, Hermosillo witnessed significant expansion due to industrialization and the arrival of the railroad. Today, Hermosillo stands as a thriving economic hub with significant contributions to the automotive, electronics, and aerospace industries. Despite modernization, Hermosillo retains its historical charm, serving as a testament to its rich past and a vital city in Mexican history and culture.

Exploring Hermosillo’s Attractions

Hermosillo, a sparkling jewel in Mexico’s tourism scene, effortlessly blends its historical appeal with a modern charm. Its vibrant cultural tapestry, breathtaking landscapes, and comprehensive amenities provide an eclectic mix of experiences for tourists. Visitors can expect a wide range of attractions from historic sites, art displays, gourmet dining to a bustling nightlife that collectively shape Hermosillo’s unique appeal.

History aficionados would find the neo-gothic Cathedral of the Assumption, nestled in Hermosillo’s heart, an unmissable attraction. Other significant historical landmarks include the Government Palace, famed for its murals portraying Sonora’s past, and the Sonora Museum, a treasure trove of the region’s indigenous cultural history. The city’s varied shopping locales and local markets like Mercado Municipal offer an intimate glance into everyday life, complete with the chance to buy traditional crafts and taste local delicacies, such as the popular Sonora-Style Hot Dog.

The scenic grandeur of Hermosillo, encapsulated by the majestic Sierra Madre Occidental mountain range, is a major allure for tourists. A brief journey from the city takes one to the untouched beaches of the Gulf of California, ideal for both relaxation and aquatic adventures. Ecotourism is also flourishing, with popular destinations like the eco-friendly Parque La Sauceda and the Sonora Desert Museum. Be it history, food, nature, or culture, Hermosillo promises a diverse array of enriching experiences for every traveler.

Discovering Sonoran Gastronomy

Sonora’s cuisine is synonymous with its gastronomic distinctiveness, courtesy of its diverse ingredients and cooking styles that mirror its unique geographical location. Combining coastal, desert, and farming influences, Sonoran cooking traditions exhibit a sumptuous mix of flavours. The state’s exceptional beef is a nod to its long-standing cattle ranching tradition. Celebrated dishes like carne asada, a grilled beef usually accompanied by tortillas, salsa, and beans, and Sonoran-style beef birria, a slow-cooked festive stew, are culinary staples here.

Situated near the Sea of Cortez, Sonora is blessed with a bountiful supply of fresh seafood. Seafood lovers can relish grilled or spicy shrimp dishes and fish tacos, featuring beer-battered fish encased in soft corn tortillas with various toppings. Indigenous Yaqui and Mayo communities’ influence shines through traditional dishes based on corn, beans, and squash. Tamales, a local favourite composed of corn dough filled with meats or cheese and steamed in a corn husk, are emblematic of this native heritage.

The Sonoran Hot Dog, perhaps Sonora’s most recognized culinary gift to the world, exemplifies the region’s fusion of Mexican and American flavours. These bacon-wrapped hot dogs are grilled and lavishly adorned with a variety of condiments, served in a bolillo-style bun. In essence, Sonoran cuisine offers an unforgettable gastronomic voyage through Mexico’s northwest, deeply rooted in local produce, cultural legacy, and historical trade connections.

Nacho Hot Dogs
Los Viñedos, 83120 Hermosillo, Sonora, Mexico

Nacho Hot Dogs is a mobile hot dog stand in the city of Hermosillo. They sell all kinds of hot dogs including
a single dog, double dog, jumbo, chile-dog, cheese-dog, Philadelphia dog, and their specialty, “El Chipilon”.

Crafting the Perfect Sonora-Style Hot Dog: A Step-by-Step Recipe Guide

Level of Difficulty: Easy | Level of Experience: Beginner

Journeying to Hermosillo, Mexico, isn’t necessary to savor the delight of this delectable dish. Here, we provide a list of ingredients and step-by-step instructions to help you recreate your very own Sonora-Style Hot Dog at home. Buen provecho, mis amigos (enjoy your meal, my friends).

What You Need to Make a Sonora-Style Hot Dog

For the Pico de Gallo:

  • ¾ cup tomatoes, diced
  • ⅓ cup onion, diced
  • ⅓ cup corn
  • ⅓ cup black beans
  • 1 tbsp jalapeño, diced & seeded
  • 1 clove of garlic, minced
  • 2 tbsp fresh cilantro chopped
  • 2 tsp lime juice
  • ½ tsp salt

Mexican Crema:

  • 1 cup heavy cream
  • 2 tbsp buttermilk
  • 1 tbsp lime juice

For the Hot Dogs:

  • 8 all-beef hot dogs
  • 8 strips bacon
  • 8 hot dog buns
  • 1 large ripe avocado, halved pitted & sliced

Time needed: 30 minutes

How to Cook the Sonora-Style Hot Dog

  1. Make the Mexican Crema

    Add heavy cream and buttermilk to a small bowl or glass jar. Stir together to combine. Cover tightly with plastic wrap or a lid and let sit in a warm spot for 12 to 24 hours. Add lime juice, salt, and mix until well combined.

  2. Make the Pico de Gallo

    Place tomatoes in a fine-mesh strainer set in a bowl, season with salt, and toss to combine. Let tomatoes sit for 10 to 15 minutes. Discard liquid, transfer tomatoes to a bowl, and add in onion, corn, black beans, cilantro, lime juice, and garlic; toss to combine. Season with salt to taste. Set aside.

  3. Make the Bacon Wrapped Hot Dogs

    Wrap a slice of bacon around each hot dog, spiraling the bacon down the length of the frank. Place hot dogs on the cool side of the grill or on a cast-iron griddle, cover, and cook until bacon has fully cooked and lightly browned 10 to 15 minutes.

  4. Assemble the Sonora-Style Hot Dog

    Place hot dog buns on the hot side of the grill or in a cast-iron griddle, cut side down, and cook until lightly toasted, about 30 seconds. Transfer to a serving platter, place a hot dog in each bun, and top with pico de gallo, avocado slices, and Mexican crema. Serve immediately.

I did not include the resting time for the Mexican crema in the recipe time. You will want to make it 12 to 24 hours in advance or buy it already made from the store.

If you liked this dish please Rate This Recipe and leave a comment.

Sonora-Style Hot Dog
Print

Sonora-Style Hot Dog

A bacon-wrapped hot dog that is grilled until crispy, and then topped with a spicy mix of corn, black beans, jalapenos, onions, and tomatoes and smothered in fresh Mexican cream.
Prep Time 10 minutes
Cook Time 10 minutes
Resting Time 10 minutes
Total Time 30 minutes
Servings 8 servings
Calories 504kcal

Equipment

Ingredients

For the Pico de Gallo:

Mexican Crema

For the Hot Dogs:

Instructions

For the Pico de Gallo:

  • Place tomatoes in a fine-mesh strainer set in a bowl, season with salt and toss to combine. Let tomatoes sit for 10 to 15 minutes. Discard liquid, transfer tomatoes to a bowl, and add in onion, corn, black beans, cilantro, lime juice, and garlic; toss to combine. Season with salt to taste. Set aside.
    ¾ cup tomatoes, ⅓ cup yellow onion, ⅓ cup sweet corn, ⅓ cup black beans, 1 tbsp jalapeño pepper, 1 clove garlic, 2 tbsp dried cilantro, 2 tsp lime juice, ½ tsp salt

Mexican Crema

  • Add heavy cream and buttermilk to a small bowl or glass jar. Stir together to combine.
    1 cup heavy cream, 2 tbsp buttermilk
  • Cover tightly with plastic wrap or a lid and let sit in a warm spot for 12 to 24 hours.
  • Add lime juice, salt, and mix until well combined.
    1 tbsp lime juice

For the Hot Dogs:

  • Wrap a slice of bacon around each hot dog, spiraling the bacon down the length of frank. Place hot dogs on the cool side of the grill or in a cast-iron griddle, cover, and cook until bacon has fully cooked and lightly browned 10 to 15 minutes.
    8 strips bacon, 8 all-beef hot dogs
  • Place hot dog buns on the hot side of the grill or in a cast-iron griddle, cut side down, and cook until lightly toasted, about 30 seconds. Transfer to a serving platter, place a hot dog in each bun, and top with pico de gallo, avocado slices, and Mexican crema. Serve immediately.
    8 hot dog buns, 1 large avocados

Nutrition

Serving: 1Sonora Style Hot Dog | Calories: 504kcal | Carbohydrates: 27.4g | Protein: 19.9g | Fat: 31.8g | Saturated Fat: 3.6g | Cholesterol: 21mg | Sodium: 670mg | Potassium: 229mg | Fiber: 1.7g | Sugar: 4.1g | Calcium: 85mg | Iron: 2mg

Other Recipes That Will Go Well With the Sonora-Style Hot Dog

Mexican Corn Salad
This Mexican Corn Salad is a delicious side dish made from grilled corn and loaded with black beans and a few other add-ins. The dressing is creamy and a little smoky, with just the right amount of zing from the lime juice.
Check out this recipe
Fresh Grilled Mexican Corn Salad
Mexican Yellow Rice Recipe
Mexican Yellow Rice makes a great side and has a big punch of flavor. Cooked with carrots and sweetpeas and spiced with turmeric, paprika, chili powder, red pepper flakes, and cilantro.
Check out this recipe
Mexican Yellow Rice Recipe

Photo Credits:

  • By Taste The World Cookbook – Copyright 2022 All rights reserved.
  • By Nacho Hot Dogs – Copyright BY https://www.facebook.com/Nacho-Hot-Dogs-120527661869361/
  • By Artotem from Here, There, and… – Plaza Bicentenario in HermosilloUploaded by PDTillman, CC BY 2.0, https://commons.wikimedia.org/w/index.php?curid=15596134
  • By SteveMX – Own work Mi Trabajo, Public Domain, https://commons.wikimedia.org/w/index.php?curid=11232279
  • By Metamario – Own work, CC BY-SA 4.0, https://commons.wikimedia.org/w/index.php?curid=39926910
  • By gakusei 88 from Japan – Catedral de Hermosillo y Kiosko, CC BY 2.0, https://commons.wikimedia.org/w/index.php?curid=90690582
  • By Danieltakaki at English Wikipedia – Transferred from en.wikipedia to Commons by Avemundi., GFDL, https://commons.wikimedia.org/w/index.php?curid=3968316
  • By SZeltzer – Own work, CC BY-SA 4.0, https://commons.wikimedia.org/w/index.php?curid=74739201
  • By Mudwater – Own work, CC BY-SA 4.0, https://commons.wikimedia.org/w/index.php?curid=49074613
  • By Alvis at English Wikibooks – Transferred from en.wikibooks to Commons by QuiteUnusual using CommonsHelper., Public Domain, https://commons.wikimedia.org/w/index.php?curid=9738243

Our Social Networks

3,346FansLike
17FollowersFollow
6FollowersFollow
0FollowersFollow
19FollowersFollow
0SubscribersSubscribe

You Might Also Like

El Submarino the Argentinian Hot Chocolate Recipe Card

El Submarino the Argentinian Hot Chocolate

0
The El Submarino, hot chocolate, comes to us from Buenos Aires, Argentina. This recipe for Hot Chocolate is made from a mug of hot milk...
Taco Seasoning Mix

Mastering Taco Seasoning Mix

Enable Notifications OK No thanks