This recipe for Pickled Cucumbers and Onions is quick and easy to make. Cucumbers and onions are soaked in a brine of water, sugar, vinegar, and a few spices to make a ready-to-eat treat that goes well with almost any other dish or by itself for a quick and tasty snack.
There are four general methods for pickling: Quick-Pickle Method, Salt-Brined Method, Vinegar-Brined Method, and the Fermented Method. Each pickling method has its own benefits, and some produce works better with one method or another.
Quick-Pickle Method: Items that are pickled using the quick-pickle technique sometimes are called “fresh pickles. This works well with cucumbers, carrots, cauliflower, hot or sweet peppers, and green beans, among other vegetables. Fruits such as cherries and crab apples also are great for quick pickling.
Salt-Brined Method: Some vegetables, such as cucumbers and zucchini, benefit from having some of their natural water removed before the pickling liquid is added. By adding salt – either on its own or in a salt-water brine – the water is drawn out of the vegetables’ cells. This allows the pickling liquid to penetrate into the cells more thoroughly, giving the pickling items more flavor, better texture, and longer shelf life.
Vinegar-Brined Method: These pickled items are a little more complex to make than the previous two methods. The vinegar-brined technique basically follows the same process for salt-brined pickles – drawing the water out of the vegetables’ or fruits’ cells to make room for the pickling liquid. In this method, the water is gradually drawn out in stages by soaking, draining, and soaking again, using a vinegar solution, sometimes in combination with a salt-water brine and often with plenty of sugar.
Fermented Method: This is a considerably different technique from the others, though it uses salt-water brine. The vegetables are covered in a salt-water brine, weighed down to make sure the vegetables are immersed, and left at a specific temperature – usually at room temperature – to ferment.
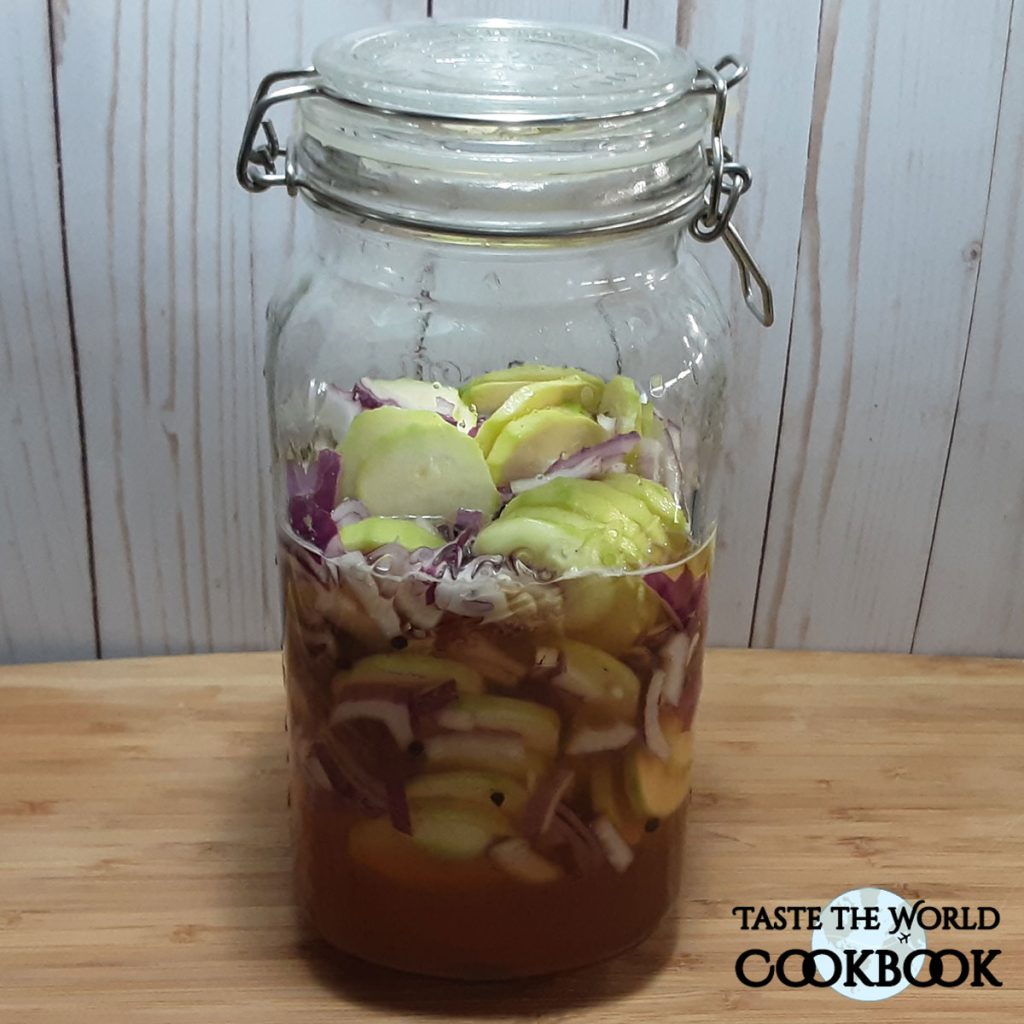
Pickled Cucumbers and Onions in a Jar
How to Store Pickled Cucumbers and Onions
Store these Pickled Cucumbers and Onions in a glass jar with an airtight lid in the refrigerator for up to 4 weeks.
History of Pickling
Pickles have been around for thousands of years, dating as far back as 2030 BC when cucumbers from their native India were pickled in the Tigris Valley.
The word “pickle” comes from the Dutch “pekel” or northern German “pókel”, meaning “salt” or “brine,” two very important components in the pickling process.
The Metropolitan City of Amsterdam, Netherlands
Amsterdam is the capital and most populous city of the Netherlands. It has a population of 907,976 within the city proper, 1,558,755 in the urban area, and 2,480,394 in the metropolitan area. Found within the Dutch province of North Holland, Amsterdam is colloquially referred to as the “Venice of the North”, due to the large number of canals that form a UNESCO World Heritage Site.
The Concertgebouw in Amsterdam.The Oude Kerk was consecrated in 1306 AD.Boathouse in an Amsterdam ChannelAmsterdam – Rijksmuseumrijksmonument number 2721
A Brief History of Amsterdam, Netherlands
Due to its geographical location in what used to be wet peatland, the founding of Amsterdam is of a younger age than the founding of other urban centers in the Low Countries. However, in and around the area of what later became Amsterdam, local farmers settled as early as three millennia ago. They lived along the prehistoric IJ river and upstream of its tributary Amstel.
Amsterdam was granted city rights in either 1300 or 1306. From the 14th century on, Amsterdam flourished, largely from trade with the Hanseatic League.
In the 16th century, the Dutch rebelled against Philip II of Spain and his successors. The main reasons for the uprising were the imposition of new taxes, the tenth penny, and the religious persecution of Protestants by the newly introduced Inquisition. The revolt escalated into the Eighty Years’ War, which ultimately led to Dutch independence.
The 17th century is considered Amsterdam’s Golden Age, during which it became the wealthiest city in the western world. Ships sailed from Amsterdam to the Baltic Sea, North America, and Africa, as well as present-day Indonesia, India, Sri Lanka, and Brazil, forming the basis of a worldwide trading network. Amsterdam’s merchants had the largest share in both the Dutch East India Company and the Dutch West India Company.
Nazi Germany invaded the Netherlands on 10 May 1940 and took control of the country. Some Amsterdam citizens sheltered Jews, thereby exposing themselves and their families to a high risk of being imprisoned or sent to concentration camps. More than 100,000 Dutch Jews were deported to Nazi concentration camps, of whom some 60,000 lived in Amsterdam.
In the 21st century, the Amsterdam city center has attracted large numbers of tourists: between 2012 and 2015, the annual number of visitors rose from 10 to 17 million. Real estate prices have surged, and local shops are making way for tourist-oriented ones, making the center unaffordable for the city’s inhabitants. These developments have evoked comparisons with Venice, a city thought to be overwhelmed by the tourist influx.
Tourism in Amsterdam, Netherlands
Amsterdam is the Netherlands’ capital, known for its artistic heritage, elaborate canal system, and narrow houses with gabled facades, legacies of the city’s 17th-century Golden Age. Its Museum District houses the Van Gogh Museum, works by Rembrandt and Vermeer at the Rijksmuseum, and modern art at the Stedelijk. Cycling is key to the city’s character, and there are numerous bike paths.
The Dutch Cuisine
Dutch cuisine is formed from the cooking traditions and practices of the Netherlands. The country’s cuisine is shaped by its location in the fertile North Sea river delta of the European Plain, giving rise to fishing, farming (for crops and domesticated animals), and trading over the sea, its former colonial empire, and the spice trade.
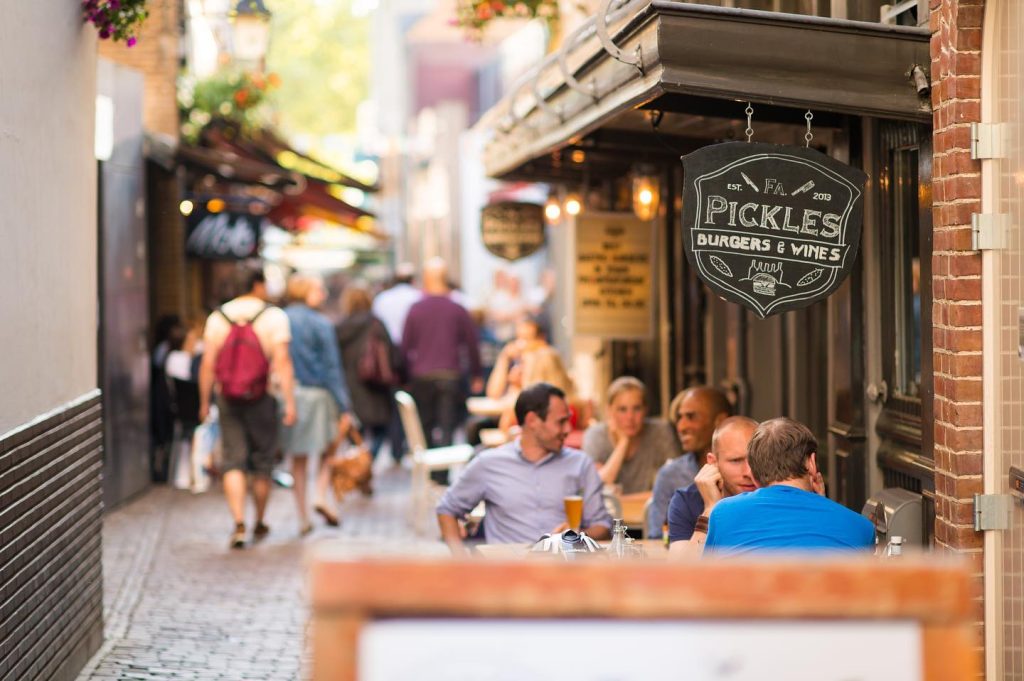
You will find Pickles in the Drieharingstraat, the restaurant street in Utrecht. The street is located right in the center between the Oude Gracht and the Vredenburg, within walking distance of the many shopping streets. Pickles can be perfectly combined with a performance in the TivoliVredenburg music center. The kitchen is open daily from 4:00 PM to 10:00 PM. This way you can still walk in later in the evening. We are also open for lunch from 12:00 on Friday to Sunday.
How to Make This Quick Pickled Cucumbers and Onions Recipe
Just make sure to slice all the cucumbers you use in a batch about the same thickness. If you like you can vary the veggies and get adventurous with the herbs.
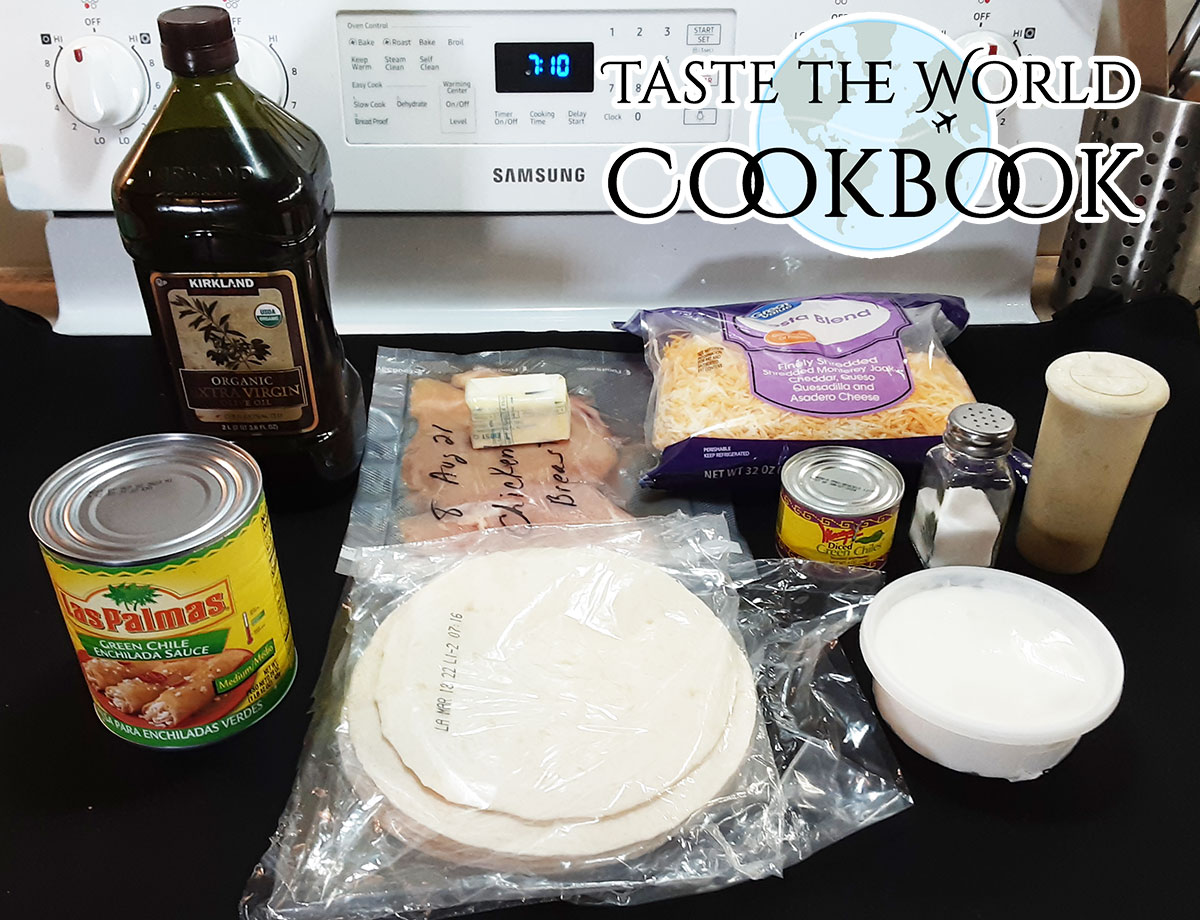
What You Need to Make Pickled Cucumbers and Onions
Ingredients for Quick Pickled Cucumbers and Onions Recipe
This recipe is so simple and easy to make, low in calories, and super good. There is no cooking involved in this recipe, just a bit of mixing and slicing.
Time needed: 10 minutes
Mixing Directions for Pickled Cucumbers and Onions
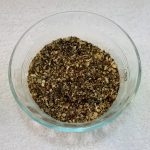
Chop the Vegetables
Chop the cucumbers, onions, and garlic and place them into a clean 1-quart jar with a tight-fitting lid.
Mix the Liquid
Combine the vinegar, water, sugar, salt, and pepper in a mixing bowl and stir until the sugar and salt dissolve. Pour into the jar until the vegetables are submerged.
Cover and Chill
Cover and refrigerate until chilled. The vegetables keep for about a week.
The sliced cucumbers and red onions soak up the sweet and tangy vinegar dressing and it tastes so fresh and delicious. This is a great, light side dish for barbecues, picnics, or potlucks. You can serve them immediately or store them in the fridge to eat as a snack or to complement a meal.
The cucumbers and red onions will soak up the sweet and tangy vinegar making them fresh and delicious. Properly stored they will last for a few weeks in your refrigerator.
Chop the cucumbers, onions, and garlic and place them into a clean 1-quart jar with a tight fitting lid.
3 cups cucumbers, 1 cup red onion, 1 clove garlic
Combine the vinegar, water, sugar, salt, and pepper in a measuring cup and stir until the sugar and salt dissolve. Pour into the jar, making sure the vegetables are submerged.
2 cups apple cider vinegar, 1 cup water, 1 tbsp lemon juice, ¾ cup white sugar, 2 tsp salt, 2 tsp black peppercorns
Cover and refrigerate until chilled. The vegetables keep for about a week.
Popular meats include skirt steak, chicken, pork, and other cuts of meat, and are usually cooked with onions and bell peppers. Popular condiments include shredded lettuce, sour cream, guacamole, salsa, mushrooms, pico de gallo, shredded cheese, refried beans, and diced tomatoes.
How to Store Chicken Fajitas
This recipe will store better than most because you do not assemble the fajitas until you are ready to eat so the ingredients will not destroy the tortilla and reheating will not wilt the vegetables. If you allow any leftovers to cool, make sure to refrigerate in an airtight container with a lid for 3 to 5 days. Reheat in the microwave or in a skillet to warm them back up.
Chicken Fajitas Meal
History of the Chicken Fajitas Recipe
Fajita is a Tex-Mex, Texan-Mexican American, or Tejano, a diminutive term for little strips of meat cut from the beef skirt, the most common cut used to make fajitas. The word fajita is not known to have appeared in print until 1971, according to the Oxford English Dictionary. (The word faja is Spanish for “strip”, or “belt”, from the Latin fascia, “band”) Although fajita originally referred to these strips of beef skirt, fajitas now are made with a variety of fillings, such as green/red/yellow peppers, onions, chilies, and jalapeño peppers.
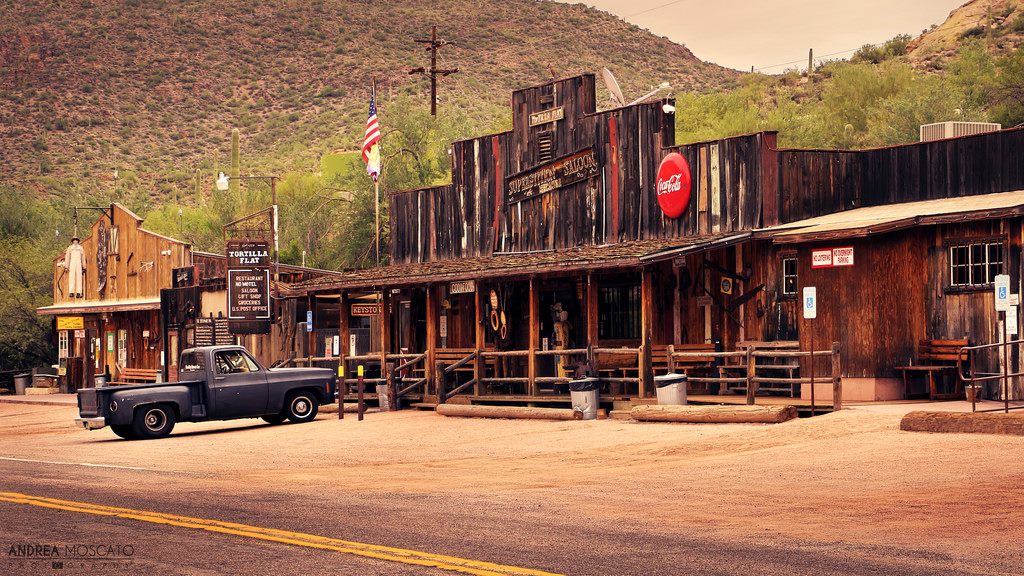
Tortilla Flat, Arizona
Tortilla Flat is a small unincorporated community in far eastern Maricopa County, Arizona, United States. It is located in the central part of the state, northeast of Apache Junction. It is the last surviving stagecoach stop along the Apache Trail.
Tortilla Flat, Arizona City Card
History of Tortilla Flat
Tortilla Flat took its name from a nearby butte shaped like a tortilla. However, an alternative explanation is that the name was given by John Cline, a Tonto Basin pioneer, who claims to have been stranded about 1867 at this location for several days with nothing but flour to make tortillas to eat.
Based on available records, Tortilla Flat got its start because of the road construction to Roosevelt Dam in 1904. There was a need for a stagecoach stop for freight haulers on their way to the construction site at Roosevelt Dam and Tortilla Flat served that purpose. Shortly following the construction of the road, Roosevelt Dam became a big tourist attraction. At that point, Tortilla Flat was a stage stop for tourists and mail carriers throughout the 1930s.
Tourism in Tortilla Flat
The town boasts a restaurant (saloon) that features bar stools made out of saddles, a patio grill (above), a post office, and a mercantile/gift shop. Tortilla Flat Campground is only two miles from Scenic Canyon Lake.
The area boasts fishing, watersports, an excursion boat, and plenty of covered ramada lakeside picnicking to fill your afternoon. There are a couple of paved boat launches on either side of the marina.
Tex-Mex Cuisine
Tex-Mex cuisine is an American and Texan cuisine that derives from the culinary creations of the Tejano people of Texas. It has spread from border states such as Texas and others in the Southwestern United States to the rest of the country.
– Featured Restaraunt –
Superstition Restaurant & Saloon 1 Main Street, Tortilla Flat, AZ 85190 Telephone: +1 (480) 984-1776
Tortilla Flat Saloon
A visit to Tortilla Flat isn’t complete without a stop in the Superstition Restaurant & Saloon. The decor alone will send you back in time, from the Saddle Bar Stools, to the walls of dollar bills from around the world – Oh and just so you know, The food is incredible. Our restaurant serves the freshest burgers, hottest chili, and coldest drinks everyday.
While you do need to plan ahead a bit to let your chicken marinate, the hands-on time for this easy chicken fajita recipe is very short. So let’s break out the cutting board and cast-iron skillet and make some Chicken Fajitas.
Aside from the 30-minute Maraniting Time, these directions are quick and easy and soon you will be eating some delicious Chicken Fajitas.
Time needed: 55 minutes
How to Cook Chicken Fajitas
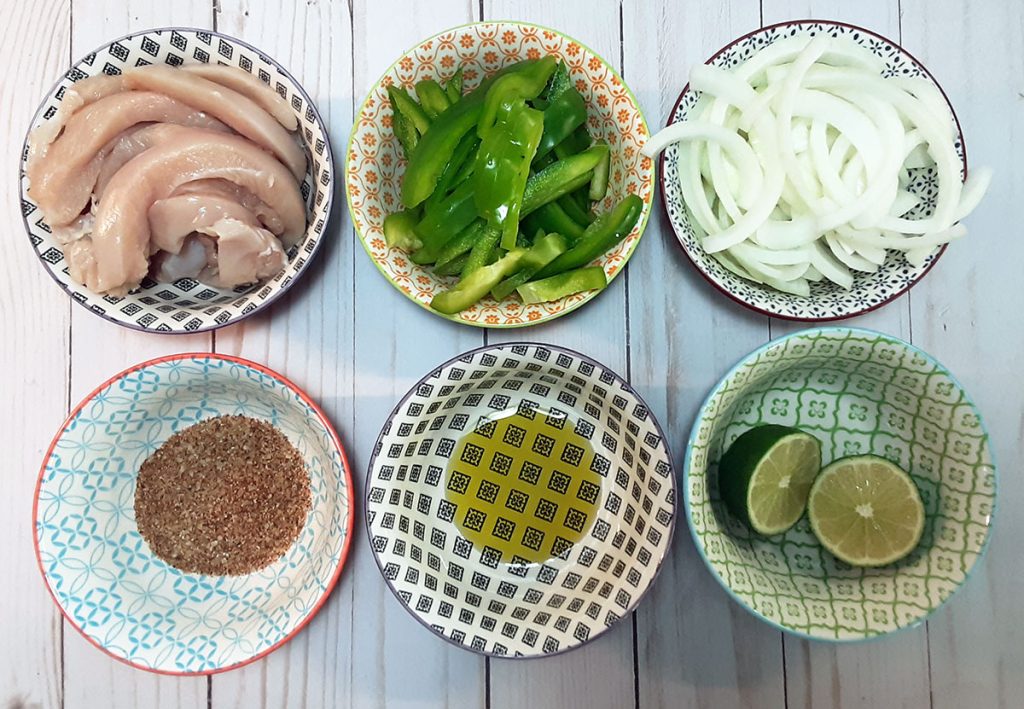
Chop the Ingredients
Cut the chicken, onions, and peppers into strips. Keep ingredients separate and set the onions and peppers aside for later use.
Season the Chicken
Add the fajitas seasoning ingredients and the chicken strips to a ziplock bag and mix well. Marinate the chicken for at least 30 minutes
Heat the Tortillas
Preheat the oven to 350 degrees. Wrap the tortillas in groups of five in foil and warm in the oven for 15-20 minutes.
Cook the Chicken
Bring the skillet to medium heat, add the oil and bring to temperature before adding the chicken. Cook the chicken for about 5 – 7 minutes, stirring frequently until the chicken is fully cooked.
Saute the Vegetables
Once the chicken has finished cooking, remove it to a plate and let it rest for a couple of minutes. Add the bell peppers and onion to the same skillet over medium heat and saute for 4-5 minutes, stirring frequently.
Combine and Heat
When the bell peppers are just about done sauteing, add the chicken, squeeze fresh lime juice and stir everything together.
Assemble and Serve
Serve immediately with warm tortillas and extra toppings such as sour cream, pico de gallo, and guacamole.
Keep it classic with tortillas or serve it over a salad for a gluten-free option. It will be delicious no matter how you serve them!
Cut the chicken, onions, and peppers into strips. Keep ingredients separate and set the onions and peppers aside for later use.
1½ lb chicken breast, 1 green bell pepper, 1 red bell pepper, 1 small onion
Season the Chicken
Add the fajitas seasoning ingredients and the chicken strips to a ziplock bag and mix well. Marinate the chicken for at least 30 minutes
½ tbsp chili powder, ½ tbsp ground cumin, 1 tsp garlic powder, ½ tsp hot paprika, ½ tsp dried oregano, ½ tsp salt, ¼ tsp black pepper
Heat the Tortillas
Preheat the oven to 350 degrees. Wrap the tortillas in groups of five in foil and warm in the oven for 15-20 minutes.
6 tortillas
Cook the Chicken
Bring the skillet to medium heat, add the oil and bring to temperature before adding the chicken. Cook the chicken for about 5 – 7 minutes, stirring frequently until the chicken is fully cooked.
2 tbsp olive oil
Once the chicken has finished cooking, remove it to a plate and let it rest for a couple of minutes. Add the bell peppers and onion to the same skillet over medium heat and saute for 4-5 minutes, stirring frequently.
When the bell peppers are just about done sauteing, add the chicken, squeeze fresh lime juice and stir everything together.
½ lime
Assemble and Serve
Serve immediately with warm tortillas and extra toppings such as sour cream, pico de gallo, and guacamole.
Mexican Yellow Rice makes a great side and has a big punch of flavor. Cooked with carrots and sweetpeas and spiced with turmeric, paprika, chili powder, red pepper flakes, and cilantro.
Frijoles Refritos or Refried Beans are a tasty side dish to almost any meal. It can be served with tacos, burritos, enchiladas, chimichangas, or almost anything.
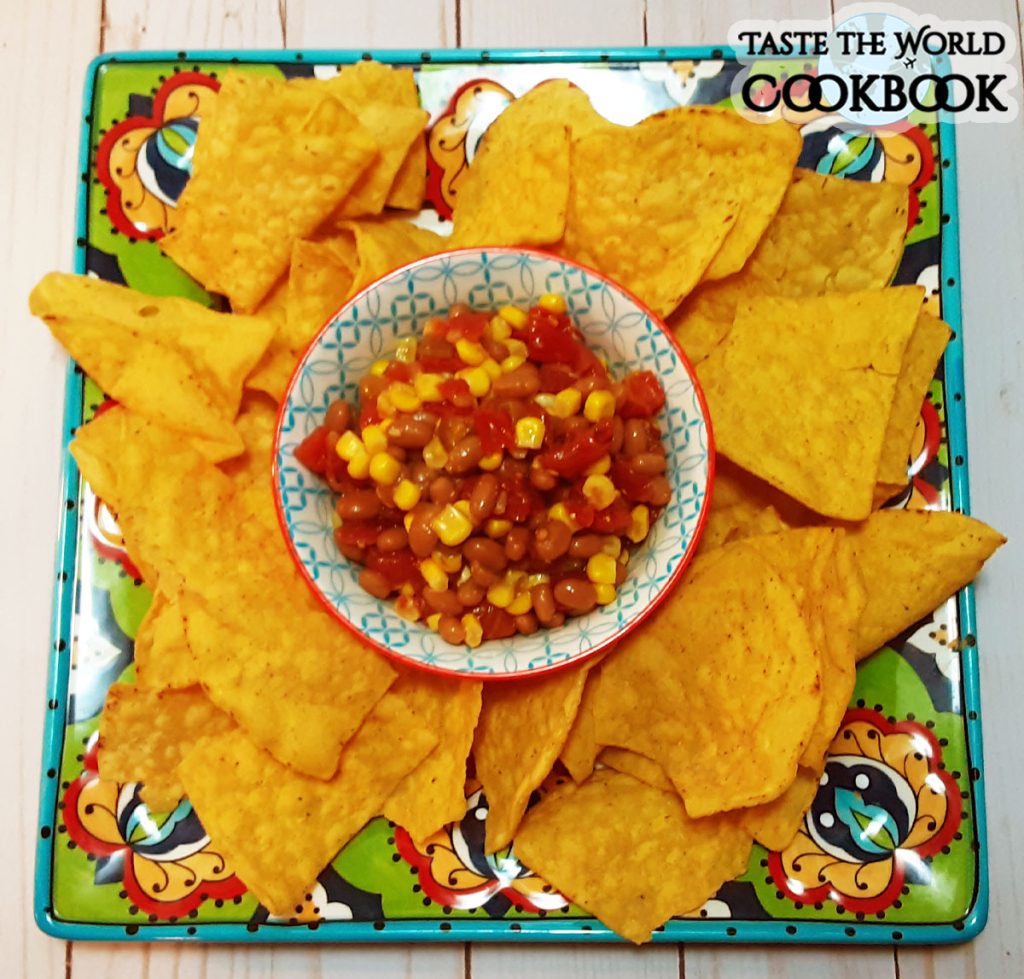
Did you know Salsa means Sauce in Spanish? I found this recipe for Sweet Corn and Baked Bean Salsa on the outside of a case of BUSH’S® Original Baked Beans. I was not sure about it at first, but OMG it is good. Add some shredded cheese and some flour tortillas to make some amazing quesadillas.
Salsa is the Spanish word for sauce, so to Spanish-speaking cultures, salsa refers to any sauce. This Sweet Corn and Baked Bean Salsa will fall into the Pico de Gallo category as it contains very little liquid.
Pico de Gallo – Known for its vibrant colors and fresh taste, this salsa contains very little liquid. Made with finely chopped tomatoes, onions, serrano peppers, cilantro, lime juice, and salt. Pico de Gallo is a great topping for tacos, quesadillas, and other Latin-inspired dishes.
Salsa Taquera – The key ingredient in Salsa Taquera “Taco Sauce” is the Chile de Arbol, a thin red chili pepper that is hotter than a jalapeno and gives the salsa its signature spicy kick. This salsa is often used to top tacos, quesadillas, and other Latin-inspired dishes.
Salsa Roja – In Spanish, Salsa Roja means “Red Sauce” and is a blended red salsa made with tomatoes, ground with onion, garlic, chile, salt, and pepper to taste. It is used to prepare traditional Mexican foods, in a mild spicy level for enchiladas and huevos rancheros, or spicier for antojitos such as tacos and quesadillas.
Salsa Verde – Salsa Verde is a “Green Sauce” that’s made with tomatillos instead of tomatoes. These small green fruits are native to Mexico and are less sweet and more acidic than tomatoes, which creates a type of salsa with a bright, vegetal flavor. It’s most often used with enchiladas but can also be used with tacos, burritos, tostadas, quesadillas, and any tortilla-based meals.
Salsa de Aguacate – Tomatillos, serrano peppers, and avocado are pureed to make a smooth topping that’s often served with tacos and grilled meats. This type of salsa balances the refreshing coolness of avocado with the spiciness of serrano peppers. Many people confuse this creamy, green salsa with Guacamole sauce but they are not the same.
Salsa Criolla – Peruvian Salsa Criolla has a different look than the other types of salsas on our list because it contains sliced red onions instead of chopped onions. To achieve the perfect Salsa Criolla, the onions are thinly sliced, then sprinkled with salt, and lightly massaged. This removes any bitterness or bite from the onions and coaxes out their natural sweetness.
Sweet Corn and Baked Bean Salsa with Chips
How to Store Sweet Corn and Baked Bean Salsa
It is best to place your prepared salsa in a glass jar with an airtight lid. A glass container will prevent flavors from seeping into your salsa from the outside and keep your vegetables as fresh as possible! Place your fresh salsa in the refrigerator and keep it there for a week or you can freeze it for up to one year.
History of Salsa
You can’t talk about authentic Mexican salsas without first honoring their history. The origin of salsa made from chopped tomatoes goes back to a time when Central America was home to the Aztecs, Incas, and Mayans. It was likely all these cultures ate salsa in some form, but the Aztec diet was documented in more detail, so they are often credited with inventing it.
A Franciscan missionary working in Central America recorded information about Aztec foods, including a sauce made from tomatoes, chiles, and squash seeds. This combination of ingredients didn’t go by one specific name until a Spanish priest dubbed it “salsa” in the 1500s. The Aztec tradition was passed down to subsequent cultures living in Central America and Mexico. Like many traditional Hispanic foods, salsa has come to be loved throughout all of North America.
The Metropolitan City of Knoxville, Tennessee
Why Knoxville for a Tex-Mex recipe you might ask? Because Knoxville is home to BUSH’S® Original Baked Beans. Now on to Knoxville, it’s the county seat of Knox County and is the state’s third-largest city after Nashville and Memphis. Knoxville proper has a population was 190,740 and the Greater Metropolitan Area of Knoxville has a population of 869,046.
Eastward view of the skyline of downtown Knoxville, TennesseeJames White’s Fort in downtown KnoxvilleThe north end of the Market Square in Knoxville, Tennessee, USA, viewed from the TVA towers courtyard. The square’s stage dominates the view at the center. The seven-story Arnstein Building rises top-center.Old City, Knoxville, TNView from campus of the new Gate 21 Plaza and the West Side tower after Phase III renovation
A Brief History of Knoxville, Tennessee
The first people to form substantial settlements in what is now Knoxville were indigenous people who arrived during the Woodland period (c. 1000 B.C. to A.D. 1000). One of the oldest artificial structures in Knoxville is a burial mound constructed during the early Mississippian culture period (c. A.D. 1000–1400). The earthwork mound has been preserved, but the campus of the University of Tennessee developed around it.
By the arrival of the first Europeans, the Cherokee had become the dominant tribe in the East Tennessee region. They had migrated into the area centuries before from the Great Lakes area. They concentrated in what the American colonists called the Overhill settlements along the Little Tennessee River, southwest of Knoxville, and were in competition for land and resources with the Creek and Shawnee tribes.
The Spanish explorer Hernando de Soto was the first European to discover the area in 1540 and was followed by an ever-increasing number of white traders and explorers. The first major recorded Euro-American presence in the Knoxville area was the Timberlake Expedition, which passed through the confluence of the Holston and French Broad into the Tennessee River in December 1761. Henry Timberlake served as an Anglo-American emissary from the Thirteen Colonies to the Native American Overhill settlements along the Little Tennessee River.
By 1796 Tennessee was admitted into the Union as a State and Knoxville served as the capital until 1817. Knoxville thrived as a way station for travelers and migrants heading west. Its location at the confluence of three major rivers in the Tennessee Valley brought flatboat and later steamboat traffic to its waterfront and Knoxville quickly developed into a regional merchandising center.
In July 1861, Tennessee had seceded from the Union and joined the Confederacy and by November of 1863, Union victories in Knoxville and Chattanooga put much of East Tennessee under Union control for the rest of the war.
Knoxville’s reliance on a manufacturing economy left it particularly vulnerable to the effects of the Great Depression. The Tennessee Valley also suffered from frequent flooding, and millions of acres of farmland had been ruined by soil erosion. To control flooding and improve the economy in the Tennessee Valley, the federal government created the Tennessee Valley Authority in 1933.
In 2006, the City of Knoxville adopted the South Waterfront Vision Plan, a long-term improvement project to revitalize the 750 acre waterfront fronting three miles of shoreline on the Tennessee River.
Tourism in Knoxville, Tennessee
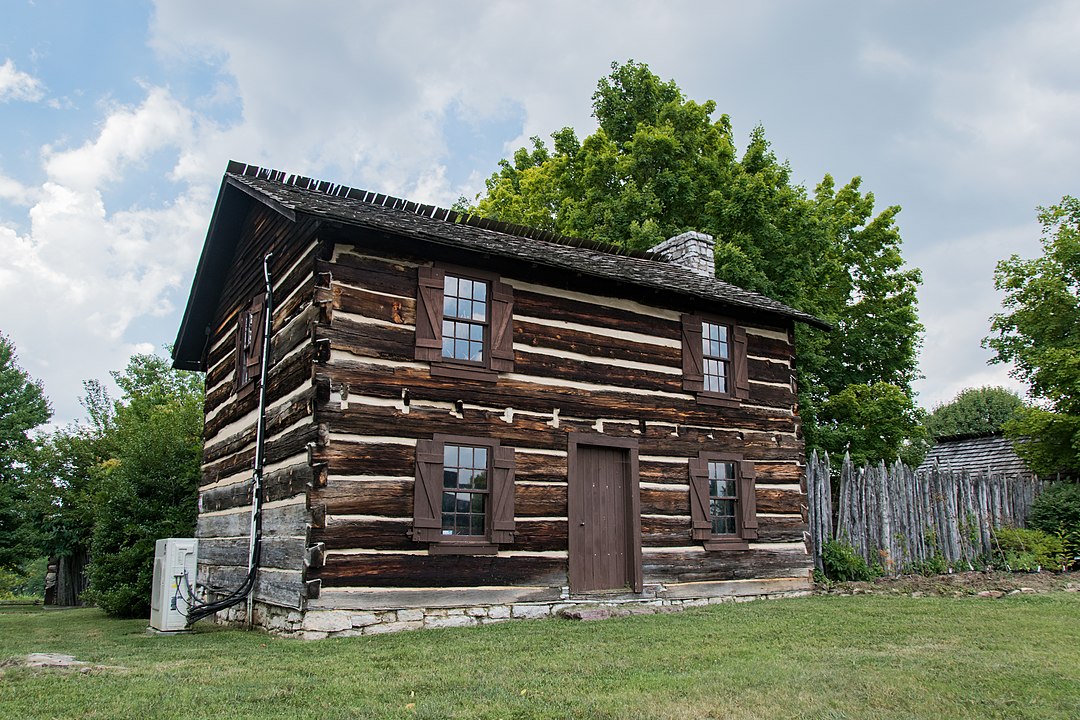
Knoxville, Tennessee is a city where you can enjoy the vibrant nightlife, the Market Square district has 19th-century buildings with shops and restaurants. The Museum of East Tennessee History has interactive exhibits plus regional art, textiles, and Civil War artifacts. James White’s Fort, built by the Revolutionary War captain, includes the reconstructed 1786 log cabin that was Knoxville’s first permanent building.
Surrounded by mountains, rivers, and lakes, it’s easy to see why Knoxville is loved for its outdoor recreation. Just minutes from downtown, you’ll find outdoor recreations like hiking, mountain biking, boating, and a visit to the Great Smoky Mountains National Park is a must.
The Cuisine of Knoxville, Tennessee
Knoxville has every type of cuisine from around the world to tempt your taste buds. Whether a taste of the southwest is what you’re after, the flavor of the Riveria, or a journey to the orient is your flare, Knoxville is full of delicious cafes and restaurants that make you feel like you might be traveling in a different part of the world. Food so delectable your mouth won’t know whether you’re in Knoxville or traveling in the Caribbean!
Enjoy burritos, quesadillas, tacos & more made from 20+ fresh ingredients. Kid’s, vegetarian, low-cal & catering options are available. And chips & salsa are free with every meal!
Whether you’re on the couch, at the office, in the park, or on a plane (ok, that might a stretch), you get the picture—wherever you are, is where we’ll be. Order online or through the Moe’s app and we’ll take care of the rest. Easy? We think que-so.
How to Make This Sweet Corn and Baked Bean Salsa Recipe
This baked bean and sweet corn salsa recipe are super fun and easy to make. The bright yellow sweet corn swirls together with the vibrant red tomatoes, bold green peppers, and earthy baked beans in a cacophony of yummy colors.
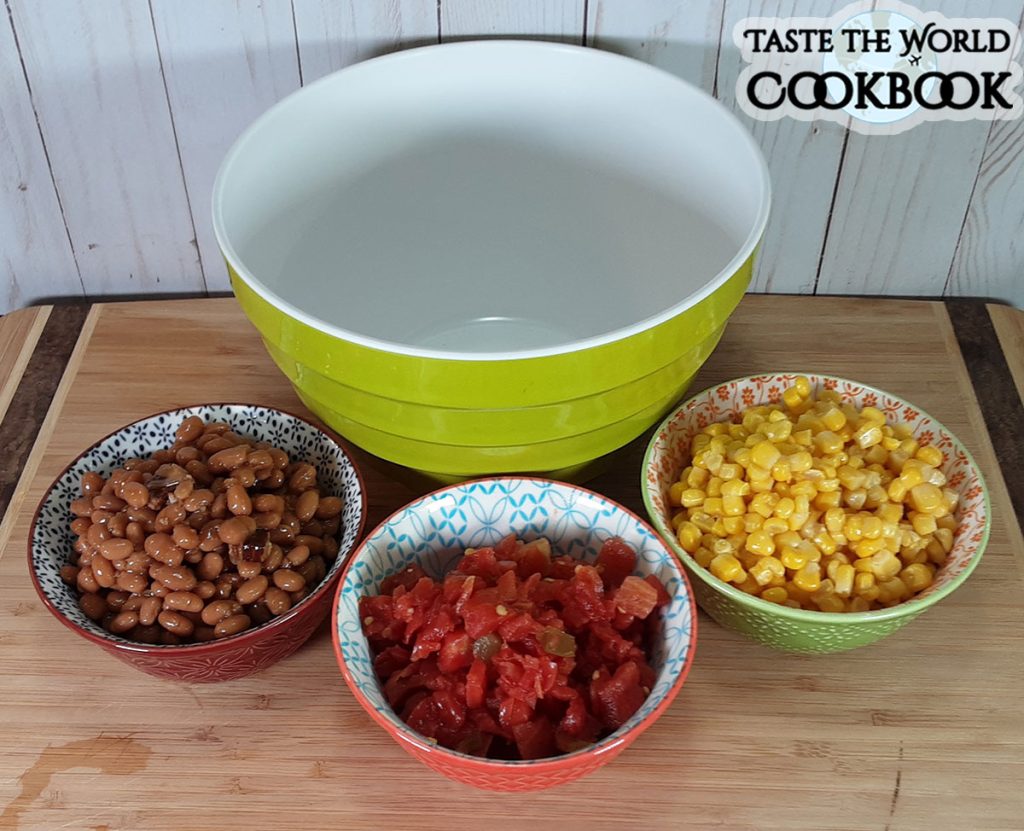
What You Need to Make Sweet Corn and Baked Bean Salsa
Ingredients to make Sweet Corn and Baked Bean Salsa
Other Recipes That Go Well With Sweet Corn and Baked Bean Salsa
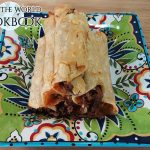
Shredded Beef Taquitos
These crunchy Shredded Beef Taquitos are made with seasoned shredded beef and a Mexican blend of cheese is wrapped in corn tortillas and baked to perfection. Serve as an afternoon snack or for the next fiesta.
Anytime is a good time to Visit Beautiful Mexico. You will discover the beautiful beaches, breathtaking sceneries, vibrant culture, ancient cities, amazing history, and gastronomical delights among many other things in Mexico.
The national language of Mexico is Spanish and the country is made up of 56 different Amerindian ethnic groups and it boasts a diverse group of foreign ethnicities. According to the 2020 census, Mexico had the 10th largest population in the world coming in at 126,014,024 inhabitants.
Pre-Columbian Mexico can trace its origins to 8,000 BCE and is identified as one of the six cradles of civilization; it was home to many advanced Mesoamerican civilizations, most notably the Maya and the Aztecs.
Mexico ranks first in the Americas and seventh in the world for the number of UNESCO World Heritage Sites. It is also one of the world’s 17 megadiverse countries, ranking fifth in natural biodiversity.
The State of Affairs in Mexico.
The crime situation in several areas of Mexico, primarily along its northern border, has received much coverage in the media. The U.S. Department of State has a travel advisory for Mexico.
According to the U.S. Government, millions of U.S. citizens safely visit Mexico each year. Also, about one million Americans live there. Like them, travelers can greatly enhance their safety by using some common sense while traveling in Mexico. It’s the same common sense one should use traveling anywhere in the world.
How to Safely Travel in Mexico
Don’t Piss Off the Natives
Just like you would expect a Mexican to obey and obverse the laws and norms of our county, the same applies when visiting their country. Learn a few commonly used phrases and their common responses to show you are trying and most Mexicans will help you as much as they can. Learn to say Hello (Hola), Goodbye (Adiós), Please(Por Favor), Thank You (Gracias), and You’re Welcome (De Nada).
Be Aware of Your Surroundings
Most crimes against tourists are crimes of opportunity. In general, if I become uneasy about my surroundings I start planning escape routes just in case I accidentally trigger a crime of opportunity. Stay out of shady areas and never drink so much you lose control of your senses.
Become a Chameleon
Like the Chameleon, you will want to blend into the crowd. Leave your America First t-shirts at home and dress according to your surroundings. A flamboyant or arrogant tourist will stick out from the crowd and they are often targeted.
Register Your Travel Itinerary With the State Department
For Americans, the Smart Traveler Enrollment Program (STEP) will alert the government where you are traveling in case there is an issue while traveling. It will make finding you and helping you that much easier if you need them to help you.
Stick to Public Transportation if Possible
Driving can be risky in Mexico. If you choose to rent a car or even drive your own car make sure your insurance policy includes uninsured motorists, as well as bail: If you’re involved in a crash, both drivers can be detained, and even jailed until the fault is determined. Also avoid cabs as you will be alone, locked in the back of a car without control of the situation.
Get Vaccinated and Bring Medication
The CDC also advises getting hepatitis A vaccine to protect against the effects of contaminated food or drink and suggests a typhoid vaccine, especially for adventurous eaters and those going to small cities or rural areas. Pack over-the-counter anti-diarrhea medicine. Savvy travelers also carry an antibiotic such as Ciprofloxacin for debilitating bacterial attacks.
Make Copies of Your Passport and Credit Cards
Or you can photograph them and save the images on your cellphone. Keep tabs on credit and debit card transactions so you can catch any fraudulent charges or withdrawals.
What Is the Capital of Mexico?
Mexico City is the densely populated, high-altitude capital of Mexico. It’s known for its Templo Mayor (a 13th-century Aztec temple), the baroque Catedral Metropolitana de México of the Spanish conquistadors, and the Palacio Nacional, which houses historic murals by Diego Rivera. All of these are situated in and around the Plaza de la Constitución, the massive main square also known as the Zócalo.
What Are the States of Mexico?
Mexico, officially known as the United Mexican States, is organized into a federation and made up of 31 states plus Mexico City, much like Washington DC is for the United States.
Mexico City
Aguascalientes
Baja California
Baja California Sur
Campeche
Chiapas
Chihuahua
Coahuila de Zaragoza
Colima
Durango
Estado de México
Guanajuato
Guerrero
Hidalgo
Jalisco
Michoacán
Morelos
Nayarit
Nuevo León
Oaxaca
Puebla
Querétaro
Quintana Roo
San Luis Potosí
Sinaloa
Sonora
Tabasco
Tamaulipas
Tlaxcala
Veracruz
Yucatán
Zacatecas
Each state is further divided into municipalities. Mexico City is divided into boroughs, officially designated as demarcaciones territoriales or alcaldías, similar to other state’s municipalities but with different administrative powers.
What Are the Best Beaches in Mexico to Visit?
Surrounded by exuberant nature, the beaches of Mexico have something special to offer for all tastes and budgets. Mexico has 5,797 miles of coastline, of which 4,559 miles face the Pacific Ocean and the Gulf of California, and 1,742 miles along the Gulf of Mexico and the Caribbean Sea.
Playa del Amor, Cabo San Lucas
Playa Sisal, Yucatan
Playa Carrizalillo, Puerto Escondido
Playa Delfines, Cancun
Playa Mayto, Jalisco
Troncones, Guerrero
Playa Balandra, La Paz
Progreso, Yucatan
Medano Beach, Cabo San Lucas
Sian Ka’an Biosphere Reserve, Quintana Roo
Playa Tangolunda, Huatulco
Playa Maroma, Riviera Maya
Isla Holbox
Playa Mujeres, Cancun
La Punta, Puerto Escondido
Playa Paraiso, Tulum
Playa Blanca, Zihuatanejo
Costalegre, Jalisco
Playa Cerritos, Todos Santos
Playa Canalan, Nayarit
Lagunas de Chacahua, Oaxaca
Whether your travel plan is to relax in an all-inclusive hotel by the sea, get in contact with nature or simply discover new destinations, the beaches of Mexico have everything for you to experience the best holiday.
What Are the Best Attractions in Mexico to See?
Mexico is one of the world’s favorite tourist destinations, not only for its history, traditions, culture, the warmth of its people, and delicious cuisine but also for the beauty and variety of attractions located throughout its entire territory.
Copper Canyon: Mexico’s Grand Canyon
Mexico City’s Historic Center
Chichén Itzá: The Mayan Metropolis
The Island of Cozumel
Ancient Ruins of Monte Alban
El Tajin
The Ancient Fortress of Tulum
Guadalajara
Mérida: Yucatán’s White City
Oaxaca
El Castillo, Stepped Pyramid
The Great Pyramid of Cholula
Morelia Cathedral
Mazatlan
Cenotes, Yucatan Peninsula
Palenque, Chiapas
Isla Holbox
The Ancient City of La Venta
So far, there are approximately 193 archaeological sites distributed throughout the country. However, it is believed that there are many that remain hidden in the jungle or under the asphalt of the big cities.
What Are the Best Resorts in Mexico to Stay At?
In Mexico, many all-inclusive resorts are often priced far cheaper than their Caribbean counterparts. Whether you’re a couple looking for secluded romance in rooms with private plunge pools, or a family planning a multi-gen escape for everyone from toddlers to grandma, there’s an all-inclusive resort for you.
Viceroy Riviera Maya, Playa del Carmen
Las Ventanas al Paraíso, a Rosewood Resort, San José del Cabo
Zadún, a Ritz-Carlton Reserve, San José del Cabo
Banyan Tree Cabo Marqués, Acapulco
Mahekal Beach Resort, Playa del Carmen
Rosewood Mayakoba, Playa del Carmen
Montage Los Cabos, Cabo San Lucas
W Punta de Mita, Punta Mita
Grand Velas Riviera Nayarit, Nuevo Vallarta
Waldorf Astoria Los Cabos Pedregal, Cabo San Lucas
Cala de Mar Resort & Spa, Ixtapa
Las Brisas Ixtapa, Zihuatanejo
Garza Blanca Resort & Spa Los Cabos, Cabo San Lucas
Vidanta Nuevo Vallarta, Nuevo Vallarta
Vidanta Riviera Maya, Playa del Carmen
Banyan Tree Mayakoba, Playa del Carmen
Esperanza, Auberge Resorts Collection, Cabo San Lucas
One&Only Palmilla, San José del Cabo
Grand Velas Los Cabos, Cabo San Lucas
Chileno Bay Resort, Auberge Resorts Collection, Cabo San Lucas
The Cape, a Thompson Hotel, Cabo San Lucas
Vidanta Los Cabos, San José del Cabo
The Ritz-Carlton, Cancun, Cancún
Four Seasons Resort Punta Mita, Punta Mita
text
What Are the Best Mexican Holidays to Celebrate?
Mexico is a country rich in heritage and traditions. Thus, it is no wonder that Mexicans celebrate a wide array of holidays over the course of the year. This is a guide to the diverse holidays that take place in Mexico year-round.
January 5th: Día de Reyes (Epiphany/Three Kings Day)
Floating – 1st Monday in February: Día de la Constitución (Constitution Day)
January 15th-23rd: Danza de los Parachicos (Dance of the Parachicos)
February 2nd: Día de la Candelaria (Day of the Candlemas)
February 5th: Día de la Constitución (Constitution Day)
February 24th: Día de la Bandera (Flag Day)
March 21: Natalicio de Benito Juárez (Benito Juárez’s birthday)
Floating – Week Before Easter: Semana Santa (Holy Week)
April 30th: Día del Niño (Children’s Day)
Floating- 2 Mondays after July 16: Los Lunes del Cerro (Mondays on the Hill)
May 1st: Día del Trabajo (Labor Day)
May 5th: Cinco de Mayo/Batalla de Puebla
May 10th: Día de las Madres (Mothers’ Day)
June 20th: Dia del Padre (Fathers’ Day)
September 15th-16th: Día de la Independencia (Independence Day)
October 12th: Dia de la Raza (The Day of the Races)
November 1st and 2nd: Día de Muertos (Day of the Dead)
November 20th: Día de la Revolución (Mexican Revolution Day)
December 12th: Día de la Virgen de Guadalupe (Day of the Virgin of Guadalupe)
December 16th-25th: Navidad y las Posadas (The Christmas Season)
December 31st: Año Nuevo (New Years’ Eve)
Given the predominance of the Catholic faith in the country, many celebrations are religious in nature, with large-scale festivities taking place around Christmas, Easter, and other occasions in the Christian calendar. However, Mexico also has many festivities which are unique to the country, including Día de Muertos, as well as civic and statutory holidays.
The History of Mexico.
First populated more than 13,000 years ago, central and southern Mexico (termed Mesoamerica) saw the rise and fall of complex indigenous civilizations. Mexico would later develop into a unique multicultural society. Mesoamerican civilizations developed glyphic writing systems, recording the political history of conquests and rulers.
Ancient Mexico can be said to have produced five major civilizations: the Olmec, Maya, Teotihuacan, Toltec, and Aztec. Unlike other indigenous Mexican societies, these civilizations (with the exception of the politically fragmented Maya) extended their political and cultural reach across Mexico and beyond.
The Olmec 1500–900 BC
The Olmec first appeared along the Atlantic coast (in what is now the state of Tabasco) in the period 1500–900 BC. The Olmecs were the first Mesoamerican culture to produce an identifiable artistic and cultural style, and may also have been the society that invented writing in Mesoamerica. By the Middle Preclassic Period (900–300 BC), Olmec artistic styles had been adopted as far away as the Valley of Mexico and Costa Rica.
The Maya 2000 BC–1697 AD
Maya cultural characteristics, such as the rise of the ahau, or king, can be traced from 300 BC onward. During the centuries preceding the classical period, Maya kingdoms sprang up in an area stretching from the Pacific coasts of southern Mexico and Guatemala to the northern Yucatán Peninsula. The egalitarian Maya society of pre-royal centuries gradually gave way to a society controlled by a wealthy elite that began building large ceremonial temples and complexes.
The earliest known long-count date, 199 AD, heralds the classic period, during which the Maya kingdoms supported a population numbering in the millions. Tikal, the largest of the kingdoms, alone had 500,000 inhabitants, though the average population of a kingdom was much smaller—somewhere under 50,000 people. The Maya speak a diverse family of languages known as Mayan.
The Teotihuacan 200 BC–650 AD
Teotihuacan is an enormous archaeological site in the Basin of Mexico, containing some of the largest pyramidal structures built in the pre-Columbian Americas. Apart from the pyramidal structures, Teotihuacan is also known for its large residential complexes, the Avenue of the Dead, and numerous colorful, well-preserved murals. Additionally, Teotihuacan produced a thin orange pottery style that spread through Mesoamerica.
The city is thought to have been established around 100 BCE and continued to be built until about 250 CE. The city may have lasted until sometime between the 7th and 8th centuries CE. At its zenith, perhaps in the first half of the 1st millennium CE, Teotihuacan was the largest city in the pre-Columbian Americas. At this time it may have had more than 200,000 inhabitants, placing it among the largest cities in the world during that period. Teotihuacan was even home to multi-floor apartment compounds built to accommodate this large population.
The Toltec 950–1150 AD
The Toltecs were Mesoamerican people that dominated a state centered in Tula, Hidalgo, in the early post-classic period of Mesoamerican chronology (ca 800–1000 CE). The later Aztec culture saw the Toltecs as their intellectual and cultural predecessors and described Toltec culture emanating from Tollan (Nahuatl for Tula) as the epitome of civilization; indeed, in the Nahuatl language, the word “Toltec” came to take on the meaning “artisan”.
The Aztec Empire 1428–1521 AD
The Nahua people began to enter central Mexico in the 6th century AD. By the 12th century, they had established their center at Azcapotzalco, the city of the Tepanecs. The Mexica people arrived in the Valley of Mexico in 1248 AD and began to establish their empire. What the Aztecs initially lacked in political power, they made up for with ambition and military skill. In 1325, they established the biggest city in the world at that time, Tenochtitlan.
Mēxihco is the Nahuatl term for the heartland of the Aztec Empire, namely the Valley of Mexico and surrounding territories, with its people being known as the Mexica. Three city-states ruled that area in and around the Valley of Mexico from 1428 until the combined forces of the Spanish conquistadores and their native allies who ruled under Hernán Cortés defeated them in 1521.
The Colonial Era 1521–1821 AD
In the colonial era (1521-1821) Mexico was called New Spain. The ‘Spanish conquest of Mexico’ denotes the conquest of the central region of Mesoamerica where the Aztec Empire was based. The fall of the Aztec capital of Tenochtitlan in 1521 was a decisive event, but the conquest of other regions of Mexico, such as Yucatán, extended long after the Spaniards consolidated control of central Mexico.
Smallpox (Variola major and Variola minor) began to spread in Mesoamerica immediately after the arrival of Europeans. The indigenous peoples, who had no immunity to it, eventually died in the millions. A third of all the natives of the Valley of Mexico succumbed to it within six months of the Spaniards’ arrival.
The Spanish conquest of Yucatán was a much longer campaign, from 1551 to 1697, against the Maya peoples of the Maya civilization in the Yucatán Peninsula of present-day Mexico and northern Central America.
War of Independence 1810–1821
In 1810, insurgent conspirators had plotted a rebellion against the royal government, which was again firmly in the hands of Peninsular Spaniards. When the plot was uncovered, Father Hidalgo summoned his parishioners of Dolores, exhorting them to action. This event of 16 September 1810 is now called the “Cry of Dolores”, now celebrated as Independence Day.
On September 27, 1821, Iturbide and the last viceroy, Juan O’Donojú signed the Treaty of Córdoba whereby Spain granted the demands. O’Donojú had been operating under instructions that had been issued months before the latest turn of events. Spain refused to formally recognize Mexico’s independence and the situation became even more complicated by O’Donojú’s death in October 1821.
First Mexican Empire 1821–1823
When Mexico achieved its independence, the southern portion of New Spain became independent as well as a result of the Treaty of Cordoba, so Central America, present-day Costa Rica, El Salvador, Guatemala, Honduras, Nicaragua, and part of Chiapas were incorporated into the Mexican Empire.
Although Mexico now had its own government, there was no revolutionary change either socially or economically. The formal, legal racial distinctions were abolished, but power remained in the hands of white elites. Monarchy was the form of government chosen and the political power of the royal government was transferred to the military. The Roman Catholic Church was the other pillar of institutional rule.
The Monarchy would spiral out of control until Colonel Antonio López de Santa Anna raised a rebellion that led to the emperor’s abdication on 19 March 1823.
The Age of Santa Anna 1823–1862
In much of Spanish America soon after its independence, military strongmen or caudillos dominated politics, and this period is often called “The Age of Caudillismo”. In Mexico, from the late 1820s to the mid-1850s the period is often called the “Age of Santa Anna”, named for the general turned politician, Antonio López de Santa Anna. The Liberals (federalists) asked Santa Anna to overthrow conservative President Anastasio Bustamante. After he did, he declared General Manuel Gómez Pedraza (who won the election of 1828) president. Elections were held thereafter, and Santa Anna took office in 1832. He served as president 11 times.
French intervention and Second Mexican Empire 1862–1867
In 1862, the country was invaded by France which sought to collect debts that the Juárez government had defaulted on, but the larger purpose was to install a ruler under French control. They chose a member of the Habsburg dynasty, which had ruled Spain and its overseas possessions until 1700. Archduke Ferdinand Maximilian of Austria was installed as Emperor Maximilian I of Mexico, with support from the Catholic Church, conservative elements of the upper class, and some indigenous communities.
Restored Republic 1867–1910
The rule of Porfirio Díaz (1876–1911) was dedicated to the rule by law, suppression of violence, and modernization of all aspects of the society and economy. This period of relative prosperity is known as the Porfiriato. Mexico moved from being a target of ridicule to international pride. As traditional ways were under challenge, urban Mexicans debated national identity, the rejection of indigenous cultures, the new passion for French culture once the French were ousted from Mexico, and the challenge of creating a modern nation by means of industrialization and scientific modernization.
Revolution of 1910–1917
The Mexican Revolution is a broad term to describe political and social changes in the early 20th century. Most scholars consider it to span the years 1910–1917, from the fraudulent election of Porfirio Díaz in 1910 until the December 1920 election of northern general Alvaro Obregón. Foreign powers had important economic and strategic interests in the outcome of power struggles in Mexico, with the United States involvement in the Mexican Revolution playing an especially significant role
The United Mexican States 1917–Present
The official name of the country has changed as the form of government has changed. In the Mexican Constitutional Signing of 1917, it declared the official name of the country as Estados Unidos Mexicanos or the variant Estados-Unidos Mexicanos, all of which have been translated as “United Mexican States”.
FAQ
Do I need a visa to travel to Mexico? To enter Mexico it is necessary that you present your valid passport, as well as the Tourist Immigration Form, this form is obtained online. Know the details and countries that require a visa here.
How long can you stay in Mexico as a tourist? As a tourist, you can stay in Mexico for a maximum of 180 days.
Is any type of vaccine required to travel to Mexico? At the moment, there is no mandatory vaccination requirement to enter Mexico, however, it is advisable to be up to date with the international vaccination scheme that includes: vaccines against Hepatitis A, tetanus, diphtheria, measles, rubella, and mumps, as well as the COVID-19 vaccine.
Is a negative COVID-19 test required to enter Mexico? At this time, a negative COVID-19 test is not required to enter Mexico. Check the measures you must take before traveling at: https://coronavirus.gob.mx/
Do I need an electrical adapter? Electricity in Mexico is 110 volts, the same as in the US. Visitors from countries that use 220 volts will need voltage adaptors.
Is the water safe to drink? Tap water is generally not safe to drink in Mexico. Bottled water is readily available at tourist sites, hotels, and restaurants. Don’t forget to use bottled water when brushing your teeth as well! Ice is not always made with boiled/ bottled water. Order your beverages without ice (“sin hielo”).
The U.S. Food and Drug Administration (FDA) designed the Nutrition Facts label based on updated scientific information, new nutrition research, and input from the public. The design and information provide valuable data in a clear format to make informed food choices that contribute to lifelong healthy eating habits.
Here at Taste the World Cookbook, we provide a complete nutrition facts label at the bottom of each recipe we publish in our cookbook. We calculate the serving size by two different methods.
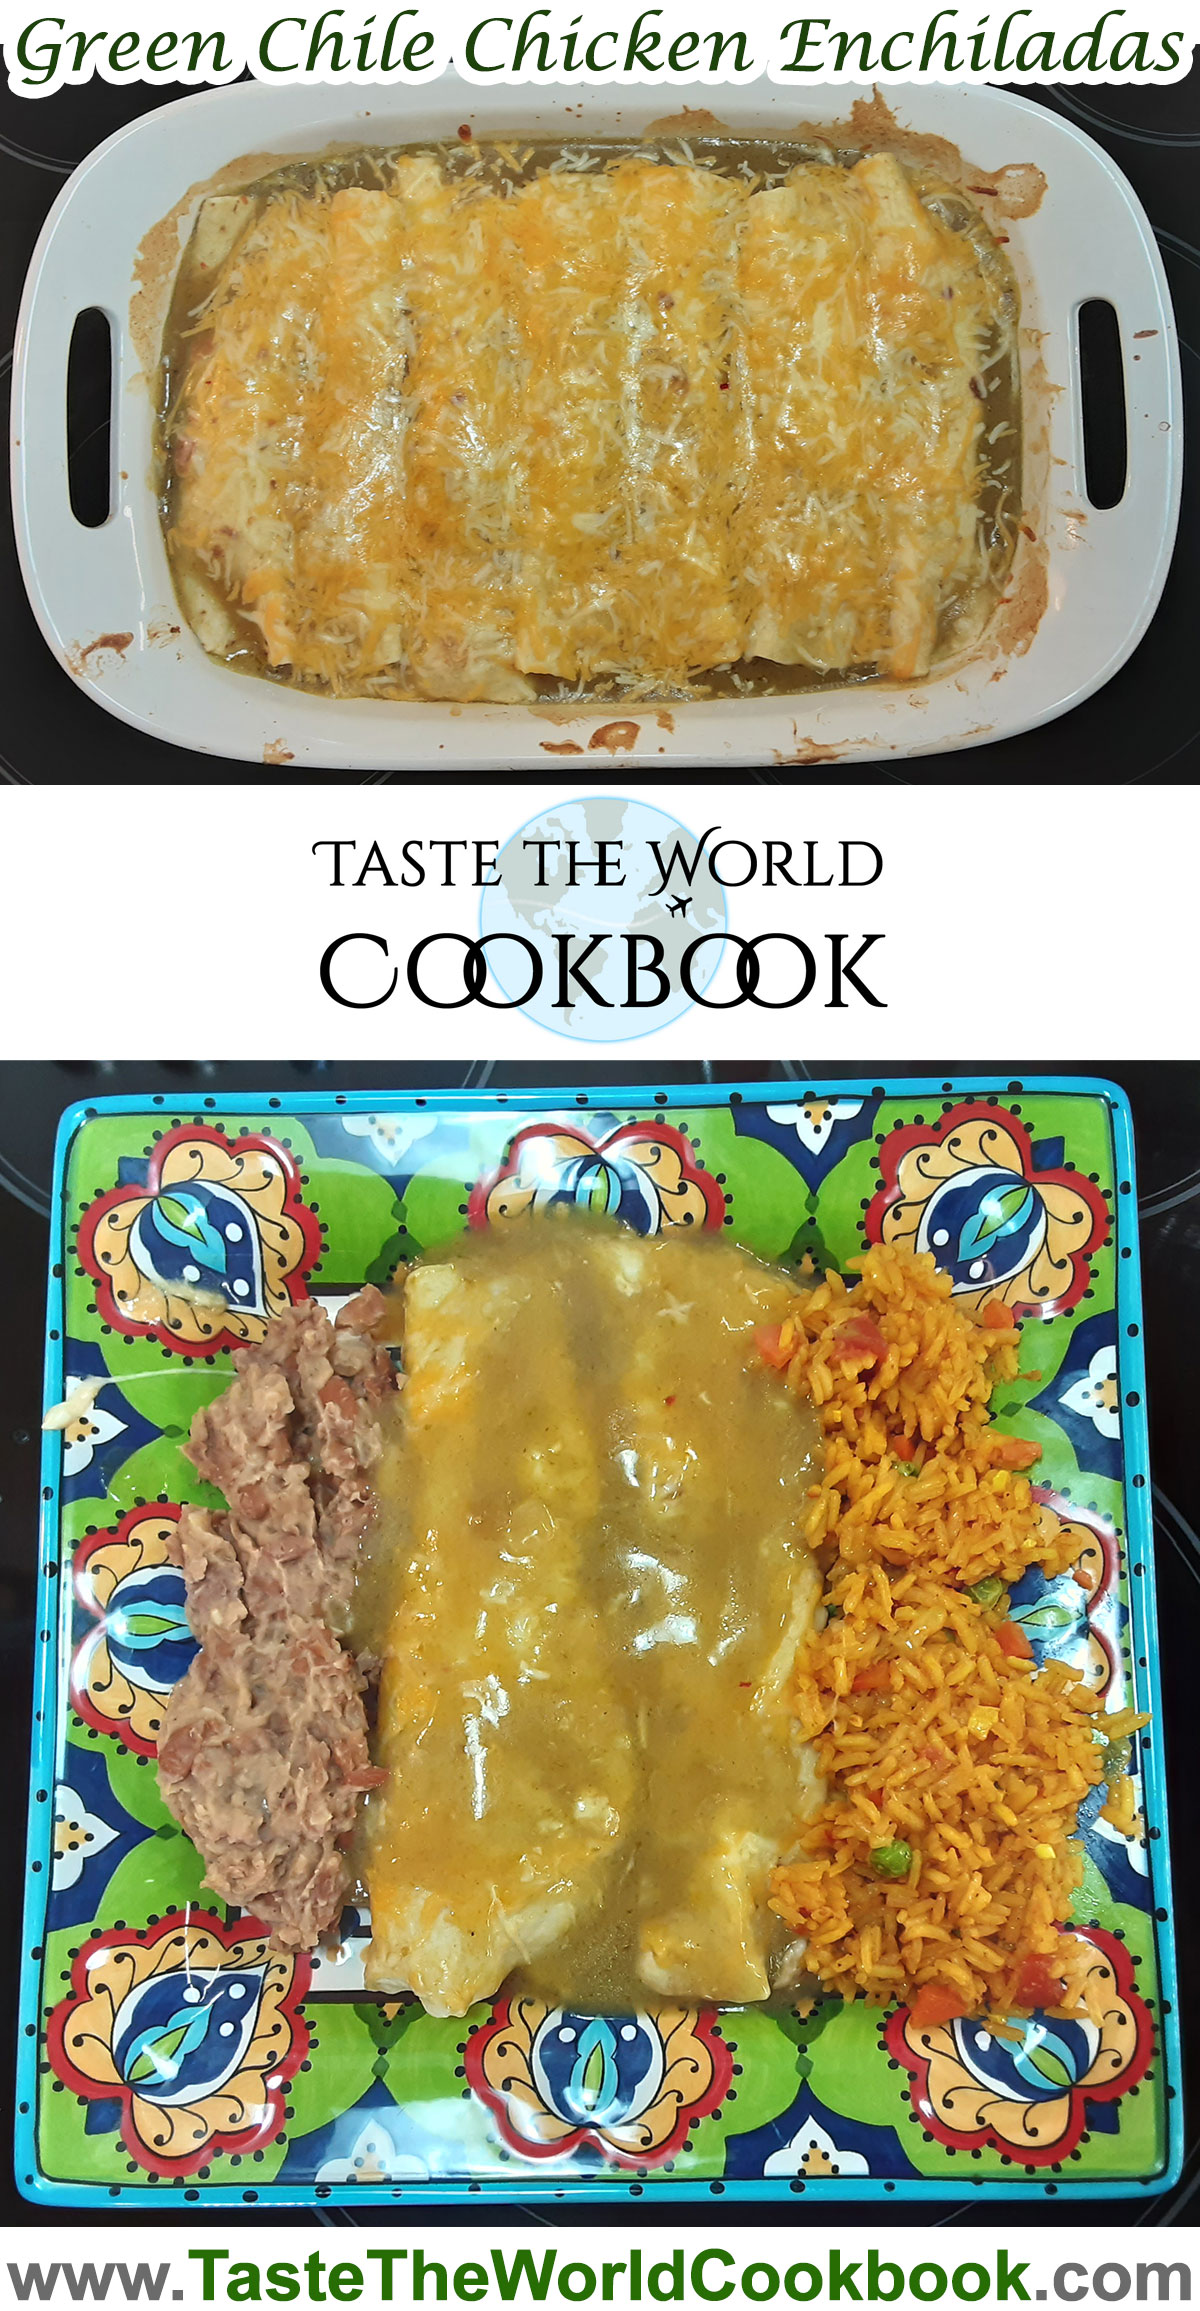
If the recipe is making a specific number of items, the serving size will be one of the total made. For example, our Green Chile Chicken Enchilada recipe makes 8 enchiladas so the serving size is one enchilada.
Below are the 7 steps to reading the new FDA Nutrition Facts Label
How to Read the Nutrition Facts Label
Start with the Serving Size
Look here for both the serving size (the amount people typically eat at one time) and the number of servings in the package.
Compare your portion size (the amount you actually eat) to the serving size listed on the panel. The Nutrition Facts applies to the serving size, so if the serving size is one cup and you eat two cups, you are getting twice the calories, fat and other nutrients than what is listed on the label.
Compare the Total Calories to Your Individual Needs
Find out how many calories are in a single serving and compare it to your total calorie allowance for the day. For general nutrition advice, 2,000 calories per day are used, but your individual needs may be higher or lower depending on a number of factors, including your age, sex, height, weight, and activity level.
Let the Percent Daily Values Be a Guide
Use the percent Daily Values (DV) to help evaluate how a particular food fits into your daily meal plan. Percent DV are for the entire day, not just one meal or snack. Daily Values are average levels of nutrients based on a person who eats 2,000 calories a day. A food item with a 5% DV of fat provides 5% of the total fat that a person who needs 2,000 calories a day should eat.
You may need more or less than 2,000 calories per day. This means that you may need more or less than 100% DV that is listed on the package for some nutrients.
Low is 5% or less. Aim low in saturated fat, trans fat, cholesterol, and sodium.
High is 20% or more. Aim high in vitamins, minerals, and dietary fiber.
Check Out the Nutrition Terms
Low calorie: 40 calories or less per serving.
Low cholesterol: 20 milligrams or less and 2 grams or less of saturated fat per serving.
Reduced: At least 25% less of the specified nutrient or calories than the usual product.
Good source of: Provides at least 10 to 19% of the Daily Value of a particular vitamin or nutrient per serving.
Excellent source of: Provides at least 20% or more of the Daily Value of a particular vitamin or nutrient per serving.
Calorie-free: Less than five calories per serving.
Fat-free/sugar-free: Less than ½ gram of fat or sugar per serving.
Low sodium: 140 milligrams or less of sodium per serving.
High in: Provides 20% or more of the Daily Value of a specified nutrient per serving.
Choose Low in Saturated Fat, Added Sugars and Sodium
Eating less saturated fat, added sugars and sodium may help reduce your risk for chronic disease.
Saturated fat and trans fat are linked to an increased risk of heart disease.
Eating too much-added sugars makes it difficult to meet nutrient needs within your calorie requirement.
High levels of sodium can add up to high blood pressure.
Remember to aim for a low percentage DV of these.
Get Enough Vitamins, Minerals, and Dietary Fiber
Choose more foods containing dietary fiber, potassium, vitamin D, calcium, and iron to maintain good health and help reduce your risk of certain health problems such as osteoporosis and anemia.
Choose more fruits and vegetables to get more of these nutrients.
Remember to aim high for the percentage DV of these nutrients in other foods.
Consider the Additional Nutrients
You know about calories, but it also is important to know about the additional nutrients on the Nutrition Facts label.
* Protein: A percentage Daily Value for protein is not required on the label. Eat moderate portions of lean meat, poultry, fish, eggs, low-fat milk, yogurt, and cheese, plus beans and peas, nuts, seeds, and soy products.
* Carbohydrates: There are three types of carbohydrates: sugars, starches, and fiber. Eat whole-grain bread, cereals, rice, and pasta plus fruits and vegetables.
* Sugars: Simple carbohydrates, or sugars, occur naturally in foods such as fruit (fructose) and milk (lactose) or come from refined sources such as table sugar (sucrose) or corn syrup. Added sugars are included on the updated Nutrition Facts label. The 2020-2025 Dietary Guidelines for Americans recommends that foods and beverages with added sugars are avoided by children under the age of 2 and individuals 2 years and older consume no more than 10% of daily calories from added sugars.
Foods with more than one ingredient must have an ingredient list on the label. Ingredients are listed in descending order by weight. Those in the largest amounts are listed first. This information is particularly helpful to individuals with food sensitivities or allergies, those who need to avoid certain ingredients due to religious reasons, or people who prefer a vegetarian eating style.
Learn more about the Nutrition Facts Label by visiting the FDA website.
The American Perimeter Trail Conference (APTC) is an effort to create a 12,000-mile continuous loop that circumnavigates the continental U.S. One might think that you can use google maps to plot a route around the country but to know if that route is feasible, someone has to put boots on the ground and walk it.
That is where Rue McKenrick comes in, he is doing advanced scouting and finding out what works and what doesn’t work. Although the proposed route uses existing trails such as the Pacific Crest Trail (PCT), the Appalachian Trail (AT), and parts of the North Country Trail, many parts of the proposed route are undeveloped as a trail. Parts of the proposed route currently rely on private roads and unmarked footpaths.
Enter the APTC, a grassroots 501c(3) non-profit organization dedicated to conservation and community. It’s a community of motivated people who would like to make a formal trial that circumnavigates the continental United States. It will take decades of hard work and political action to bring the dream of the American Permiter Trail to life.
The project’s goals are:
Create a protected corridor available for recreational use roughly tracing the contiguous United States.
Create a more connected America, bring outdoor recreation within reach of more communities.
Connect people to public lands.
The American Perimeter Trail seeks to connect the land, resources, people, and communities. It strives to encourage conservation efforts through recreation, allowing all people and generations to experience the diversity of the contiguous United States.
Rue McKenrick ~ Executive Director
The APTC Board of Directors
Rue McKenrick is the Executive Director
Rue McKenrick is the Executive Director and a professional backpacker, triple crowner, and founder of the APT. He is currently out on the first scout and official hike of the APT.
Leilah Grace is the Vice President
Leilah Grace is the Vice President and she manages all of the social media, emails, fundraising, public relations, scheduling, and logistics.
Suzanne is the Secretary
Suzanne is the Secretary and the lead for the state of Connecticut Chapter of the APT. She is also a hiker and avid explorer.
Yvette is the Treasurer
Yvette is the Treasurer and part of the Search & Rescue team in New Mexico. She is also a hiker and backpacker.
How to Become an APTC Member
Membership to the American Perimeter Trail Conference (APTC) includes full access to the members portal, members-only events, early registration to events, and discounted registration to APTC events.
All members will have a 1 time, 10% discount in the store, and early access to sales and other merchandise.
Membership includes a members-only video address from Rue McKenrick every month, and a downloadable, printable certificate with the APTC logo and your name. All APTC members that join in the first 6 months are founding members of the organization and will be noted as such in the records and publications.
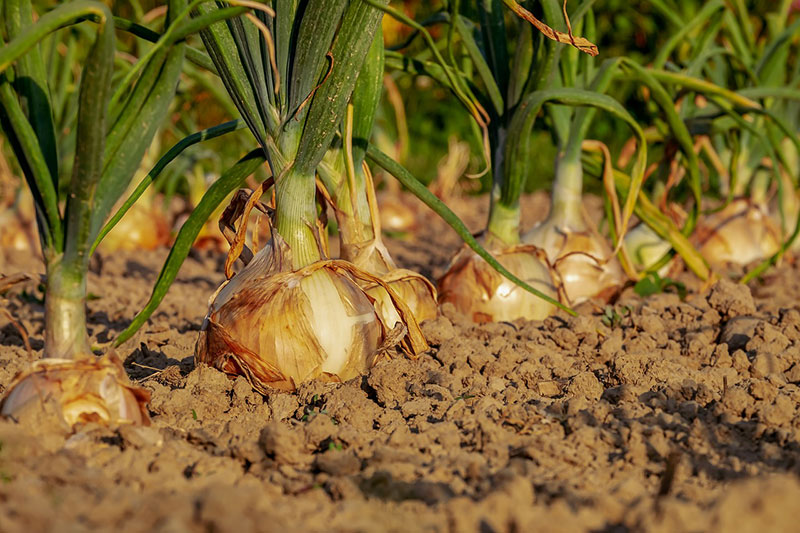
Did you know Onions are one of the easiest vegetables to Regrow from scraps? You can regrow most onion varieties, including grocery store-bought onions, in your garden or inside your house.
Onions thrive in a variety of temperature ranges but they produce the best at 55 to 75 F. (12-23 C.) and most varieties are hardy to 20 F. (-6 C.). Onions also need 12 and 15 hours of light to produce large bulbs.
Onions cost about a dollar apiece in the grocery store and I grew 10 new onions from the bottoms of 4 onions. I spent $4.00 on four onions and four months later I saved $10.00 by picking and using the ten onions I grew.
The onions can only be regrown about 3 or 4 times before the plant wears out and you will need to start fresh again. I guess the old idiom is true, nothing lasts forever.
10 Steps to Regrow an Onion
Time needed: 120 days
How to Regrow an Onion
Determine Time and Location to Plant
If you’re growing the onions outside, start your cuttings at the beginning of your growing season in the climate zone you live in. For onions grown indoors, any time of the year is fine. Find a location that will allow the maximum amount of sunlight during the day to grow your onions.
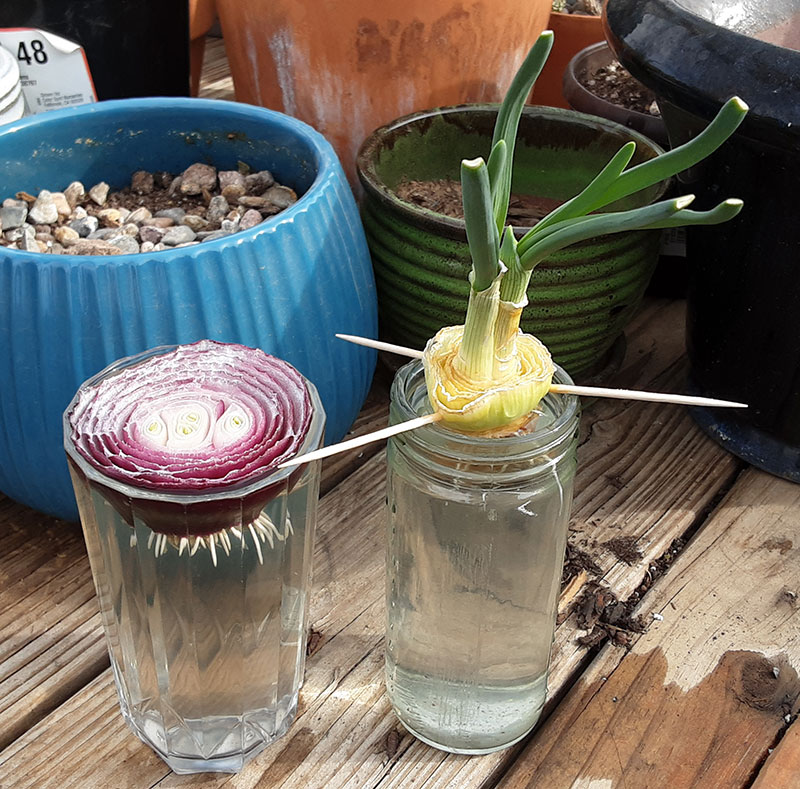
Prepare the Onions
Cut the onion about 1 inch above the root and let set on the counter for 24 hours to dry. Put the onion on top of a jar filled with water. By day 4 the roots should begin to grow and they will begin to grow green sprouts. Most onions will grow 2 to 3 separate sprouts that must be separated before planting. Allow sprouts to grow 2 to 3 inches before separation.
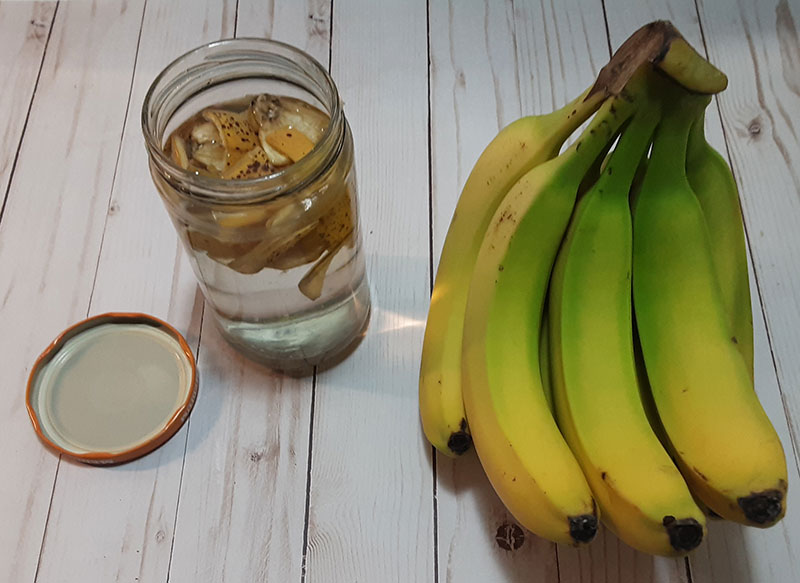
Make Nitrogen Fertilizer
Add chopped banana peels to a jar and fill to the top with water, enough to cover the banana peels. Close the jar and allow it to rest for a few days. Remove the peels and water plants with the banana peel fertilizer. You will need this recipe for the next step.
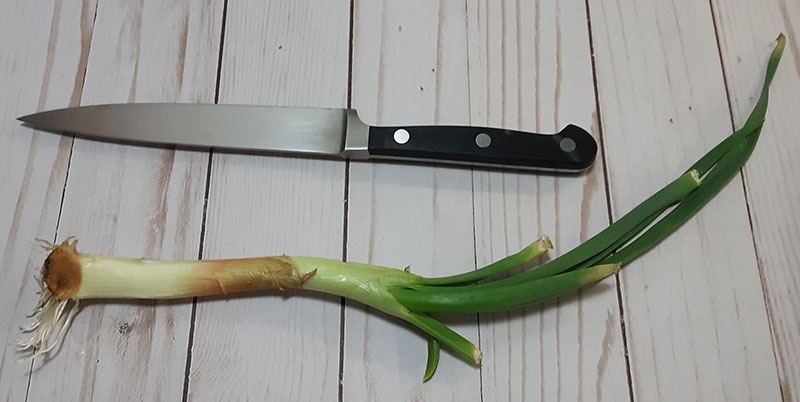
Separate the Sprouts
Peel back the outside layers of the onion and remove them from the root ball. Using a sharp knife separate the root ball evenly between the sprouts.
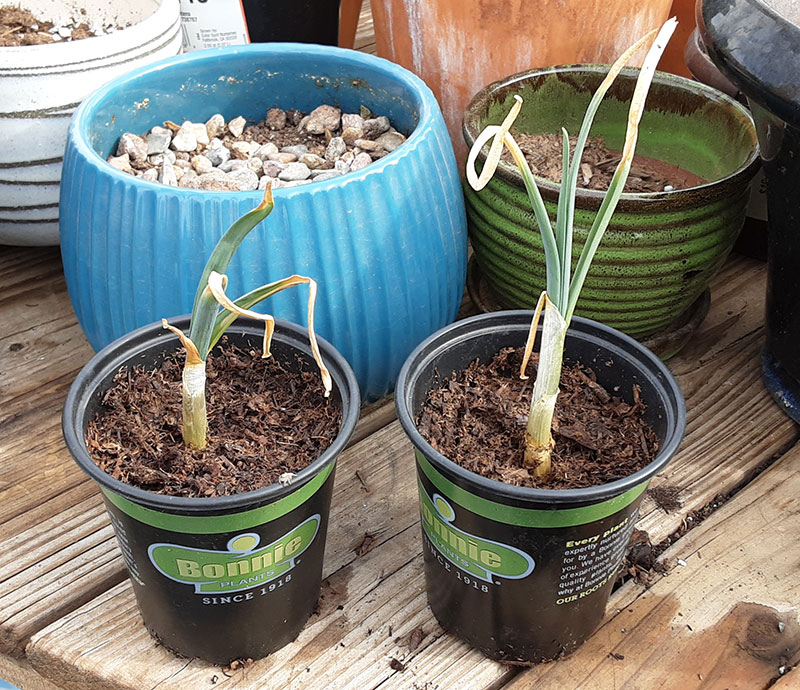
Plant the Sprouts
You can skip this step and go directly to step 6 if you’re going to plant directly into the garden. Otherwise, plant the sprouts in starter cups filled with fresh potting soil about 1–2 in (2.5–5.1 cm) deep. Water the onion cutting with a nitrogen fertilizer mix immediately after planting and give the sprouts as much natural sunlight as possible. Supplement any lack of sunlight with light from a grow-lamp.
Transplant to the Garden
If you are bringing the sprouts directly to the garden to plant, onions should be planted at a depth of 1 to 1 1/2 inches in rows 12 to 15 inches apart. Water the onion cutting with a nitrogen fertilizer mix immediately after planting.
Caring for Your Onions
Water your onion once a week and fertilize your onions once every 3 weeks. Fertilizing your onion plant regularly helps it grow large, healthy bulbs. Spray the onion plant at least twice a month. Try and provide a full 12 hours of light if possible, onions thrive on light. Supplement with grow-lamps if necessary.
Harvest Your Onions
Harvest your onion when it forms flowers. When your onion starts to grow flowers, it’s ready to harvest. Loosen the soil around the onion with your shovel and pull the onion by the base of its green foliage to pull it out of the ground. On average, it takes onions grown from cuttings about 90-120 days to grow a new bulb.
Cure Your Onions
A properly cured onion stores the longest. Curing means the onion has dried thoroughly from the neck (where the stem meets the bulb) to the bulb surface. The onion skin becomes dry and papery. When tops are completely dry, they should pull right off the bulb. After curing your onions outdoors for a few days, move them indoors to a spot where they’re protected from weather and have good airflow. Lay them on screens to finish drying. When bulbs are completely dry, clip roots and either clip or braid tops.
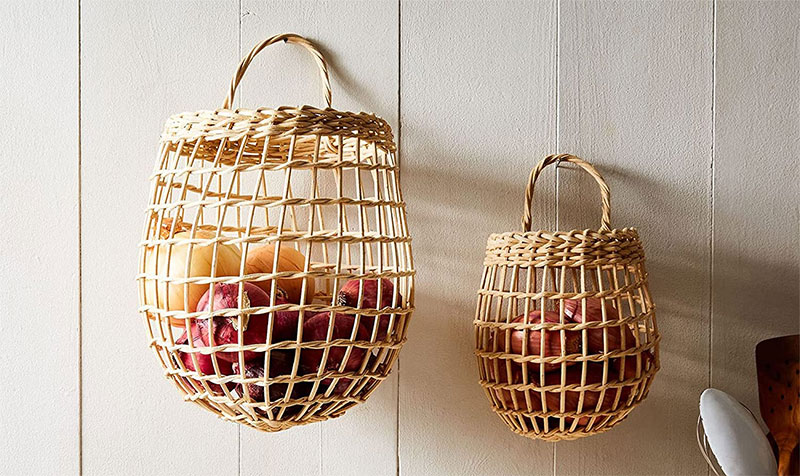
How to Store Cured Onions
Place onions in a cool, dry area with good airflow. Tuck bulbs into a mesh bag to increase air exposure. In a cool spot (45 F), onions store from three to 10 months. Sweeter onions usually don’t store as well, so plan to eat those first.
Because I live in Phoenix, my outdoor onion growing season is from November to March and I plant onions in my garden. The rest of the year I plant inside at a west-facing window. I supplement the 5 hours of sunlight the onions get with 6 hours of light from a grow lamp.
I use a planter that is 12″ wide by 36″ long and 10″ deep allowing me to grow 12 onions in the planter at the same time.
Travel has been unpredictable since the pandemic began. To help plan this year’s travel adventures, here are our Top 10 Travel Tips for 2022.
As the coronavirus continues to spread many countries have chosen to resume tourism. If you are among the ones that choose to travel, you should be aware that travel requirements vary between countries. The rules change even from state to state and city to city so try to stay abreast of the current requirements to stay out of trouble.
Plan For the Worst and Hope for the Best
When traveling in these conditions one should remember that the situation is fluid and plans should be made for emergencies. You don’t have to look far to see examples of this issue. The Norwegian Escape stopped sailing 4 days before its scheduled dock but that didn’t mean passengers got to leave the ship immediately. The Crystal Symphony and Crystal Serenity cruise liners diverted to the Bahamas with all passengers aboard to avoid being impounded for unpaid fuel bills.
Top 10 Travel Tips for 2022
How To Prepare for Travel in 2022
Set Your Budget
Many will tell you to choose your destination before setting a budget. The only people who do that are people with enough money they don’t consider things like a budget. Determine how much money you can spend on your trip before spending money on it. Having an emergency fund puts a buffer between you and the obstacles travel can throw at you.
Choose a Destination Open to Your Country.
Now that you know how much money you can spend on your trip you can make a top 10 list of destinations that will be within your fiscal limits. Determine how much time you have and narrow down which destinations you can actually visit within that time and pick one.
Use a Travel Agent
In most cases, a Travel Agent can plan your vacation cheaper, cover more bases, and avoid more pitfalls than most individuals can. They buy in bulk and have preexisting deals with airlines, hotels, cruise lines, car rentals, and almost anything you need for travel and they have dealt with almost every issue.
Buy Travel Insurance.
Insurance is one of those things that be evaluated to determine if you need it. If you’re driving from Phoenix to Denver, then your existing car and health insurance are good, no extras are needed. However, if you are taking a plane, train, automobile, and boat to a remote part of the Amazon, you will need Travel Insurance. Insurance prices can vary widely, with most packages costing between 5 and 12 percent of the total trip.
Stay Updated on COVID-19 Protocols, Travel Guidelines, and Restrictions.
Check the CDC website for the latest COVID-19 protocols, travel guidelines, and restrictions. Different countries, states, and cities have different restrictions and requirements.
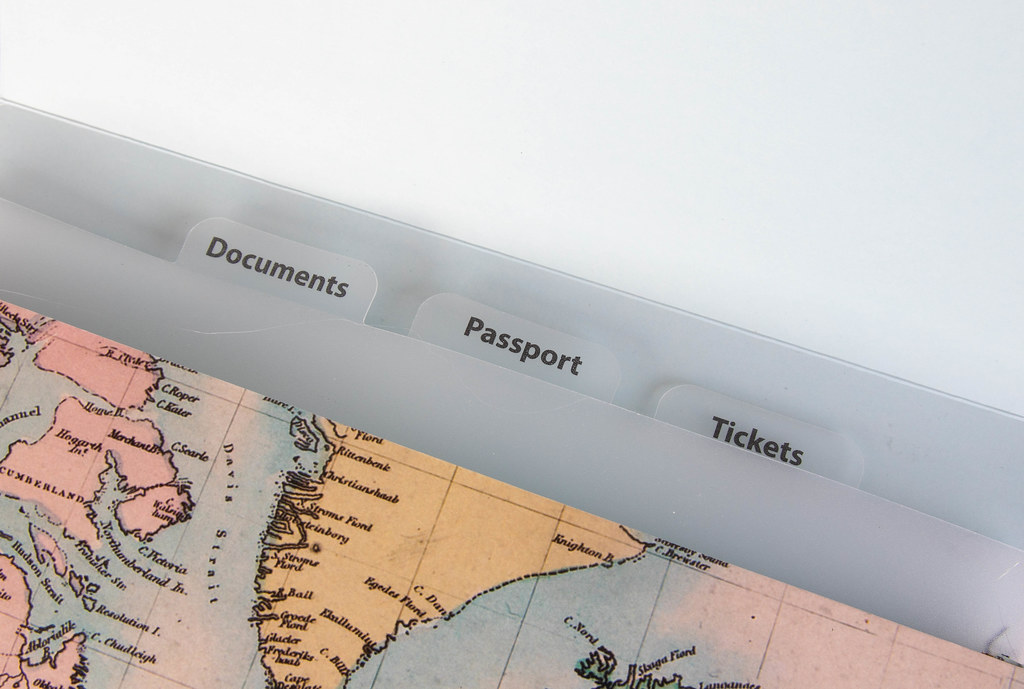
Print Several Copies of Your Travel Documents and Passport Photo Page.
You should have one original that you keep with you, one copy that you keep with you but separate from the originals, and one copy that you can leave with a trusted individual. The copies are not legally binding but they will go a long way to recovering the necessary replacement documents.
Register With the Consulate.
Register your travel plans with your country’s Consulate just in case something goes wrong. They will have your information and a rough idea of where you are at if they need to come to your aid.
Call Your Bank
Alert your bank that you’ll be traveling and using your debit and credit cards. Ask about transaction fees and your bank’s emergency phone number in the US (no 800 numbers, direct numbers only) to call if you have a problem.
Arrange for Your House or Apartments Security While You Are Gone.
An unattended house draws criminals so if you have someone, ask them to pick up the mail and newspapers. If not ask the post office to hold your mail and cancel your newspaper delivery until you return.
Review Baggage Requirements and Pack The Essentials
The Transportation Security Administration’s website has an up-to-date list of what you can bring on the plane with you and what you must check. Pack for the weather you will be going to, and take only what you will need. Think about what you might pick up while on your travels, you will need a way to bring it back.
These tips to help you plan your next big adventure are just the beginning. Each step has many small sub-steps to check off. The more research you do while planning your next vacation will make it a more enjoyable and fun experience. Plan well and travel safe my friends.
I have worked for years on this Baked Macaroni and Cheese with Tomatoes recipe. It’s the trifecta of cheese blends; Gruyere and sharp white cheddar blended, then topped with parmesan cheese. The Cavatappi pasta and tomatoes give the dish a visual pop.
Growing up the only thing I knew about Cheesy Noodles came out of a box or was served in the lunch line at school. Neither of which was ever very appealing to me. However, when I was in my early 20s I lived in Fulda, Germany, and discovered well-made baked macaroni and cheese.
I chose the Cavatappi pasta for its size and surface area. When compared to Elbow macaroni the rigged outside gives more area for the cheese to cover and, like macaroni it has a hollow center to fill with cheese. Plus it gives a great look in the pan and on the plate.
I have tried several ways of bringing tomatoes into this recipe without much success. The tomato juice turns the sauce pink and the rich creamy flavors of the cheese mix overwhelm the flavors of the tomato. Aside from the visual antics, the tomato did nothing for the recipe.
Enter Ro*Tel diced tomatoes & green chilies, it brings a whole new dynamic to the dish. I cooked the pasta al dente, undercooked, then I drained the pasta and cooked it for another 5 minutes in the Ro*Tel. The liquid from the can was absorbed into the pasta and gave it a popping flavor of tomato, jalapeno, cilantro, and lime.
Over the years I have tried different combinations of cheese from Gruyere, cheddar, mozzarella, provolone, feta, gouda, and even American cheese. A few common spices are pepper, onion, garlic, and pepper, and I have even seen mustard used.
I never found a use for the spices in this recipe as the cheese sauce almost always covers the other flavors. The only spice used in this recipe is pepper and Ro*Tel diced tomatoes & green chilies.
How to Store Mac & Cheese
To store your Mac & Cheese treat, allow it to cool to room temperature and store in an air-tight container then refrigerate for 3 to 5 days in the refrigerator.
To freeze mac & cheese, place the cooled mac and cheese in a freezer-safe container, stasher bag, or ziplock bag and seal. Label the top of the freezer-safe container and lay them on a cookie tray and place it in the freezer. After it is frozen you can remove the tray and the mac and cheese will stack nicely.
History of RO*TEL
Carl Roettele and his wife open a small canning plant in Elsa, Texas, processing over 25K cases of vegetables a year. The product they’re proudest of is their tomatoes and green chilies. Worried people couldn’t spell or pronounce “Roettele,” Carl used the name RO*TEL. Soon, his zesty tomatoes and chilies graced the tables of public figures and politicians throughout Texas.
Originally, RO*TEL® Tomatoes and Green Chilies were only shipped as far away as San Antonio, Houston, and Dallas. They were the biggest cities closest to the town of Elsa, which is at the bottom tip of the state.
Cans of ROTEL had made their way to Oklahoma and Arkansas by the mid-1950s. The news about ROTEL Tomatoes and Chilies was slowly starting to spread its way around the USA.
The wife of a popular politician in Washington bragged to a national magazine about her chili recipe. She revealed the secret ingredient that made her chili better than anyone else’s. You guessed it: RO*TEL.
History of Macaroni
The International Pasta Organisation traces the word ‘macaroni’ to the Greeks, who established the colony of Neopolis (modern-day Naples) between 2000 and 1000BC and appropriated a local dish made from barley-flour pasta and water called Macaria, possibly named after a Greek goddess.
The Metropolitan City of Naples, Italy
The Metropolitan City of Naples province occupies a total geographical area of 1,171 square kilometers, including the city of Naples itself, the provincial and regional capital of Campania.
The City of Naples, Italy
Within the province, there are 92 provincial towns containing a total population of around three million inhabitants.
A Brief History of Naples
Dating back some 4,000 years, Naples is one of the oldest cities in the world. Greek settlers established an early colony here about 2,000 BC, and by the 6th century BC they had erected the ancient city of Neapolis. The distinct Neapolitan culture was born then and survived even after the Romans conquered the area.
Tourism in Naples
With piazzas around every corner, there’s always outdoor seating where you can enjoy an Aperol Spritz (or several) and people watch for hours. Naples is located on the water and walking along the pedestrian-friendly Lungomare, the two-mile seafront promenade teeming with restaurants and attractions, is an activity that many locals enjoy during both balmy summer evenings and crisp winter mornings. Whether it’s high-end shopping, street stalls, or budget fashion you seek, Via Chiaia has something for everyone. There’s even a funicular that takes you up to the top of the city for panoramic views.
Italian Cuisine
Italian cuisine consists of the ingredients, recipes, and cooking techniques developed across the Italian Peninsula since antiquity. Significant changes occurred with the colonization of the Americas and the introduction of potatoes, tomatoes, capsicums, maize, and sugar beets to Europe. It is one of the best-known and most appreciated gastronomies worldwide.
– Featured Restaraunt –
Trattoria da Nennella Rampe S. Giovanni Maggiore, 1, 80134 Napoli NA, Italy Telephone: +39 081 552 9103
Osteria La Chitarra – Neapolitan Restaurant
Osteria La Chitarra is a place between past and present, a journey that tells the love for Neapolitan cuisine and its traditions. A place made of stories, warmth, friendship, and sharing. A taste experience in a setting made of smells, flavors, and aromas of the magnificent city of Naples.
How to Make This Baked Macaroni and Cheese with Tomatoes Recipe
To make this recipe you will need 2 medium stock pots, a small saucepan, and a 2-quart baking dish. If you would rather you can use 6 one-cup ramekins. The recipe will make 1½ quarts, however, if you use a 1½ quart baking dish it will probably boil over in the oven.
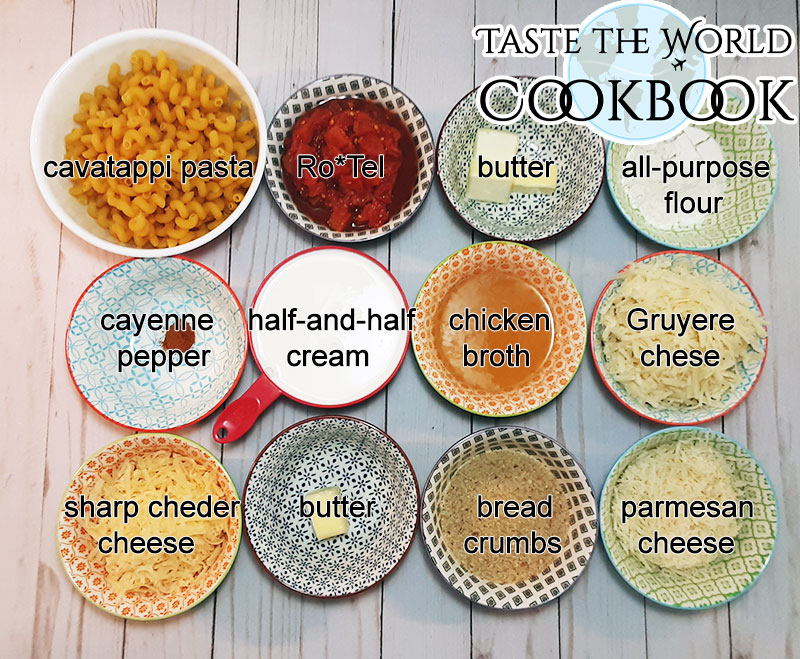
What You Need to Make Baked Macaroni and Cheese with Tomatoes
Get all of your ingredients ready and laid out before starting as this recipe goes fast. There is no time for grating cheese and measuring things out once you have started.
Ingredients for Baked Macaroni and Cheese with Tomatoes
How to Cook Baked Macaroni and Cheese with Tomatoes
Time needed: 1 hour and 15 minutes
Baking Directions for Macaroni and Cheese with Tomatoes
Preheat the Oven
Preheat the oven to 400 degrees.
Cook the Pasta Al Dente
Bring 4 quarts of water to a boil in a large Dutch oven over high heat. Stir in 1 tablespoon salt and macaroni and cook until just al dente, about 6 minutes.
Cook the Pasta in Ro*Tel
Drain the pasta and return to the pot. Pour diced tomatoes with their juices over pasta and stir to coat. Cook over medium-high heat, stirring occasionally until most of the liquid is absorbed, about 5 minutes. Set aside.
Make the Roux
Meanwhile, melt butter in a medium saucepan over medium heat until foaming, and then stir in the flour and cayenne. Cook it until it turns golden, about 1 minute.
Add the Cream
Slowly whisk in the half-and-half and the chicken broth until smooth. Bring to boil, reduce heat to medium, and simmer. Stir occasionally, until the mixture is slightly thickened, about 15 minutes.
Add the Cheese
Remove from the heat and whisk in the cheeses, salt, and pepper until the cheeses are melted. Pour the sauce over macaroni and stir to combine.
Make the Topping
In a small saucepan melt butter, add the bread crumbs, and stir until thoroughly coated. Remove from the heat and mix with parmesan cheese.
Fill the Baking Dish
Put the mixture into a 2-quart baking dish and sprinkle the bread crumbs on top of the mixture.
Bake the Dish
Place a rimmed baking sheet in the oven and set the baking dish with macaroni on top. Bake until the top begins to brown, 15 to 20 minutes.
Cool and Serve
Let the macaroni and cheese cool for 10 to 15 minutes before serving.
You need to be prepared when you start this recipe because about 10 or 15 minutes in you will have 3 pans going at the same time. Although it does require a little work the rewards are worth the effort.
This Baked Macaroni and Cheese with Tomatoes recipe is rich, decadent, and the ultimate comfort food. Made with a superior blend of Gruyere, Cheddar, and Cream, and topped with a toasted bread crumb and Parmesan cheese mix.
Bring 4 quarts of water to a boil in a large Dutch oven over high heat. Stir in 1 tablespoon salt and macaroni and cook until just al dente, about 6 minutes.
water, 1 tbsp salt, ½ pound cavatappi pasta
Drain the pasta and return to the pot. Pour diced tomatoes with their juices over pasta and stir to coat. Cook over medium-high heat, stirring occasionally until most of the liquid is absorbed, about 5 minutes. Set aside.
10 oz Ro*Tel diced tomatoes & green chilies
Mix the Cheese Sauce:
Meanwhile, melt butter in a medium saucepan over medium heat until foaming.
3 tbsp unsalted butter
Stir in the flour and cayenne and cook it until golden, about 1 minute.
¼ cup all-purpose flour, ¼ tsp cayenne pepper
Slowly whisk in the half-and-half and the chicken broth until smooth.
2 cups half-and-half cream, ½ cup chicken broth
Bring to boil, reduce heat to medium, and simmer. Stir occasionally, until the mixture is slightly thickened, about 15 minutes.
Remove from the heat and whisk in the cheeses, salt, and pepper until the cheeses are melted. Pour the sauce over macaroni and stir to combine.
2 cups Gruyere cheese, 1 cup sharp white cheddar cheese, 1 tsp salt, 1 tsp black pepper, 1 tbsp Italian Bruschetta Seasoning Mix
Mix the Topping:
In a small saucepan melt butter, add the bread crumbs, and stir until thoroughly coated.
1 tbsp unsalted butter, ½ cup bread crumbs
Remove from the heat and mix with parmesan cheese.
½ cup parmesan cheese
Assemble and Bake the Macaroni:
Put the mixture into a 1½ quart baking dish and sprinkle the bread crumbs on top of the mixture.
Place a rimmed baking sheet in the oven and set the baking dish with macaroni on top. Bake until the top begins to brown, 15 to 20 minutes.
Let the macaroni and cheese cool for 10 to 15 minutes before serving.
Whip up this flavorful Bruschetta Seasoning Mix with ease and speed, a kitchen essential that's ready in just minutes. Infuse the herby goodness into your beloved pasta dishes, sprinkle it on pizza, or add a flavorful twist to focaccia. With this versatile mix at your disposal, every meal can have that delightful Italian finish.
Other Recipes That Go Well With Baked Macaroni and Cheese with Tomatoes
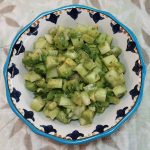
Avocado-Cucumber Salad
In this enticing dish, we bring together the creaminess of ripe avocados and the crunchiness of fresh cucumbers. We then infuse these textures with the tangy zest of lemon and a subtle hint of sweetness from brown sugar. Each ingredient harmoniously combines to create an Avocado-Cucumber Salad that's both refreshing and satisfying.
By Taste The World Cookbook – Copyright 2022 All rights reserved.
By Trattoria da Nennella – By https://www.facebook.com/osterialachitarra/
By it:Utente:…Lord_Zarcon – it:Immagine:Napoli_di_sera_di_alessandro_zarcone.jpg modified, CC BY-SA 3.0, https://commons.wikimedia.org/w/index.php?curid=1686610
By pietro scerrato, CC BY 3.0, https://commons.wikimedia.org/w/index.php?curid=54107994
By ParsonsPhotographyNL – Own work, CC BY-SA 4.0, https://commons.wikimedia.org/w/index.php?curid=86676222
By ho visto nina volare – Flickr: Napoli 2012, CC BY-SA 2.0, https://commons.wikimedia.org/w/index.php?curid=23782920
By This Photo was taken by Wolfgang Moroder.Feel free to use my photos, but please mention me as the author and send me a message.This image is not public domain. Please respect the copyright protection. It may only be used according to the rules mentioned here. This specifically excludes use in social media, if applicable terms of the licenses listed here not appropriate.Please do not upload an updated image here without consultation with the Author. The author would like to make corrections only at his own source. This ensures that the changes are preserved.Please if you think that any changes should be required, please inform the author.Otherwise you can upload a new image with a new name. Please use one of the templates derivative or extract. – Own work, CC BY-SA 3.0, https://commons.wikimedia.org/w/index.php?curid=53543269
By Sordelli – Own work, CC BY-SA 3.0, https://commons.wikimedia.org/w/index.php?curid=113226367
Shredded Beef Taquitos are tasty appetizers of shredded beef and cheese wrapped in corn tortillas and baked to crispy perfection. They are delicious when dipped in sour cream, guacamole sauce, pico de gallo sauce, or melted nacho cheese.
A taquito, tacos dorados, rolled taco, or flauta is a Mexican food dish that typically consists of a small rolled-up tortilla that contains filling, including beef, cheese, or chicken. The filled tortilla is then crisp-fried or deep-fried. The dish is often topped with condiments such as salsa, sour cream, guacamole sauce, and nacho cheese.
How to Store Taquitos
If you make the taquito filling ahead of time, it can be refrigerated in an airtight container for up to 1 week, or frozen for up to 3 months.
Fully cooked taquitos can be refrigerated for up to 5 days. Reheat them in a 300-degree oven for about 15 minutes.
Shredded Beef Taquitos
History of the Taquito
The taquito or small taco was referred to in the 1917 Preliminary Glossary of New Mexico Spanish, with the word noted as a “Mexicanism” used in New Mexico. The modern definition of a taquito as a rolled-tortilla dish was given in 1929 in a book of stories of Mexican people in the United States. Taquitos were also referred to in a 1932 issue of the Los Angeles School Journal.
The Metropolitan City of Albuquerque, New Mexico
Albuquerque, New Mexico’s largest city, sits in the high desert. Its modern Downtown core contrasts with Old Town Albuquerque, dating to the city’s 1706 founding as a Spanish colony.
Albuquerque, New Mexico
A Brief History of Albuquerque, New Mexico
Petroglyphs carved into basalt in the western part of the city bear testimony to an early Native American presence in the area, now preserved in the Petroglyph National Monument. By the 1500s, there were around 20 Tiwa pueblos along a 60-mile (97 km) stretch of river from present-day Algodones to the Rio Puerco confluence south of Belen.
From the arrival of the Spanish in 1706, Albuquerque was first ruled by the Spanish Empire until182. After the Mexican revolution in 1821it remained in Mexican hands until the Mexican session in 1846 when New Mexico was turned over to the United States.
Tourism in Albuquerque, New Mexico
Albuquerque is filled with historic adobe buildings, such as San Felipe de Neri Church, 5 museums, and shops selling Native American handicrafts. Nearby, The Indian Pueblo Cultural Center traces the area’s tribal history.
Tex-Mex Cuisine
Tex-Mex cuisine (from the words Texan and Mexican) is an American and Texan cuisine that derives from the culinary creations of the Tejano people. It has spread from the border states of Texas, New Mexico, Arizona, and Southern California in the Southwestern United States to the rest of the world.
Tex-Mex cuisine is characterized by its heavy use of shredded cheese, beans, meat (particularly chicken, beef, and pork), peppers, and spices, in addition to flour tortillas.
– Featured Restaraunt –
El Patron 10551 Montgomery Blvd NE Albuquerque, NM 87111 Telephone: +1 (505) 275-0223
El Patron New Mexican Restaurant
Enjoy traditional New Mexican food prepared fresh daily: hearty Carne Adovada, stuffed sopapillas, spicy chile and so much more! We serve USDA choice steaks, great seafood, and homemade desserts. Gluten-free and vegan dishes are available.
El Patron is one of a kind restaurant that gives you a sense of dining in an old Mexican plaza. Join us for live music events, book a private party room or enjoy brunch outdoors on our dog-friendly patio.
This Shredded Beef Taquitos Recipe is quick and easy to make. You will need a skillet, baking dish, and a preparation plate to roll your taquitos. Layout your ingredients and follow the directions for delicious taquitos in about 20 minutes.
These crunchy Shredded Beef Taquitos are made with seasoned shredded beef and a Mexican blend of cheese is wrapped in corn tortillas and baked to perfection. Serve as an afternoon snack or for the next fiesta.
This Taco Seasoning Mix recipe yields one cup of sumptuous mix. To create your perfect tacos, simply use a ¼ cup of this delicious seasoning blend. The tantalizing flavors packed into each batch will elevate your taco game, leaving you and your guests craving more.
By Taste The World Cookbook – Copyright 2022 All rights reserved.
By El Patron – By https://www.facebook.com/ElPatronNewMexicanRestaurant
By Danae Hurst, Asaavedra32, John Phelan, Luigi Novicrop, montage and hue/contrast changes: KingCam – File:AIBF Mass Ascent, 2007.jpg, Danae Hurst (2007)File:Albuquerque Plaza Tower 1st national.JPG, Asaavedra32 (2007)File:Albuquerque Alvarado Transportation Building.JPG, Asaavedra32 (2007)File:San Felipe de Neri Church, Albuquerque NM.jpg, John Phelan (2010)File:6.18.08SandiaMountainsByLuigiNovi23.jpg, Nightscream / Luigi Novi (2008)File:Rio Grande River marshes.JPG, Asaavedra32 (2007), CC BY-SA 3.0, https://commons.wikimedia.org/w/index.php?curid=21042067
For a traditional Irish meal on St. Patrick’s Day, you will need to make some Corned Beef and Cabbage. This tasty meal is made with corned beef, potatoes, carrots, and cabbage and is guaranteed to bring you the luck of the Irish.
Corned Beef and Cabbage is the Irish-American variant of the Irish dish of Bacon and Cabbage. The dish consists of sliced back bacon boiled with cabbage and potatoes.
A New England Boiled Dinner, a traditional New England meal, is made with corned beef, cabbage, and one or more root vegetables, such as potatoes, rutabagas, parsnips, carrots, turnips, or onions.
Jiggs Dinner consists of corned beef, boiled together with potatoes, carrot, cabbage, turnip, and turnip or cabbage greens. Pease pudding and figgy duff are cooked in pudding bags immersed in the rich broth that the meat and vegetables create.
Corned Beef and Cabbage
How to Store Corned Beef and Cabbage
Leftovers should be stored in an airtight container and refrigerated within 2 hours of cooking or reheating. Use leftover corned beef within 3 to 4 days or freeze it for up to 2 months.
History of Corned Beef
Although the exact origin of corned beef is unknown, it most likely came about when people began preserving meat through salt-curing. Evidence of its legacy is apparent in numerous cultures, including ancient Europe and the Middle East.
The word corn derives from Old English and is used to describe any small, hard particles or grains. In the case of corned beef, the word may refer to the coarse, granular salts and potassium nitrate used to cure the beef.
Irish corned beef was used and traded extensively from the 17th century to the mid-19th century. Shipped from the port of Cork, the British supplied its civilian population, British naval fleets, and North American armies with corned beef. The product was also traded to the French, who used it in their colonies in the Caribbean as sustenance for both the colonists and enslaved laborers.
1898 can of corned beef by Libby, McNeill & Libby of Chicago, Ill.
The Metropolitan City of Cork, Ireland
Cork is the second-largest city in Ireland, located in the southwest of Ireland, in the province of Munster. The city center is an island positioned between two channels of the River Lee which meet downstream at the eastern end of the city center, where the quays and docks along the river lead outwards towards Lough Mahon and Cork Harbour, one of the largest natural harbors in the world.
The City of Cork, Ireland
A Brief History of Cork
Cork was originally a monastic settlement, reputedly founded by Saint Finbarr in the 6th century. Cork became (more) urbanized at some point between 915 and 922 when Norseman (Viking) settlers founded a trading port.
The city’s charter was granted by Prince John, as Lord of Ireland, in 1185 and it was once fully walled. It suffered a severe blow in 1349 when almost half the townspeople died of plague when the Black Death arrived in the town.
Since the nineteenth century, Cork had been a strongly Irish nationalist city, with widespread support for Irish Home Rule and the Irish Parliamentary Party, but from 1910 stood firmly behind William O’Brien’s dissident All-for-Ireland Party.
Tourism in Cork
Sitting proudly on an island in the middle of the River Lee, Cork’s feelgood buzz surges through its hip coffee shops, vibrant art galleries, off-beat museums, and seriously good pubs. Despite being a city, there’s a decided towny feel.
Irish Cuisine in Cork
Cork has a historic food market, rich culinary traditions, and forward-thinking chefs means that Cork is at the top of its game when it comes to food.
– Featured Restaraunt –
O’Mahony Family Butchers English Market, 35/36 Grand Parade, Centre, Cork, T12 W0DV, Ireland Telephone: +353 21 427 0254
O’Mahonys Butchers
O’Mahony’s was started by Katherine O’Mahony in 1974. Since then her son Eoin and daughter Eimear have joined her behind the counter and become integral to the business. In addition to serving home cooks, they supply meat to 20 restaurants in Cork City.
This corned beef and cabbage recipe is quick and easy to make. A no-fuss meal, that’s great for St. Patrick’s Day or just a weeknight family dinner. Chop up the leftover corned beef for corned beef hash tomorrow morning.
Place corned beef in a Dutch oven and cover with water. Add spice packet, cover, and bring to a boil. Reduce heat and simmer until corned beef is just about fork-tender, about 2 hours.
Prep the Vegetables
While the corned beef is simmering, cut potatoes in half. Peel carrots and cut them into 3-inch pieces. Cut cabbage into small wedges.
Add the Vegetables
When corned beef has cooked for 2 hours, add potatoes and carrots; cook until vegetables are almost tender and meat is fork-tender, about 10 minutes. Add cabbage and cook until tender, about 15 more minutes.
Slice and Serve
Remove meat and let rest for 15 minutes. Leave broth and vegetables in the Dutch oven. Slice meat across the grain. Serve with vegetables and broth.
Condiments are likely to include mustard pickles, pickled beets, cranberry sauce, butter, and a thin gravy made from the cooking broth.
Corned beef and cabbage is a complete meal made with tender corned beef, potatoes, sweet carrots, and cabbage. It's the perfect traditional Irish meal for St. Patrick's Day.
Place corned beef in a Dutch oven and cover with water. Add spice packet, cover, and bring to a boil. Reduce heat and simmer until corned beef is just about fork-tender, about 2 hours.
3 lbs corned beef brisket
While the corned beef is simmering, cut potatoes in half. Peel carrots and cut into 3-inch pieces. Cut cabbage into small wedges.
10 small red potatoes, 5 med carrot, 1 lrg cabbage
When corned beef has cooked for 2 hours, add potatoes and carrots; cook until vegetables are almost tender and meat is fork-tender, about 10 minutes. Add cabbage and cook until tender, about 15 more minutes.
Remove meat and let rest for 15 minutes. Leave broth and vegetables in the Dutch oven.
Slice meat across the grain. Serve with vegetables and broth.
Other Recipes That Go Well With Corned Beef and Cabbage
Lyonnaise Potatoes
Fried potatoes with onions in butter and garlic. Do your tastebuds a favor and throw them a party of Lyonnaise Potatoes so they can do the happy dance.
By Taste The World Cookbook – Copyright 2022 All rights reserved.
By O’Mahony Family Butchers – By https://www.facebook.com/omahonysbutchers/
By Microstar – File:Cancun Strand Luftbild (22143397586).jpg, por Dronepicr (CC-BY-2.0)File:Boulevard Kukulcan, Zona Hotelera, Cancún, Mexico – panoramio (34).jpg, por Panoramio upload bot (CC-BY-3.0)File:Gone to Lunch. – panoramio.jpg, por Panoramio upload bot (CC-BY-3.0)File:Yamiluum1.JPG, por Feliks~commonswiki (CC-BY-SA-3.0-migrated)File:El Rey Zona Arqueologica, Cancun, Mexico RFDZ1265.jpg, por Xe3osc (CC-BY-SA-3.0)File:Cancun Luftbild (22143391876).jpg, por Dronepicr (CC-BY-2.0)File:Cancún, Playa Caracol – panoramio.jpg, por Panoramio upload bot (CC-BY-3.0)File:Ferry Port in Cancun.jpg, por Nv8200pa (CC-BY-SA-4.0), CC BY-SA 4.0, https://commons.wikimedia.org/w/index.php?curid=61626705
Fannie Merritt Farmer was a true polymath and her cookbook standardized the use of the teaspoon, tablespoon, and cup measurements in cooking. Her work laid the foundation for home economics courses and culinary institutes around the world.
Fannie was born in Boston, Massachusetts in 1857. As a child, she suffered a paralytic stroke while attending Medford High School and was confined to a wheelchair ending her formal academic education. However, by 1987 Ms. Farmer was able to walk again and enrolled in the Boston Cooking School.
She graduated from the school with honors and was invited to join the faculty. By 1891 she had become the Director of the school and would serve for 11 years.
10 Qualities of a Great Chef
Creative
Passionate
Team Work
Stress Tolerance
Able to Accept Criticism
Attention to Detail
Endurance
Leadership
Commitment to Quality
Her legacy will forever be that she single-handedly standardized the cookbook/recipe industry. She brought science and organization to a chaotic system and introduced advertising to the cookbook world. She was truly a maverick of her time.
The Fulcrum That Changed the World of Cooking
A new century was dawning and American women aspired to the new ideal of middle-class family life, home-ownership, and to become a full-time mothers who would oversee the home and family. The Boston Cooking School was designed to train chefs to cook who would become private cooks for the newly emerging middle-class families.
By 1896 Frannie Farmer self-published her famous The Boston Cooking-School Cook Book which included 1,849 recipes. It provided women with a practical guide of detailed cooking and dietary knowledge that earlier generations would expect to get from their mothers, aunts, or older sisters.
3 Beef Recipes with 2 images, saddle of beef a beef roast dish1st Cookbook to Run Ads in its Pages. An ad for Baker’s Chocolate in 1921.11 Potato Recipes by Fannie Merritt FarmerA health care article with and ivory soap ad and a hand written recipe by the books original owner
The book was an immediate success and has never been out of print. Because she owned the copyright to the book, it ensured Farmer’s financial independence. She was able to finance the publication by selling advertising space inside the cookbook. That fact would make her one of the world’s first food influencers.
Cookery is the art of preparing food for the nourishment of the body. Prehistoric man may have lived on uncooked foods, but there are no savage races today who do not practice cookery in some way, however crude. Progress in civilization has been accompanied by progress in cookery.
Fannie Merritt Farmer ~ An American Culinary Expert
One might think after a success that big she would ride the fame and fortune out. However, that is not how Frannie Farmer was built. She would go on to author another 5 books and she established her own school named Miss Farmer’s School of Cookery.
Frannie would regularly deliver lectures to women’s clubs, nurses, and dietitians. She even taught a course on dietary preparation at Harvard Medical School. A prolific worker, she would continue to lecture, write, and invent recipes right to the end. She would eventually suffer another paralytic stroke returning her to a wheelchair. She continued lecturing until just 10 days before her death in 1915.
Princess Cruises has finalized programs and guest experiences for a full summer season of 2022 cruises and cruise tours to Alaska, as well as its popular summer and fall Canada & New England program.
Princess in Alaska features six ships, including the line’s newest ship, Discovery Princess. Offerings include 12 unique itineraries, totaling 140 departures and five glacier-viewing experiences, with visits to the Southeast Alaska towns of Juneau, Skagway, and Ketchikan.
The reopening of Canadian ports to the cruise industry is a bold and important move that significantly expands the array of travel opportunities available to guests while boosting the economies of the Canadian and Alaska destinations we visit by generating important revenue and job opportunities,
John Padgett, Princess Cruises President
The first Princess cruise ship to visit Canada is Caribbean Princess, sailing on a four-day Pacific Coastal voyage, with a scheduled port stop in Victoria on April 6, followed by Vancouver on April 7. For the May through September 2022 season, four convenient west coast homeports – Seattle, Vancouver, B.C., Anchorage, and San Francisco – make traveling to Alaska seamless and hassle-free.
Princess continues to enhance the award-winning North to Alaska program, bringing local Alaskans, culture, and fresh seafood onboard and ashore to immerse guests in all things Alaska.
On Canada and New England voyages, Princess sails from Quebec and New York visiting popular Canadian ports, including Halifax, Saint John (for the Bay of Fundy), Sydney (Cape Breton Island), and Charlottetown (Prince Edward Island).
Alaska 2022 Season of Glacier Viewing in Glacier Bay Alaska
Additional information about Princess Cruises is available through a professional travel advisor, by calling 1-800-PRINCESS (1-800-774-6237), or by visiting the company’s website at http://www.princess.com/.
CDC Cruise Ship Guidance
CDC’s Temporary Extension & Modification of Framework for Conditional Sailing Order (CSO) expired on January 15, 2022. CDC recommends that cruise ships operating in U.S. waters choose to participate in CDC’s COVID-19 Program for Cruise Ships.
CDC has issued an Order that requires face masks to be worn by all travelers while on public transportation including all passengers on board and all personnel operating maritime conveyances traveling into, within, or out of the United States. Masks are also required while indoors at U.S. transportation hubs, including seaports and ferry terminals. Travelers are not required to wear a mask in outdoor areas of a conveyance.
What You Need to Know
Make sure you are up to date with your COVID-19 vaccines before cruise ship travel.
If you are not up to date with your COVID-19 vaccines, avoid cruise ship travel at this time.
Cruise ship travel is not a zero-risk activity. The virus that causes COVID-19 spreads easily between people in close quarters on board ships and the chance of getting COVID-19 on cruise ships is high, even if you are up to date with your COVID-19 vaccines.
Get a COVID-19 viral test as close to time of cruise departure as possible (no more than 3 days) before you travel.
Green Chile Chicken Enchiladas or Enchiladas de Pollo en Salsa Verde, as they are known in Mexico, is one of my favorite Mexican dishes. These tasty treats are made with flour tortillas, shredded chicken, a green chili sauce, and a blend of Mexican cheese.
Enchiladas can be made in more ways than you can shake a stick at. They can be made with corn or flour tortillas, with red or green sauce, and with pork, beef, chicken, fish, and seafood fillings. My personal favorite is the Green Chilli Chicken Enchilada wrapped in a flour tortilla.
How to Store Enchiladas
Let the enchiladas cool to room temperature before storing. Place in an airtight container and your enchiladas will keep up to 2 days in the refrigerator. You can freeze enchiladas for up to 3 months, and place them in an airtight container to prevent freezer burn.
Green Chile Chicken Enchilada Dinner
History of the Enchilada
As early as the preclassical period (c.2000-250 BC), the Maya of the Yucatán Peninsula is known to have dipped corn tortillas in pumpkin seeds, rolled them around a chopped, hard-boiled egg, and then covered them in a rich tomato sauce.
The Aztecs were the first to develop the first ‘true’ enchilada. As its Nahuatl name, chīllapīzzali (literally ‘chili-flute’), suggests, its most distinctive ingredient was the chili pepper. This was ground up to produce a spicy paste, into which tortillas were dipped, then filled with beans, squash, fish, game, or eggs.
The City of Cancún, Mexico
Cancún is a city in southeast Mexico on the northeast coast of the Yucatán Peninsula in the Mexican state of Quintana Roo. It is a significant tourist destination in Mexico and the seat of the municipality of Benito Juárez. Cancún lies next to the Caribbean Sea and is one of Mexico’s easternmost points.
The City of Cancún, Mexico
A Brief History of Cancún
In the years after the Conquest, much of the Maya population died or left as a result of disease, warfare, piracy, and famines, leaving only small settlements on Isla Mujeres and Cozumel Island.
When the development of the area as a resort was started on January 23, 1970, Isla Cancún had only three residents, all caretakers of the coconut plantation of Don José de Jesús Lima Gutiérrez, who lived on Isla Mujeres. Some 117 people lived in nearby Puerto Juárez, a fishing village, and military base.
Tourism in Cancún
Cancún is best known for its beaches, numerous resorts, and nightlife. It’s composed of 2 distinct areas: the more traditional downtown area, El Centro, and Zona Hotelera, a long, beachfront strip of high-rise hotels, nightclubs, shops, and restaurants. Cancun is also a famed destination for students during universities’ spring break period.
Mexican Cuisine
Mexican Cuisines earliest roots lie in Mesoamerican cuisine. Its ingredients and methods begin with the first agricultural communities such as the Maya who domesticated maize, created the standard process of maize nixtamalization, and established their foodways (Maya cuisine).
– Featured Restaraunt –
Restaurante Mextreme Boulevard Kukulcan km. 9.5, Punta Cancun, Zona Hotelera, 77500 Cancún, Q.R., Mexico
Restaurante Mextreme
The restaurant Mextreme is a lively restaurant/bar in a colorful setting offering traditional Mexican dishes & dining on a terrace.
How to Make This Green Chile Chicken Enchilada Recipe
For this recipe, we have included instructions for cooking chicken breast to shred. However, you can use leftover chicken or rosery chicken if you like.
Ingredients Needed to Make This Green Chile Chicken Enchilada Recipe
Ingredients Needed to Make This Green Chile Chicken Enchilada Recipe
How to Cook the Green Chile Chicken Enchilada Recipe
Time needed: 40 minutes
Cooking Directions for Green Chile Chicken Enchilada Recipe
Preheat the Oven
Preheat the oven to 350°F.
Heat the Skillet
On medium-high heat a large skillet with oil.
Dry the Chicken
Pat dry the chicken breasts with paper towels and drizzle enough oil to coat each chicken breast.
Cook the Chicken
Add the chicken breasts to the hot skillet and cook covered for 5 to 7 minutes without moving them around.
Flip the Chicken
Flip the chicken over, add 1 tablespoon of butter, swirl the butter around and continue to cook the chicken for 7 more minutes, or until internal temperature reaches 165°F. Cooking time will always depend on the thickness of the chicken breasts.
Remove and Cool
Remove chicken breasts from the skillet and keep them covered for 5 more minutes before shredding.
Shredd and Mix
Build the Enchiladas In a small bowl, combine the shredded chicken, 1 cup of cheese, green chiles, salt, and pepper.
Heat the Sauce
In a small skillet, bring enchilada sauce to boil then remove from the heat.
Dip the Tortillas
Dip each tortilla into the heated sauce for a few seconds to coat.
Fill the Tortillas
Spoon ⅓ cup of chicken mixture and 2 tablespoons sour cream down the center for each tortilla. (You can place the sour cream in a sandwich bag and cut the bottom tip and squirt it down the center)
Roll the Tortillas
Roll the tortilla and place seam-side down in a baking dish.
Cover in Sauce
Repeat until all the tortillas are filled. Pour the remaining enchilada sauce over top and sprinkle with the remaining cheese.
Bake the Enchiladas
Bake the enchiladas for 20 minutes at 350°F.
Remove and Serve
Remove from oven, let cool for 5 minutes before serving.
These Green Chile Chicken Enchiladas are made with tortillas that are stuffed with chicken, cheese, green chile enchilada sauce, sour cream, and green chilies.
Pat dry the chicken breasts with paper towels and drizzle enough oil to coat each chicken breast.
2 chicken breasts
Add the chicken breasts to the hot skillet and cook covered for 5 to 7 minutes without moving them around.
Flip the chicken over, add 1 tablespoon of butter, swirl the butter around and continue to cook the chicken for 7 more minutes, or until internal temperature reaches 165°F. Cooking time will always depend on the thickness of the chicken breasts.
2 tbsp unsalted butter
Remove chicken breasts from the skillet and keep them covered for 5 more minutes before shredding.
Build the Enchiladas
In a small bowl, combine the shredded chicken, 1 cup cheese, green chiles, salt, and pepper.
2 cups Mexican blend cheese, 4.5 oz green chilies, 1 cup sour cream, 1 tsp salt, 1 tsp black pepper
In a small skillet, bring enchilada sauce to boil then remove from the heat.
19 oz green chile enchilada sauce
Dip each tortilla into the heated sauce for a few seconds to coat.
8 flour tortillas
Spoon ⅓ cup of chicken mixture and 2 tablespoons sour cream down the center for each tortilla. (You can place the sour cream in a sandwich bag and cut the bottom tip and squirt it down the center)
Roll the tortilla and place seam-side down in a baking dish.
Repeat until all the tortillas are filled. Pour the remaining enchilada sauce over top and sprinkle with the remaining cheese.
Bake the enchiladas for 20 minutes at 350°F.
Remove from oven, let cool for 5 minutes before serving.
Notes
How to Save Leftovers
Cool enchiladas to room temperature before storing.
Place in an airtight container to store for up to 2 days in the refrigerator.
Other Recipes That Go Well With Green Chile Chicken Enchiladas
Easy Refried Beans Recipe
Frijoles Refritos or Refried Beans are a tasty side dish to almost any meal. It can be served with tacos, burritos, enchiladas, chimichangas, or almost anything.
Mexican Yellow Rice makes a great side and has a big punch of flavor. Cooked with carrots and sweetpeas and spiced with turmeric, paprika, chili powder, red pepper flakes, and cilantro.
By Taste The World Cookbook – Copyright 2022 All rights reserved.
By Restaurante Mextreme – By https://www.facebook.com/MextremeCancun
By Microstar – File:Cancun Strand Luftbild (22143397586).jpg, por Dronepicr (CC-BY-2.0)File:Boulevard Kukulcan, Zona Hotelera, Cancún, Mexico – panoramio (34).jpg, por Panoramio upload bot (CC-BY-3.0)File:Gone to Lunch. – panoramio.jpg, por Panoramio upload bot (CC-BY-3.0)File:Yamiluum1.JPG, por Feliks~commonswiki (CC-BY-SA-3.0-migrated)File:El Rey Zona Arqueologica, Cancun, Mexico RFDZ1265.jpg, por Xe3osc (CC-BY-SA-3.0)File:Cancun Luftbild (22143391876).jpg, por Dronepicr (CC-BY-2.0)File:Cancún, Playa Caracol – panoramio.jpg, por Panoramio upload bot (CC-BY-3.0)File:Ferry Port in Cancun.jpg, por Nv8200pa (CC-BY-SA-4.0), CC BY-SA 4.0, https://commons.wikimedia.org/w/index.php?curid=61626705
Refried Beans or Frijoles Refritos, as it is known in Mexico, were invented in Northern Mexico about 100 years ago. Refried beans are almost a mandatory side dish for most Mexican meals. This side dish is fast and easy to make and tastes better than the premade canned refried beans you buy in the store.
Frijoles Refritos are made by mashing cooked beans, most commonly pinto beans then followed in popularity by black turtle beans. Chili powder, cumin, chopped sweet bell, jalapeño peppers, and citrus juice are typically added as enhancements.
Frijoles Refritos
How to Store Refried Beans
To store leftover refried beans, allow them to cool to room temperature. Place beans into an airtight container or a storage bag that seals properly and store in the refrigerator for up to 5 days.
To freeze refried beans allow them to fully cool before attempting to freeze them. Separate refried beans into usable portions and place them into airtight containers or heavy-duty freezer bags. Label, date, and seal all packaging. You can freeze refried beans for up to 12 months.
History of Frijoles Refritos
Although nobody knows who invented this delicious way of making beans, it is believed that Frijoles Refritos were first made in Northern Mexico about 100 years ago. The translation of Frijoles Refritos to English is incorrect as the word Frijoles translates to Beans and the word Refritos translates to Well-Fried, so the real name in English is Well-Fried Beans.
The Metropolitan City of Monterrey, Mexico
Monterrey is the capital city of the northeastern Mexican state of Nuevo León. It has a sprawling business and industrial center and is fringed by mountains. The city sprawls over the semiarid floodplain of the Santa Catarina River, which spills eastward from the flanks of the Sierra Madre Oriental.
The City of Monterrey, Mexico
Monterrey is one of the most livable cities in Mexico. The metropolis has an estimated population of 5,341,171 and the city itself has a population of 1,142,194.
A Brief History of Monterrey
Monterrey was founded by the Spanish in 1596, it grew slowly until 1882 when Monterrey was linked by rail with Laredo, Texas. By 1900 thousands of workers were producing iron, brass, steel, wagons, woolen textiles, beer, and flour in Monterrey.
Tourism in Monterrey
The city is overlooked by the Palacio del Obispado, a storied Baroque palace with a regional museum. In the downtown of Monterrey lies the Macroplaza, a vast green area of connected squares and home to the striking Museo de Arte Contemporáneo and the Faro de Comercio tower, which beams green lasers into the sky at night.
Mexican Cuisine
Since the pre-Columbian era, corn, squash, chile peppers, and beans have formed the base of the Mexican diet. In the 15th century, Spanish settlers introduced new culinary techniques to Mexico, along with new ingredients like wheat, onions, rice, cheese, chicken, pork, and beef. Throughout the country, European traditions began to fuse with indigenous recipes. The result was a new and wholly original cuisine.
– Featured Restaraunt –
Los Frijoles Merendero & Cantina C. Albino Espinosa 239-Oriente, Centro, 64000 Monterrey, N.L., Mexico Telephone: +52 81 8344 6879
Los Frijoles Merendero & CantinaLos Frijoles Merendero & Cantina
Filled tortillas, grilled meat & live music at a cheery cantina with classic cars in a small museum.
For this recipe, we used pinto beans and seasoned them with onions, garlic, chili powder, cumin, cilantro, and lime juice. When the beans were fully cooked we mashed about half the beans and served with some melted cheese on top.
In a saucepan over medium heat, warm the olive oil until shimmering. Add the onions and salt. Cook, stirring occasionally, until the onions have softened and are turning translucent, about 5 to 8 minutes.
Cook the Beans
Add the garlic, chili powder, and cumin and continue to cook, stirring constantly, until fragrant, about 30 seconds. Pour in the beans and water. Stir, cover, and cook for an additional 5 minutes.
Mash the Beans
Reduce the heat to low and remove the lid. Use a potato masher or the back of a fork to mash up half of the beans, until you reach your desired consistency. Continue to cook the beans, uncovered, stirring often, for 3 more minutes.
Garnish and Serve
Remove from the heat and stir in the cilantro and lime juice. Taste, and add more salt and lime juice if necessary. If the beans seem dry, add a very small splash of water and stir to combine. Cover until you’re ready to serve.
Frijoles Refritos or Refried Beans are a tasty side dish to almost any meal. It can be served with tacos, burritos, enchiladas, chimichangas, or almost anything.
In a saucepan over medium heat, warm the olive oil until shimmering. Add the onions and salt. Cook, stirring occasionally, until the onions have softened and are turning translucent, about 5 to 8 minutes.
1 tbsp olive oil, ½ cup yellow onion, ¼ tsp salt
Add the garlic, chili powder, and cumin and continue to cook, stirring constantly, until fragrant, about 30 seconds. Pour in the beans and water. Stir, cover, and cook for an additional 5 minutes.
2 cloves garlic, ½ tsp chili powder, ¼ tsp ground cumin, 3 cups pinto beans, ½ cup water
Reduce the heat to low and remove the lid. Use a potato masher or the back of a fork to mash up half of the beans, until you reach your desired consistency. Continue to cook the beans, uncovered, stirring often, for 3 more minutes.
Remove from the heat and stir in the cilantro and lime juice. Taste, and add more salt and lime juice if necessary. If the beans seem dry, add a very small splash of water and stir to combine. Cover until you’re ready to serve.
These Green Chile Chicken Enchiladas are made with tortillas that are stuffed with chicken, cheese, green chile enchilada sauce, sour cream, and green chilies.
Mexican Yellow Rice makes a great side and has a big punch of flavor. Cooked with carrots and sweetpeas and spiced with turmeric, paprika, chili powder, red pepper flakes, and cilantro.
By Taste The World Cookbook – Copyright 2022 All rights reserved.
By Los Frijoles Merendero & Cantina – By https://www.facebook.com/losfrijolesmonterrey/
By Microstar – File:Panoramica plaza de armas Durango.jpg, por Sozi (CC-BY-2.0)File:Catedral Basílica Menor de La Purísima.JPG, por Fernandocasas (CC-BY-SA-3.0)File:A lo alto, Quinta del Aguacate.JPG, por MohamedPulido (CC-BY-SA-3.0)File:ES la salvacion.JPG, por Lalomen96 (CC-BY-SA-3.0)File:Palacio Municipal Durango.JPG, por MohamedPulido (CC-BY-SA-3.0)File:Torre del Templo de San Agustín.JPG, por MohamedPulido (CC-BY-SA-3.0)File:AnalcoDurango013.jpg, por Thelmadatter (CC-BY-SA-4.0), CC BY-SA 4.0, https://commons.wikimedia.org/w/index.php?curid=74730877
Mexican Yellow Rice, also known as Spanish Rice or Red Rice (Spanish: Arroz Rojo), is a Mexican side dish or an ingredient in other dishes. It’s made with white rice, tomatoes, garlic, carrots, sweetpeas, and a few spices. The name Spanish Rice is only used in the United States and did not originate in Spain.
Venture into the realm of Mexican Yellow Rice, a dish celebrated both as a delightful side and as a key ingredient in numerous Mexican recipes. Known variably as Spanish Rice or Arroz Rojo, this dish exhibits the culinary flexibility and flavor complexity inherent to Mexican cuisine. Its components, including white rice, tomatoes, garlic, carrots, sweet peas, and a medley of spices, combine to create a gastronomic masterpiece.
Interestingly, the term “Spanish Rice” is a moniker predominantly used within the United States. While it might suggest a connection to Spain, the origins of this name lie elsewhere. This term has been widely adopted across the U.S. due to its ease of recognition, despite the dish’s roots being firmly planted in Mexican culinary traditions.
The process of creating Mexican Yellow Rice involves more than just mixing ingredients. It’s about understanding and respecting each component, appreciating the unique flavors and textures that each brings to the table. The resulting dish, whether served alone or as part of a larger meal, represents a piece of Mexico’s rich culinary tapestry. From its vibrant color to its robust flavor profile, Mexican Yellow Rice truly stands as a testament to the country’s diverse and delicious cuisine.
Embracing Variety: Different Ways to Prepare Spanish Rice
Spanish Rice, a versatile and wholesome one-pot meal, offers a variety of preparation methods. You have the flexibility to choose between cooking it in a Dutch Oven, as traditionally done, or using a Pressure Cooker, Crockpot, or Rice Steamer. This gives you the opportunity to adapt the cooking process according to your available tools and personal preferences.
Enchiladas with Mexican Yellow Rice and Refried Beans
When using a crockpot or rice steamer, there’s an extra step that can elevate your dish. Consider browning your rice and sautéing your carrots and garlic in a separate pan before transferring them into the crockpot or steamer. This pre-cooking process enriches the flavor profile of your Spanish Rice. Yet, if you’re using a Dutch Oven or most modern pressure cookers, you can seamlessly perform the browning and sautéing stages in the same pot, thereby preserving the released flavors and simplifying the process.
Spanish Rice truly shines with its adaptability, welcoming the inclusion of various other vegetables like corn, peas, and onions. Usually, you’ll find it served alongside refried beans, adding a layer of complementary texture and flavor. Moreover, it makes a hearty accompaniment to many Mexican main dishes, including carne asada, picadillo, tacos, and many more, further demonstrating its integral role in Mexican cuisine.
Safeguarding the Freshness: Best Practices for Storing Red Rice
Begin the storage process of your leftover Red Rice by transferring it into an airtight container or Ziploc bag. Taking care to limit the rice’s exposure to air is crucial to preserve its freshness. Once safely enclosed, place the container or bag in the refrigerator. Properly stored, your Red Rice can maintain its quality for up to five days, ensuring you can continue to enjoy this delightful dish throughout the week.
If you have a larger quantity of leftover Red Rice or you wish to preserve it for a longer duration, consider freezing as an effective option. Transfer your leftover Mexican Yellow Rice into freezer-friendly containers or bags and place them in the freezer. This method extends the life of your rice, allowing you to store it for up to six months without compromising its taste and texture.
When it’s time to reheat your stored Red Rice, either the microwave or stovetop serves as a viable method. To prevent your rice from drying out during the reheating process, incorporate a handy trick. Simply add 1-2 teaspoons of water into the rice before heating it up. This little addition of moisture will ensure your Red Rice retains its original texture and deliciousness, making it just as enjoyable as when freshly cooked.
Tracing Back the Roots: The Intriguing History of Arroz Rojo
Interestingly, rice, a staple ingredient in Mexican cuisine, is not a native crop to Mexico. This grain made its way into the region during the Age of Discovery, a historical period characterized by extensive overseas exploration. During this era, Spanish explorers and traders traveled far and wide, bringing back a wealth of goods, foods, and cultural influences to their home countries, including the novel grain of rice to the Americas.
On the other hand, one of the critical components of Arroz Rojo, the tomato, finds its roots deep within Mexican soil. Mexico prides itself as the birthplace of the tomato, making it an integral part of the country’s culinary landscape. Consequently, the arrival of rice to Mexico sparked a unique culinary innovation.
With the arrival of rice and the presence of native tomatoes, Mexico found itself at the forefront of creating a unique, mouth-watering tomato-flavored rice dish. Thus, Arroz Rojo, or Red Rice, was born, perfectly embodying the fusion of foreign influence and local ingredients. Today, this delightful dish continues to hold a cherished place in Mexican cuisine, reminding us of a flavorful legacy traced back to the Age of Discovery.
Delving into Durango: A Spotlight on Mexico’s Historic City
Victoria de Durango stands as the official name of this Mexican city, yet it frequently goes by simpler monikers: the City of Durango or Durango City. Nestled in Mexico, Durango carries the distinction of being the capital city of its namesake state. Its importance stretches far beyond just political and administrative roles, as Durango represents a vital hub of culture, history, and architecture.
Durango, Mexico
An essential element that distinguishes Durango is its historic center. This core part of the city is a reflection of a rich past, encapsulated in the form of stunning colonial architecture. Walking through Durango’s center, one can appreciate the physical remnants of times gone by, beautifully preserved in stone and mortar.
Moreover, the city is renowned for its significant buildings reflecting the Mexican baroque style. This architectural aesthetic, characterized by its grandeur and intricate detailing, lends an air of charm and sophistication to the city. Durango’s baroque structures, along with its colonial ones, weave together to form a unique architectural tapestry that continues to captivate residents and visitors alike.
Durango Uncovered: A Journey through the City’s Rich History
Long before Durango became the city we know today, the area served as a significant cultural corridor. Dating back to the pre-historic period, it acted as a conduit facilitating the exchange of influences between the north and south, specifically between the Aridoamerican and Mesoamerican peoples. Around 2,000 years ago, the Nahoa people, a nomadic tribe from the north, are believed to have first settled in the area, marking the start of Durango’s long history.
The formation of the modern city of Durango traces its roots back to July 8, 1563. Francisco de Ibarra, an explorer and silver miner, established a small mining town, marking the birth of Durango. Throughout the 18th century, the city experienced a period of significant prosperity and influence, primarily due to mining operations in the nearby Sierra Madre Occidental. This economic boom led to the construction of numerous grand colonial-era buildings within the city center, structures that continue to grace the cityscape to this day.
In a testament to its rich historical and cultural heritage, Durango was recognized as a World Heritage site in 2010. The city forms a part of the Camino Real de Tierra Adentro, a historic trade route that played a crucial role in the cultural and commercial exchange between the Spanish and Mesoamerican civilizations. This recognition reaffirms Durango’s place in the annals of history, not just as a mining town, but as a vibrant crossroads of cultures and eras.
Exploring Durango: The Allure of Tourism in Mexico’s Historic City
Durango, a state known for its rich biodiversity and stunning landscapes, offers a spectacular array of experiences for visitors. With mountains, rivers, lakes, forests, and desert areas, Durango is a haven for nature lovers and adventurers alike. Over the years, these striking natural features have not only attracted tourists but also caught the eye of Hollywood movie producers. As a result, many films have chosen this diverse landscape as their backdrop, bringing a touch of cinematic glamour to the state.
Accommodation options in Durango are just as diverse as its landscapes. Ranging from historic boutique hotels that echo the grandeur of the past, to rural cabins nestled within the forests offering breathtaking views over rivers and valleys, Durango caters to every type of traveler. These unique lodging experiences allow visitors to immerse themselves in the local scenery and enjoy a tranquil retreat away from the hustle and bustle of city life.
Besides its natural beauty and accommodation options, Durango is also recognized for its vibrant traditional fairs and festivals. The locals, known for their friendly and accommodating demeanor, eagerly participate in these cultural events, infusing them with color and vivacity. One of the standout celebrations is the Durango National Fair held in July, commemorating the founding of the capital city, Victoria de Durango. This annual event serves as a rich cultural immersion for tourists, adding another dimension to the Durango experience.
A Taste of Durango: Delving into the Region’s Signature Cuisine
The culinary identity of Durango, like its history, is a blend of various cultural influences. Interestingly, the region’s cuisine saw a significant transformation with the arrival of the Spanish conquerors. Along with establishing Durango and commencing the conquest of the northern territory, these explorers also introduced new food staples. Rice, a variety of vegetables, and the first herds of animals were all brought to Durango by these settlers, leaving an indelible mark on the local culinary landscape.
Among the numerous dishes that constitute Durango’s gastronomic repertoire, the “Yellow Rice” stands out. This particular dish is renowned throughout the region and beyond, particularly for its unique flavor profile. It has been adapted and reimagined over time but has always remained a local favorite.
The popularity of the “Yellow Rice” underscores Durango’s culinary tradition. This dish, along with others, reflects the region’s history of cultural exchange and adaptation. Indeed, each bite into a dish from Durango’s cuisine is not just a gastronomic delight, but also a taste of the region’s rich and varied past.
El Esquilón offers a variety of flavors, aromas, and colors of their ancestral roots. The restaurant’s emblem is a replica of the Esquilón de San José, better known as the Bell of Dolores, rung by the priest Miguel Hidalgo to call for the struggle of Independence.
Mastering Mexican Yellow Rice: A Simple and Tasty Recipe
Creating this Mexican Yellow Rice recipe is a straightforward process that guarantees delightful results. First, in a Dutch Oven, you initiate the process by browning the rice and sautéing bell peppers and garlic. The warmth and flavors unleashed in this step form the base of this scrumptious dish.
Next, you add the fresh tomatoes and a blend of spices into the mix. After 20 minutes of cooking, the ingredients meld together to produce a dish that is not only easy and quick to make but also incredibly delicious. This Mexican Yellow Rice recipe, with its simplicity and burst of flavors, certainly encapsulates the charm of Durango’s beloved cuisine.
Gathering Your Essentials for Spanish Rice
Welcome to your culinary adventure of crafting Spanish Rice. With the right essentials at hand, we’re set to create a dish that exudes vibrant flavors and traditions. Having your ingredients prepared and within reach makes the cooking process smoother and more enjoyable. So, gather your cooking tools, clear your kitchen counter, and prepare your senses for an exciting journey into the heart of Spanish cooking.
Mexican Yellow Rice makes a great side and has a big punch of flavor. Cooked with carrots and sweetpeas and spiced with turmeric, paprika, chili powder, red pepper flakes, and cilantro.
Complementary Dishes: Enhance Your Mexican Yellow Rice Experience
As we explore the rich and vibrant world of Mexican cuisine, it’s worth noting that the beauty of Mexican Yellow Rice lies not only in its unique taste but also in its versatility. This dish pairs wonderfully with a variety of recipes that further elevate your culinary experience. The following suggestions are a blend of traditional favorites and innovative combinations that beautifully complement the Mexican Yellow Rice.
Green Chile Chicken Enchiladas Recipe
These Green Chile Chicken Enchiladas are made with tortillas that are stuffed with chicken, cheese, green chile enchilada sauce, sour cream, and green chilies.
Frijoles Refritos or Refried Beans are a tasty side dish to almost any meal. It can be served with tacos, burritos, enchiladas, chimichangas, or almost anything.
Having explored these suggested recipes, you can see how each dish adds its own flavor and character to your meal, creating a comprehensive Mexican feast. Pairing these recipes with Mexican Yellow Rice offers a delightful blend of tastes and textures, enhancing the overall dining experience. Remember, the beauty of cooking lies in experimentation. So, don’t hesitate to try different combinations and find your perfect pairing. Enjoy your culinary journey as you dive deeper into the exciting flavors of Mexican cuisine.
Photo Credits:
By Taste The World Cookbook – Copyright 2022 All rights reserved.
By Restaurante Esquilón – By https://www.facebook.com/restaurante.esquilon/
By Microstar – File:Panoramica plaza de armas Durango.jpg, por Sozi (CC-BY-2.0)File:Catedral Basílica Menor de La Purísima.JPG, por Fernandocasas (CC-BY-SA-3.0)File:A lo alto, Quinta del Aguacate.JPG, por MohamedPulido (CC-BY-SA-3.0)File:ES la salvacion.JPG, por Lalomen96 (CC-BY-SA-3.0)File:Palacio Municipal Durango.JPG, por MohamedPulido (CC-BY-SA-3.0)File:Torre del Templo de San Agustín.JPG, por MohamedPulido (CC-BY-SA-3.0)File:AnalcoDurango013.jpg, por Thelmadatter (CC-BY-SA-4.0), CC BY-SA 4.0, https://commons.wikimedia.org/w/index.php?curid=74730877
Golubtsi (голубцы) or Stuffed Cabbage Rolls are a traditional Ukrainian dish that is made with ground beef, ground pork, rice, mushrooms, onions, and wrapped in cabbage leaves then cooked in a delicious homemade tomato sauce. Top it with some sour cream to give it ever more gusto.
The traditional stuffing for Ukrainian Golubtsi, Stuffed Cabbage Rolls, is rice and minced meat (as a rule it is a mix of pork and beef). Additional fillings of mushrooms, bacon, haricot beans can also be used. Sometimes, the rice is substituted with buckwheat, wheat grits, etc.
There are two ways to make this Ukrainian dish: bake them in the oven or stew them in a pan and although the stuffing, spice, and sauce may vary, the cabbage is the universal ingredient.
How to Store Stuffed Cabbage Rolls
To store cooked cabbage rolls, refrigerate in shallow airtight containers or wrap tightly with plastic wrap. Properly stored, the cooked cabbage rolls will last for 3 to 4 days in the refrigerator.
Golubtsi ~ Stuffed Cabbage Rolls
Freezing Golubtsi
We do not recommend freezing your cooked cabbage rolls because it’s likely they will fall apart into a soupy puddle when reheating them. You have to start the freezing process slowly in the refrigerator, just like you have to thaw cabbage rolls slowly for best results. The cabbage leaves do not freeze well.
History of the Golubtsi
All of the ingredients needed to make stuffed cabbage rolls were available in Europe for the last 10,000 years with the exception of the tomato which was only available in the Americas before the 1700s. In the past 300 years, almost every country in the world has there own version of stuffed cabbage rolls.
Ukraine is the world’s 5th largest producer of cabbage, so it’s no wonder that golubtsi is their national dish. This delicious dish is served in many homes and restaurants across the country. In Odessa, you can find perhaps the best golubtsi in the country at Kumanets – Куманець – Restaurant.
.
The City of Odessa, Ukraine
Odessa is the third most populous city and municipality in Ukraine and a major tourism center, seaport, and transport hub located in the southwest of the country, on the northwestern shore of the Black Sea. The city is also the administrative center of the Odessa Raion and Odessa Oblast, as well as a multiethnic cultural center. Odessa is sometimes called the “pearl of the Black Sea”, the “South Capital”, “The Humor Capital” and “Southern Palmyra”.
Odessa was the site of a large Greek settlement no later than the middle of the 6th century BC. The history of the modern city began in the 14th century when the Tatar fortress of Khadzhibey was built. In 1795 the city fell to the Russian empire and the name was changed from Khadzhibey to Odessa.
The first census that was conducted in Odessa was in 1797 accounted for 3,455 people and by 1803 the city boasted 9,000 people. Today, Odessa is home to over a million people with 68% ethnic Ukrainian and 25% ethnic Russian.
Tourism in Odessa
Odessa is known for its beaches and 19th-century architecture, including the Odessa Opera and Ballet Theater. The monumental Potemkin Stairs, immortalized in “The Battleship Potemkin,” lead down to the waterfront with its Vorontsov Lighthouse. Running parallel to the water, the grand Primorsky Boulevard is a popular promenade lined with mansions and monuments.
Ukrainian Cuisine
Often referred to as the “breadbasket of Europe” the Ukrainian cuisine emphasizes the importance of wheat and grain to the Ukrainian people and its often tumultuous history with it. The majority of Ukrainian dishes descend from ancient peasant dishes based on plentiful grain resources such as rye as well as staple vegetables such as potatoes, cabbages, mushrooms, and beetroots. Ukrainian dishes incorporate both traditional Slavic techniques as well as other European techniques, a byproduct of years of foreign jurisdiction and influence.
We offer you to enjoy the main dishes of generous Ukrainian cuisine, so carefully prepared by the chefs of Kumants. Dumplings, stuffed cabbage, borsch, potato pancakes, and many other delicious Ukrainian dishes. Our main task is to deliciously feed and surprise you with the taste of Ukrainian cuisine, generous portions, and beautiful dishes!
This Stuffed Cabbage Rolls recipe is made with cabbage boiled to soften the leaves. Each leaf is stuffed with ground beef, pork, rice, onion, carrot, and tomato, and seasoned with salt and pepper. Then it is cooked in a tomato sauce until the Golubtsi (голубцы) has reached 160 degrees F.
What You Need to Make Stuffed Cabbage Rolls
Ingredients for Stuffed Cabbage Rolls
Equipment Needed
1 Stock Pot
1 Knife
1 Cutting Board
For the Sauce
2 tbsp butter
½ cup onion, chopped
1 tsp garlic, minced
28 oz crushed tomatoes
15 oz tomato sauce
½ tsp salt
½ tsp pepper
2 tbsp brown sugar
1 tbsp red wine vinegar
For the Cabbage Rolls
1 cabbage
8 oz rice
1 tbsp cooking oil
1 onion, diced
½ cup mushrooms, diced
6 oz tomato paste
½ lb beef ground
½ lb pork ground
1 tbsp salt
1 ½ tbsp black pepper
How to Cook Golubtsi – Stuffed Cabbage Rolls
Time needed: 1 hour and 30 minutes
Cooking Instructions for Golubtsi ~ Stuffed Cabbage Rolls
For the Sauce
Melt the butter in a large pot over medium heat. Add the onion and cook for 4-5 minutes or until translucent.
Cook the sauce
Add the garlic and cook for 30 seconds. Add the crushed tomatoes, tomato sauce, salt, and pepper to the pot.
Stir in Sugar and Wine
Stir in the brown sugar and red wine vinegar. Bring to a simmer. Cook for 10-15 minutes, stirring occasionally. Set aside for later use.
Preheat the Oven
While the sauce is simmering, prepare the cabbage rolls. Bring a large pot of water to a boil and preheat the oven to 350 degrees F.
Boil the Cabbage
Trim off the stem end of the cabbage and boil the cabbage until soft. Pull away leaves trying to avoid crushing. Set aside for later use.
Cook the Rice
Cook the rice in salted water until half-ready. Set aside for later use.
Brown the Onions
Brown the onions and mushrooms in the frying pan with cooking oil. Set aside for later use.
Mix the Filling
Mix rice, browned onions and mushrooms, raw beef and pork, tomato paste, salt, and pepper together in a mixing bowl.
Stuff the Cabbage
Fill the softened cabbage leaves with stuffing. Place even amounts of filling on each cabbage leaf, then roll the leaf around the filling. Beginning from the cut end of the leaf, roll each leaf up and over the filling, tucking the leaf underneath itself to create a tight bundle. Put them into a large pot for further cooking.
Cook the Golubtsi
Add the finished tomato sauce to Golubtsi and bake for 30 minutes.
The recipe takes a little planning and some patience to make these little pockets of flavor but it’s well worth the extra effort. Garnish with sour cream and serve with a side of a cucumber salad, and garlic roasted carrots for an authentic Ukrainian meal.
Ukrainian Golubtsi (голубцы) ore Stuffed Cabbage Rolls are little bundles of cabbage leaves that have been stuffed and cooked with a mixture of ground beef and pork, onions, mushrooms, and other spices, and braised in a homemade tomato sauce. They are typically served with a sour cream-based sauce.
Melt the butter in a large pot over medium heat. Add the onion and cook for 4-5 minutes or until translucent.
2 tbsp unsalted butter, ½ cup yellow onion
Add the garlic and cook for 30 seconds. Add the crushed tomatoes, tomato sauce, salt, and pepper to the pot.
1 tsp garlic, 28 oz crushed tomatoes, 15 oz tomato sauce, ½ tsp salt, ½ tsp black pepper
Stir in the brown sugar and red wine vinegar. Bring to a simmer. Cook for 10-15 minutes, stirring occasionally. Set aside for later use.
2 tbsp brown sugar, 1 tbsp red wine vinegar
For the Stuffed Cabbage Rolls
While the sauce is simmering, prepare the cabbage rolls. Bring a large pot of water to a boil and preheat the oven to 350 degrees F.
Trim off the stem end of the cabbage and boil the cabbage until soft. Pull away leaves trying to avoid crushing. Set aside for later use.
1 cabbage
Cook the rice in salted water until half-ready, about 10 minutes. Set aside for later use.
8 oz white rice
Brown the onions and mushrooms in the frying pan with cooking oil. Set aside for later use.
1 tbsp vegetable oil, 1 yellow onion, ½ cup white mushrooms
Mix rice, browned onions and mushrooms, raw beef and pork, tomato paste, salt, and pepper together in a mixing bowl.
½ lbs 80/20 ground beef, ½ lbs ground pork, 1 tbsp salt, 1 ½ tbsp black pepper, 6 oz tomato paste
Fill the softened cabbage leaves with stuffing. Place even amounts of filling on each cabbage leaf, then roll the leaf around the filling. Beginning from the cut end of the leaf, roll each leaf up and over the filling, tucking the leaf underneath itself to create a tight bundle. Put them into a large pot for further cooking.
Add the finished tomato sauce to Golubtsi and bake for 40 minutes.
Remove from oven and let cool for 5 minutes. Garnish with sour cream and chopped green onions.
Other Recipes That Go Well With Golubtsi ~ Stuffed Cabbage Rolls
Iranian Shirazi Salad
Revel in the simplicity and vibrancy of the Iranian Shirazi Salad, a Persian treasure that marries the crispness of cucumbers with the tanginess of ripe tomatoes. This delightful mixture comes alive with a hearty serving of fresh herbs, culminating in a lively dressing of lemon juice and extra virgin olive oil. This speedy, lettuce-free salad, with its remarkable versatility, is the perfect accompaniment to a wide range of main courses. Indulge in its refreshing charm and discover why it's a beloved classic in the culinary world.
By Taste The World Cookbook – Copyright 2022 All rights reserved.
By Kumanets – Куманець – Restaurant – By https://www.facebook.com/Kumanets.od.ua
By ciekawy (Szymon Stasik) – https://www.flickr.com/photos/47826075@N00/2931885416/, CC BY-SA 2.0, https://commons.wikimedia.org/w/index.php?curid=12632861
By Konstantin Brizhnichenko – Own work, CC BY-SA 4.0, https://commons.wikimedia.org/w/index.php?curid=82536967
By HOBOPOCC – Own work, CC BY-SA 3.0, https://commons.wikimedia.org/w/index.php?curid=10472130
By Alexostrov – Own work, CC BY-SA 3.0, https://commons.wikimedia.org/w/index.php?curid=21658066
By Erud – Own work, CC BY 3.0, https://commons.wikimedia.org/w/index.php?curid=11601693
By Alexey M. – Own work, CC BY-SA 4.0, https://commons.wikimedia.org/w/index.php?curid=60505034
There is nothing like Egg Salad Sandwiches on a family picnic or just a quick snack. They are tasty and easy as sin to make. This recipe is made with hard-boiled eggs, celery, red onions, mayonnaise, dijon mustard, lemon juice, paprika, red pepper flakes, salt, and pepper between two slices of bread and lettuce.
The two common ingredients to make egg salad are always present are eggs and mayonnaise. It is also made with a variety of other cold foods added. Bacon, bell pepper, capers, cheese, cucumber, onions, lettuce, pickle relish, pickles, and ketchup are common additional ingredients.
Egg Salad Variations
Egg Salad Sandwiches
How to Store Egg Salad
Egg salad can be stored in the refrigerator in an airtight container for up to 3 days. Do not freeze egg salad because eggs tend to become tough and rubbery. Mayonnaise also tends to break down causing a watery consistency. So do not freeze your egg salad.
History of the Egg Salad Sandwich
Humans have been eating eggs since before we discovered fire to cook them with. Picking wild grain, grinding it down into flour, and baking it taught humanity the need for agriculture and inspired a revolution. Then in the late 1700s, the French invented mayonnaise and I am sure soon after someone put hard-boiled eggs chopped up and mixed with mayonnaise and seasoned with salt and pepper on bread.
Egg Sandwiches Chop finely the whites of “hard-boiled” eggs; force the yolks through a strainer or potato ricer. Mix yolks and whites, season with salt and pepper, and moisten with Mayonnaise or Cream Salad Dressing. Spread mixture between thin slices of buttered bread prepared as for Bread and Butter Folds.
THE BOSTON COOKING-SCHOOL COOK BOOK By Fannie Merritt Farmer Published 1896
The City of Quincy, Massachusetts
Quincy is a coastal U.S. city in Norfolk County, Massachusetts. It is the largest city in the county and a part of Metropolitan Boston as one of Boston’s immediate southern suburbs. Its population in 2020 was 101,636, making it the seventh-largest city in the state.
A Brief History of Quincy, Massachusetts
The Massachusett were a Native American tribe that lived in the region and around present-day Greater Boston in the Commonwealth of Massachusetts. The name Massachusett comes from the native American word for “At the Great Hill,” referring to the Blue Hills overlooking Boston Harbor from the south.
In 1625 a British party led by Captain Wollaston established an outpost on a low hill near the south shore of Quincy Bay. The area was first incorporated in 1630 and was briefly annexed by Boston in 1634. Following the American Revolution, Quincy was officially incorporated as a separate town named for Col. John Quincy in 1792, the grandfather of Abigail Adams, and was made a city in 1888.
Tourism in Quincy, Massachusetts
Fascinating historic sites abound, while miles of coastline capture the imagination with their enchanting beauty. Culture and commerce blend to create an impressive array of things to see and do year-round. The New Quincy Center (downtown) which is among the largest urban revitalization efforts anywhere in Massachusetts, encompasses a total of more than 50 acres of mixed-use development in the heart of one of America’s most historic cities.
Massachusetts Cuisine
Massachusetts Cuisine is characterized by extensive use of seafood and dairy products, resulting from its historical reliance on its seaports and fishing industry, as well as extensive dairy farming.
– Featured Restaurant –
Bay Pointe Waterfront Restaurant
64 Washington Ct, Quincy, MA 02169
Bay Pointe Waterfront Restaurant
Nestled inside Bay Pointe Marina in Quincy, on the South Shore of Massachusetts, Bay Pointe Waterfront Restaurant sits on the docks amongst the boats and alongside the bay, offering a spectacular New England backdrop for both innovative and traditional fin fare fresh from local markets.
In a large saucepan, cover the eggs with cold water and bring them to a boil. Remove the pan from the heat and cover it with a lid and let stand in the hot water for 10 to 12 minutes. Remove from hot water, cool, peel, and set them aside.
Chop the Eggs and Vegetables
Cut the boiled egg in half and remove the yolk and place it in a mixing bowl. On a cutting board, chop the egg whites, celery, and onions into small cubes and set them aside.
Mix and Season the Egg Yolks
In a mixing bowl with the egg yolks, stir in the mayonnaise, mustard, lemon juice, paprika, red pepper flakes, salt, and pepper until well mixed and smooth.
Mix the Egg Salad
Gently fold in the egg whites, celery, and onions until well mixed and set aside.
Build the Sandwich
On a slice of bread lay a few leaves of lettuce. Place a layer of egg salad and top with more lettuce. Cover it with a second slice of bread and serve with french fries and a chocolate milkshake.
Egg salad is easy and makes the perfect side dish for lunch or stuff it between two slices of bread for sandwiches – everyone loves them!
In a large saucepan, cover the eggs with cold water and bring them to a boil. Remove the pan from the heat and cover it with a lid and let stand in the hot water for 10 to 12 minutes. Remove from hot water, cool, peel, and set them aside.
8 eggs
Make the Egg Salad
Cut the boiled egg in half and remove the yolk and place it in a mixing bowl. On a cutting board, chop the egg whites, celery, and onions into small cubes and set them aside.
¼ cup celery ribs, ¼ cup red onion
In a mixing bowl with the egg yolks, stir in the mayonnaise, mustard, lemon juice, paprika, red pepper flakes, salt, and pepper until well mixed and smooth.
½ cup mayonnaise, 1 tsp dijon mustard, 1 tsp lemon juice, ¼ tsp sweet paprika, ¼ tsp red pepper flakes, ¼ tsp salt, ¼ tsp black pepper
Gently fold in the egg whites, celery, and onions until well mixed and set aside.
Build the Sandwich
On a slice of bread lay a few leaves of lettuce. Place a layer of egg salad and top with more lettuce. Cover it with a second slice of bread and serve with french fries and a chocolate milkshake.
Other Recipes That Will Go Well With Egg Salad Sandwiches
Batido de Trigo ~ Wheat Milkshake
Indeed, this luscious milkshake, crafted with the richness of sweetened condensed milk, whole milk, and puffed wheat cereal, will make your tastebuds rejoice in delight. So, why wait? Immerse yourself in this Cuban sensation and let the celebration begin!
Join us on a culinary journey as we explore the vibrant flavors of Phoenix, embodied in our Phoenician Steak Fajitas recipe. Discover the city's rich history, cultural diversity, and thriving tourism scene, all while learning how to create a Southwest-inspired dish right in your own kitchen.
We use Cookies that you can't eat on our website to give you the most relevant experience by remembering your preferences and repeat visits. By clicking “Accept”, you consent to the use of ALL the Cookies that you can't eat.
This website uses cookies to improve your experience while you navigate through the website. Out of these, the cookies that are categorized as necessary are stored on your browser as they are essential for the working of basic functionalities of the website. We also use third-party cookies that help us analyze and understand how you use this website. These cookies will be stored in your browser only with your consent. You also have the option to opt-out of these cookies. But opting out of some of these cookies may affect your browsing experience.
Necessary cookies are absolutely essential for the website to function properly. These cookies ensure basic functionalities and security features of the website, anonymously.
Cookie
Duration
Description
_abck
1 year
This cookie is used to detect and defend when a client attempt to replay a cookie.This cookie manages the interaction with online bots and takes the appropriate actions.
bm_sz
4 hours
This cookie is set by the provider Akamai Bot Manager. This cookie is used to manage the interaction with the online bots. It also helps in fraud preventions
cookielawinfo-checkbox-advertisement
1 year
Set by the GDPR Cookie Consent plugin, this cookie is used to record the user consent for the cookies in the "Advertisement" category .
cookielawinfo-checkbox-analytics
11 months
This cookie is set by GDPR Cookie Consent plugin. The cookie is used to store the user consent for the cookies in the category "Analytics".
cookielawinfo-checkbox-functional
11 months
The cookie is set by GDPR cookie consent to record the user consent for the cookies in the category "Functional".
cookielawinfo-checkbox-necessary
11 months
This cookie is set by GDPR Cookie Consent plugin. The cookies is used to store the user consent for the cookies in the category "Necessary".
cookielawinfo-checkbox-others
11 months
This cookie is set by GDPR Cookie Consent plugin. The cookie is used to store the user consent for the cookies in the category "Other.
cookielawinfo-checkbox-performance
11 months
This cookie is set by GDPR Cookie Consent plugin. The cookie is used to store the user consent for the cookies in the category "Performance".
viewed_cookie_policy
11 months
The cookie is set by the GDPR Cookie Consent plugin and is used to store whether or not user has consented to the use of cookies. It does not store any personal data.
Functional cookies help to perform certain functionalities like sharing the content of the website on social media platforms, collect feedbacks, and other third-party features.
Performance cookies are used to understand and analyze the key performance indexes of the website which helps in delivering a better user experience for the visitors.
Analytical cookies are used to understand how visitors interact with the website. These cookies help provide information on metrics the number of visitors, bounce rate, traffic source, etc.
Cookie
Duration
Description
_ga
2 years
The _ga cookie, installed by Google Analytics, calculates visitor, session and campaign data and also keeps track of site usage for the site's analytics report. The cookie stores information anonymously and assigns a randomly generated number to recognize unique visitors.
_ym_d
1 year
This domain of this cookie is owned by Yandex.Matrica. This cookie is used to store the date of the users first site session.
_ym_isad
20 hours
This domain of this cookie is owned by Yandex.Matrica. This cookie is used to collect information about the user like his characteristics, behaviour on page and targeted actions.
_ym_uid
1 year
This cookie is by Yandex.Metrica. This cookie is used to set a unique ID to the visitor and to collect information about how visitor use the website. Thus it help to track the user and the collected informationn is used to improve the site.
CONSENT
2 years
YouTube sets this cookie via embedded youtube-videos and registers anonymous statistical data.
yabs-sid
session
These are cookies used by Yandex Matrica script belonging to the company Yandex. This cookies are used to measure and analyse the traffic of the website by giving information about how the users use the website.
yandexuid
1 year
This cookie is used to identify the users. This cookie collects information about how visitors use the website. This information is used for internal analysis and site optimization.
ymex
1 year
This cookie is set by yandex. This cookie is used to collect information about the user behaviour on the website. This information is used for website analysis and for website optimisation.
Advertisement cookies are used to provide visitors with relevant ads and marketing campaigns. These cookies track visitors across websites and collect information to provide customized ads.
Cookie
Duration
Description
i
10 years
This cookie is set by OpenX to record anonymized user data, such as IP address, geographical location, websites visited, ads clicked by the user etc., for relevant advertising.
VISITOR_INFO1_LIVE
5 months 27 days
A cookie set by YouTube to measure bandwidth that determines whether the user gets the new or old player interface.
YSC
session
YSC cookie is set by Youtube and is used to track the views of embedded videos on Youtube pages.
yt-remote-connected-devices
never
YouTube sets this cookie to store the video preferences of the user using embedded YouTube video.
yt-remote-device-id
never
YouTube sets this cookie to store the video preferences of the user using embedded YouTube video.
yt.innertube::nextId
never
This cookie, set by YouTube, registers a unique ID to store data on what videos from YouTube the user has seen.
yt.innertube::requests
never
This cookie, set by YouTube, registers a unique ID to store data on what videos from YouTube the user has seen.